Shameless Plug for Trinity Cookbook


Trinity Episcopal Church in Fort Worth is a good place, indeed. It has a nice, 100+ year old building, a folk service every sunday, (Which has been held for 20+ years – A wonderful anomaly within the Episcopal faith). There’s a scent of antiquity and peace in the sanctuary, and a smell of some damn fine cooks in the kitchen.

Yes, Virginia, there is a truly fine tradition of food and fellowship at Trinity, and it’s now being bound and offered to you.

From Fabulous Feastings to Terrific Teas is available through the church. Offerings therein stem from appetizers to desert, with everything in between, including some true gems from the Feasting with the Saints meals conceived and brought to life by my dear friend Shannon Shipp.

The book costs $20, is well worth it, and as an added bonus, the proceeds will go to help update the kitchen, which is in dire need of such!

Contact the church to get your copy, and tell your pals!

Food Safety 101


Looked at the national weather map and saw that, with few exceptions, the cool seats in the US right now are in the 80s, with lots in the 90s and 100s – Yikes!

Got me to thinking about The Number One thing we stress each and every day in restaurant work – Food Safety. While it’s a must in the business, it’s all too often lacking at home, so I thought we’d better revisit the ground rules and spell ‘em out in big letters. You can and should print this one and stick it to the fridge with one of those goofy magnets.

The Golden Rules

1. Keep it ALL clean! Wash your hands with hot, soapy water, actively, for at least 20 seconds. Do it before and after you work with food that has greater potential for bacteria, like meat, poultry and fish, before you move on to prepping something else. Wash and sanitize your cutting boards (Use a mild bleach solution on those – They’re semi-porous, so you really need to pay attention to cleaning them!), knives, and anything else that touched those potentially high risk foods before you prep something else with them. Does your sponge stink? Big clue – Toss it and use a fresh one; same goes for kitchen towels.

2. Don’t defrost or marinate at room temp.
Ever… Best practice is to defrost in the fridge. If you must defrost really quickly, fill a bowl big enough to hold what you’re working with the coldest water you can get from your tap, immerse the food in the water and let it run as low as you can get it until it’s ready. NOTE: If, like it is here right now, you cannot get water colder than 70º F, do NOT use this method, period!

3. Use your senses and respect the Nasties.
When food spoils, is it dangerous? The answer is, not always but maybe, so err to the side of caution. Bacteria like the same things we do, from food to comfy conditions; keep that always in mind. When food spoils, rots, etc, it looks, smells, tastes and feels off – Respect your senses and let it go if it ain’t right – I can guarantee you won’t get sick of you don’t eat it, eh? Bacteria need pretty specific conditions to thrive, and those have to do with temperature, time, moisture and PH level of the things they live on, AKA, our food. Know and consider the food you’re cooking and storing in regards to those attributes and act accordingly – Use the section of your fridge meant for butter, cheese, eggs, veggies and fruit – Modern fridges really can help control moisture levels as well as temp, so allow them to do their thing.

4. Understand and Respect the Food Temperature Danger Zone, and the safe handling practices associated with such. Bacteria love temps between 40º F and 140º F, so naturally, we want to strictly limit food from hanging out in that range. The mantra is ‘Keep cold food cold and hot food hot,’ and yes, it is that simple. Couple temp with time, and you’re ahead of the curve – Don’t let anything hang in the zone for longer than 60 minutes, and that’s a total time – So keep track, do the math, and between shopping, prep, service and leftovers, keep to the rules, (Yes, I said shopping – Think about it – You buy a steak, and by the time you get it home and in the fridge, how long has it been in your buggy and car, AKA, the danger zone? At least 20 minutes and probably more – Do NOT forget that when you’re working with it thereafter!

165°F+ – Most bacteria die within seconds
141°F to 164°F – Safe range for holding hot foods. Bacteria aren’t killed, but don’t multiply.
40°F to 140°F – Food Temperature Danger Zone! Bacteria thrive and multiply. Perishable foods spend NO MORE than one hour here!
33°F to 39°F – Fridge range. Bacteria aren’t killed, but they multiply relatively slowly. Food is safe here for a limited time.
32°F – Freezer zone. Bacteria aren’t killed but don’t multiply.

5. Use a thermometer and cook smart!
You’ve read herein where I write about cooking to temperature, not to time; if you ain’t using a thermometer, and you’re not a seasoned cooking pro, how do you know what’s at what? You don’t… Buy and use a good cooking thermometer as well as a couple little, cheap instant read dudes. The top end of the Food Temperature Danger Zone, 140º F is not the temp at which bacteria die, it’s just the point at which they more or less stop multiplying. You need 165º F to kill most things that can hurt ya, like salmonella and e. coli, and that’s 165º F internal temperature – No thermometer, no sure, no good…

6. Store and reuse smartly.
Put leftover proteins in a solid container, or wrap them really well, and put ‘em down low in the fridge where other stuff won’t get potentially dripped on. When reserving cold food, remember that Golden Hour; once time has elapsed, let it go, Luke… When reheating hot food, get it back up above 165º F internal temperature before you serve it, and, sad as it may seem, you only get one shot at that if you’re eating smart – No second reheats – So plan, portion and cook accordingly.

Blessed are the Cheesemakers


“What’d he say?”
“I think it was “Blessed are the cheesemakers”.”
“Aha, what’s so special about the cheesemakers?”
“Well, obviously it’s not meant to be taken literally; it refers to any manufacturers of dairy products.”

(With apologies to Monty Python)

This just in from the field:
OK, I love the queso fresco–nice and salty and sorta crumbly but still chewy, doesn’t melt fast. Feta (my heretofore fav, I’m part Greek, after all) is salty, crumbly, doesn’t melt hardly at all, but not chewy. So, Big E, can you give us a cheese tutorial, with some of the basics and what we can substitute in a pinch?

That was from our pals up north, who got to try fresh Queso Fresco for the first time during our gig in Walker, MN. So, of course, the answer is, Yep!

Now, I ain’t a cheese expert by any sense of the word, but I do know of some that I’ll share with y’all after covering some basics. The real bottom line of cheesemaking is taking water out of milk, and doing various things with the results – That’s it, in a nutshell. Think you can handle that? Sure, I knew ya could…

First and foremost, yes, you can make great cheese at home. Once you do, you may decide to stick with one genre for a good while before moving on: Just as cheesemakers often specialize in a single variety, so might you!

That said, we can make some general divisions to make things easier. Dividing cheese into soft, semi-hard, or hard, and is probably simplest. Soft cheeses that come to mind are ricotta, brie, or Camembert. Semi-soft examples would include queso fresco, or Dorset. Hard cheeses are what you buy most of in the store, everything from cheddar to parmigiano. Here again, the answer to the unasked question is yes, you can make all of those at home if you wish, and you’re going to find that what you can make is superior to what you can buy in most stores.

Uncooked cheeses are the easiest to start with for my mind; Queso Blanco or Fresco are examples of that genre. They are heated, but only mildly compared to the temperatures used for many other styles. Cream cheese or ricotta are also excellent choices.

The really nice thing about making a queso variety or ricotta is the fact that it’s so simple, trained weasels could do it. Ready to learn? Here it is:
1. Buy good, whole milk.
2. Heat the milk
3. Add acid
4. Drain
5. Eat

That simple enough for ya? Want to see that again, but with pictures? Go back to this post here and dig in!

Now in deference to accuracy, ricotta ain’t made from milk, it’s made from left over whey. So, in fact, you could make queso and then make ricotta with the leftovers from that, which would be most cool wouldn’t it?

My one caveat for home cheesemaking is this: Buy the best milk you can find. Use only whole milk. Get it as unprocessed as you can find and are comfortable with. Branch out and try goat or sheep’s milk if you can find it. Avoid anything that says ‘Ultra-Pasteurized,’ it will not work. Google local dairies, and make a field trip out of it.

Now, as I said, I ain’t no expert, so as far as specific recipes, this is where I get off. I’m making more than soft cheese now, but I know just enough to be dangerous, so it’s time to steer you to the experts. Besides, once you’re bitten, you’re gonna want some stuff so that you can expand your study and practice; from real cheesecloth to rennet to specific cultures, you’ll want to load up, so…

There are many, many cheesemaking suppliers out there. I’ve found Leeners to be among the best, well equipped and friendly, with great selection and prices. The New England Cheesemaking Supply Co. gets a nod as well; they’re friendly, funny and love to get the customer involved. There are links for both to the right of this monologue, so dive right in.

Finally, you’ll probably want at least one book on the subject for your library. I’ve looked through a bunch, and if I had to choose just one, it would be this: The Complete Idiot’s Guide to Cheese Making, by James Leverentz. As goofy as some of these titles are, this is a great book for beginners and semi-experienced folks alike.

Cheese On!

Semi-Greek


Ok, so we suddenly have, shall we say, a whole pantload of cucumbers! What to do, what to do… Can’t preserve much of them, can’t give them all away, so gotta get cookin’. first thing that comes to mind for me is Tzatziki, just ’cause I do love it so. Secondly, we wanted something cool, ’cause it’s bloody 100+ outside and we neither need a bunch of cooking heat nor hot food on days like this, eh?

So off to the market, with a vague idea of a Greek themed dindin. I saw no lamb, so I settled on pork and beef, both USDA Choice, which they had as a Buy-1-Get-3-Free deal, so I bought three of each, of course. Snagged some very nice Greek yoghurt and some flatbread. No Retsina in sight, so a dry white wine, and back to the kitchen I went. I decided to make the protein as Greek-Like as a could and work from there. Here’s what I came up with.

Kinda-Greek Sausage
50%-50% cuts of beef and pork
Basil
Rosemary
Oregano
Thyme
Granulated Garlic
Salt & Pepper
Olive Oil

Note: I did this as sausage ’cause I have an attachment for our Kitchenaid – If you don’t, fret not – Just cut stuff to about 1/2″ and go with that, it’ll be fine – You won’t need to freeze/chill the flesh if you go this route, but limit its time outside the fridge strictly for food safety considerations.

Remove meat from packages, cube to about 1.5″ and throw them into the freezer for about 15 minutes. Throw another stainless bowl in there too, to catch the finished product. When making sausage, or really, any forcemeat, keeping your ingredients really cold all throughout the process is critical: This is necessary first and foremost to keep the proteins under 40°F and thus out of the Food Temperature Danger Zone. Secondly, it helps make a more homogenous end product with better taste and texture.

I grabbed the herbs from the garden, of course, (Which you should do too, by the way…) Field strip herbs and chiffenade/mince. Remove protein from freezer, coat liberally with oil, add herbs, garlic, salt and pepper, mix well.

Process through grinder with the wider of the two plates provided. Use chilled bowl for catching the finished sausage and return finished product to the fridge ASAP.

I cooked off the sausage in a saute pan, and M came home as I was doing so – I knew I’d done OK when the first words out her mouth were “Oh that smells soooo good!”

Now for the magic ingredient…

Tzatziki

1 8 oz container of Greek Yogurt, (You can use regular too)
1 med cucumber
2 tbspn olive oil
Juice from 1/2 to 1 lemon, (As you like it)
1 tspn dill, chopped fine, (You can sub spearmint)
2 cloves of garlic, minced
salt to taste

If you don’t have Greek Yoghurt, plain will do, but find Greek if you can; it is richer, tangier and thicker, all of which are good things when it comes to Tzatziki.
Line a colander or strainer with paper towel and drain the yogurt for 15 to 30 minutes; this is critical in avoiding a runny final product.

Peel, seed and grate cucumber. We used Armenian from our garden, which have wonderful taste and nice, firm flesh. Any decent cuke will do, but make sure it is nice and firm!

Combine everything and mix well by hand, as blending or processing will make your yogurt break down.

Place in a non-reactive bowl, cover, and refrigerate for 1 to 2 hours.

Let the sausage cool along with the Tzatziki.

Cut up veggies of your choice for garnish – We went with yellow bell pepper, tomato, cilantro, lettuce, onion, and pimento stuffed green olives – Talk about yummy!

Grill or toast flatbread. I wanted flatbread we could open and stuff like a Gyro, but the stuff I found wouldn’t do that, so we just cut grilled wedges and called it good. If you like cheese, then Feta or Mizithra would rock with this – We didn’t want to cloud the wonderful Tzatziki, so we left it off of ours.

Pile everything on and απολαύστε – εύγευστος!
(Enjoy – Delicious!)

State of the Herbs Address


7 pm, north Texas, late July, 107 degrees in the shade, (Too hot in the shade…). Is there a oasis in all this heat? Yep, but it’s still mighty hot – If you don’t move too much, you don’t sweat too much.

Several friends with nice gardens all say the same thing – “It’s so hot, I don’t even want to go out to water…”

Job #1 is balancing water use, remaining responsible given our drought conditions, and the cost thereof, of course – We’re on a city water supply, so it does indeed cost ya. We’ve given up watering the grass out front; the back has none to speak of, it’s all planted in one form or another, the lion’s share of which is veggies and herbs. Our priorities are keeping our foundation moist enough to avoid cracking, then the gardens next, catch as catch can.

So is this possible? Can you grow stuff in heat like this? This question’s not solely pertinent to north Texas, of course. A look at the national weather map today shows 70’s in some coastal and mountain areas, but 80s, 90s and 100+s predominate across the whole shebang. Our forecast for the next week shows projected temps of 105 to 109 for seven days straight…

The answer is yes, but it takes work. We don’t broadcast water anything, no sprinklers, just careful hand watering. We could probably do better with a drip system, but here, anyway, we have to move things from time to time, if they’re not thriving in any given micro-climate – Yes, moving from one small bed to another six feet away can make a difference, for a myriad of reasons.

Monica works her butt off to juggle all this; thank God she has the persistence, expertise and will to do it! Many folks I talk to here and elsewhere ask, “How do you guys still have stuff thriving? Ours has died, even though we watered.” The answer is soil, soil and more soil – We’ve brought literally tons of it to our growing spaces. The so-called ‘top soil’ we had here when we moved in was maybe an inch deep and crap quality. M has built up fantastic beds, tailored to what they grow, (i.e., the chile beds have more lava sand, etc). She also rotates beds, allowing one to lie fallow, in a miniature version of smart farming. One of the larger beds is covered with compost and growing nothing, recovering its potency for the next season.

Here you can see the fallow bed, which is actually about 8′ x 6′ – The cukes have over run it somewhat, but the bed is covered in compost and then she’s stored her spare pots on top of that.

So far, herbs are hanging in there. The cilantro has gone to seed and died, which is fine – We let it do so, then cut the dried stuff and separate the coriander seeds from the chaff. We’ll save some seeds for replanting, (Almost not necessary, as this stuff will come back given a fraction of a chance), and bottling the rest for use. We’ll most dry these, but some will go into infused oils and vinegars as well.

Other than that, we’re moving our herb and spice preserving up in the calendar, rather than letting anything else die. Meal planning and prep shifts a bit also, to take advantage of the soft-stemmed herbs that just don’t dry all that well, Parsley, garlic chive, dill, etc. The Dill and Parsley went first, and although the dried version are a shadow of the real thing in potency and flavor, they still beat the pants off of 90% of what you find in stores, so dry them we do!

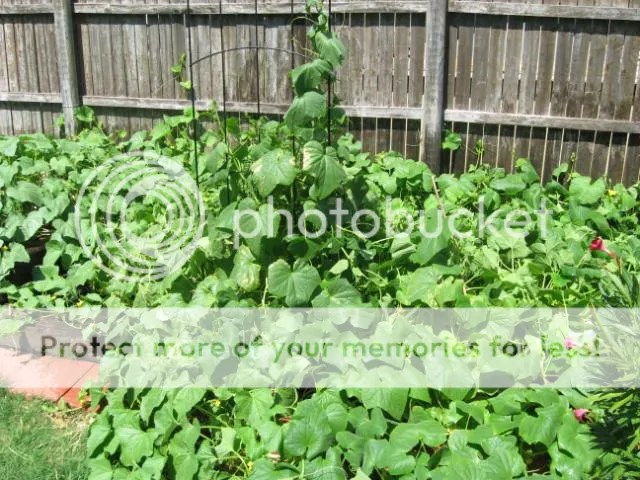
Here’s what things look like in general:

The chiles are pretty robust, as you can see – Constant watering causes a micro version of what happens in big fields, water pulling soil away from the plant bases, so she actively mounds them back up periodically.

This small bed held Tabasco chiles, beets and carrots, but the heat is simply too much for those crops. M has transplanted the chiles and abandoned the others, covering the bed with compost awaiting a (Hopefully) cooler fall.

Here are the transplanted Tabascos, much happier than they were, along side tomatoes. M chose varieties that bear small fruit, to allow for less water demand and less stress on the plants; they’re bearing steadily and holding up fine – so far, so good.

Mint is a beast – You don’t grow it, you subdue it… The basil likes this southern exposure under the house eaves and is thriving.

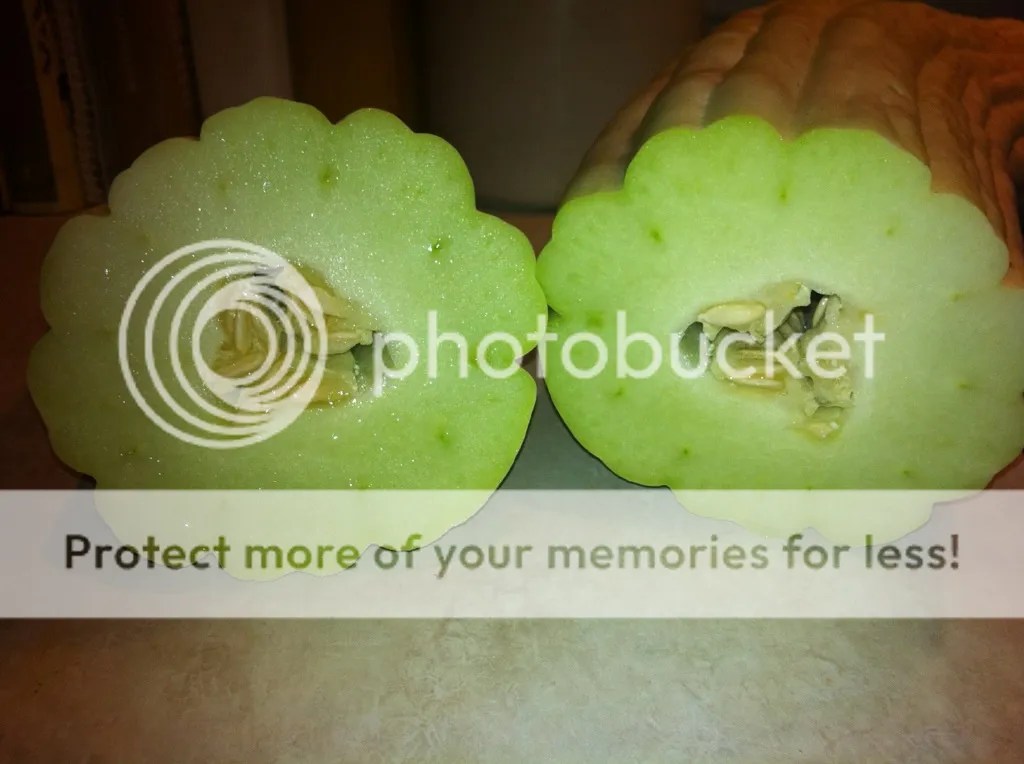
Umm, do ya think these cukes are happy, or what? Insane is more like it… We planted Armenian and Lemon cukes. Both have done, ah, fine, as the second pic confirms. Their water use proves to be just to high to justify, though, so we’ve picked them clean and will let them go fallow.

This beast, which M literally tripped over, shows what I mean – 24″ long, 5.5″ diameter, and 6.5 pound Armenian, with some lemons beside that. We’ve had beacoup salads, Tzatziki, and everything else we can think of, and of course, the neighbors are all supplied as well – Not as ubiquitous and zucchini, but durn close!

Forge on, stay cool, and pray for rain!