Cider Bird


Regardless of the bird you’re fixin’ to cook, trust me when I say it will benefit from a good brining; this is one of those restaurant secrets that answers the age old question, “Why is what they make always better than mine?”

Brining is easy, so there’s no reason not to do it, but naturally, you still wonder why you should, right? Good question! Brining makes things notably juicier in a couple of ways. First off, the mild salt solution that is a brine allows the flesh to absorb liquid during brining. Since we know for a fact that dang near any flesh we cook looses moisture during that process, anything we can do to counteract that will lead to juicier meat. So, really and truly, when you brine you’re starting out with flesh that is juicier from the get go, so it ends up juicier. Brined meats end up 6% to 8% heavier than they do if we don’t brine them; solid proof that they gained moisture from the process. Secondly, brining dissolves some proteins in muscle fibers, turning them from solid to liquid during the process. Softer equals tender and that’s what we want to eat, right?

Convinced on the science? Cool, lets get cooking!

I’ve taken to thawing our bird by brining, which kills two birds with one rock. If you buy fresh turkey, you don’t need to thaw of course, but the brining process remains the same. Many folks wonder at this point how long is too long for brining. The answer is a function of both brine strength and the weight of the flesh being brined. Standard brine ratio is 1 cup salt to 1 gallon liquid, (See salt note below). Most of us will buy whole turkeys in the range of 10 to 24 pounds; we will want to brine birds in that weight range for between 12 to 24 hours in a standard brine concentration, or roughly an hour per pound of whole turkey. As such, if you’re working with a 16 pound bird, plan on a brining period around 16 hours and you’re good to go. And FYI, A little leeway to either side ain’t gonna hurt a thing, either.

So, your basic brine ratio is 1 cup salt to 1 gallon of water. Trust me when I tell y’all that, weighed out, that’ll be 10 ounces of table salt for each gallon of nice, clean water. If you’re gonna use the kosher salts you’re likely to find at your local store, I’ll save you some weighing time there, too:
Morton Kosher salt = 7 ounces per cup
Diamond Kosher salt = 5 ounces per cup
Anything else you find or use, weigh it out and go from there.
Note: do not use iodized salt for brining; it can add a nasty off flavor you don’t want!

For this bird, we’re going to replace the water with apple cider, so our brine recipe per gallon will look like this:
1 Gallon Apple Cider
5 – 7 Ounces Kosher Salt
1 Tablespoon fresh ground Black Pepper
1-2 dashes Tabasco

I buy birds in the 15 to 18 pound range, and plan on 2 gallons of cider as the base for a bird this size, but of course that depends on what you’re brining in, right? Your best bet is a food grade plastic bucket, which are readily available in this day and age; just make sure you’re getting food grade, so you’re not introducing any plastic nastiness into your food, right? With that as your vessel, you’ll have some cider left over for a bird of anywhere from 12 to 20 pounds. Warm some up to enjoy while your bird cooks!

Plan ahead for this process. If you are going to be brining a whole bird, you will also want an additional 6 to 12 hours between the brining and the cooking; more on this in a bit. In other words, if you’re thawing and brining, your process needs to begin nice and early on the day before turkey day.

Start out by prepping your brine. Combine all brine ingredients and stir thoroughly until all your salt has dissolved.

Next comes unwrapping, unpacking and rinsing your bird. Make sure you find any little packets of giblets, neck, etc, (Don’t be that cook that misses those for somebody to discover deep in the bird on the festive day…)

Slip that bird into the bucket and gently pour in the brine. Make sure you’ve got enough in there to completely cover the bird. If you’re a bit short, make more, no big deal, no pressure! You may need to weigh your bird down to make sure it stays immersed. Just take care that whatever you use is sanitized and OK for being next to food. I use plates inverted and stacked until the bird sinks. Place your brine bucket in a clean, cool, dark corner.

Pay attention to the food safety temperature range during brining, without fail! Your brine and bird must remain under 40 F at all times, period; if you need to add a little ice, do so. If you need to add a lot, compensate with a bit more salt.

When your brining period is done, pour out the brine, (NEVER reuse brine!), gently rinse the bird in clean, cold water, then pat it dry with clean paper towels and then transfer to a roasting pan.

Now, If you want your bird to have a golden, crispy skin, (And you do, right?!), it needs to sit in the refrigerator, uncovered, for 4 to 6 hours after brining. This will allow moisture to evaporate from the skin, and also lets the meat reabsorb some moisture as well.

Preheat your oven to 350 F.

Keep your bread stuffing to a casserole dish and prepare a nice juicy cavity filler for the bird.
1-2 Oranges
1/2 Sweet Onion
1 stalk Celery
Tablespoon Canola Oil
1/2 teaspoon Sage
1/2 teaspoon Sea Salt
1/2 teaspoon ground Black Pepper

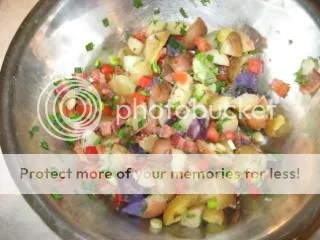
Rough chop the orange, onion, and celery, (and if you have celery leaves, use those!). Throw those in a mixing bowl, then add oil, Sage, salt and pepper, then combine thoroughly. Stuff your bird’s cavity thoroughly. Place the bird on a rack in a roasting pan, and add 2 cups of clean water to the pan. Insert an internal thermometer to the thickest part of the breast.

 photo IMG_3345.jpg

Standard roasting times, stuffed, at 350 F follow; that said, the only real way to know when the bird is done is by internal temperature, and we’re looking for 165 F.

10 to 18 pounds 3-3/4 to 4-1/2 hours

18 to 22 pounds 4-1/2 to 5 hours

22 to 24 pounds. 5 to 5-1/2 hours

Start your roast with the bird uncovered, then cover loosely with foil for the last hour. Basting isn’t necessary, but it sure doesn’t hurt.

When the bird is done, remove it from the oven and let it rest for 20 minutes prior to carving; the rest is vital to allowing juices to equalize throughout the cooked bird, so don’t cheat!

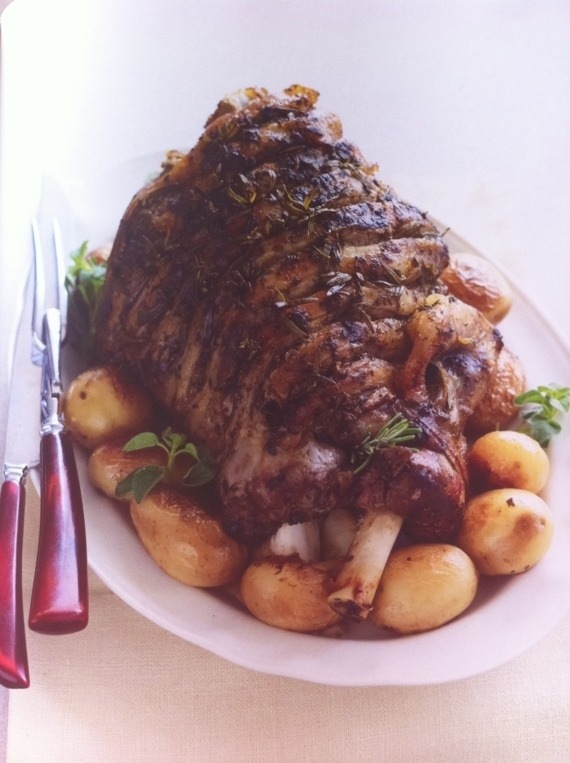
Carve, admire, enjoy, and get ready for leftovers,

 photo IMG_0124.jpg

Monica and I wish y’all a peaceful Thanksgiving with those you love.

One Hour Minestrone


OK, so a good few of y’all have asked for the zero-to-minestrone in an hour recipe, so here goes.

There is much leeway in this wonderful soup. You can make it with meat or vegetarian. You can add whatever veggies are in house with confidence. In other words, there are few rules. That said, what I’ll propose as the single non-negotiable point is this: the base stock should be veggie and include white beans, (AKA Great Northerns). As I’ve said numerous times here, try it this way first and then go forth as you see fit thereafter…

So, let’s say that like me the other night, you got a hankering for soup, it’s 5 pm, you have no stock on hand and nothing prepped. Ready?

Open and lightly rinse a can of white beans. Pour them into a sauce pan and add,
2 Cups hot water
1 small Shallot, minced
1 Bay Leaf
Sprig of Parsley, minced
1/2 teaspoon Italian Oregano
Shake Sea Salt
Twist of ground Pepper

Get that up to a simmer and reduce heat so it barely perks along.

Preheat oven to 400 F.

Choose 1 medium sweet onion, then choose carrot and celery for size so that you get roughly 50% onion and 25% each celery and carrot, then rough chop. Toss those on a sheet pan, drizzle with olive oil and shove them in the oven for 15 minutes.

Set a stock pot over high heat with 10 cups of hot water and bring to a boil.

When the veggie timer goes off, pull them out of the oven and throw them into the boiling water. Allow them to boil freely for 15 minutes, then strain or scoop all the veggies out and toss ’em in your compost. Toss the bean pan contents into the stock pot and there’s your speed stock.

Dice 2 or 3 potatoes and a carrot, then throw them in the microwave for a minute or two until just fork tender; add them to the pot. If there are any other root veggies you have or like, do the same with those.

In a sauté pan over medium high heat, toss 1/2 diced sweet onion and a stalk or two of celery until they start to soften and sweat; throw those into the pot. If you have the leaves and tiny shoots on your celery,so much the better, just use that.

Begin scavenging the fridge and shelves. I found fresh frozen corn, peas and green beans as well as canned tomatoes we’d preserved earlier in the year and threw a handful of each into the mix. If you’ve got leftover pasta or rice in the fridge, in it goes; this is how and why minestrone has been made for many moons, capiche?

Now you can make this a broth soup or you can make it stewier if you like. If thickening appeals to you, the simplest way is to just purée some of the soup and add it back; that’ll give you slight thickening and will honor the flavor you’ve chosen exactly, of course. If you want thicker still, use a slice or two of day old bread, or a scoop of some of that rice or pasta you found in the fridge, or even leftover mashed potatoes. Take that chosen thickener, toss it in your blender or processor, add two or three ladles of soup and let ‘er rip, then return that to your stock pot and viola.

Adjust seasoning with salt and pepper to taste, then allow your minestrone to simmer for 15 minutes or so. Take that time to use your preheated oven and make some quick corn bread, or rub slices of baguette with a split clove of garlic and a brush of butter.

Serve hot and bask in your ingenuity.

Enjoy!

Homemade 4th


What American comfort food is rootsier than a burger? And what holiday is more deserving of a great burger than July 4th? I rest my case…

Of course a great burger needs great sides, so I suggest you head out and source some local corn on the cob and second, build a nice, fresh spud salad with olive oil, fresh citrus and vinegar, for a lighter take on potato salad that we’ll amp up with some fresh herbs.

If you’ve ever had a truly amazing burger at a local joint, I’ll bet you 10 to 1 that they either grind their own beef, or have their regular supplier do that for them: Custom ground and seasoned burger, done fresh, is what separates Holy Crud from Ho Hum in Burgerland.

At the market I found nice chuck steaks for $4 a pound, (They were marked ‘For marinating’); that’ll be the heart and soul of our burgers. The relatively high fat content coupled with nice big chunks of meat is gonna be great, but it does need a little help to put it over the top; I went with aged, Choice Tenderloin, which I found for $9 and change a pound, which ain’t bad, (And we’re only buying a half pound so…). I ended up with a mix of roughly 2:1 Chuck to Tenderloin.

I found a really nice medley of red, white, and blue baby potatoes that’ve not only pretty but real tasty.

Back home, I stuck the beef into the freezer for a little bit. Any time you’re grinding meat, making sausage, etc, you want your protein as cold as you can get it; this will help keep the fat in a proper matrix while you work with and, more importantly, cold keeps your food out of the temperature danger zone, thereby avoiding making you and your loved ones sick; always a plus, that, eh?

I set up the grinder attachment on the ol’ KitchenAid, cut the beef up into strips manageable for the hopper and got to seasoning. As with sausage making, you can season ground meat before or after you grind it; I prefer doing so before, because you get a more even distribution of spice as the meat is grinding. For these burgers, I went with Hawaiian flaked salt, fresh ground pepper blend, (Black, red, white, green; our go-to mix), onion powder, celery seed, granulated garlic, smoked paprika, and a dash of Worcestershire. I seasoned with a fairly light hand, because we just want to accent the meat’s great flavor, not blow it out of the water… So into the grinder she goes, using the coarser of the two plates I have available. I gave the freshly ground burger a few tosses to make sure everything was well blended, then covered it and stuck it in the fridge to think about things for a while.

While the burger was incorporating all those flavors, I put the spuds on to boil. Just a note on water; it’s sad to say that not all tap water is created equally these days, (Especially coming from a kid who grew up drinking from streams and lakes and even garden hoses!) My bottom line on cooking with stuff is simple; if it does not look, taste, feel and smell right, do not cook with it! The concept of taking, say, a nasty bottle of wine and cooking with it because it wasn’t good enough to drink also applies to a thing as elemental as water. If yours doesn’t taste good to drink, do what we did and get a decent filter for your kitchen tap; from home brewed coffee to things you boil for dinner, everything will taste better.

A trip out to the herb garden offered Garlic Chives and Cilantro, to which I added fine diced green onion, red bell pepper, and fresh tomato: All that, plus a few pieces of local Apple smoked bacon will go into our spud salad.

For the salad dressing, I squeezed the juice from one lime and one lemon, and then added a couple tablespoons of grapefruit juice; I whisked some nice extra virgin olive oil into that at a roughly 2:1 ratio, added a dash of sal de mere, fresh ground pepper, and celery seed, and there you have it. I quartered the spuds, put everything into a stainless bowl to mix and then into a ceramic bowl, covered in the fridge, for a good hour to allow everything to blend: As M rightly points out, stuff like this salad are gonna be great tonight but much better tomorrow; like good soup or stew, salads marrying a bunch of wonderful flavors are gonna be at their prime about 24 hours later…

For the burgers, I formed thin, wide patties, then cut up some of my stash of 2 year old WSU Creamery White Gold Cheddar and placed a nice layer of that in the middle of one patty, (use whatever cheese most floats your boat.) Then we assemble; a layer of burger, then cheese, then burger, seal and plump up the edges of each so we have a nice round patty of uniform thickness throughout. I let them hang in the fridge for 30 minutes or so to marry flavors further.

The burgers hit the grill over nicely glowing coals for about 4 minutes each side, with the cover on and vents wide open. I put the buns in a warm oven with a little dish of water to get nice, moist heat going. Finally, I sliced onion, tomato and pulled some lettuce leaves. M got condiments out and we were good to go.

At the point that she turned to me, burger in hand, with that serious knit-brow look and said, “This is, without a doubt, the best burger you’ve ever made; seriously…” I considered my mission a success… pair yours up with great local beer, and a Happy 4th to one and all!

BONUS: Here’s a link to another variation on the home ground burger, as well as our recipe fore house made buns!

The Tzatziki of the Lambs


We did a show for the boys recently, the idea being for the male of the species to somehow convince the female to cook for him. Now if that works…

The Greek wanted something Greek of course, so I suggested a nice roasted leg of lamb with Tzatziki, so we’ll cover that here.

If you’ve never had Tzatziki sauce before, you’ve got a real treat in store. Tzatziki is, hands down, one of the finest uses for cucumber. In Greek cooking it’s often served with lamb as we suggest, but I’m here to tell y’all that Tzatziki is excellent on eggs, fantastic on flat bread, pleasant on poultry, and beautiful on burgers; in other words, like hot sauce, it’s good on durn near everything!

Whip up a batch and enjoy!

 photo Tzatziki_zpseee80e70.jpg


Classic Tzatziki Sauce

1 8 oz container of Greek Yogurt, (You can use regular too)
1 med cucumber
2 Tablespoons Extra Virgin Olive Oil
1 fresh lemon
1 teaspoon Dill, (You can also use mint)
2 cloves Garlic
Salt to taste

Line a colander or strainer with paper towel and drain your yogurt for around 30 minutes, (Critical step to avoid runny Tzatziki, and even more so if you’re not using Greek yoghurt).

Peel, seed and grate the cucumber.

Juice the lemon and reserve.

Do a fine chiffenade on the dill or mint.

Peel and mince the garlic.

Combine everything in a non-reactive bowl and mix well by hand, (Blending or processing makes your yogurt break down).
Refrigerate covered for 2 to 3 hours.
Serve chilled

Real Deal Greek Roast Leg of Lamb

Disclaimer; I’m Scots, Welsh, and Dutch, and M carries German and Norse blood. We’ll lay claim to this being a genuine interpretation of a classic by way of the truly born and raised Greek cooks who we kind enough to share their passion.

A fair number of folks in this country don’t care for lamb because they find it gamey. It can be, but we’re here to say that the rest of the meat eating world can’t be all wrong. Great lamb comes from choosing good meat, to proper preparation and cooking, and that’s what we’ll relate here.

My Greek pals will tell you that lamb is always cooked to well done, a key consideration in avoiding funky, off-putting flavors.

Be sure to trim the lions share of the fat prior to roasting as well. This recipe will provide a fine feast for 6 to 8.

5 lbs bone-in leg of lamb
16 – 24 small new potatoes, (Variety of your choice, or mix and match)
2 tablespoons olive oil
12 cloves garlic
Zest of two lemons, grated
2 tablespoons Oregano
2 tablespoons Rosemary
1/2 cup extra virgin Olive Oil
1 cup dry Red Wine
3/4 cup fresh Lemon Juice
1 tablespoon Dijon Mustard
salt and Pepper to taste

Wash the lamb thoroughly and pat dry with paper towel

Peel and dice 8 cloves of the garlic and toss them into a non-reactive bowl large enough to hold all the ingredients.

Add 4 teaspoons each of oregano and rosemary, a 1/4 cup of the olive oil, the wine, and the lemon zest and juice.

Place lamb in the bowl, rubbing it in and turning to coat well on all sides; cover and refrigerate overnight.

Crush remaining cloves of garlic and combine with the mustard and the rest of the oregano and rosemary.

Remove lamb from marinade and reserve all the marinade.

With the tip of a paring knife, poke a bunch of holes into the lamb on all surfaces.

Hand rub the garlic-herb-mustard mixture thoroughly over the lamb, pressing into incisions as much as you can.

Gently coat the lamb with 2 Tablespoons of olive oil and sprinkle liberally with salt and pepper.

Preheat oven to 350 F.

Place the lamb on a rack in a shallow roasting pan.

Toss potatoes in the reserved marinade from the lamb with 2 additional tablespoons of olive oil added; coat thoroughly. Pour everything into the roasting pan, all around the lamb.

Roast uncovered for 90 minutes, then turn the lamb so that it develops a nice crust on both sides. Toss the potatoes to recoat them with the marinade as well. Roast for another 45 minutes, (total roasting time – 2 hours and 15 minutes).

And as our Greek pals insist, serve nice and hot, with plenty of fresh, crusty bread, a big ol’ salad of onions, peppers, tomatoes and olives in vinaigrette, and plenty of red wine.

εύγευστος! (Delicious!), right Greek?

Enjoy!

20130125-102550.jpg