It’s currently 48° F, with the wind south by southwest off the sea, blowing steadily at 20 knots with gusts strong enough to shake the cabin. In other words, it’s a great time for soup or stew. As an accompaniment to that, you’d be hard pressed to beat a nice, hot popover.
There are plausible claims that popovers are a U.S. dish. The oldest recipe reference to popovers I’m aware of is American, within M. N. Henderson’s Practical Cooking, which dates to the Centennial year of 1876.
It’s thought that the popover is naught but younger kin to Yorkshire Pudding, which certainly makes sense. Perhaps it’s good old yankee ingenuity that is evident in their making; much smaller, they don’t require the lengthy beat/chill/beat sequence that a Yorkshire does to rise successfully. They can be enjoyed in less than 45 minutes, as opposed to several hours.
While the batter for popovers is simplicity itself, the successful baking thereof is not. The tricks to great popovers are as follows;
1. Have all ingredients at room temperature before you incorporate them; this allows faster heating, which is critical to a good rise.
2. Scalding the milk; heating the milk helps integrate it with the other batter constituents, and promote a faster rise and lighter final product.
3. Very through blending of the batter; as with a quiche or frittata, well blended ingredients, with a wealth of minute air bubbles worked into the batter, make for a lighter popover. An immersion blender does the best job, especially one that has a beater head.
4. Heat the tin and the fat, (butter); again, having everything as hot as possible when introduced to baking heat allows that energy to be used for generating steam, the engine behind a well-risen popover, rather than it being needed to simply heat the pan and the batter.
5. Don’t open the oven door while they’re cooking, period.
Here’s our go to version. They’ll take you about 10 minutes to make.
1 Cup All Purpose Flour
1 Cup Whole Milk
2 Large Eggs
3 Tablespoons unsalted Butter
1 teaspoon fine Kosher Salt
Have all ingredients at room temperature, (Butter doesn’t matter, since you’ll melt it shortly).
Preheat the oven to 400° F.
Pour milk into a small saucepan over medium heat. Remove the milk when it scalds, (small bubbles formed along the edge of the pan), and set aside to cool.
Melt butter, and lightly brush 6 to 8 cups of a muffin tin with same.
Slide the muffin tin into the hot oven for about 5-7 minutes.
Crack eggs into a large mixing bowl; whisk until well blended, about 1-2 minutes.
Add milk, flour, remaining melted butter, and salt.
With an immersion blender, whisk briskly until the batter is smooth and even, about 2-3 minutes.
Remove tin from oven and fill each roughly half way with batter.
Bake until fully inflated and golden brown, about 30 to 35 minutes.
Breakfast is the meal we love best here, and that’s where I do some of my best work.
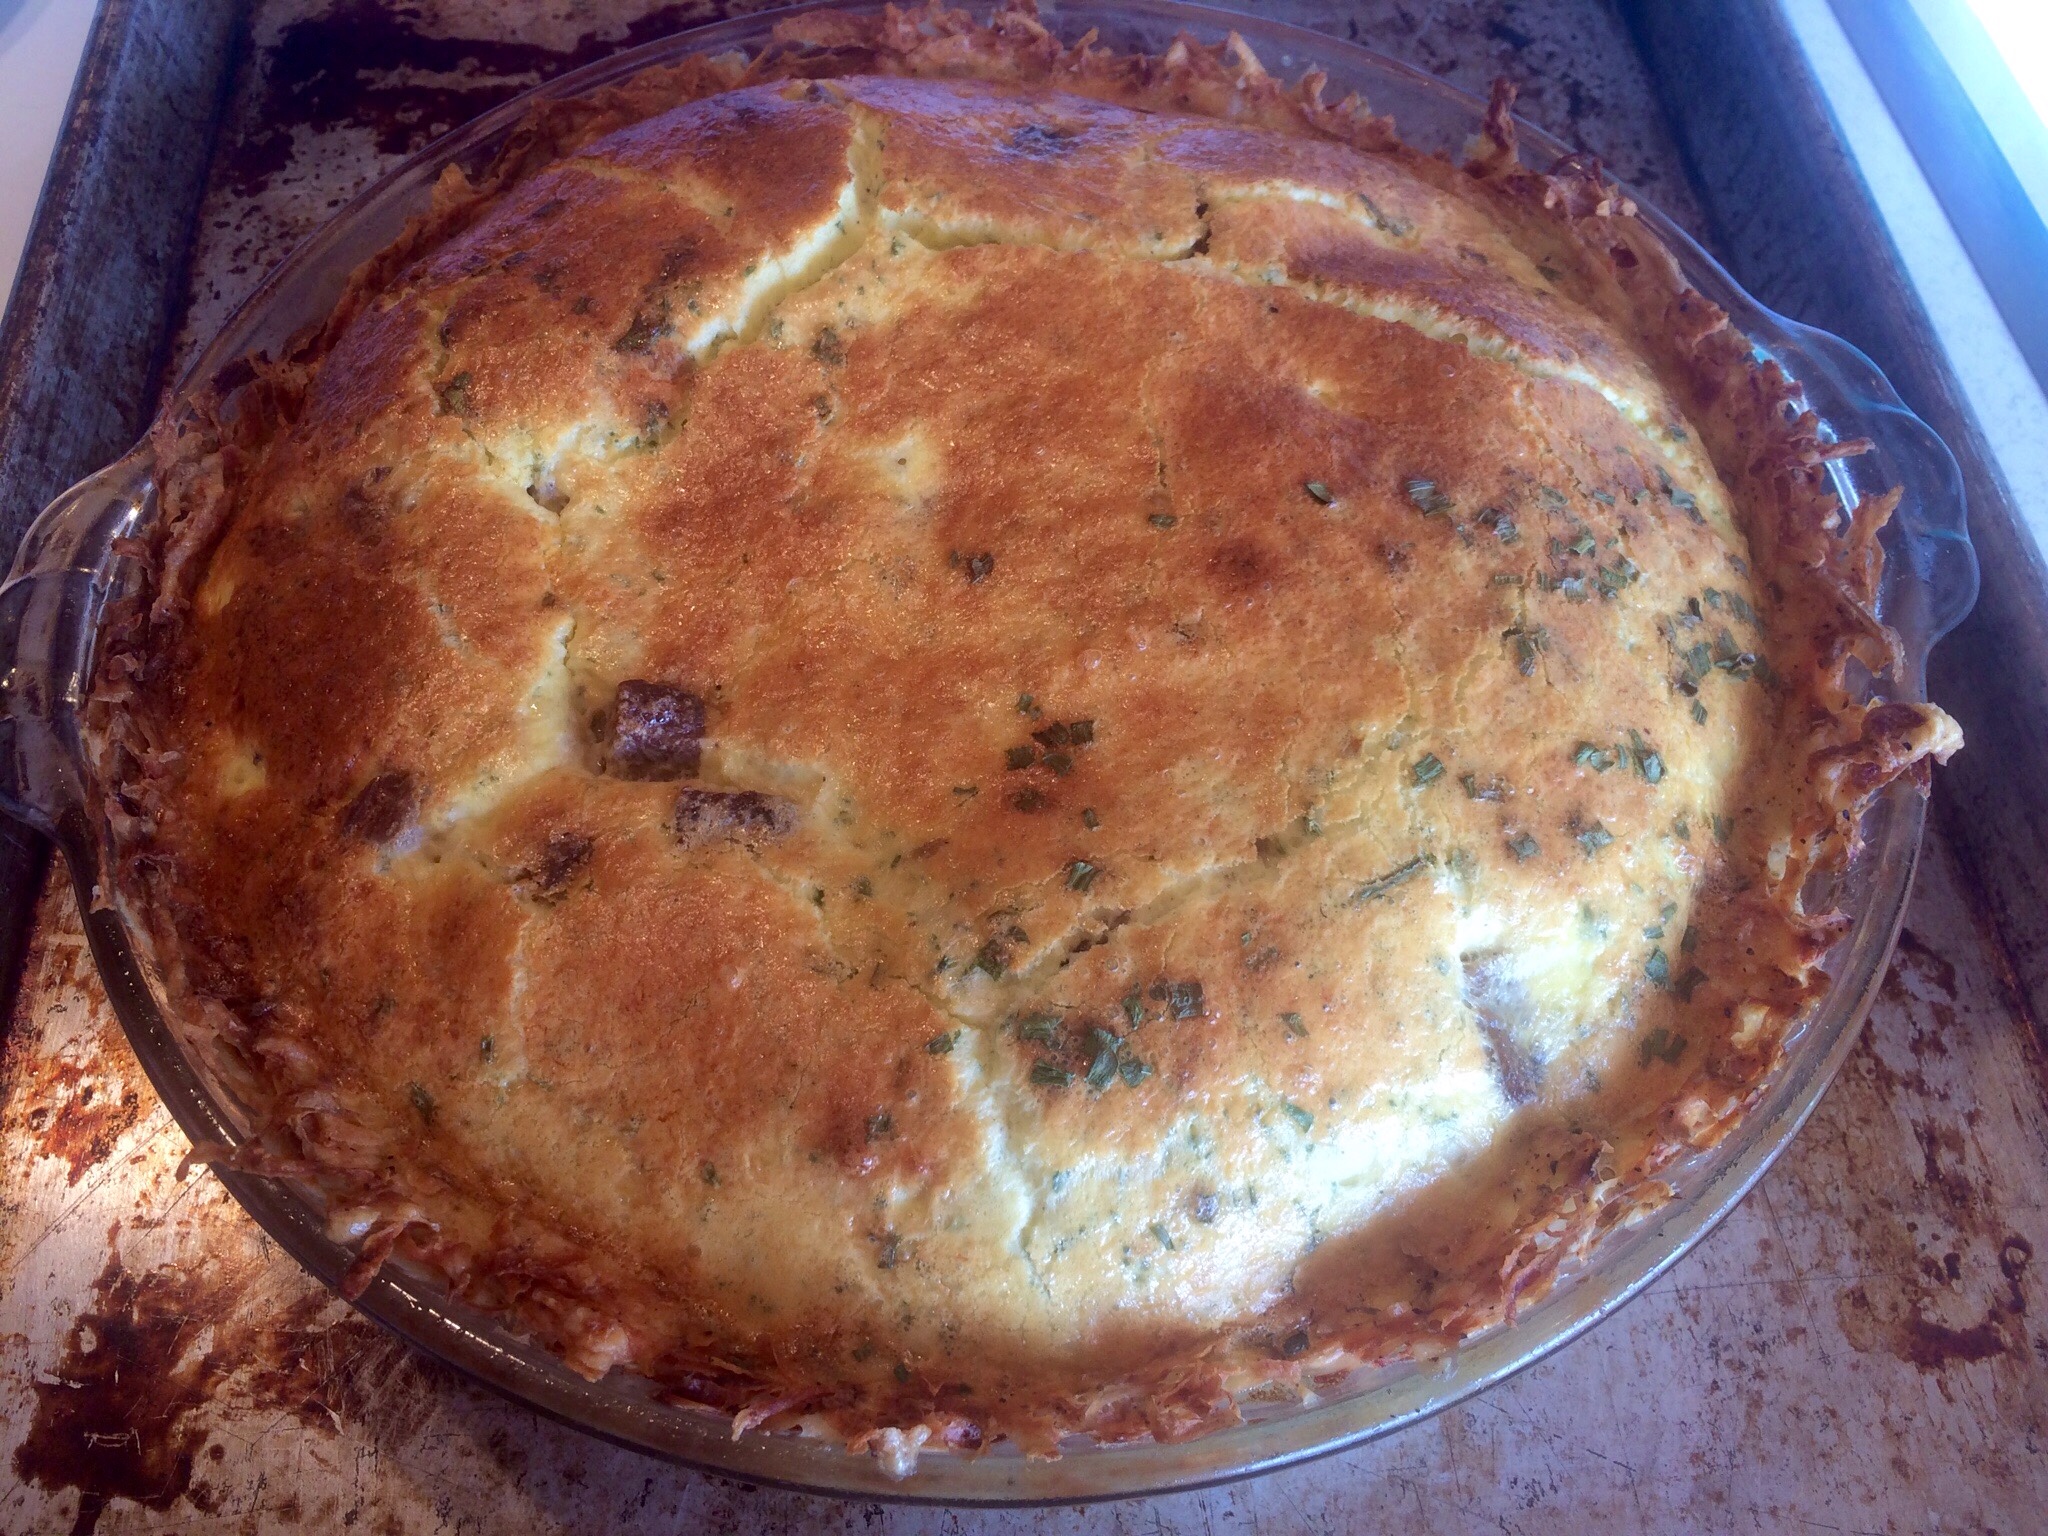
Here's a recipe for a signature dish that I literally worked on for years before offering here. It is incredibly good, fun to make, very impressive visually and unbelievably delicious. Ladies and gents, I give you the potato crusted quiche.
Quiche is a member of the custard family, of course, which encompasses everything from crème brûlée to the savory breakfast variants, like frittatas and tortas and quiche. Eggs are a perfect food, and quiche is the best possible savory application utilizing them that I can think of.
As with all things custard, there are a few little touches that will make the difference between good and great;
1. Bring your eggs and cheese out with enough lead time to have them pretty close to room temperature before you mix and cook.
2. Scald your milk before you mix – In a sauce pan over medium high heat, until tiny bubbles form right around the very edges of the milk, then take it off the heat and let it cool a bit; this helps things made with it to cook quicker and more evenly in the oven.
3. Blend your egg-milk mixture well. the more it is blended, the smoother your custard will be – Use an immersion blender if you’ve got one, a stand mixer or blender if you don’t.
For the crust
1-2 potatoes
1/2 Cup shredded Swiss Cheese
2 Eggs
Sea Salt and fresh ground Pepper
Preheat oven to 400° F.
Grate about 2 cups of your favorite hash brown potato; Russets are most traditional, but any high-starch potato will do fine. Transfer the grated potato to a mixing bowl, and cover the potatoes completely with ice cold water. Let them stand for about 5 minutes, then strain out the water, and refill the bowl with ice water again, and allow a second 5 minute soak.
Drain the potatoes into a single mesh strainer, then grab handfuls of the shredded spud and wring the water out of them. Transfer the potatoes to a dry bowl.
Add the grated Swiss and crack the eggs into the mix as well, then season lightly with salt and pepper. Combine everything thoroughly by hand or with a wooden spoon.
Lightly coat a pie pan with olive oil, then spread the crust into the pan by hand and form a nice, even layer on bottom and sides. Form the sides of the crust over the height of the pie pan, as they'll shrink a bit during blind baking.
Bake the crust for 15 minutes at 400° F, until the eggs have set and the cheese has melted slightly; this is important, as it forms an impermeable layer for the egg mixture to come.
Remove from heat and reduce baking temp to 350° F.
For the Filling:
3 large Eggs
1/2 Cup Swiss Cheese
1 Cup Whole Milk
1/2 Cup Sour Cream
1 Tablespoon fresh Chives
1/4 teaspoon granulated Garlic
1/4 teaspoon granulated Onion
Sea Salt and fresh ground Pepper
Scald the milk and set aside to cool a bit.
Cut the cheese into roughly 1/2″ cubes. Chiffenade the chives.
Whisk eggs briskly, then add sour cream. Add the milk slowly, to temper the mixture and avoid cooking the eggs prematurely. Blend all very well with an immersion blender.
Add seasoning and mix well.
A classic quiche is simply eggs, cheese, and some seasoning, but you can certainly add more as you desire. Avoid ingredients that hold a lot of water, like tomatoes, as they'll tend to make your final product runny. If you wish to add things like ham or onion, it's best to lightly sauté them first, which will concentrate flavors and drive off excess moisture prior to baking.
Bake for 45 minutes at 350° F, until the quiche has risen nicely and is golden brown on top.
Remove from heat and allow a 10 minute rest, then cut, serve and enjoy.
Almond Biscotti are a delight, but as with all things baked, best when they're fresh. That said, they're meant to be crunchy; if you ever thought that their consistency was somewhat akin to hardtack, you'd be right on the mark. Biscotti have their origins in the same vein as that staple of old time sailors. Initially, biscotti was a twice baked, fatless ration carried by the Roman Legions, meant to last for months if not years. The almond flavoring we use here harkens back to that original version. Nowadays, we often add a little fat to make them more toothsome, at the expense of longevity.
Make this recipe fresh at home and you'll never go back to store bought.
2 Cups Whole Wheat Pastry Flour
3/4 Cup local Honey or Agave Nectar
1/2 Cup slivered Almonds
2 whole Eggs
1 Egg White
1 Tablespoon Unsalted Butter
3/4 teaspoon Baking Soda
1 Vanilla Bean, (or 1/2 teaspoon pure extract)
1/4 teaspoon Almond Extract
1/4 teaspoon Sea Salt
Preheat oven to 350° F and set a rack in the middle spot.
Line a heavy gauge baking sheet with parchment paper and set aside.
Cut or process almonds to a rough chop.
In a saucepan over medium heat, melt the butter and sauté the almonds until slightly browned, about 2 minutes. Remove from heat and set aside.
Carefully slice the vanilla bean lengthwise. Scrape the seeds into a smaller mixing bowl. Put the pod into your sugar bowl to add a lovely vanilla note; you can also save the pod for a recipe that calls for a liquid and soak it therein.
In a large mixing bowl, thoroughly combine the flour, almonds, baking soda, and salt.
In a separate bowl, blend the vanilla, almond extract, eggs, egg white, and honey or agave.
Add the wet mix to the dry and combine thoroughly. This will be a rather dry dough. Turn it out onto a lightly floured surface and knead for about 15 seconds. Like a good pie dough, you just want to incorporate the ingredients and activate the gluten a bit; take care to not overwork the dough – 15 seconds kneading, max.
Divide the dough in two and roll each half out by hand to roughly 12″ length.
Place loaves on your prepped baking sheet and gently flatten them down to about 3/4″ thickness.
Bake for about 30 minutes, or until the loaves are firm and slightly springy to the touch.
Remove loaves from the oven, reduce oven heat to 325° F.
Place loaves onto a wire rack and allow to cool for 10 minutes.
Slide loaves onto a cutting board and slice each at a 45° angle and 1/2″ thick.
Place slices on an unlined baking sheet, then bake for 10 minutes.
Flip each biscotti over and bake another 10 minutes.
Remove from oven, place biscotti on the wire rack, allow them to cool completely.
Store biscotti in an airtight glass container. They'll last quite a while, but they're best if eaten within a few days of baking.
VARIATIONS:
Dip biscotti about half their length in the chocolate of your choice. Set them on a wire rack until the chocolate has hardened completely.
Add 1/2 Cup of dried cranberries, raisins, dates, apricots, or other dried fruit to the wet mix.
Here's another great question from reader Pauline all the way over in New Hampshire, on a topic that probably doesn't get asked all that often;
“So, I bake infrequently, and I've got containers of baking soda and baking powder that have been in my pantry forever; do these things go bad? And while you're at it, was is this stuff anyway?
Glad to help, Pauline, and thanks for asking.
The quick and dirty answer to the former question is, yes, they can go bad. Baking soda and powder are chemical leavening agents that promote rising in baked good recipes that don't employ yeast. While the end result is much the same with all three leaveners, the primary benefit imparted by baking soda and powder is speed; they can and should be used right away after mixing, while yeast takes time and really can't be rushed much. The active constituents of both do have a shelf life, albeit a long one. Fortunately, there's a couple of quick test you can do to see if yours still makes the grade.
The first test is to find and read the expiration date; at the risk of being flippant, there are printed dates on the containers of both products, though they may take a bit of sleuthing to find. If yours is past its date, discard it and buy a fresh replacement. When you're at the store, check that expiration date on what you're about to buy; in a professional kitchen, we check the dates on every case that comes in, because it's not that uncommon to find expired product in your just-made delivery, and your local grocery is no exception to that rule.
The second test is for a chemical reaction, and is therefore a bit more definitive. Take a good pinch of baking soda and drop it into some fresh vinegar; if it fizzes actively, you're in business. For baking powder do the same thing into hot water. If either just sit there, toss them
On to the latter question;
Baking soda is pure sodium bicarbonate, an alkaline or base in chemical terms. Combined with moisture and an acidic ingredient like dairy, chocolate, or honey, you get a mild chemical reaction akin to the freshness test you just did. The resulting tiny bubbles of carbon dioxide, (CO2), remain trapped in the batter matrix. Exposed to baking temperatures in your oven, they expand and cause your baked goods to rise. baking soda is a pure chemical base, so it can impart a bitter taste note if you add too much; that said, a little extra is actually a very good thing, for a most interesting reason. Just a bit more baking soda than that needed to neutralize the acid in your recipe contributes in a very positive way to browning and flavor in your finished product. This has to do with the Maillard reaction, named after Louise-Camille Maillard, who first described it about a hundred years ago. What Maillard detailed was a complex set of reactions that lead to such culinary wonders as the luscious crust on your steak, the sweet beauty of caramelized onions, and the golden brown outside of a cream biscuit. On top of the lovely color added, the reaction also produces hundreds of aromatic compounds that add savoriness and complexity; in other words, it's a very good thing indeed. The key is moderation; an eighth of a teaspoon above a stated recipe amount is enough to hit the sweet spot.
Baking powder is a mixture of a base and an acid or acids; sodium bicarbonate is the base, while cream of tartar and sodium aluminum sulfate are the common acids. There's typically a bit of added starch as a carrier for the active ingredients as well. Baking powder is a more complex and balanced leavener than baking soda, since it contains both acid and base; it is completely inert when dry, but when introduced to moisture, the base and acid mix and generate CO2, and you're in business. The reason baking powder is called 'double acting' is the presence of the two different acids. When added to your recipe, the first acid, cream of tartar, mixes with the baking soda and goes to work right away. The second acid, sodium aluminum sulfate, is temperature activated; when your batter or dough hits roughly 175° F, that acid combines with the remaining base and contributes a bit more rise.
You can make basic baking powder at home by combining,
2 teaspoons Cream of Tartar
1 teaspoon Baking Soda
1 teaspoon Corn Starch
The obvious benefit is fresh product, assuming your constituents are, of course, but this will not be a double acting powder and as such, won't have quite the lifting power of the commercially prepared stuff.
If the aluminum makes you nervous, maybe it should. Aluminum has been found to adversely affect reproductive and nervous systems in animal studies. Some human studies have suggested a possible connection between aluminum and Alzheimer's Disease. The health effects of aluminum on humans are not definitive, but nonetheless, the Joint Food and Agriculture Organization/World Health Organization Expert Committee on Food Additives (JECFA) significantly lowered the tolerable intake of aluminum as a result of such studies.
Some recipes call for baking soda, others for baking powder, and some employ both. The leavener(s) called for is governed by the over-arching recipe. The straight base chemistry of baking soda dictates does well with more acidic ingredients, like buttermilk pancakes, or cake recipes that employ vinegar. Baking powder commonly gets paired with more neutral ingredients like plain milk or non-dairy alternatives.
So how about the interchangeability of these two? You can substitute baking powder in place of baking soda using a ratio of 3:1 powder to soda, but it's not a desirable substitute; the significant amount of added acid will impact the taste of your finished product. On the other hand, you cannot sub baking soda for baking powder, since baking soda lacks the acidity needed to make things rise.
With both these leavening agents, it's important to keep in mind that the reaction produced is relatively short lived and begins as soon as you mix ingredients. It's always best practice to have your oven preheated and to bake promptly, otherwise you'll miss the window of efficacy and your goodies will fall flat. Unlike a yeasted dough, which is relatively low in moisture and kneaded until a tough, elastic gluten network is produced that will trap massive amounts of carbon dioxide, quick batters and doughs are made with an extremely moist batter, because baking powder just doesn't generate enough gas to effectively leaven a thicker dough. Additionally, batters have relatively little gluten formation, so they're not that meaning that great at trapping and holding bubbles.
Alert reader Christy, (always wanted to use that…), writes, “What kinds of fats can be substituted for each other when baking and how do you do it? You used lard for the piecrust, which does make the best crust. Leaf lard is hard to find around here, though. I made a pie crust the other day using butter instead, but it turned out pretty tough. And then there are liquid fats such as olive oil and canola oil, etc.?”
Great question, so let’s wade in. For the record, I bake with butter, lard, and coconut oil pretty exclusively. I believe firmly that neither butter or lard are bad for you, eaten in moderation, and in fact, are healthier than most highly manufactured fats. I’ve covered this in other posts, so I’ll leave my position at that. Christy is a wonderful, agile cook, and if she or any of the rest of you want to know stuff like this, or need to for health reasons, then I’ll honor it and answer as best I can.
The primary issue when substituting oil for butter in a cake, cookie, or pie recipe is to fully understand the chemistry the fat facilitates within such things. In the broadest sense, fat contributes tenderness, moistness, and mouth feel to baked goods. There is also a flavor aspect involved, the rich nuttiness of butter and the salty tang of lard. Fats also contribute significant textural qualities to baked goods. Consider a recipe that has you creaming butter with a sweetener, like the gingerbread or the Nanaimo bar recipes we just posted. In both recipes, I wrote about whisking the sweet and fat ingredients together until a notable lightening of the texture is achieved; this is possible because the semi-solid fat traps tiny air bubbles in the matrix and physically lightens it, something that liquid fats don’t do very well at all. Similarly, consider something that depends on a loose matrix of fat and flour to derive a light, flaky texture, like a pie crust; again the property imparted by the semi-solid fat is an absolute necessity. The second consideration involves proportions, as virtually no alternative fat is a straight 1:1 substitution for butter or lard. Take muffins or pan breads as an example in this regard; reducing the amount of fat will will allow gluten to develop more freely, resulting in a notable tougher product.
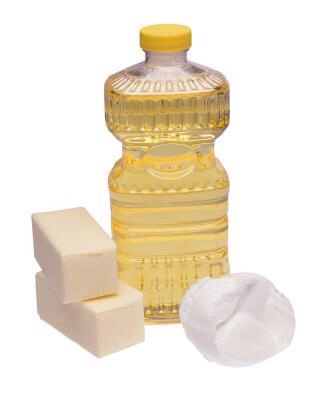
A closer examination of the most commonly used baking fats will help to better understand what we need to emulate with a substitute. Fat content is the key in this regard. Butter is 80% + fat, with the rest made up of water and milk solids. True lard is virtually all fat; when I say true lard, I’m speaking of lard you yourself have rendered from pork, or lard you’ve bought that was kept in a dairy case, the leaf lard Christy referenced above. I know excellent chefs who swear by duck fat and schmaltz for baking as well, which is certainly food for thought.
If you’re buying the lard that sits out next to the shortening, stop doing that and don’t do it again. Those are vegetable or animal fats heated under pressure, with hydrogen gas introduced into it, usually with some form of nasty, toxic catalyst used to make it all happen faster. This process forces hydrogen atoms to latch on to carbon bonds in the fat in a crossways configuration, generating what’s commonly known as a trans fat. This is done not for our wellbeing, but so that said products can remain in solid form on an unrefrigerated store shelf and not go bad. That, for my mind, is reason enough to ban them from your kitchen.
In any case, the good news here is that the overall fat content of most of the healthy cooking oils and a few interesting non-oil alternative are comparable to butter, so successful substitution is certainly viable.
The first rule of subbing for butter or lard is that there is no hard and fast rule; it varies by recipe, and you need to experiment a bit to land on the winning formula. Here are some general guidelines to get you started.
Subbing liquid oil for butter works best in recipes that call for melted butter.
Subbing coconut oil, with its more solid form, works best in recipes that call for chilled butter. Keep in mind that coconut oil will go to liquid faster than butter will due to its lower melting point, so keeping it well chilled will serve you best when working with it in a recipe that calls for creaming, or in pie and tart crusts.
Start by subbing half the butter with your chosen alternative in a cake, muffin or cookie recipe; stick with butter or lard for pie crusts until you get a good, solid feel for how your alt choice behaves, then brave onward.
When you’re ready to 86 all the butter,
For olive, avocado, peanut, macadamia, walnut, or coconut oil, use .75:1 for the amount of butter called for.
For canola, grape seed, or hemp seed oil, use .625:1 for butter.
Consider these non-oil alternatives as well.
Applesauce, especially fresh, homemade, makes a fine butter alternative; it works best in cakes, muffins, and quick breads. Here again you can opt for the 50% butter, 50% applesauce route, or simple replace all the butter; doing so will yield a denser, moister product, but that’s rarely a bad thing.
Avocado is great in the same category of recipes. Avocado lowers the calorie content and yields a softer, chewier baked good.
Full fat Greek yogurt also makes a fine replacement. Use it in a 1.5:1 ratio for butter and again, you’ll lower the calories and saturated fat count of your recipe.
Closing thoughts on that tough pie crust made with butter, Christy. My first questions are; how old was the butter and the flour, what kind of flour did you use, and how cold was the butter and water? Next would be was this made by hand or machine assisted?
I like whole wheat pastry or whole wheat white flour for pie crust. Much better results than AP in my experience.
I make crust by hand, exclusively. Flaky crust requires pretty big chunks of fat and a relatively loose dough; I get the best feel for that by hand.
Machines can and will heat up your ingredients, and cold is kind when it comes to flaky crust.
Finally, keep in mind that butter has a lower melting point than lard, so it will break down to smaller sizes faster. Cut your butter into 1/4″ cubes and stick it in the freezer for about 15 minutes before you combine flour and fat.
It might not surprise y’all to know that Monica and I pull out all the stops when it comes to camp cooking. Rather than see camping as a need to pare down and go simple, we take it as a chance to eat well in some of the prettiest places you’ll ever visit. If you’re car camping, or talking hunting or fishing camp, you not only can bring what you want, you should. You’ll want some form of flat top of course; a big old cast iron skillet is perfect. And make sure you include your Dutch oven, it’s a must for great camp cooking.
A Dutch oven is a must for great camp cooking.
Without a doubt, the most important meal of the day out there is breakfast; that’s where your fuel comes from for the fun to come later in the day. With the Dutch oven, baked eggs, quiche, frittatas, biscuits, cinnamon rolls, Dutch babies, and dang near anything else you like for breakfast is absolutely doable. Just do a bit of pre-prep at home, measuring and combining ingredients so that it’s a quick and easy job at the camp end of things. Here are a few tips to help you have a great outing.
There’s nothing finer than campfire cooking.
Make some genuine camp coffee. Pull the guts out of a percolator, or just use a pan if you like. Do it up right, on the fire or in the coals if you’ve ’em; a Coleman or camp stove will work just fine if you’re camping in a no fire area. Here’s the scoop.
10 tablespoons coffee
10 cups cold water
5 empty eggshells
Tiny pinch of salt
Use a nice, dark roast, medium ground, (a bit rougher than you’d use for a drip at home.) Crush your eggs shells and throw everything into the perc or pot and cover it. Bring to a full boil, then move the pot to lower flame or coals and simmer, covered, for about 6 minutes. Remove pot from heat and Let stand, covered, until the grounds settle, about 2 minutes. Carefully pour off coffee, leaving the grounds and shells in the pot. Even Fannie Farmer herself used this method; try it, you’ll like it!
Knowing and regulating the cooking temperature for a Dutch oven is the real trick. First things first, decide whether you’re going to use charcoal or wood. Charcoal will give you the most consistent heat and control, so that’s what I prefer.
Use high quality hardwood briquettes and avoid the self lighting crap; it burns much hotter and doesn’t last as long as the good stuff. Good charcoal will provide at least an hour of cooking: For recipes that take longer than that, pull expended briquettes and replace them with fresh ones. Keep in mind that the Dutch oven is already hot, so you only need to replace a few briquettes at a time.
Here’s the general rule of thumb for heat regulation with a Lodge or GSI Dutch oven. Note that briquettes are applied to both the bottom and top. To achieve 325° F, take the size of the oven, then use that number of briquettes less three for the bottom and that number plus three for the top. So, with a 12″ oven, you place 9 briquettes on the bottom (12-3) and 15 briquettes on the top (12+3). Adding one set of briquettes (one on top and one on bottom) will raise the temperature of the Dutch Oven approximately 25 degrees, (Conversely, removing one set of briquettes will lower the temperature by 25 degrees). Here’s a handy little chart that’ll help a bunch.
That said, you do want to vary the ratio of briquette placement on the top and bottom of your oven, depending on what you’re cooking. Here are some guidelines.
* For simmering food, place 1/3 of the total briquettes on the lid and 2/3 under the oven.
* For baking bread, rolls, biscuits, cakes, pies, and rising cobblers, place 2/3 of the total briquettes on the lid and 1/3 underneath the oven.
* For roasting meats, poultry, casseroles, quiche, vegetables, and non-rising cobblers, use an even 50% on the lid and underneath the oven.
Heat placement around the Dutch oven is crucial to yield the best cooking results. Briquettes placed under the oven should be arranged in a circular pattern right under it and come to no less than 1/2″ from the outside edge of the oven. Briquettes placed on the lid should be spread out in an even checkerboard pattern. Avoid bunching briquettes; that’ll cause hot spots.
The Golden Rule of Dutch oven cooking is this; Go Easy With The Heat! You can always do things to get the oven hotter, but if you burn the food, it’s game over.
If you’re cooking over a camp fire, you can still use charcoal. Get the briquettes started in the coals of your fire and then cook with those. Again, it’s just a whole bunch easier to accurately regulate cooking with charcoal than it is with coals, unless you’re a real pro.
Keep in mind that environmental factors, (Air temperature, humidity, altitude, wind), all influence how much heat is generated by burning briquettes. Cool air temperatures, high altitudes, shade, and high humidity will decrease the amount of heat generated by briquettes. Hot air temperatures, low altitude, direct sunlight, and wind will increase the amount of heat generated by briquettes. In real windy conditions, briquettes will burn faster due to increased air flow, and they won’t last as long.
Here are a couple of our favorite recipes for you to try on your next outing.
Spanish Frittata
6 large Eggs
2 Cups Milk
1/2 Cup Sour Cream
1 Cup shredded Extra Sharp Cheddar Cheese
1 Jalapeño Chile
1 Tomato
2 Yukon Gold Potatoes
5-6 sprigs Cilantro
1 clove Garlic
1/2 teaspoon sea salt
1/4 teaspoon ground Pepper
At home, mix eggs, milk, sour cream, cheese, salt, and pepper, and blend well. Store refrigerated.
At camp, stem, seed, and core tomato and jalapeño, then fine dice.
Mince Cilantro and garlic.
Dice potatoes.
Combine all ingredients. Add to a preheated Dutch oven. Follow the ratio for roasting, (50% – 50%), and cook for 45 minutes, then check dish. When eggs have risen about double height and the frittata is firm in the center, it’s good to go. Serve with salsa, more sour cream and toast.
Dutch oven roasting with a 50%-50% coal mix
Here’s a great French Toast Casserole, perfect for the first morning in camp. The initial prep can be done at home, then set up for breakfast the night before in camp.
1 Loaf Sourdough Bread
8 large Eggs
2 Cups 1/2 & 1/2
1 Cup Milk
2 Tablespoons Honey
1 teaspoon Vanilla Extract
1/4 teaspoon Ground Cinnamon
1/4 teaspoon Ground Nutmeg
Pinch of Sea Salt
Maple Syrup
In a mixing bowl at home, combine eggs, half-and-half, milk, sugar, vanilla, cinnamon, nutmeg and salt. Whisk by hand until thoroughly blended. Store blend in a Tupperware container with an airtight lid.
In camp the night before breakfast, slice the Sourdough about 1″ thick. Arrange the slices, overlapped, in a large Tupperware container or bowl with a snap lid.
Pour the egg mixture over the bread slices, making sure all are evenly covered. Lift the slices and make sure the batter gets all around the bread. Keep in a cooler until morning.
On breakfast morning, carefully transfer the bread to a well buttered Dutch oven. Pour all the remaining batter in as well.
Follow the briquette ratio for baking, (1/3 on bottom, 2/3 on top), and bake for 45 minutes, until the casserole has puffed up and turned light golden brown. Serve with warm maple syrup and butter.