Easy Eggs Benedict at Home – No, Really


It’s the youngest’s Birthday, and he’s up for a visit, so I offered several options for breakfast – he landed on Eggs Benedict. It’s also Palm Sunday, which means that this weekend and certainly next, a lot of folks are gonna think about going out for a special breakfast, and often enough, for the same dish. That’s all the reason you should need to make it at home.

Few breakfast dishes are more celebrated than Eggs Benedict. This is as it should be, because when done well, there are few things more delightful. And yet they’re rarely done at home, due to the assumption that they’re a royal pain in the ass to make. They’re really not if you go in understanding what you’re gonna do and have a pretty simple mis en place ready – do that, and they can and will be pretty easy.

There’s a couple versions of Benedict that claim to be the original out there. What’s generally agreed to is that it is an 19th century American dish and that hollandaise is involved. I was raised believing in the Lemuel Benedict version, named after a retired stockbroker with a hangover who wobbled in to the legendary Waldorf one morning in the late nineteenth century and ordered toast, bacon, poached eggs, and hollandaise. The Maître d’ on duty liked the idea and put it on the menu, subbing English muffin for toast and ham for the bacon.

The competing ‘original’ Benedict came from Elias Cornelius Benedict, a New York City banker – his version included a mixture of chopped, hard boiled eggs and minced ham topped with hollandaise. 

With this post as an excuse, we tried both versions. We found them both delish, but it was agreed that Lemuel’s version is best. In any event, it’s quite obvious who has won at least the popular vote, if not the naming rights.

There’s a boatload of variants, from Florentine to mournay and Chesapeake to Hebridean. As far as I’m concerned, any variant is still Benedict so long as it involves eggs, bread and hollandaise.

So why does the dish have such a bad rep for home kitchens? The overall sense of fussiness and time pressure when constructing the dish, (largely due to a broad belief that you must make the hollandaise last), and mixed results when poaching eggs are the top complaints.

What you’ll find here does away with all that, and produces consistent, pretty results. We’ll build the hollandaise first, with a grounding in how and why it works, which makes for an unfussy, unhurried brunch. We’ll also deploy a skillet instead of a sauce pan to poach – that way you can clearly see how your eggs are cooking and have a much easier time with assembly.

First a bit about hollandaise. This is an emulsion, not much different than salad dressing in what we’re after getting it to do for us. The egg yolks we’ll use are basically protein rich water, and butter is our fat.

Successful hollandaise involves giving egg yolks, a little water, and lemon juice the time and gentle heat needed to allow us to gradually add butter and end up with a delicious, stable emulsion.

A couple tablespoons of water isn’t much, but it’s key to allowing the proteins in the yolks to relax. For the life of me I can’t understand recipes that omit it. Acids like lemon juice or vinegar also help relax yolk proteins, but the real protagonist here is gentle heat, with a strong emphasis on gentle.

Heating that mixture too much or too fast is the top cause of Hollandaise failure for home cooks. I’ll have you use far less heat than most recipes, and none if it direct -that’ll solve the overcooking problem. The indirect, (mostly steam), heat in the double boiler, coupled with the latent heat of the melted butter is more than sufficient to get the job done. Here’s how you do it.


Painless Hollandaise

4 large, fresh Egg Yolks

1/2 Cup fresh Butter

2 Tablespoons Cold Water

2 teaspoons fresh Lemon Juice

2-3 shakes Tabasco Sauce

Separate eggs. Place whites in an airtight container and refrigerate or freeze for future projects.

Put about 2″ of water in a sauce pan sized such that a mixing bowl or double boiler will fit within. You want the bottom of the bowl you’ll work in to be above the water by a good 2″. Not doing this right is a primary cause of failed hollandaise – Too much heat, and/or heating too fast.

Turn heat to medium low.

In a separate sauce pan, melt butter over medium low heat.

When the water starts to simmer, turn off the heat.

In a small mixing bowl, combine egg yolks, water, and lemon juice.

Whisk briskly by hand to combine, until blend thickens and the volume has increased notably, about 2 minutes.

Place bowl over the hot water pan.

Gently but steadily whisk the egg yolk mixture to heat it through, about 1 – 2 minutes.

Begin slowly adding butter in a thin stream; add a few seconds worth, whisking gently but constantly, until the yolk mixture has incorporated the butter, then add a little more, and keep doing so until all the butter is absorbed.

The sauce will thicken somewhat, but possibly not as much as you like it to end up, but don’t sweat that point; as the sauce sits while you prep the rest of the dish, it’ll thicken a bit more.

Whisk in the Tabasco, then set the whole double boiler rig on the back of your oven, and cover with a clean towel.

What to do if your Hollandaise breaks – It’s gonna happen some day, so just accept that and be prepared. It’s not the end of the world, and you can fix it, so – deep breath! Broken hollendaise looks like oil with little bits of egg in it – fear not. Grab a small spoon and snag a little hot water from your double boiling rig. Add a couple of those to the hollandaise and slowly, steadily whisk it in. Add a couple more and repeat. You can go as high as 25% of the volume of your sauce, but you probably won’t need to. Be patient – keep adding a couple small spoons of hot water and whisk slowly and steadily until your sauce emulsifies and takes on the smooth texture you’re after. Taste it, adjust lemon and Tabasco balance, and carry on – all is well again.


Eggs Benedict – Serves 2

4 large, fresh Eggs

2-4 slices thick cut Ham, (Cooked)

4 slices thick cut Sourdough Bread

Tablespoon of White Vinegar

Optional: Pinch of fresh Dill

Preheat oven to Warm.

Cut sourdough into roughly 4″rounds, and do the same with the ham.

Toast sourdough lightly, then place ham onto plates in the oven to heat through.

In a large skillet over medium heat, add about 2″ of hot water, and the vinegar.

When the water starts to simmer, roll the heat back to medium low.

Gently crack an egg and, with the shell just above the water, slowly release it into the pan. The vinegar will help the whites to solidify quickly, keeping your eggs together. Repeat with the other three eggs.

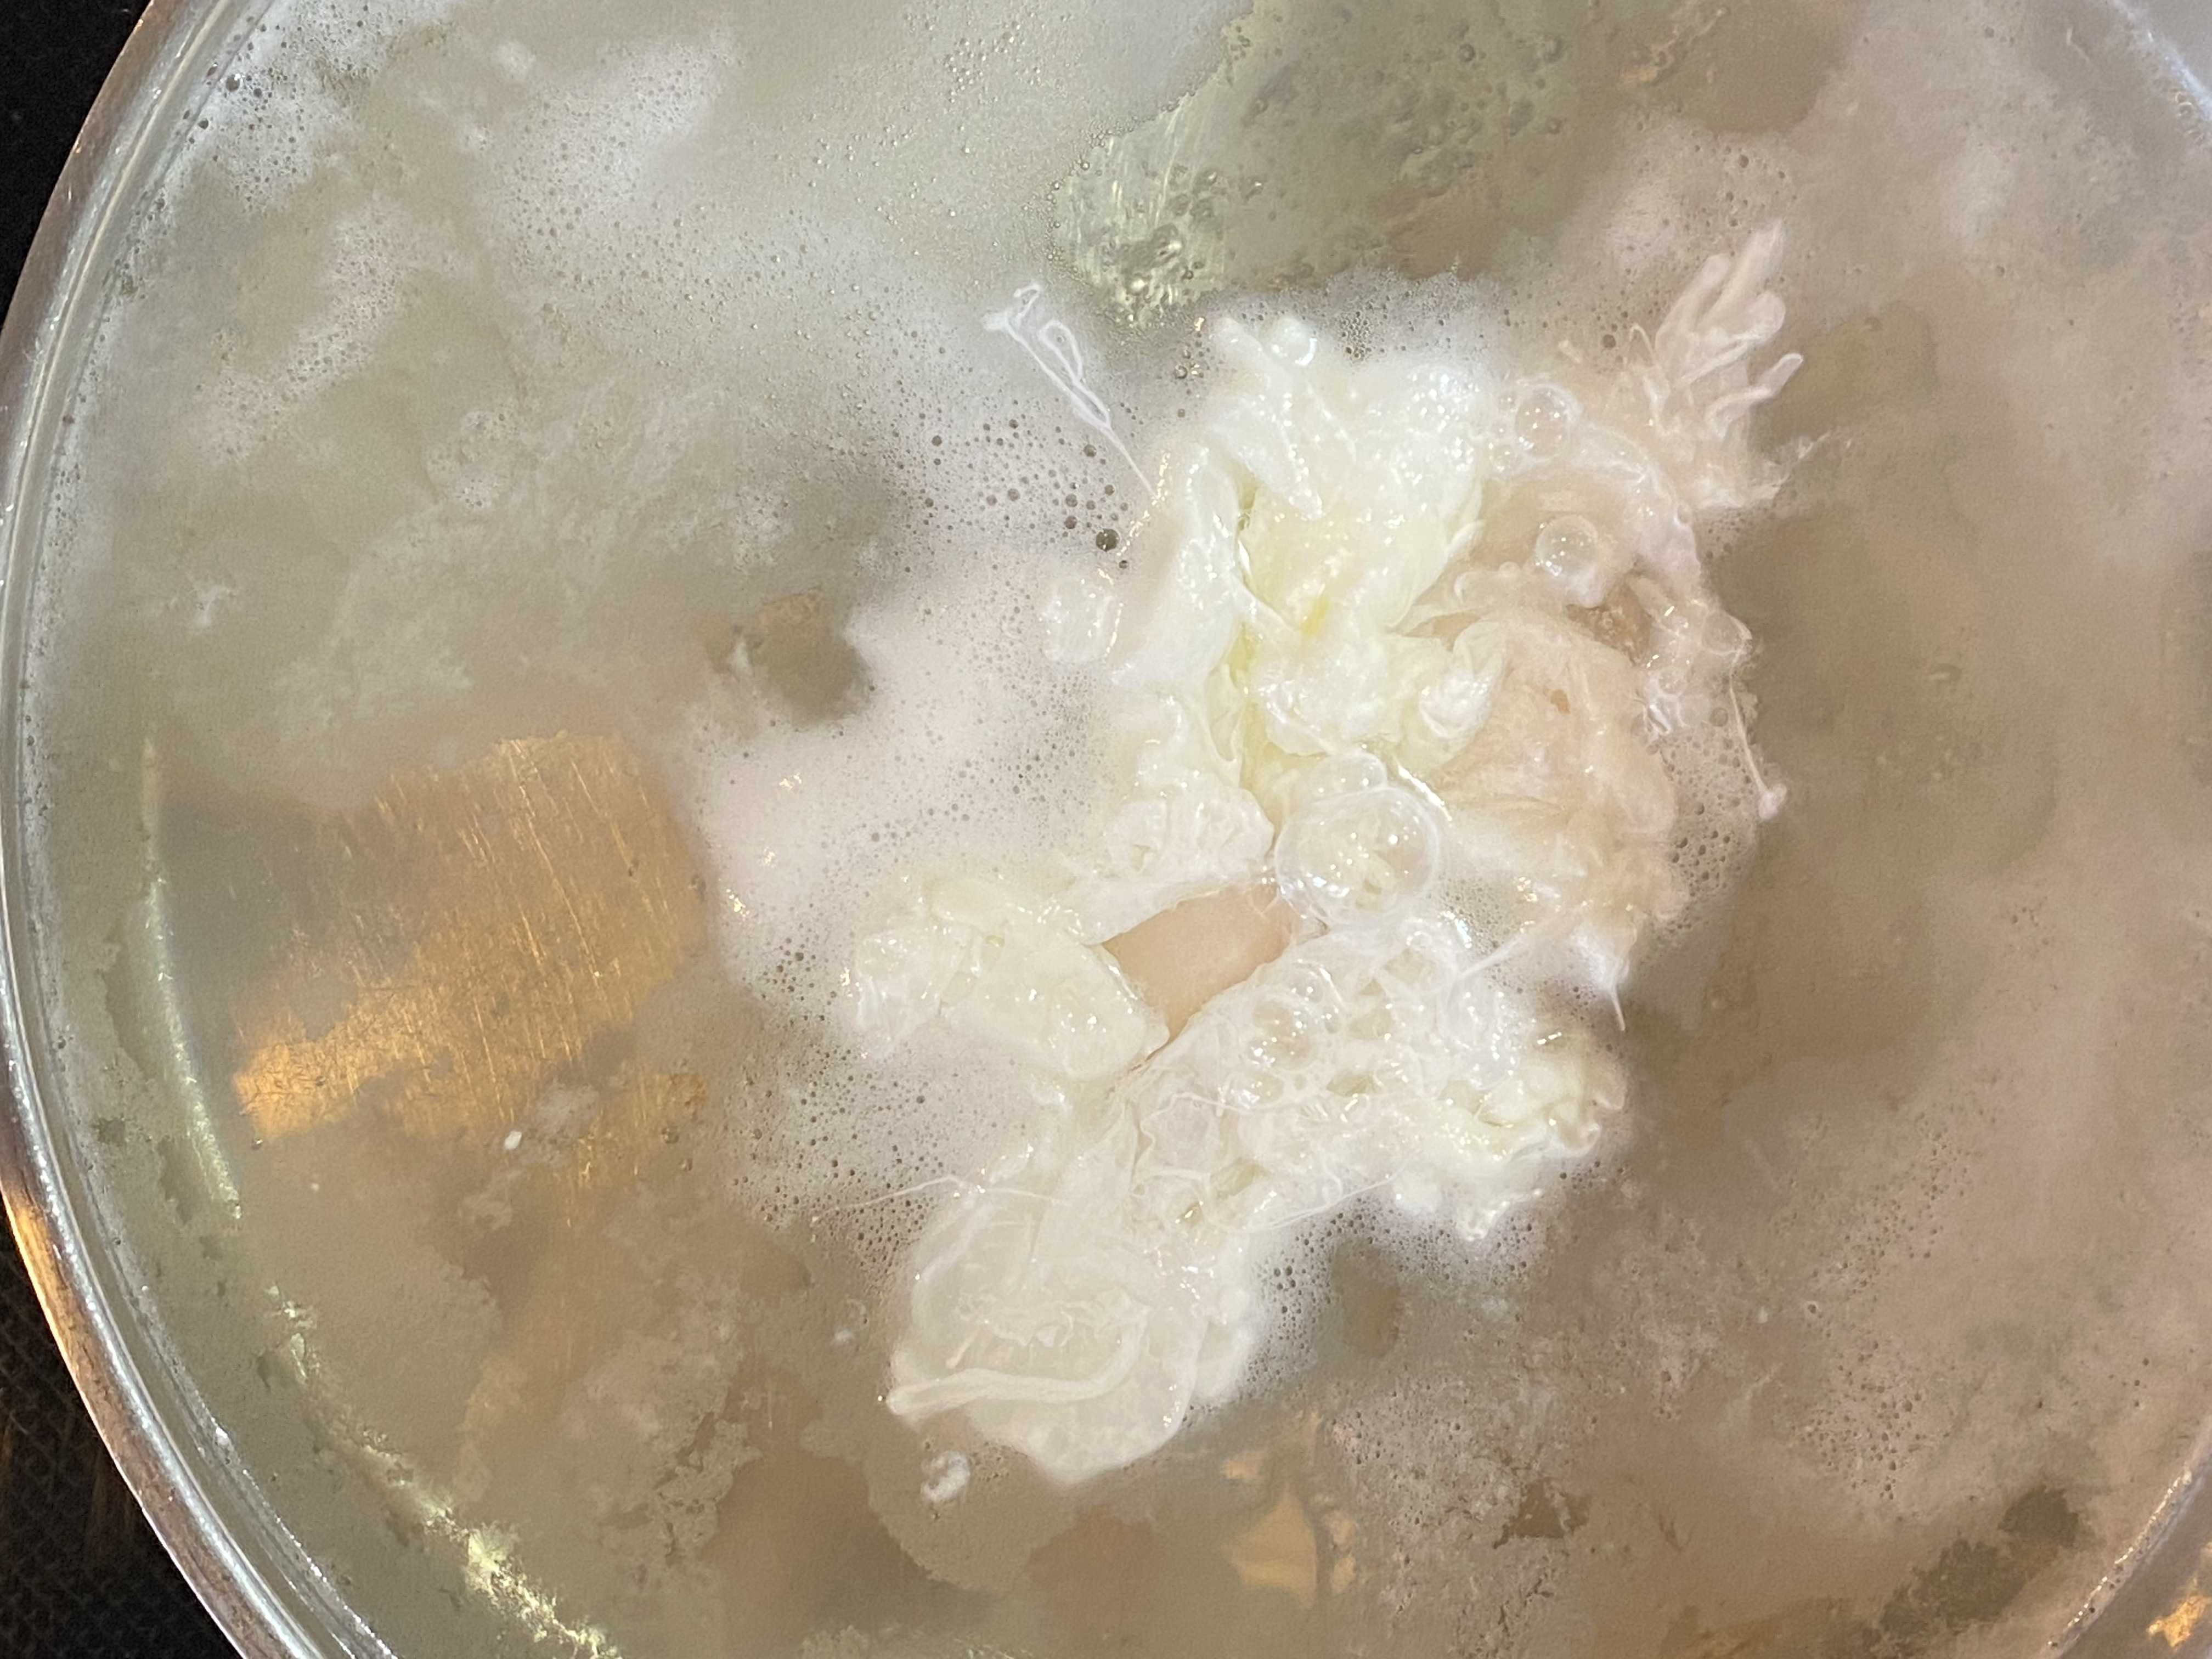
Poach eggs for about 3 minutes, until all the whites are nicely set and the yolks are still semi-liquid.

Remove plates, toast, and ham and set up two of each on warm plates.

Use a slotted spoon to gently corral eggs and set them carefully on the ham and toast stacks.

Uncover hollandaise and whisk to loosen it up a bit. If it’s a bit too thin, a little burst of heat and whisking will take care of that in less than a minute. If perchance it’s thickened too much, a teaspoon to two of milk whisked in will bring everything back to status quo.

Spoon generously over eggs and garnish with a little fresh dill if you wish.

 
The pretty plate up there? That was the Birthday Boy’s – here’s mine.

Urban’s Not Too Damn Bad For Ya Breakfast Cookies & Bars


Truth be told, when I’m working, breakfast usually consists of a few handfuls of nuts and dried fruit, because I’m on the go, and really don’t have time to stop and eat. I love that stuff, but every once in a while, I want something I can eat on the go that’s a bit more soul satisfying. While breakfast bars are tasty, most of the commercial stuff is crap. Mulling that over, I initially settled on a cookie, but then thought I might as well do up a bar version too – variety, spice of life – all that jazz.

What I came up with in either iteration has lots of oats, a relatively small amount of sweet stuff, unsaturated avocado oil, and good old fruit and nuts – tasty, and as advertised – not too bad for ya. Give them a try as I show below, and then you can modify them to make the mirrors. Changes in the fruits and nuts alone will give you quite a while variety of taste profiles. Enjoy!

Urban’s Not Too Damn Bad For Ya Oatmeal Breakfast Cookies

3 Cups Old Fashioned Oats

1 1/3 Cups Pastry Flour

3/4 Cup Avocado Oil

1/2 Cup Honey

2 Large Eggs

1/2 Cup chopped Pecans

1/2 Cup dried Cranberries

1/2 Cup Dark Chocolate Chunks 

1 teaspoon Baking Soda

1 teaspoon Ground Allspice

1 teaspoon Vanilla

1/2 teaspoon Salt

Place a rack in the middle slot and preheat oven to 350° F.

In a large mixing bowl, combine oil, honey, and eggs and cream the mixture until a bit fluffy.

In a small bowl, sift to blend flour, salt, and baking soda.

Add flour blend, oats, pecans, cranberries, and chocolate chunks to the wet mix and blend thoroughly.

On a baking sheet with a silicone pad, drop rounded soup spoon size chunks of cookie dough, spaced about 2” apart.

Bake for 5-6 minutes, then spin baking sheet 180° and bake another 5-6 minutes, until cookies are lightly browned on the edges.

Remove from oven, give them a couple minutes to cool, then carefully transfer to a rack to finish cooling.

Allow the baking sheet to cool for roughly 10 minutes before working your next batch. Makes about 24-30 cookies.

Store in an airtight container.


and then there’s the bars

Urban’s Not Too Damn Bad For Ya Breakfast Bars

2 Cups Old Fashioned Rolled Oats

1/2 Cup Pastry Flour

1 Cup Whole Milk

2 Large Eggs

1/2 Cup chopped Pecans

1/2 Cup dried Cranberries

1/3 Cup Dark Brown Sugar

1/4 Cup Avocado Oil

1 ½ teaspoons Baking Powder

1 teaspoon Vanilla Extract

1/2 teaspoon Allspice

1/2 teaspoon Cinnamon

½ teaspoon fine Kosher Salt

Pull eggs and milk and allow to come to room temp.

Lightly oil a 9” square baking pan. Add a tablespoon of flour and dust the oil evenly, then tap out the excess flour.

In a large mixing bowl, combine and mix well the flour, oats, sugar, baking powder, allspice, cinnamon, and salt.

In a separate mixing bowl, add milk, eggs, oil, and vanilla – whisk to thoroughly incorporate.

Position a rack in the center slot and preheat oven to 350° F.

Add wet mix to dry and fully blend the two with a kitchen spoon – allow the batter to rest while the oven finishes preheating.

Spread the batter evenly into the pan, then bake until edges of the bars are golden brown, about 25-30 minutes.

Remove from oven and allow to cool in the pan until handleable, about 15 minutes.

Cut into 12-16 bars, and store in airtight glass.

Dutch Baby with Lemon Honey Butter


Sunset Magazine claims the Dutch Baby as we know it hails from roughly 110 miles south of us, in Seattle. Manca’s Cafe was the place. Derived from the German Pfannkuchen, or pancake, Dutch Babies are in fact made in some form or another all over the world, so Sunset is likely blowing smoke in that regard. Nonetheless, they’re delicious, easy to make and a joy to eat. Monica requested one for brunch today, so off we go. This is my gussied up version with fresh, local ingredients, and it was fabulous indeed; the lemon is nice and tart,and the spice notes provide a pleasant, subtle background.

3 large Eggs (brought to room temperature for 30 minutes prior to prep.)
2/3 cup whole Milk at room temperature
2/3 cup Whole Wheat Pastry Flour
1/4 Cup Honey or Agave Nectar
4 ounces unsalted Butter
2 teaspoons grated Lemon Zest
Seeds from 1/2 Tahitian Vanilla Bean, scraped, (or 1/4 teaspoon pure vanilla extract)
1/8 teaspoon true Cinnamon
1/8 teaspoon Allspice
1/8 teaspoon Sea Salt
2 Lemon wedges

Preheat oven to 400° F.
Place a cast iron Dutch oven (or 10″ skillet) in a middle rack position as the oven heats.
In a small non-reactive mixing bowl, combine together sugar and lemon zest.
With an immersion blender or stand mixer, beat eggs until they’re frothy; you want to incorporate a fair amount of air bubbles into this battery, as that’s the catalyst for a good rise.
Add milk, flour, spices, and continue beating for another minute; you should have a thin, smooth batter with big bubbles in it.

Dutch Baby batter should be thin with lots of air incorporated

Carefully add 3 ounces of the butter to the hot pan and continue heating.
When the butter is sizzling, carefully pour the batter into the center of the Dutch oven.

When the butter in your Dutch oven sizzles, it's time for batter
When the butter in your Dutch oven sizzles, it’s time for batter

Bake for 20 minutes and do not open the oven door – The trapped heat and moisture is critical to the Dutch baby’s rise.
Combine 1 oz. soft butter, a teaspoon of honey, and the juice from the lemon wedges – it won’t incorporate fully, but it’ll be fine for service.

Lemon honey butter topping for the Dutch Baby

Serve immediately, topped with the lemon-honey-butter.

Viola, a fat and sassy Dutch Baby!

Cooking at the Gathering


So, a couple weeks ago, I didn’t post, because, as luck and joy would have it, I was 1600 miles from home, at my other home for a few precious days. Formally known as The Luthier Community Gathering, this is an annual event held in the north woods of Minnesota. Hosted by Grant Goltz and Christy Hohman at their incredibly eclectic and homey spread, this is several days of companionship, renewed and new friendships, music, incredible house made beer and ale, and of course, food.   

Over the years, I’ve become the official Chef de Gathering, and it is a joy of joys to do. Over the three days of the main event, we feed somewhere around 30 to 40 folks for dinner, and maybe 12 to 20 for breakfasts and lunches. While some folks bring a little of this and a little of that, Chris and I provide the mainstays, (and usually Monica, who couldn’t make the trip this year due to a new job). And rank has its privilege – I get my own incredibly cozy Chef apartment, and an incredible kitchen to work from.


 For such a big crowd, the process is incredibly easy. At some point, we’ll touch base and decide on theme, main ingredients, etc – it rarely takes more than a couple minutes. I say, “Hey Chris, what are we gonna build?” She fires off some options, inspiration takes hold, and off we go. 

 The real joy comes not only from feeding good friends in a great kitchen, but in the gathering of ingredients. Grant and Christy run a Community Supported Agriculture, (CSA), operation on their spread, so the variety and scope of produce is truly stunning, as you can see.  So, picking ingredients means just that; heading out on the trail with basket in hand, and coming back with the bounty. 


 This year marked the first truly amazing mushroom harvest, from logs inoculated and set up last season – Shiitakes, an almost embarrassing wealth of gorgeous, just picked beauties – I put them in everything I could think of, (and I did say ‘almost’).


Our mutual friends, John and Lissa Sumption, have a working CSA close by, (King’s Gardens), so literally anything we don’t have right on hand can be had with a phone call. During my visit, Mark, the very talented local butcher, stopped by and dropped off some goodies, for which he took produce in barter. The results speak for themselves.  

  
 Our recent piece on apples contains several of the recipes we did this year. Here’s the recipe for smoked Guacamole – It’s become a must-do for the event ever since we debuted it seven or eight years ago.


The Annual Gathering is open to any and all who love music, good friends, and good food. Here’s a video and a song that pretty well sums up the vibe. It’s held in August every year. This year, a dear friend from my wildfire fighting days, Nancy Swenson, made the trip out – First time we’d seen each other in thirty four years!

Waffles 101


Along with stand mixers and fondue sets, waffle irons are more than likely collecting dust in a corner of many of our pantries. Waffles get a bad rap as ‘food that’s not good for you,’ and ‘a pain to make’; nothing could be further from the truth. Sure, a store bought, frozen waffle is an abomination, along with generic table syrup, and both are to be avoided like the plague. A homemade waffle, on the other hand, topped with delicious things is a delight in every way.


Batter or dough has been cooked between two hot plates for hundreds of years. The earliest recipe written in English that I’m aware of appeared in the 1600s, and paid proper homage to the Dutch ‘wafel’, that from the Frankish ‘wafla’, which harken back as far as the 1100s and meant honeycomb or cake. Waffles started out life as derivations of the communion wafer, thin, crisp cakes not unlike the modern pizzelle, still quite popular in Italy. These earliest versions were almost always round and made of grain flour and water, just as communion wafers were and are. As such, they weren’t particularly big on taste, so flavorings like honey or florally infused water were introduced, such as rose and orange blossom. It wasn’t until the 1300s that a recipe included eggs, wine, flour, and salt, but did not contain leavening of any note. Another hundred years would pass before irons notably different in pattern from the communion wafer, or oublie, would appear. These new versions, the French fer à oublie and the Belgian wafelijzer, were square or rectangular, and set with an even grid pattern; the space between these early irons was still rather thin, leading to a finished product likely akin to the modern Brussels waffle. Another couple of centuries would pass before recipes routinely included yeast, sweeteners, and spices added directly to the batter. Leavening was the innovation that allowed waffles to become the thicker, more appealing treat we enjoy to this day.

Waffle makers have advanced leaps and bounds from the versions we had as kids. There are makers that’ll do anywhere from 2 to 8 at a pop; some are deeper and rotate, to specialize in the thicker Belgian version. There are timers and dark-to-light controls as well. I opted for a simple maker with a light to indicate ready status, and no other bells and whistles. If you keep an eye on your maker while it’s working, it’s a safe bet that somewhere around 6 to 8 minutes in, when the steam output has diminished and you’re smelling nice, toasty cereal notes, your waffle will be done. After you’re used to yours for a while, it’ll be second nature that requires little conscious thought. Non stick is nice, and can now be found in non-toxic, environmentally friendly versions; it’s great to have, but does not mean you don’t still need a little something sprayed or wiped on before you cook.

Waffle recipes are pretty straightforward; once you’ve got your ratios down, they lend themselves well to experimentation. A few points, illustrated with the recipes below.

Thicker, lighter styles, like Belgian, want the eggs separated and the whites beaten and folded in to achieve that end.

The same process will help heavier, gluten poor flours generate a lighter, less leaden final product.

Vital wheat gluten is a fantastic tool to help those heavier flours end up as fluffy waffles.

Leavening can usually be achieved adequately with just baking powder, but judicious use of both powder and soda works just fine as well, especially with heavier batters. Yeast raised waffles take longer, but reward with a complex, tangy note that faster leaveners just can’t duplicate.

Here are a few variants to spark your creative juices. Any of these recipes can be made savory if you wish. Thinly sliced green onions, chive, or other herbs can be added to the batter, or incorporated into toppings made with sour cream, cremé fraîche, crema, or Greek yoghurt. Chutney, salsa, mostarda, or sauteéd vegetables are equally delicious, as is a waffle topped with an over easy egg, crumbled bacon, and melted cheese. If you add veggies or fruit directly to a batter, consider sweating them in a sauté pan first, to reduce the amount of moisture and keep your waffles from getting soggy or falling apart.


For topping sweet waffles, it’s awfully hard to beat real maple syrup and butter.

You can substitute whole wheat pastry, or whole grain white flour, one to one for any recipe calling for all purpose. Subbing 2% milk for whole works, and almond or soy milks make fine alternatives as well. Coconut oil makes a great sub for butter, as will olive, avocado, or grapeseed oils for savory waffle recipes. Honey, agave nectar, or less refined sugars are also fine alternatives. Fresh fruit is always a delightful topping for any variant.


With modern waffle makers, it’s best to pour a ladle or two of batter into the middle of the iron, enough spread to within a couple inches so of the edge; gently closing the lid will finish the job.

Each recipe will make 6-8 waffles. They will store well short term, and are delicious toasted the next day.

Yeast Raised Waffles
2 Cups all purpose Flour
3/4 Cup Whole Wheat Pastry Flour
2 Cups whole Milk
2 large Eggs
1/2 Cup Unsalted Butter
1 Tablespoon Sugar
1 package active dry Yeast, (2 1/4 teaspoons)
1 teaspoon Sea Salt
1/4 teaspoon Baking Soda
 
In a small pot over medium heat, combine milk and butter; stir until melted and bubbles start to form on the edge of the pan. Add sugar and salt and stir steadily until melted and hot but not simmering. Remove from heat and let stand until lukewarm.
In a warmed mixing bowl, combine 1/2 cup warm water and yeast. Let stand until it foams, about 5 minutes.
Add warm milk mixture to yeast and stir.
Whisk in flours, then cover tightly with plastic wrap and let stand until doubled in volume, at least two to three hours at room temp, or overnight in the fridge.
Preheat waffle iron.
Whisk eggs and baking soda into the batter.
Cook according to manufacturer’s directions until golden brown.


Belgian Waffles

2 Cups all purpose Flour

2 large Eggs

2 Cups Whole Milk

1/2 Cup unsalted Butter

1/2 Cup Sugar

3-1/2 teaspoons Baking Powder

1 teaspoon Vanilla Extract

1 Cup fresh Strawberries


Preheat waffle iron.

Rinse and slice strawberries.

Separate eggs into two small dishes.

Melt butter.

In a large mixing bowl, combine flour, sugar and baking powder.

In a second mixing bowl, lightly beat egg yolks until frothy. Add milk, melted butter, and vanilla, and whisk thoroughly to incorporate.

Add wet to dry mix and whisk gently until just combined.

Whisk egg whites until stiff peaks form; fold gently into the batter.

Cook in a preheated waffle iron according to manufacturer’s directions until golden brown.

Serve topped with strawberries.


Buttermilk Waffles

2 cups all purpose Flour

2 Cups Buttermilk

2 large Eggs

1/3 Cup unsalted Butter

2 Tablespoons Sugar

2 teaspoons Baking Powder

1 teaspoon Baking Soda

1 teaspoon Vanilla Extract

Pinch Sea Salt


Preheat waffle iron.

Melt butter.

In a large mixing bowl, combine flour, sugar, baking powder, baking soda, and salt, and whisk to incorporate. In a separate bowl, whisk and combine thoroughly buttermilk and butter; add the eggs and vanilla, and whisk again.

Add wet mix to dry and whisk gently until just combined; batter will be slightly lumpy.

Cook until golden brown, according to manufacturer’s instructions.


Buckwheat Waffles

2 Cups Buckwheat Flour

2 Large Eggs

1 1/2 Cups whole Milk

1/2 Cup Greek Yoghurt

1/2 Cup unsalted Butter

2 Tablespoons Bob’s Vital Wheat Gluten

2 Tablespoons Honey

2 teaspoons Baking Powder

1 teaspoon Baking Soda

Pinch of Cinnamon

Pinch of Sea Salt


Preheat waffle iron.

Melt butter.

In a large bowl, add buckwheat flour, vital wheat gluten, baking powder, baking soda, salt, and cinnamon, and combine.

Separate eggs into two small dishes.

Add yolks to a second mixing bowl, and whisk until frothy. Add the sugar, butter, milk, and yogurt and combine thoroughly.

Whisk egg whites until they raise to soft peaks.

Add wet mix to dry and whisk gently until just combined.

Add one half of the egg white and fold them gently into the batter; do the same with the second half.

Cook until golden brown, according to manufacturer’s instructions.


Whole Grain Waffles

2 Cups Whole Wheat Pastry Flour

2 large Eggs

1 1/2 Cups whole Milk

1/2 Cup Sour Cream

1/4 Cup Butter

2 tablespoons Honey or Agave Nectar

2 teaspoons BakingPowder

1 teaspoon Baking Soda

1 teaspoon Vanilla extract

Pinch Sea Salt


Preheat waffle iron.

Melt butter.

In a large mixing bowl, combine flour, sugar, baking powder, baking soda, and salt, and whisk to incorporate.

In a separate bowl, whisk and combine thoroughly buttermilk and butter; add the eggs and vanilla, and whisk again.

Add wet mix to dry and whisk gently until just combined; batter will be slightly lumpy.

Cook until golden brown, according to manufacturer’s instructions.


Waffles 101


Along with stand mixers and fondue sets, waffle irons are more than likely collecting dust in a corner of many of our pantries. Waffles get a bad rap as 'food that's not good for you,' and 'a pain to make'; nothing could be further from the truth. Sure, a store bought, frozen waffle is an abomination, along with generic table syrup, and both are to be avoided like the plague. A homemade waffle, on the other hand, topped with delicious things is a delight in every way.


Batter or dough has been cooked between two hot plates for hundreds of years. The earliest recipe written in English that I'm aware of appeared in the 1600s, and paid proper homage to the Dutch 'wafel', that from the Frankish 'wafla', which harken back as far as the 1100s and meant honeycomb or cake. Waffles started out life as derivations of the communion wafer, thin, crisp cakes not unlike the modern pizzelle, still quite popular in Italy. These earliest versions were almost always round and made of grain flour and water, just as communion wafers were and are. As such, they weren't particularly big on taste, so flavorings like honey or florally infused water were introduced, such as rose and orange blossom. It wasn't until the 1300s that a recipe included eggs, wine, flour, and salt, but did not contain leavening of any note. Another hundred years would pass before irons notably different in pattern from the communion wafer, or oublie, would appear. These new versions, the French fer à oublie and the Belgian wafelijzer, were square or rectangular, and set with an even grid pattern; the space between these early irons was still rather thin, leading to a finished product likely akin to the modern Brussels waffle. Another couple of centuries would pass before recipes routinely included yeast, sweeteners, and spices added directly to the batter. Leavening was the innovation that allowed waffles to become the thicker, more appealing treat we enjoy to this day.

Waffle makers have advanced leaps and bounds from the versions we had as kids. There are makers that'll do anywhere from 2 to 8 at a pop; some are deeper and rotate, to specialize in the thicker Belgian version. There are timers and dark-to-light controls as well. I opted for a simple maker with a light to indicate ready status, and no other bells and whistles. If you keep an eye on your maker while it's working, it's a safe bet that somewhere around 6 to 8 minutes in, when the steam output has diminished and you're smelling nice, toasty cereal notes, your waffle will be done. After you're used to yours for a while, it'll be second nature that requires little conscious thought. Non stick is nice, and can now be found in non-toxic, environmentally friendly versions; it's great to have, but does not mean you don't still need a little something sprayed or wiped on before you cook.

Here are a few variants to spark your creative juices. Any of these recipes can be made savory if you wish. Thinly sliced green onions, chive, or other herbs can be added to the batter, or incorporated into toppings made with sour cream, cremé fraîche, crema, or Greek yoghurt. Chutney, salsa, mostarda, or sauteéd vegetables are equally delicious, as is a waffle topped with an over easy egg, crumbled bacon, and melted cheese. If you add veggies or fruit directly to a batter, consider sweating them in a sauté pan first, to reduce the amount of moisture and keep your waffles from getting soggy or falling apart.

For topping sweet waffles, it's awfully hard to beat real maple syrup and butter.

You can substitute whole wheat pastry, or whole grain white flour, one to one for any recipe calling for all purpose. Subbing 2% milk for whole works, and almond or soy milks make fine alternatives as well. Coconut oil makes a great sub for butter, as will olive, avocado, or grapeseed oils for savory waffle recipes. Honey, agave nectar, or less refined sugars are also fine alternatives. Fresh fruit is always a delightful topping for any variant.

With modern waffle makers, it's best to pour a ladle or two of batter into the middle of the iron, enough spread to within a couple inches so of the edge; gently closing the lid will finish the job.

Each recipe will make 6-8 waffles. They will store well short term, and are delicious toasted the next day.


Belgian Waffles

2 Cups all purpose Flour

2 large Eggs

2 Cups Whole Milk

1/2 Cup unsalted Butter

1/2 Cup Sugar

3-1/2 teaspoons Baking Powder

1 teaspoon Vanilla Extract

1 Cup fresh Strawberries


Preheat waffle iron.

Rinse and slice strawberries.

Separate eggs into two small dishes.

Melt butter.

In a large mixing bowl, combine flour, sugar and baking powder.

In a second mixing bowl, lightly beat egg yolks until frothy. Add milk, melted butter, and vanilla, and whisk thoroughly to incorporate.

Add wet to dry mix and whisk gently until just combined.

Whisk egg whites until stiff peaks form; fold gently into the batter.

Cook in a preheated waffle iron according to manufacturer's directions until golden brown.

Serve topped with strawberries.


Buttermilk Waffles

2 cups all purpose Flour

2 Cups Buttermilk

2 large Eggs

1/3 Cup unsalted Butter

2 Tablespoons Sugar

2 teaspoons Baking Powder

1 teaspoon Baking Soda

1 teaspoon Vanilla Extract

Pinch Sea Salt


Preheat waffle iron.

Melt butter.

In a large mixing bowl, combine flour, sugar, baking powder, baking soda, and salt, and whisk to incorporate. In a separate bowl, whisk and combine thoroughly buttermilk and butter; add the eggs and vanilla, and whisk again.

Add wet mix to dry and whisk gently until just combined; batter will be slightly lumpy.

Cook until golden brown, according to manufacturer's instructions.


Buckwheat Waffles

2 Cups Buckwheat Flour

2 Large Eggs

1 1/2 Cups whole Milk

1/2 Cup Greek Yoghurt

1/2 Cup unsalted Butter

2 Tablespoons Bob's Vital Wheat Gluten

2 Tablespoons Honey

2 teaspoons Baking Powder

1 teaspoon Baking Soda

Pinch of Cinnamon

Pinch of Sea Salt


Preheat waffle iron.

Melt butter.

In a large bowl, add buckwheat flour, vital wheat gluten, baking powder, baking soda, salt, and cinnamon, and combine.

Separate eggs into two small dishes.

Add yolks to a second mixing bowl, and whisk until frothy. Add the sugar, butter, milk, and yogurt and combine thoroughly.

Whisk egg whites until they raise to soft peaks.

Add wet mix to dry and whisk gently until just combined.

Add one half of the egg white and fold them gently into the batter; do the same with the second half.

Cook until golden brown, according to manufacturer's instructions.


Whole Grain Waffles

2 Cups Whole Wheat Pastry Flour

2 large Eggs

1 1/2 Cups whole Milk

1/2 Cup Sour Cream

1/4 Cup Butter

2 tablespoons Honey or Agave Nectar

2 teaspoons BakingPowder

1 teaspoon Baking Soda

1 teaspoon Vanilla extract

Pinch Sea Salt


Preheat waffle iron.

Melt butter.

In a large mixing bowl, combine flour, sugar, baking powder, baking soda, and salt, and whisk to incorporate.

In a separate bowl, whisk and combine thoroughly buttermilk and butter; add the eggs and vanilla, and whisk again.

Add wet mix to dry and whisk gently until just combined; batter will be slightly lumpy.

Cook until golden brown, according to manufacturer's instructions.