Grapefruit Pico de Gallo


OK, well I mentioned this salsa in a Facebook post and now a few of y’all have asked for the recipe. It’s super simple, and here ya go. If you don’t make your own fresh salsa as a routine, it’s time to start – Here’s another place where it’s a serious night and day difference from store bought.

Pico de Gallo is a fresh salsa, and such, it’s quick to make. With pico, you want the sweet notes of tomato, onion, and cilantro to mesh with the chile heat, and nothing furthers that combination better than citrus. This is a great salsa to make shortly before meal time, but it’ll be twice as good then next day. This recipe will make enough to last for two or three meals, most likely.

4 medium Tomatoes
2-4 Jalapeño Chiles
1 large pink Grapefruit
1 Lime
1 sweet Onion
Handful go fresh Cilantro
Sea Salt

I do this in a mini food processor powered by a stick blender, but you can certainly do it by hand. Size of dice is up to you; we like it fine, minced in fact, because it spreads and blends better.

Process tomatoes and toss into a non-reactive mixing bowl. Process onion, then cilantro and add to the tomatoes.

Feel free to sub a chile you like better for jalapeño down the line, but try this first. If you like it hot, don’t field strip your chiles; if you’re cooking for a broad spectrum of diners, be kind and do strip ’em. Process with the cilantro and add to the mix; cilantro is also a personal taste note, so use more or less as you see fit.

Cut grapefruit in quarters and the lime in half. Squeeze the grapefruit by hand over the bowl and absolutely do let some of the crushed fruit go in there too. Squeeze lime next, take care to keep seeds out of the mix.

Give all a good stir, taste and season with a shake of salt as you see fit; it’ll brighten up the mix and bring flavor out, so don’t skip it.

Allow ingredients to marry in the bowl for an hour prior to serving. The salsa will last a good few days refrigerated.

For a wonderful alternative, try roasting or grilling everybody, including the fruit; it brings out a very subtle note of smoke and heightens the sweet tones nicely.

Smoked salt is another neat alternative that you might try as sub for regular sea salt.

Enjoy!

Makin’ Bacon


Love bacon? Love good bacon? Seen the prices lately? Us too! That little revelation led us to home made, courtesy of Michael Ruhlman’s blog.

I started our odyssey with a search for pork belly locally, which wasn’t as easy to find as I thought it’d be. Eventually, we found roughly 15 pound packs at Cash and Carry for $3.15 a pound. We took that home, divided it into 2 1/2 pound batches, and went to town.

 photo IMG_0931.jpg

Our first batch was made straight from Ruhlman’s recipe. It turned out great, but it wasn’t exactly what I want in my perfect bacon. Having no doubt that experimentation is almost always a good thing, we analyzed the results and decided that Ruhlman’s would be, for us, perfect lunch and dinner bacon, but not breakfast. We found Michael’s recipe a touch salty, even when we’d carefully weighed the pork belly and salt; further, we felt that while the bay leaf, nutmeg, garlic and thyme in that recipe added glorious floral notes perfect for lardons, and stellar for carbonara, it was a bit much for our breakfast palate, so we set out to build our perfect breakfast bacon.

While one needs to stick pretty closely to the 1.5:1 salt to curing salt ratio for proper bacon, you have relative freedom with the other ingredients, so we revamped with our chosen notes, less salt, more sugar, Grains of Paradise for that unique pepper note we love, brown mustard seed for the tang, and a little smoke.

The results were spot on, and we’re happy campers!

2.5 pounds Pork Belly
1/4 Cup Dark Brown Sugar or real Maple Syrup
1 Ounces Flaked Salt
1.5 teaspoons Pink Curing Salt, (Sodium Nitrite)
2 Tablespoons Grains of Paradise, coarsely ground
2 teaspoons Brown Mustard seed, coarsely
1 teaspoon Smoke Powder

Mix all dry rub ingredients except the smoke powder together in a bowl.

 photo IMG_0930.jpg

Set your belly on a baking dish or sheet tray.

Rub the cure onto and well into all surfaces of the belly. Take your time and work it right in there evenly and completely.

 photo IMG_0932.jpg

Place your belly into 1 a gallon Ziplock bag, press the excess air out, and set it in the back of your fridge for 3 days.

 photo IMG_0938.jpg

On day 4, pull out your belly and rub everything back into the flesh again. Set ‘er back into the fridge for another 3 days.

And on the 7th day, there be bacon…

Pull your belly outta the bag, rinse your sink well and then stick the belly under nice, cold running water and rinse all the cure off, giving it a good rub as you do.

 photo IMG_0939.jpg

Preheat oven to 200 F.

Pat your belly dry with paper towels and set into a glass baking dish or a sheet pan.

Rub the smoke powder evenly and thoroughly into your belly.

 photo IMG_0940.jpg

Roast for 90 minutes, or until your internal temp reaches 150 F.

Remove from oven, allow to cool, and then repackage in a ziplock in the fridge. It’ll last as long as store bought, or maybe a bit less, since it has less bullshit stuff in it; anyway, I’d bet that after you try it, lasting long won’t be an issue…

 photo IMG_0944-1.jpg

 photo image.jpg

You can freeze bacon, but not for more than about a month. If you do freeze it, you’ll want all the air you can out of the bag so, again, vacuum sealing is best.

You can also sub Honey or Agave Nectar for the sugar and get some pretty nice flavor variations. Our family also likes peppered bacon, and for that we’ll layer on a bit of olive oil and ground, black pepper for the roast.

Big thanks to Michael Ruhlman for a wonderful charcuterie book, and for encouraging experimentation. Now it’s your turn, and make sure you try his recipe, because it rocks and it just might be your all-around fave!

Enjoy!

 photo image-1.jpg

Classic Pecan Pie


A perfect Pecan pie is a thing of sublime beauty. What I consider perfection starts, of course, with great nuts, and for my mind, this means they should be fancy halves from Texas. I don’t know the scientific reason why, but I can honestly say I’ve tried nuts from all over and the Texas ones are best; sweet, rich and meaty. This recipe does everything I want for that perfect pie; the nuts are front and center, it’s not too sweet, and has great depth of flavor, with just a touch of salty from the simple crust, as well as the heady hints of vanilla and Whisky. It’ll make one perfect 9″ pie.

For the Crust:
2 cups all-purpose Flour
1/2 cup cold Butter, diced
1/4 teaspoon Sea Salt
6 – 8 Tablespoons Ice Cold Water

Filling:
2 1/2 Cups Pecan halves
3 Eggs
1 Cup Dark Brown Sugar, lightly packed
3/4 Cup Light Corn Syrup
3 tablespoons Butter
2 Tablespoons Sour Mash Whiskey
2 teaspoons pure Vanilla extract
1/2 teaspoon Sea Salt

Crust Prep:
Remember; great pie dough is simple and minimally handled!
In a mixing bowl, combine the flour and salt.
Add the butter and work it into the dry ingredients by hand until it resembles rough corn meal in texture.
Add the water a tablespoon at a time and stir the dough with a fork.
When the dough holds together as a ball, but isn’t wet or sticky, stop messing with it, cover it in plastic wrap and refrigerate for 1/2 hour.

 photo IMG_0936.jpg

This is, BTW, the basic KitchenAid mixer pie dough, so you can use that device if you prefer, (That’s what I do).

Form the dough into a disk about 3/4″ thick, then roll it out on a lightly floured surface, into 12-inch circle about 1/8″ thick. Lift an edge and carefully peel the dough free, then drape it onto a dry 9″ pie pan.
Trim the dough with a paring knife, leaving it about 1″ over the edge, then tuck the overhanging dough underneath itself to form a thick edge on the pan, and treat it as you see fit, (I like the classic thumb print myself).

Preheat your oven to 400 F, and position racks in the center and lower third of oven.

Put a piece of parchment paper or foil over the pie shell and fill with dried beans or pie weights.

Spread the pecan halves out on a baking sheet.

Blind bake the crust on the center rack for 15 minutes, and start on the filling.

In a sauce pan over medium-high heat, melt the butter, then add the sugar and corn syrup. Stir constantly with a whisk until completely combined.

Slip the pecans into the hot oven on the lower rack; let both nuts and crust bake for another 5 minutes.

Lightly beat the eggs and set aside.

Remove crust and nuts from oven and reduce heat to 350 F.

Remove filling mixture from heat. Add hot nuts to the hot mixture. Add Vanilla and Whisky carefully and slowly; the hot sugar can bubble up explosively if it’s too hot and it will scald and stick to skin!

Add eggs to hot nut mixture and incorporate thoroughly with a whisk.

Remove weight or beans from crust, then pour hot filling carefully to fill crust.

Place pie on center rack of oven with a baking sheet on the lower rack, centered under the pie.

Bake for 40 minutes and then take a peek; pie should look firm and nicely set at this point. If the edges are notably darker, line them with an edge guard or foil and bake another 5 minutes.

Remove pie from oven, set on a wire rack to cool.

 photo IMG_0937.jpg

 photo e6ab7993-89e9-4186-9bb2-5dc4777a89db.jpg

I don’t need to tell you to enjoy immensely,
do I?

Butternut Squash Bisque


Its officially fall in the Great Northwet and with an epic September storm rattling the house, it seemed like a good time to make soup. A day like this begs for something hearty and in keeping with the season, so naturally I thought of Butternut squash.

 photo butternut.png

The real beauty of a squash bisque isn’t the rich, satisfying flavor; it’s the fact that this wonderful stuff is so dang easy to build. Something this luxurious makes folks think you slaved for hours, when in fact it takes less than 30 minutes to make and is at its best eaten right away.

There are many takes on this stuff, a lot of which are a bit sweet for my taste. I prefer something savory that highlights the ability of squash to marry well with bold flavor notes, so I went for a vaguely Provençal feel to the spicing: Here’s how ya do it.

Butternut Squash Bisque, (Serves 6 to 8)

3 Cups Chicken Stock
1 Cup heavy Cream
1 Large Butternut Squash
1 medium Sweet Onion
1 Cup Celery, (Use leaves whenever possible)
1-2 Cloves Garlic
1 teaspoon fresh Rosemary
1 teaspoon fresh Pineapple Sage
2 Tablespoons Olive Oil
1/4 fresh Lemon
Dash hot chile flakes
Salt & Pepper to taste

When choosing butternuts at the store, look for nice evenly colored tan squashes; the sort of greyish-tan ones aren’t as ripe as the evenly toned, almost peanut colored specimens. Make sure the squash feels firm and has no lesions or soft spots – That’s your guy.

NOTE: If you’ve got time and want to deepen the flavors a mite, roast the squash, onion, celery and garlic for about 15 minutes at 325 F – It adds notable complexity to the overall flavor.

NOTE 2: You can do a very nice vegetarian version of this soup by using vegetable instead of chicken stock and soy milk for the cream.

Peel and slice the squash, then cut into roughly 3/4″ cubes.

Dice the onion and celery, mince the garlic, and chiffonade the herbs.

 photo IMG_0919.jpg

In a stock pot over medium high flame, heat the olive oil thoroughly.

Toss in the onion and celery and sauté until the onion is just starting to turn translucent. Add the garlic and herbs, squeeze the lemon juice in. Continue to sauté for a couple minutes longer.

Add the chicken stock and bring the mixture to a rolling boil.

Throw all the squash cubes into the party; reduce heat to a low simmer and allow everything to marry and soften for about 20 minutes or until the squash cubes are all fork tender.

 photo f1bb5bd3-aa34-4087-b454-c4c7425c1211.jpg

The next step is blending, best done with a boat motor, (AKA immersion blender), but a stand blender or food processor will do just fine – Just be careful transferring hot liquids, naturally. Blend the mixture until you have a nice, even consistency.

 photo IMG_0925.jpg

Add the cream and mix thoroughly.

 photo IMG_0926.jpg

Now season to taste with the chile, salt and pepper, and there you are; serve nice and hot, with fresh local bread lightly rubbed with a garlic clove and toasted.

 photo IMG_0928.jpg

E & M

Brine on, you crazy diamond


We’re enjoying wonderful salmon runs here in the northwest, which is heartening, to say the least. Goes to show that all the fishing restrictions, dam removals and other environmental mitigation steps do seem to have a positive impact.

Since we do get to catch some, it’s a great time to think about preserving for the cold months ahead.

Friends who like to smoke fish and meat asked for my take on brines, so here goes.

Before we tackle brining, we need to chat about salt a bit. Salts now come in many varieties and from many sources. This reinforces the need for a few basic consideration when using it.

The first and foremost variable is weight. Weighing different salts quickly reveals the fact that they differ widely, so using a spoon or cup as a measure can yield very inconsistent results. weighing is what you really want to do to get an accurate ratio, as that is the key to not only brine, but many other recipes using salt. In other words, while tossing in a pinch is fine for every day cooking, if you want consistent, accurate results in recipes and processes that really matter, you measure by weight, (as bakers well know).

Next comes source; fancy salts are great for finishing, but expensive and unnecessary for salt-intensive processes like curing. You’ll also want to avoid table salt which often has iodine and anti-caking agents in it that can discolor or add off-putting flavor notes.

Then there’s crystal size; larger crystals will dissolve faster in water, but take longer to do so when sprinkled on meats, so choose according to your primary need. And yeah, you are gonna end up with a bunch of salts in your pantry and that’s a good thing. As you’ve read here before, I like plain Kosher salt for brining, and I use flaked salt for pickling and corning.

Alright, on to brine!

Your basic brine ratio is 1 cup salt to 1 gallon of water.

Trust me when I tell y’all that, weighed out, that’ll be 10 ounces of salt for each gallon of nice, clean water. If you’re gonna use the kosher salts you’re likely to find at your local store, I’ll save you some time:
Morton Kosher salt = 7 ounces per cup
Diamond Kosher salt = 5 ounces per cup
Anything else you find or use, weigh it out and go from there.

And that is all you need to brine something for smoking, grilling, or barbecuing. Really, just that. Everything else, the sugar and spice and everything nice, is optional. The best southern barbecue I’ve ever had was treated with that basic brine and nothing else. Good meat, the right heat, maybe some smoke, bingo – perfection. That is a classic example of why to brine; it makes for juicy, tender, and flavorful food. Now lets look at some basics for the process itself.

Brining 101 Rules
1. Whatever you’re brining needs to be completely covered.
2. Brine in a non-reactive vessel; glass is always best.
3. Boil your water, add salt, herbs and spices, and allow the salt to dissolve completely.
4. Cool the brine completely before you use it, (don’t cook in the brine).
5. Always brine cold, in the fridge is best, of course.
6. The general timing rule of thumb is 1 hour per pound of product.
7. You don’t need to rinse brined foods unless you did an exceptionally heavy ratio, (Like corned beef, for instance), or if you see an obvious salt residue on your food. The exception to this rule is poultry; for a perfect bird, quickly rinse after brining, then wrap or place in a sealed container, in the fridge, for at least. 12 hours and as long as a day. You’ll be rewarded with glorious crispy skin and melt in your mouth bird.
8. Finally, water is optional; you can brine in any liquid you like, and you should definitely experiment. Just keep in mind that acidic liquids like vinegars or fruit juices can make for mushy flesh; nobody likes that, so plan and execute accordingly, (like much shorter brining time or appropriate ratios of acids to non, for instance).

Now lets cover some more specific brines.

For all of these recipes, the additional ingredients can be tossed right into the boiling water and salt.

Reduce heat to a simmer and allow everything to incorporate for 10 minutes; remove from heat and cool completely prior to brining.

Beef Brine
To the basic brine, add
1 teaspoon whole Pepper Corns
1/2 teaspoon whole Mustard Seed

Pork Brine
To the basic brine, add
1/4 Cup Brown Sugar
1 teaspoon whole Pepper Corns
1 teaspoon whole Mustard Seed
1/2 teaspoon whole Coriander Seed
1 – 2 cloves Garlic, rough chopped

Poultry Brine
To the basic brine, add
1/2 cup Apple Cider Vinegar
1 teaspoon whole Pepper Corns (Try Tasmanian Pepperberry!)
1/2 teaspoon Mexican Oregano
1/4 teaspoon Sage
1 – 2 cloves Garlic, rough chopped
3 – 4 Juniper berries
1 Bay Leaf, crumbled

Fish Brine
To the basic brine, add
1/4 Cup Brown Sugar
Juice and Zest of 1 Lemon
Juice and Zest of 1 Lime
Juice and Zest of 1 Orange
1/4 Cup fresh Cilantro, rough chopped
1 small Shallot, rough chopped
1 teaspoon whole Pepper Corns (Try Tasmanian Pepperberry!)
3 – 4 Juniper berries
1 Bay Leaf, crushed
Shot of Tabasco

Veggie Brine
To the basic brine, add
2 Tablespoons White Balsamic Vinegar
1 teaspoon whole Pepper corns
Juice and zest of 1/2 Lemon
Shot of Tabasco

So there ya go – Happy brining, and as always, if you’ve got good ones, y’all share!

Gold Medal Pickles


Back in the day, you cold count on fall as canning season, making sure summer bounty got put up for the long winter months to come. Now, not so much and that’s a shame, ’cause there’s no better time than tough ones to take advantage of preserving good food.

Arguably the signature thing to can is the pickle, and why not? Like good mustards, I don’t consider our fridge full unless we’ve got a good selection of pickles onboard, and what better option therein than your own?

Choose your style: the pickles we’ll do here are referred to as Fresh Pack, which means they’re cured for a relatively short time, then covered in hot brine and processed in a hot water bath for canning. You can also do fermented pickles, which are the ‘barrel style’ from those old sepia toned pics you see now and then. There’s also fridge pickles that are super quick and easy, and you can find recipes for those right here.

Of course many things other than cukes can be pickled, from beets to watermelon rinds; once you get the bug, you can dive right on in. The NCHFP is where you wanna go for further research.

I’ve done pickles on my own for over 30 years now. Most have been great, a few have been awful, and I’ve learned from both. I’ve also plucked some juicy thoughts and practices from other good picklers I know to offer y’all a nice, dependable base to start your own explorations from, (Thanks to Dan, Carla, Christy, Annzie and anybody I forgot), so here we go…

Picking your pickles:
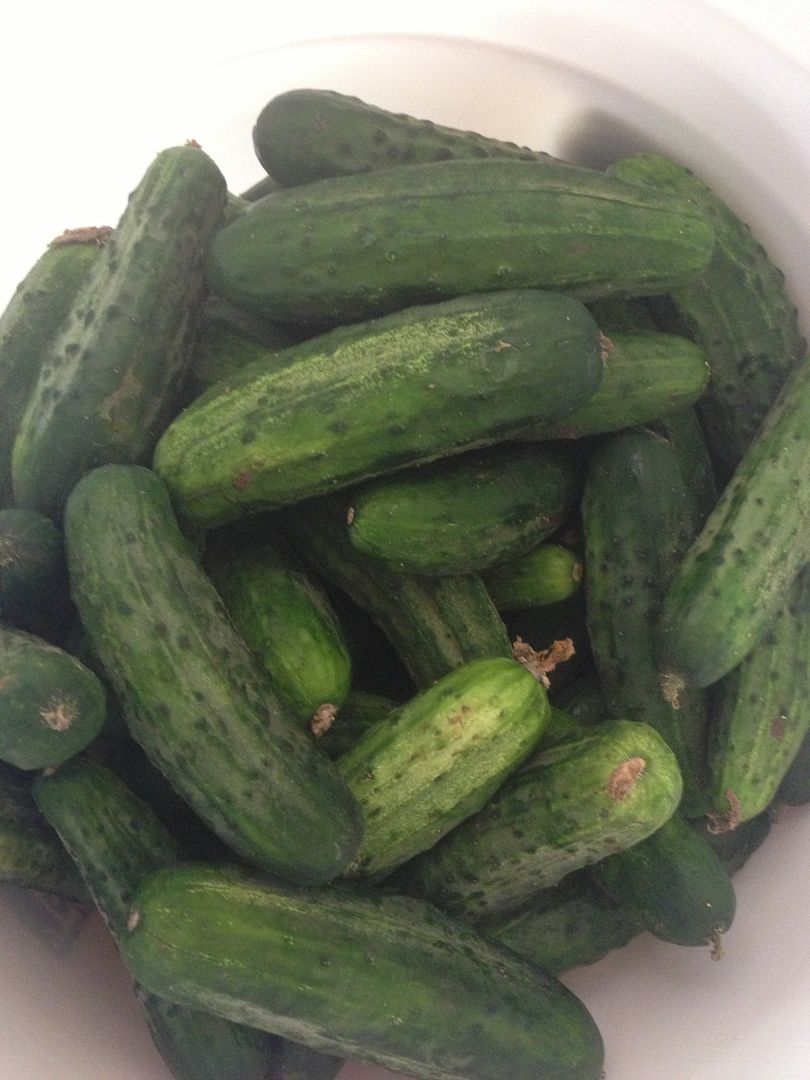
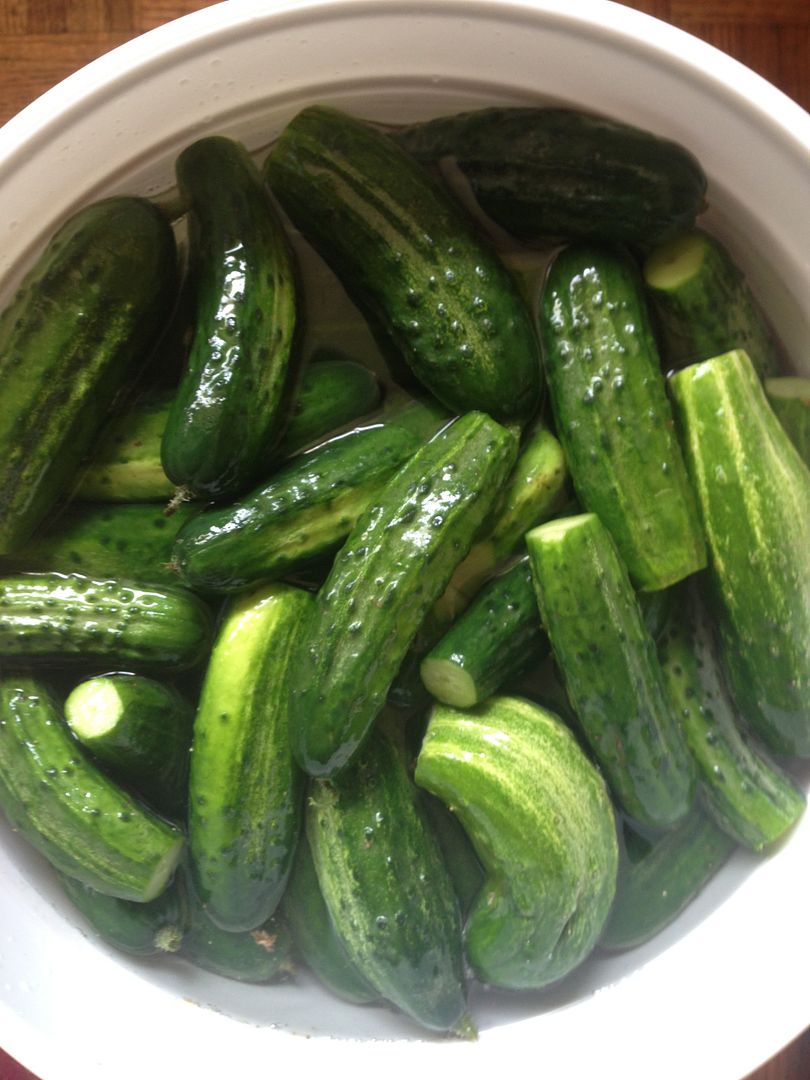
All cukes are not created equally. So chose carefully when your ready to can. Its great if you hit the timing right and can go to a you-pick outfit, or have your local CSA fill your needs. I missed the heart of the season a bit, so I did a little phone and neighbor recon work, then got ours from a grower who not only kept the cukes gently refrigerated, but separated them into basic size groups as well. That said, I still only paid $1.25 a pound, which was fair enough for us.

Choose cukes that are glossy and dark green, with distinct and plentiful knobs on ’em, just like you want to see on your finished pickles. Avoid ones that look bloated, as they are likely past their prime and going to seed; of course lesions, dark or soft spots are right out.

Does size matter? Yeah, to some degree; the bigger the cuke, the longer it takes the brine and spices to infuse. Of course, you can cut your cukes into spears or rounds if you like and bypass any size concerns.

As far as amount needed goes, I chose 20 pounds of cukes in the sizes I wanted most, ended up rejecting about a pound of those after initial processing, and ended up with 18 quarts of lovely pickles; you can gauge from there how much you want to do.

Initial prep and brining:
If this is your first time canning, head on over to the NCHFP and read up on Principles of Home Canning and Using Boiling Water Canners before you start.

You’ll want a container big enough to handle your desired crop size; I use a 5 gallon bucket for ours and if you’re doing anything over about 8 quarts, you’ll want to do something similarly sized; avoid aluminum for this process; ideally you’ll want glass or stainless steel.

Make sure you’ve checked on everything you’ll need, from jars, rings and lids to vinegar and spices, so you’re truly ready to rock when your cukes are.

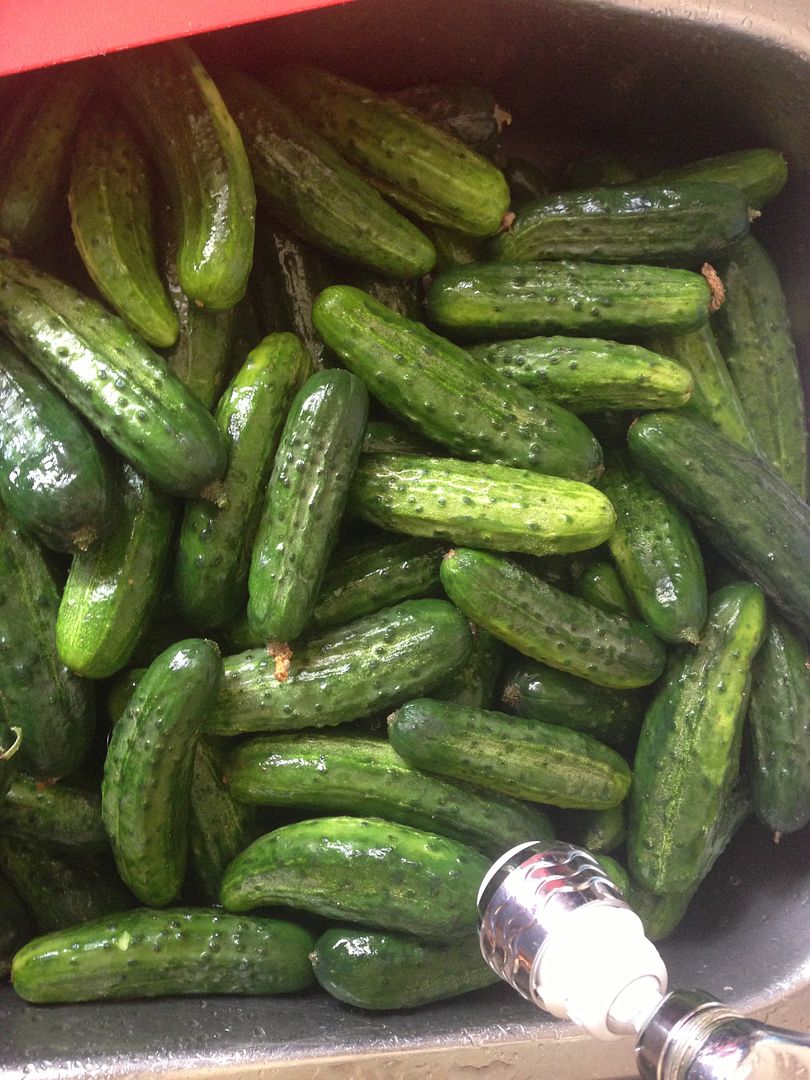
Toss your cukes into the sink and give the, a good rinse, as well as checking for bugs and other detritus…

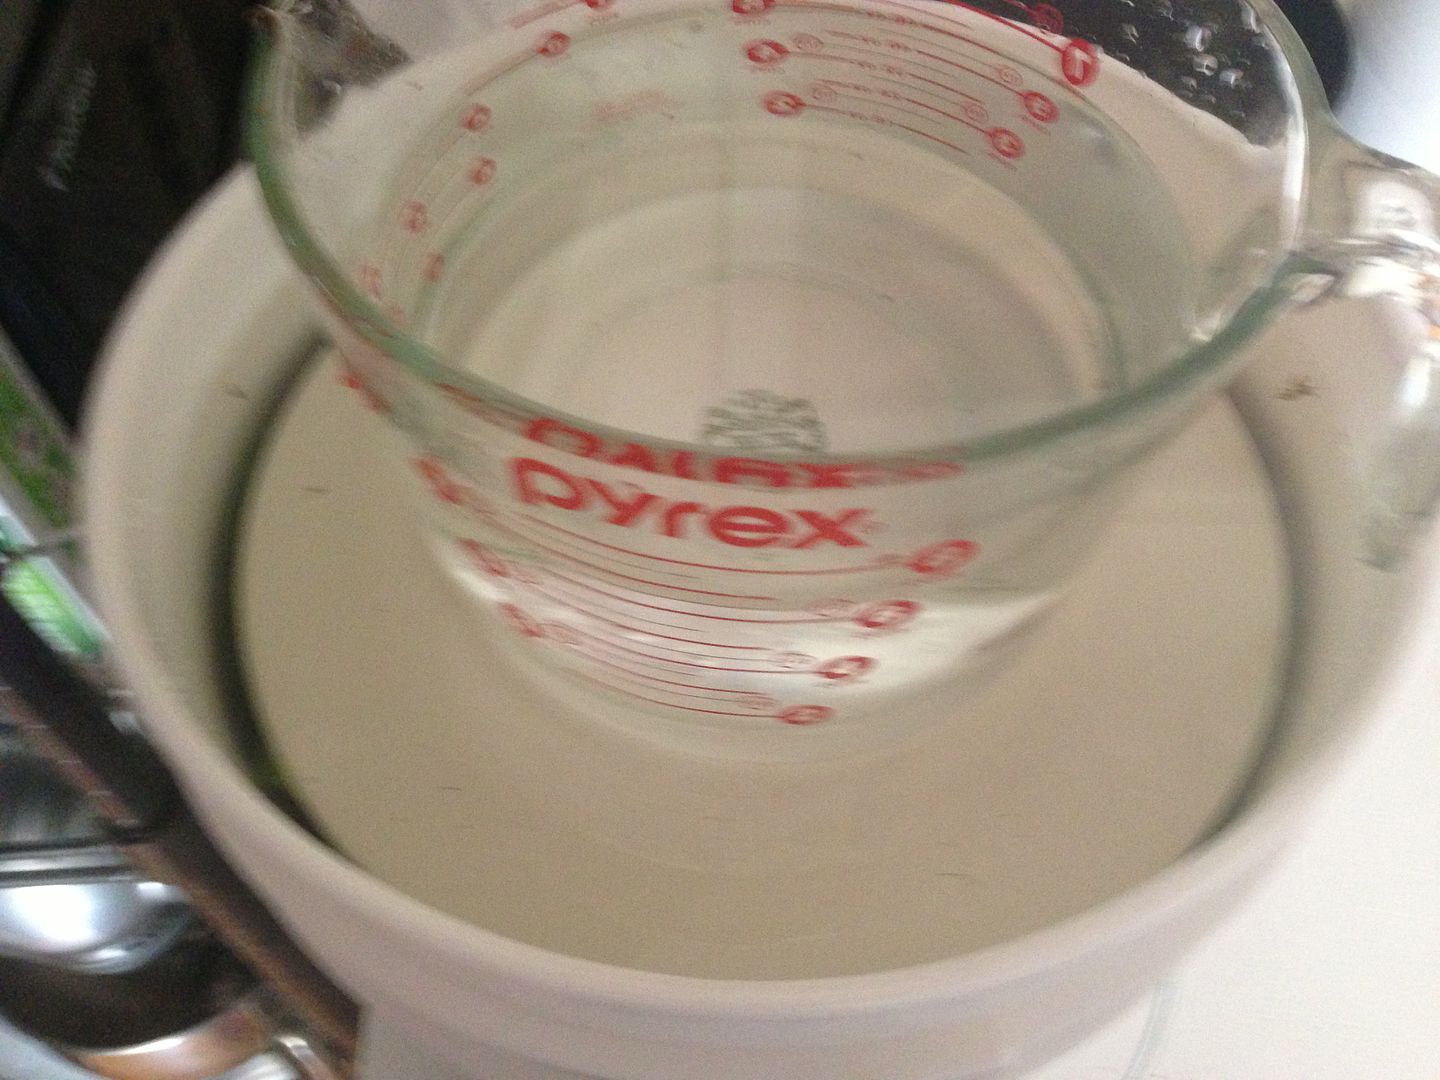
For the initial brine, thoroughly dissolve 3/4 Cup of salt in 2 Gallons of water. Here, as with all things food, quality matters. If your tap water ain’t good to drink, don’t pickle with it. Use nice, fish water, not distilled. Salt should ideally be canning or pickling salt, which does not contain iodine or anti-caking agents; the iodine can impart a nasty, bitter taste to pickles and the anti-caking agents tend to make things cloudy, so they really are to be avoided. Read your labels carefully at the store, or head on over to Leeners and get the good stuff with no worries. You do not need to heat this brine, (which can also make pickles mushy), just make sure the salt is completely dissolved.

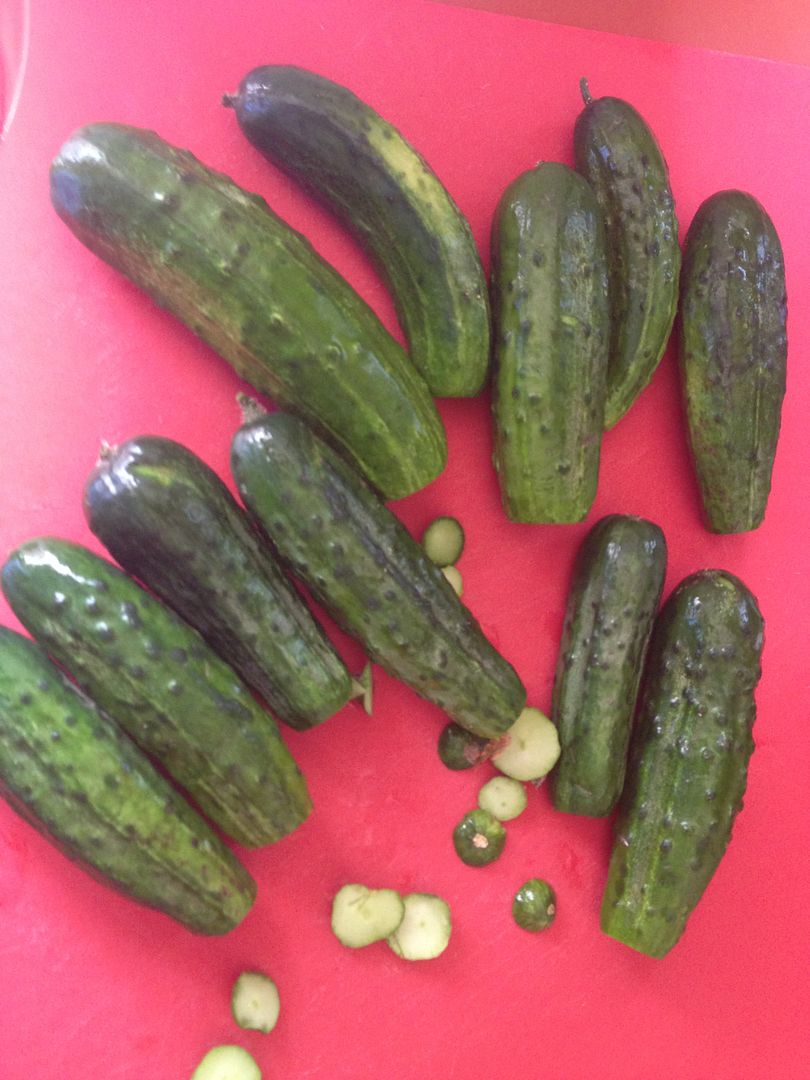
Trim all the blossom ends of your cukes by about 1/8″; the blossoms have an enzyme that can soften cukes, and nobody likes mushy pickles. You can leave the stem ends on so long as they’re not too long, (1/4″ or less).

Toss your cukes onto a bucket or non-reactive container, and makes sure your brine covers them completely. Use a plate and weight of some kind to make sure the floaters stay fully submerged. You should brine for at least 12 hours and up to 24 hrs.

When initial brining is complete, drain your cukes, fill your vessel with fresh, cold water and move on the fun stuff.

Pickling:
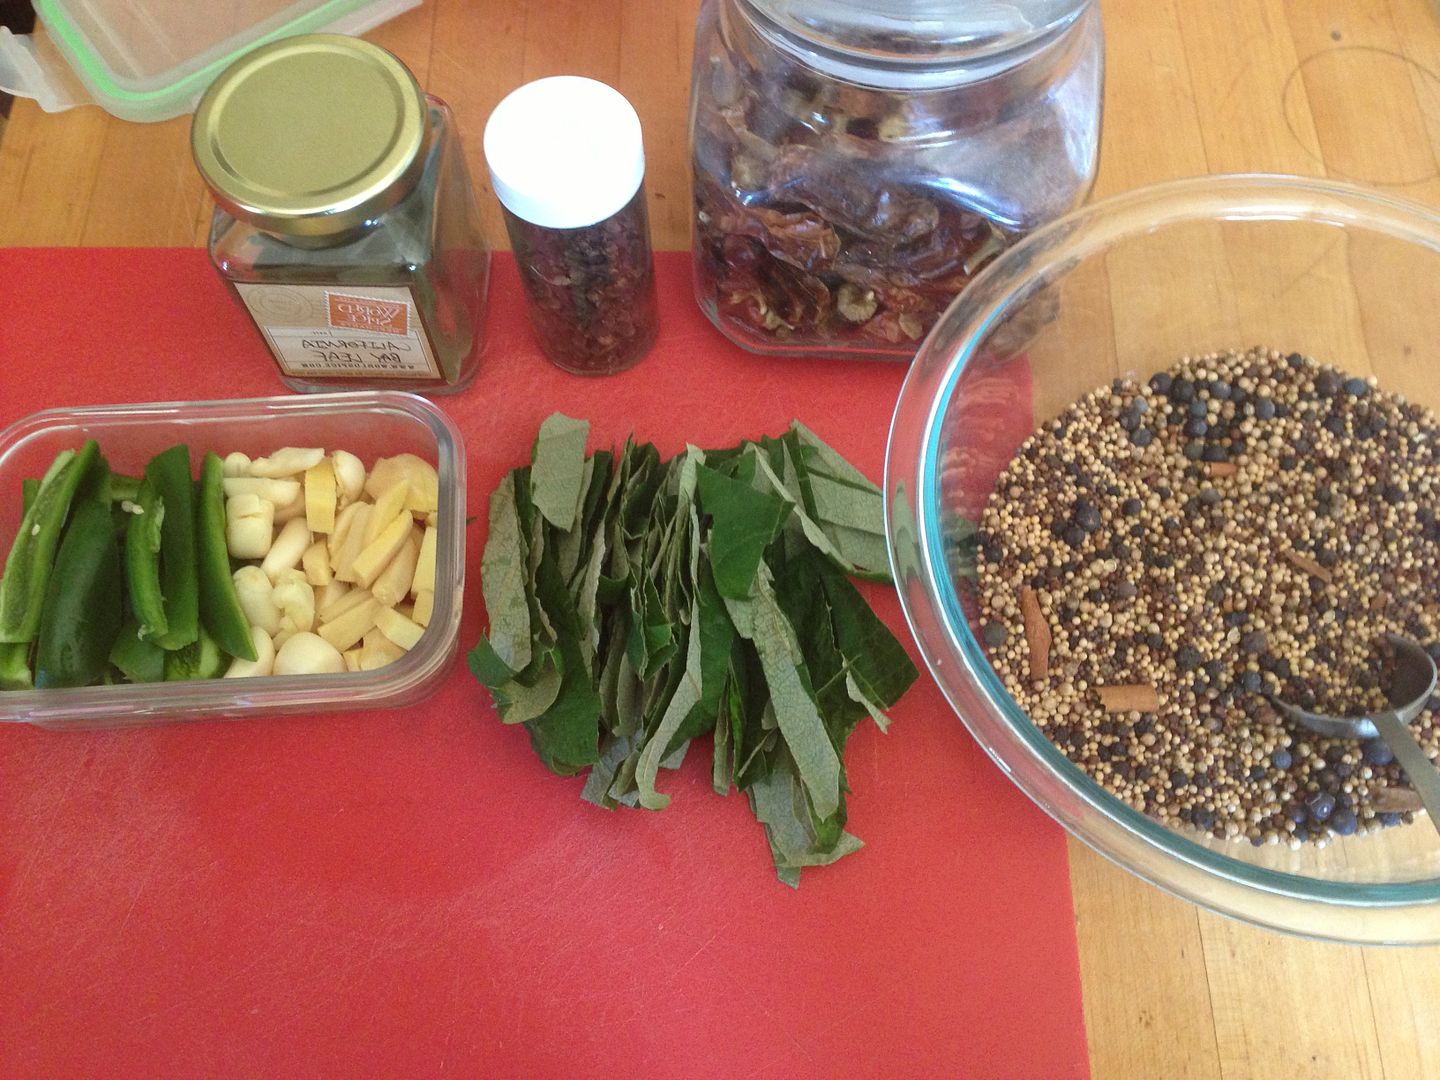
The ratios for pickling brine are somewhat flexible, depending on what you’re pickling. What I’ve got here is pretty uniformly reflected in my cohorts versions as well. Pickling spices are really wide open to interpretation; my fellow picklers choices run the gamut from nothing but salt to quite complex indeed; even dill isn’t a requirement unless you want dill pickles… Our spice blend is is a very nice blend of sweet, spicy and hot. Try this or make your own as you see fit.

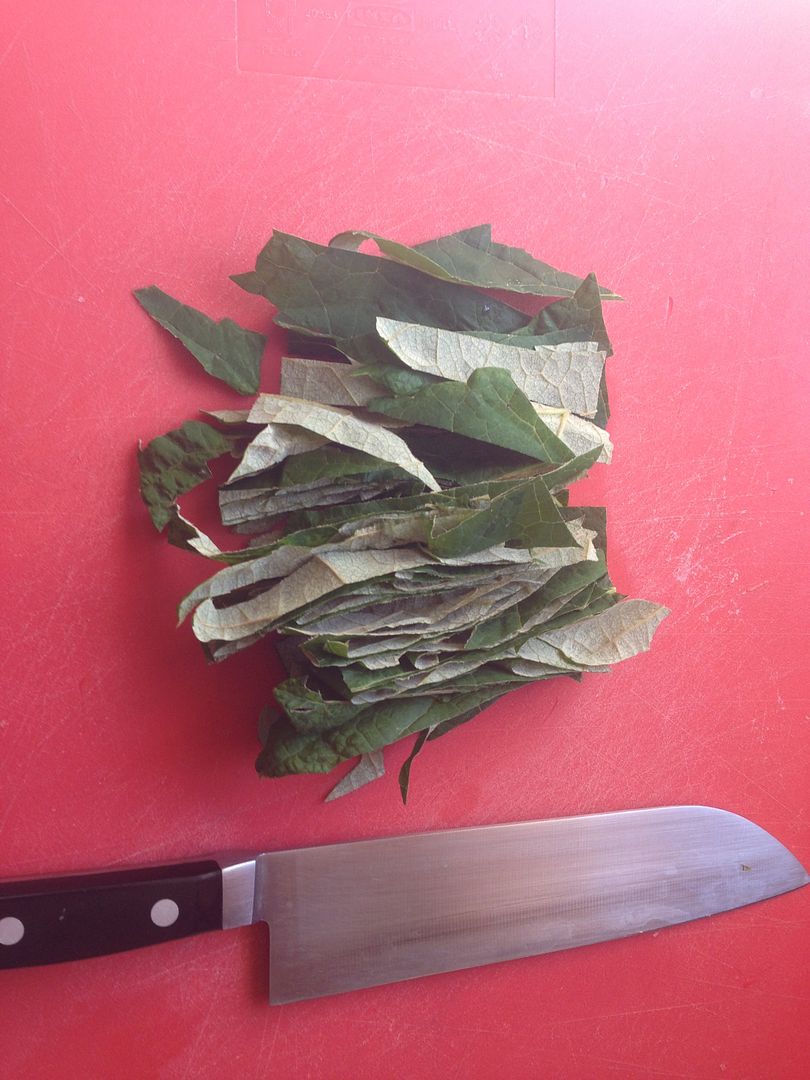
The one secret ingredient I’d advise you to find and use is grape leaves; they contain tannins that can do wonderful work toward keeping your pickles crisp. Rinse leaves well and trim off any browned or curled edges, then set aside.

The same rule applies for water used here. Additionally, I’d strongly advise that you do not buy pickling spices from the grocery. Get your spices as fresh as you can, get them while whenever you can, and blend/grind your own.

Vinegar should be 5%, but it’s up to you what version you use. We like good apple cider vinegar for the light, fruity note it imparts, but you can use white if you like. Avoid heavily flavored versions and create your own signature pickle.

The ratios detailed here are for about 5 – 6 quarts of pickles; scale up or down as you see fit. You’ll end up with a bit too much brine, but better too much than not enough, and you can always fridge pickle something with the extra.

Pickling Brine:
2 Quarts Vinegar
2 Quarts Water
1/2 Cup Pickling Salt
1/4 Cup Sugar, (You can sub Honey, Agave Nectar, etc, but be aware of altered flavor notes)

In a non-reactive stock pot over high heat, combine all ingredients and bring to a rolling boil. Make sure sugar and salt are completely dissolved.

You may add a sachet of 1 Tablespoon of pickling spices to the boil if you like; use fine weave cheesecloth or a tea ball to hold ’em.

Pickling Spices:
1 Tablespoon whole Yellow Mustard seed.
1 Tablespoon whole Brown Mustard seed.
1 teaspoon mixed whole Peppercorns.
1 teaspoon whole Grains of Paradise.
1 teaspoon whole Coriander seed.
1 teaspoon whole Juniper berry.
1 Bay Leaf, crumbled.

Optional, add to each quart as desired:
(We use the garlic, ginger, clove, cinnamon and dill in all ours, and add the Jalapeños and/or dried chiles just for our hot quarts.)
1 clove fresh Garlic, peeled and skinned.
Fresh Ginger root, peeled and chopped.
1 whole Clove berry.
1/2 fresh Jalapeño chile, stemmed, seeded and deveined.
1″ Cinnamon stick.
1-2 small heads fresh Dill

Sanitize your jars in the dishwasher, or in water held above 165 F for at least 5 minutes. Rims and lids get the same hot water treatment; set them aside on a clean towel.

Do a quick chiffonade cut to your rinsed grape leaves, and add about 1/2 a leaf to each quart.

Drain your brined cukes and add equal measures of the pickling spices to each sanitized jar. Carefully pack cukes into your jars. You want them full, but not jammed in there so tight that brine and spices won’t be able to freely do their thing. Leave the cuke level in each jar about 1/4″ below the start of the jar’s neck.

Seal your jars with the sanitized lids and rims, hand tight as you can get ’em.

Canning:
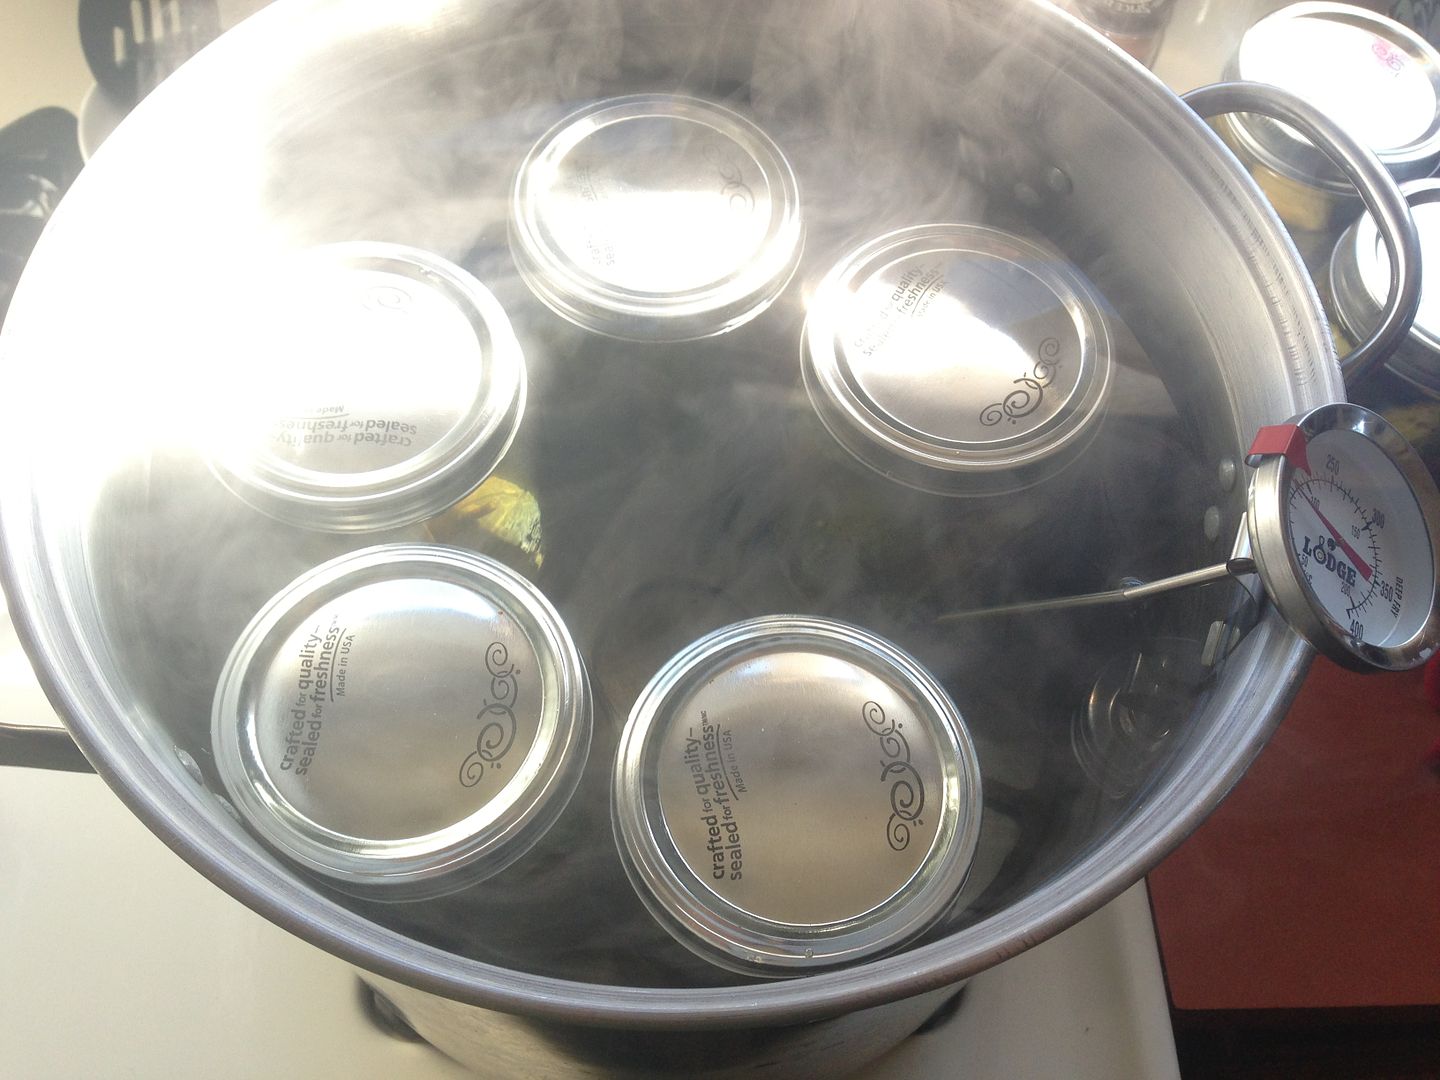
Set your jars on a clean towel right next to your brine on the stove. Carefully ladle brine into each jar, leaving 1/2″ of headroom per jar.

Now it’s water bath processing time. You’ll want canning tongs to safely handle the hot jars; if you don’t have ’em, get ’em!

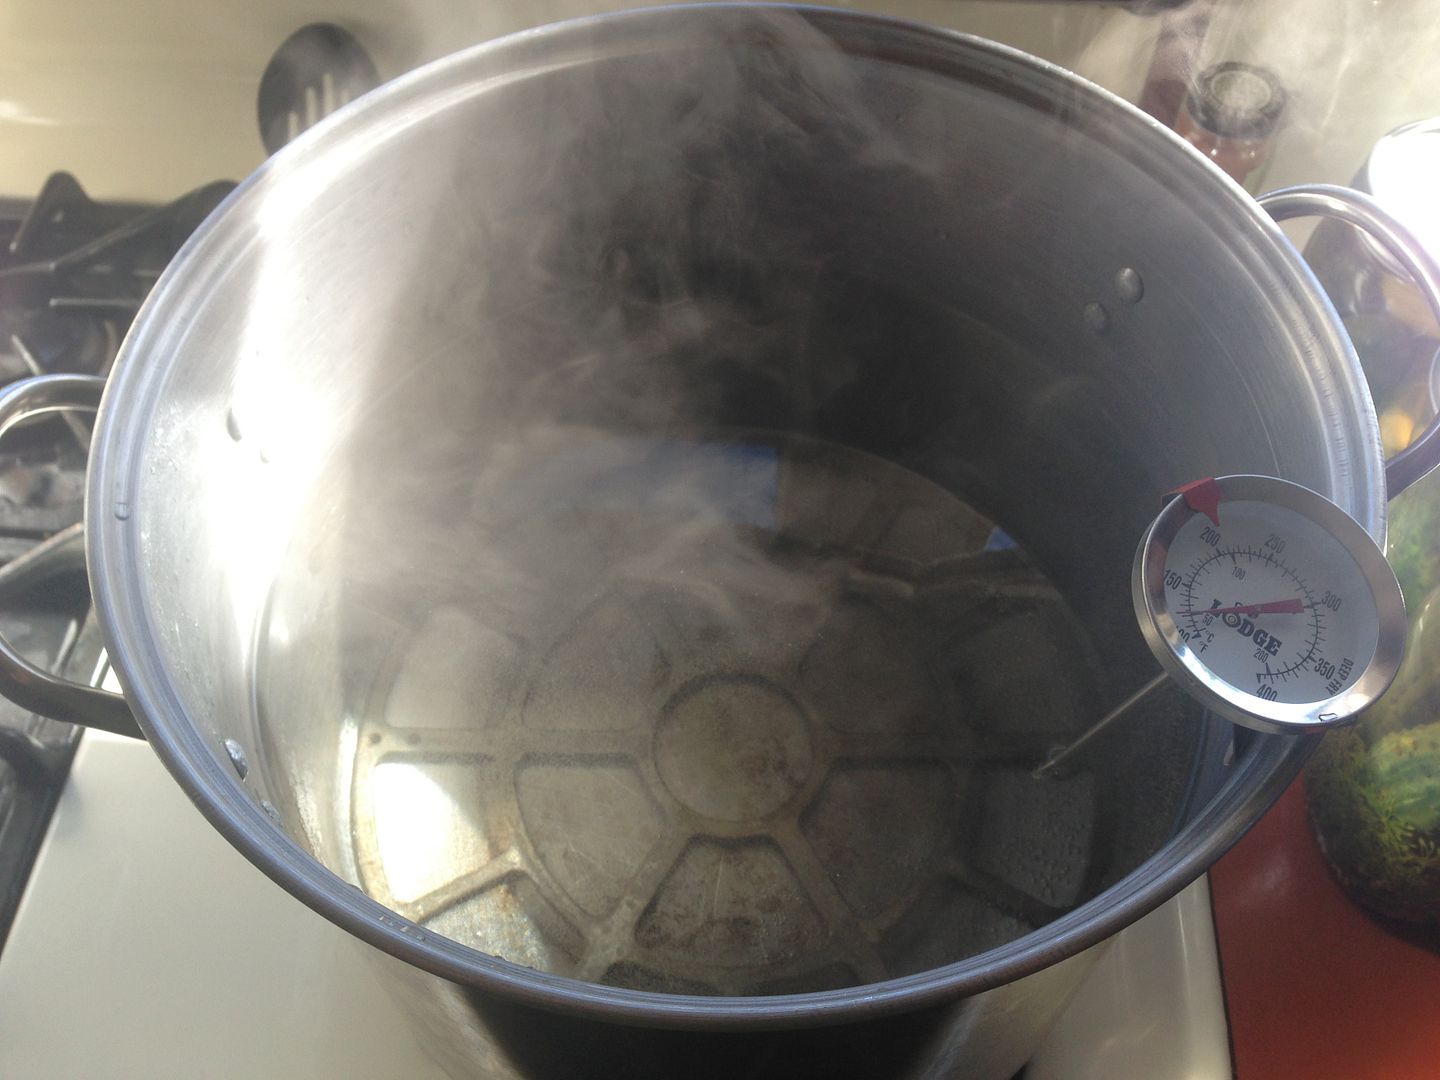
Have your canning pot filled with enough water over high heat such that a cycle of jars being processed will have at least 1″ of water above the lids.

Do not set jars on the base of your pot. Use a canning ring or basket to allow some space between the jar and the pot to minimize the possibility of jars shattering.

The recommended processing time for fresh pack Pickles in a boiling-water canner, per the NCHFP are as follows: water temperature MUST remain above 180 F throughout each processing cycle.
Process Time at 6,000 ft
Pints 10 min 15 20
Quarts 15 min. 20 25

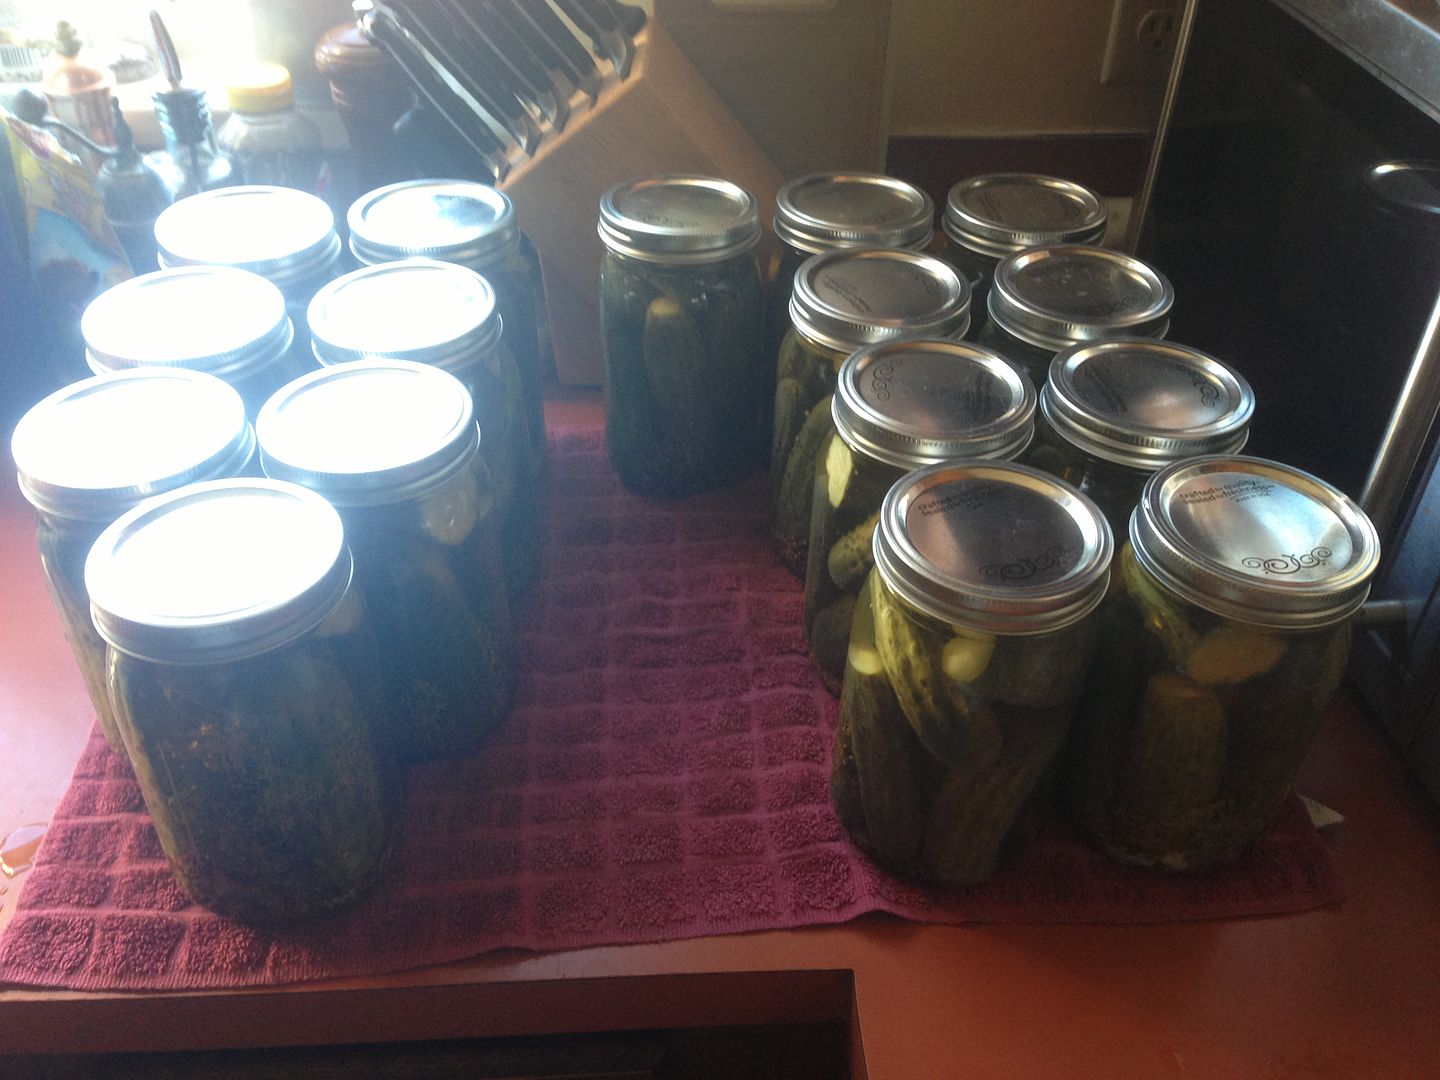
Carefully remove jars back to the clean towel after processing. Listen and watch for the telltale little metallic pop or click that ells you your lids have properly vacuum sealed. You will see a distinct small center ring in each lid when it’s properly sealed. Jars that do not seal properly are not safe for long term non-refrigerated storage!

When your jars have cooled completely, check all lids and rings for tightness, then store your pickles in a relatively cool, dark place and allow the to do their thing for at least 60 days before sampling, (And 90 is better yet). Once they’re opened, they’re fridge only storage, of course.

Enjoy, share and compare!

E & M