Spring is Here – Time to Clean Freezers & Grills


For 25 points, identify the following protein:

Didn’t think so…

Spring is the perfect time for deep cleaning. Shaking off the dust and cold and mold of winter, letting fresh air in – We do it to our homes, (hopefully), and we need to do it to our freezers as well.

Whether you’ve got a combo fridge/freezer, or a big ol’stand alone unit, it’s time to thoroughly clean that beast, inventory what’s there with a critical eye, toss what needs to be tossed and cook what must be cooked before that too goes to the great beyond.

This line of reasoning naturally brooks the question, “Can food go bad in the freezer?” The answer to which is a definite ‘Yup!’

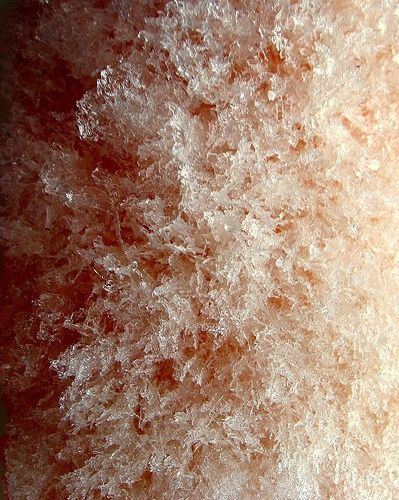
Keep in mind that freezing does not kill bacteria, yeast, mold, etc –  it just pretty much keeps them from multiplying. If there was something funky present prior to freezing, it could indeed reappear when thawed. Additionally, freezing does not do any favors for food quality or taste – over time, great stuff will become good and good stuff becomes that image up yonder.

When does quality starts to degrade? That depends on what it is, and how well it was packaged, frankly. For answers to this and other freezer questions, hop on over to the USDA’s Food Safety site and read for yourself. You’ll also find the National Center For Home Food Preservation a wealth of good info.

In general terms, anything that looks like the image above – an obvious victims of freezer burn – needs to go. If flesh looks substantially different than it usually does when thawed, (Darker, off color, dried out, etc), then give it the heave ho. Trust me when I say if it looks funky, it’ll taste funky, and it could well be dangerous.

When you package for freezing, head back to the NCHFP site and read up on best practices.

The time to clear out your freezer is also the time to clean; this should be done at least annually. The best time do the deed is when stocks are low – AKA, the end of winter.

Pull everything out and put it into a fridge or cooler(s) while you clean.

Turn off, unplug, and thoroughly defrost your unit.

Once it’s to room temp, clean the insides thoroughly; I like a bleach solution for the job, but dish soap and water works fine too. Remove and clean all the shelves, racks, drawers, etc as well.

Do a rinse wipe with a solution of 2 Tablespoons of baking soda to a quart of warm water, then wipe that down with a clean, dry cloth.

Don’t forget the unseen parts – Pull the freezer from its normal locale and clean underneath. Inspect the back and clean that and the top, and dust the coils if your unit has exposed ones.

Optimal freezer temp for food storage is -15ºF to -5ºF; it should never go above 15ºF for any extended length of time.

Fire ‘er back up, let it get fully cold and then put your bounty back in – and mark your calendar for the same time next year.

Does your grill look something like this after a winters slumber? Time to get after that before you fire up for the first time.

Open up and remove the grill grates. If you’ve got a gas rig, disconnect the fuel from the grill, remove the flame deflectors and burners from the grill body. Remove all old briquettes, burned whatever, and scrape as much grease and char off as you can by hand.

For the deep cleaning, you’ll need a grill brush, a heavy duty sponge, a scrubby pad and steel wool, a bucket of hot, soapy water, another of hot, clean water, some rags, and some degreaser. I recommend Simple Green, it’s effective and environmentally sound.

Have at the entire grill with the degreaser first, allowing it some working time before you scrub. Move onto the soapy water, then the rinse, until your grill looks as close to new as you can get it. FYI, if you’re a heavy user, a mid-season cleaning won’t hurt. Thoroughly clean every component, including the grates. A seasoned grill is a good thing, but excessive grease and char build up can lead to flaring, burning and off-putting flavors in your food. A clean grill will last far longer than a dirty one as well.

Kick the Tires & Light the Fires
Now give your grill a point by point, detailed inspection of every component. Check grill and charcoal grates for rust, rot or missing and chipped porcelain. After they’re clean, dry, and inspected, you’ll re-season them. Check your framework and lid to make sure they’re all sound and there are no nuts, bolts, struts, or wheels missing or damaged.

If you use a gas grill, check your tank, valve, line, regulator, burners and flame deflectors to make sure they’re clean and sound. Don’t screw around with gas parts; if they’re rotted or badly rusted, replace them. At the least, your grill will cook poorly; at worst, you could have a genuine explosion or fire hazard brewing. If you need parts, Home Depot carries quite a few, and of course there’s probably a local supplier not to far from most of us.

When you’re ready to rock, season your grates prior to first use. Soak some paper towels with cooking oil and thoroughly rub all surfaces of the grates. Turn on the gas or light a small charcoal fire and heat the grill to high with the cover open until the oil burns off. Now turn the heat down to low and let the grill work for about fifteen minutes or, (or until your charcoal expires).

Let the grill cool down, then wipe the grates down and reapply a thin coating of fresh oil; those last steps are always a good idea after grilling, to prepare for your next session and extend the life of the grates by making sure rust doesn’t form.

Now your grill is ready to rock and roll but… Got fuel? It’s the first thing we need and the first one we forget on friday night when we step out the back door with a platter of steaks. Inspect any charcoal, smoking or seasoning woods and pellets, and gas tanks left over from last season. If any of your briquettes or woods got soaked, you’re OK if they retained their shape and what soaked them was just water. Set affected fuel out to dry and repackage as needed after they’re ready to go.

While we’re on the subject of charcoal, avoid instant light products and charcoal lighter fluid like the plague. It’s bad enough that the stuff contains things you don’t want to feed your family, and even worse that they absolutely ruin the flavor of good food. Get yourself a lighting chimney that works off scrap paper and use that; it’s just as fast, far cheaper, and makes better food.

Finally, charcoal quality does count. Crappy generic charcoal is the equivalent of mystery meat hot dogs; you’ve got no idea what’s in there and it’s likely none of it is good. High quality lump charcoal heats better, longer and more consistently, and that too means better food.

Blanching & Freezing Fresh Peas


Serendipity is a wonderful thing. Three years ago almost to the day, I posted this, and here we are full circle. Enjoy!

Received this PM earlier today, from alert and hearteningly honest reader Sarah, who lives in the wilds of Cleveland, Ohio.

‘Recently saw the photos of your wife’s garden. It just so happens that I planted peas for the first time this year, and lo and behold, they actually grew! I ended up harvesting a big pot, and then realized that I really don’t know the step by step for preserving these things! Naturally, I though of you, so, what do I do?!’

Well, Sarah, first and foremost, I hope you know how much it thrills us that you thought of us first with such a great question. Secondly, good on ya for asking, and third, your timing couldn’t be better – Monica and our two lovely Granddaughters picked a whoppin’ big bowl full of fresh peas last night – They’ve headed for the park, and I’ve been tasked with pea processing – so let’s get after it!

Freezing really is the best thing to do with fresh peas. You didn’t mention the variety you grew, so first we’ll touch briefly on the three most common versions, shell, snow, and sugar snap. Shell, (also called garden, English, or Sweet), are thin skinned peas with an inedible shell. Snow peas, (also called Chinese pea pods), are smaller peas with a thicker, edible pod. Sugar snaps, (or just plain snap), peas are a cross between the former and the latter, with a very thick, edible pod and relatively large mature peas.

Snap, Snow, and Shell peas, respectively.

For both snow and snap varieties, while you can and should eat some whole when they’re just picked, it’s best to remove the fibrous strings that run along the seams before you do so.

Regardless of what variety you’ve grown, you’ll want to freeze them. Canning peas is laborious, and frankly, doesn’t yield very good taste or appearance. Shell peas must, of course, be shelled prior to freezing. Snow peas can be frozen whole, as long as they’re blanched first – If you don’t do that process diligently, you’ll end up with nasty, mushy results.

With snap peas, I’ve found that whole peas just don’t freeze very well; they’re really delicate things, which is why their freshness is so fleeting. For my mind, it’s best to eat and cook whole peas at the peak of their freshness, and to shell anything you’re going to freeze. Don’t toss the pods however; sauté them in a stir fry, or better yet, make a pea stock, which makes a phenomenal base for split pea soup. Here’s how.

Fresh pea stock is great for split pea soup

Snap Pea Stock

10 Cups Water
4-6 Cups empty Snap Pea Pods
1/2 Cup Sweet Onion, rough chopped
1/4 Cup Carrot, rough chopped
2 Tablespoons Celeriac or Celery Leaf
1 teaspoon Lemon Thyme
1/2 teaspoon Sea Salt
1 Bay Leaf

Put everything in a large stockpot over medium high heat.

As soon as the stock begins to simmer, cover and reduce the heat until you’ve got a very slow simmer; cook for 45 minutes.

Pour the stock carefully through a chinoise, or a colander lined with cheese cloth into a clean mixing bowl.

Allow to cool to room temperature.

Transfer to clean glass jars, or a freezer bag. May be frozen for up to 4 months, or refrigerated for 3-4 days prior to use.

Pea stock is surprisingly fragrant and lovely stuff to boot
Pea stock is surprisingly fragrant, flavorful, and lovely stuff to boot

To preserve those peas, you’ll need to shell them. As with all production cooking processes, set yourself up an area where you can have everything arranged right at hand. To shell fresh peas, grab one and turn it wide seam side up, with the stem away from you. Grab the stem between thumb and forefinger, and zip it back toward you – that’ll remove the fiber along the seam. Now zip your thumb nail along the seam and viola, your pea will open up like a book. Push the peas out of the pod and into a mixing bowl.

Now it’s time to blanch. There are a lot of questions about blanching, and most, if not all of them are answered here at one of my favorite cooking sites, serious eats. Blanching is a short, high temperature cooking cycle done in boiling water, followed by an immediate plunge into ice water. We blanch for three reasons when – To
destroy enzymes that begin to break produce down once they’ve been harvested, to preserve great color, and to keep them crisp – All very worthwhile pursuits, indeed.

The fine print for blanching is that you want two things without question – First, you need water at a steady boil through the relatively short cooking time, and secondly, you need to plunge what you blanched into ice water immediately after cooking. Those things are non-negotiable for the success of the process.

The old adage about using lots of water to blanch really doesn’t translate all that well to home kitchens – The logic ran that a relatively large volume of water won’t lose temperature as drastically when food is introduced. That’s true for commercial stoves, but not so much for home cooks – If you’re blanching in small batches at home, a pot with one quart, (4 cups), of water will actually recover a boil far faster than larger volumes.

Second issue is salting. The sages say ‘salt heavily’, and to some degree, that’s true. You want water about as salty as the ocean, or about 3%. The wonderful website Pickl-It has a super handy brine calculator that’ll let you dial that right in, (and its 1 ounce of salt for 1 quart of water). Now, this requires weighing, because the fact is, all salt weighs differently. I can’t recommend a small kitchen scale enough – They’re cheap, easy to use, and if you get at all serious about baking, you’ll want to have one anyway. I’ll give you a cheat and tell you that 1 ounce of the most popular kosher salt is roughly 5 teaspoons. While Harold McGee notes in his epic reference volume, On Food and Cooking, that salt tenderizes veggies by interacting with natural pectins, this also means that too much can make your peas soft.

Finally, there’s time. I don’t know how many folks I’ve heard say that you ‘blanch for about a minute,’ and frankly, that dog just don’t hunt. Blanching time varies depending on what’s being blanched, and you should pay attention to that. The Reluctant Gourmet has published a great blanching time list, so head over there, read and heed.

OK, now we’re ready. It’s possible I just made blanching sound really laborious, but it’s not at all. Set up a station so everything is close at hand. You’ll want a stock pot of salted water, a large bowl with ice water, and a single mesh strainer handy.

Everything set up to blanch

Shelled peas do indeed blanch for about a minute. For peas, corn, and a whole lot of veggies that are small individual things, I add about a half tablespoon of butter to the blanching water. It doesn’t impart much taste, and it helps them freeze without turning into a block of peas or whatnot.

A little butter in salted blanching water helps frozen veggies seperate

Once your water is boiling merrily, throw in those shelled peas and count off a minute. As soon as the time is up, carefully pour the peas into a single mesh strainer and immediately into the ice water. Work the peas around gently with a slotted spoon to help them cool. Let them sit in the ice water for about 3 minutes, until they’re thoroughly cooled. Scoop off any remaining ice, pour the peas back through the strainer, then transfer them to a clean mixing bowl. Viola – bright, crisp blanched peas.

Blanched peas drained and ready for the ice water bath

Plunge blanched peas into ice water immediately

Fresh peas ready for the freezer
Fresh peas blanched and ready for the freezer

Now it’s time to package for freezing. A vacuum sealer is the bomb for such things, but not everybody has or really needs one. Next best thing is a nice, heavy freezer ziplock style bag. Portion the peas into bags based on your anticipated use – I portion for two, as you can always whip out an extra bag for guests. Seal about 90% of the bag, then suck all the air out that you can, and zip it all the way closed while you’re still sucking. That’ll do about as good a job as possible to deter freezer burn and keep things fresh. Label your stuff with the date, pop them in the freezer and you’re good to go.

Fresh peas ready for the freezer

So, there you go, Sarah – Maybe more than you asked for, but hey – You got me started! Happy preserving.

Operation Reduce Kitchen Plastic – Ork Pee!


Hello! We’re back from winter vacation – We trust the holidays were good to you and yours, as they sure were to us – Family, food and fun are three of our favorite F words. (Sorry, couldn’t resist).

In any event, here’s what’s up in our kitchen. I researched, tested and chose some new non-stick pans – A thing I didn’t like very much until I got my paws on these new ones, which I think highly enough of to include on our essential Cookware page. What? You don’t see that page? Well truth be told, no, you don’t, yet – But that, along with some other fresh Essentials pages, will be appearing soon, so please do stay tuned! Then finally, Santa gifted us with a home sous vide unit, so expect some process and execution thoughts and recipes from that in the not too distant future as well.

We’ve also been working diligently on Operation Reduce Kitchen Plastic, (ORKP, or Ork Pee, if you prefer), and have an update on that worth sharing with y’all –  Here then are a few considerations for you.

The focus for this phase of ORKP is elimination of single use plastics, arguably the heart of the kitchen problem. While we tend to think of this in terms of ziplocks and such that we employ at home, the trail really begins at the store. There, everything from bags for produce and bulk foods to the bags our stuff gets stuffed with really adds up over time. The solution is simple – Reusable bags to replace all that – And those work great, if you can remember to get them out of the trunk when you arrive…

For big grocery bags, there are a lot of options. We went with a set of Earthwise cotton canvas whoppers. With hefty fabric, larger size than typical, double-stitched and machine washable, they hold up really well to hefty, regular use.

Earthwise canvas shopping bags

To replace produce bags, we got a great set of 10 solid and mesh bags made by Colony. They’re sized just right for the stuff we usually buy, and they’re machine washable cotton, well made, and hefty enough for a decent lifespan. Added bonus, the flip side of each name tag tells the cashier the tare weight of the bag, so you’re not paying for stuff you ain’t buying.

Colony bags are perfect for produce, and even show tare weight

More and more stores are offering reusable cloth bags for bulk foods too – They’re light and rugged, and just right for stuff like nuts or coffee beans that we buy regularly.

lots of Store snow offer reusable bags of their own

In house, we’ve replaced plastic bags with glass containers with air tight nylon lids – Here again, we’ve tried all glass and found the breakage rates excessive for our needs. We continue to employ canning jars as well, for freezing broth, soup, stock and such. As long as you don’t fill past the tapered neck, you’re generally good to go, (albeit you must be more careful, because they will indeed break with rough handling.)

And finally, there’s plastic wrap – Super useful, but super wasteful, so it’s house made waxed cloth wraps to the rescue. There are a bunch of these offered for sale these days, but the prices sure gave us pause, so we decided after some research to make our own. 

House made food wraps - Pretty and practical

There are a bunch of recipes out there, some that use everything we did and some that don’t. The bottom line is this – you can make wraps with just beeswax, but what you won’t have with that formula is much of a tacky quality to them – they won’t stick to themselves very well. For that, you need to add pine rosin, and since cling wrap is what everyone is trying to replace, using it made sense to us. The third ingredient we went with is jojoba oil. It helps to keep the wraps supple over time, and also imparts some antimicrobial properties to the mix – Not a bad thing in our book.

There are a ton of step by step recipes out there, so rather than repeat that, we’ll show y’all some pics of the basic process, and add some caveats that we did not see very often covered in the stuff we researched – Here are our bullet points.

1. Use new, 100% cotton fabric of a fairly lightweight weave. A lot of sites talk about something about like a bed sheet,but to be honest, we found that too far too light – We went with 100% cotton duck, and washed it first to get the sizing out, (which is important, says M.)

2. Think about the kinds of things you cover commonly, and size things to achieve that. We made a set of small, medium, and large in square, rectangular, and circular shapes, and that seems to cover most of what we ask of them – Too many sites talked about very specific sizes, and that may not be what you typically use, so measure your stuff and go with that.

DIY food wraps - Fun and pretty easy too

3. Contrary to what almost everybody says, it’s damn near impossible to get this stuff out 100% of a nice cooking vessel, so don’t use your nice Calphalon set, (right, Babe?). Go find a cheap double boiler insert and dedicate that to this process – It’ll be well worth the eight bucks it costs you.

Pelletized beeswax is super easy to work with

4. These things do NOT wear out when they start to show lines and creases – They can be reheated and recoated easily, and should be! You will get many, many moons of service from them.

The waxing is is first painted on, then baked in to fully impregnate the fabric

5. Use parchment when you bake the wraps to avoid contaminating a baking sheet.

The production process was easy and fun – In essence, you’re going to cut fabric to size, melt the ingredients, paint that onto the fabric, and then bake them for a spell to fully impregnant the sheets, and that’s pretty much it. Just be careful with it – Hot wax, rosin, and oil can and will get everywhere if you’re not paying attention. As stated, the end results are very satisfactory, and a joy to use – You might even call them the bees knees.

NOTE: As with everything we test and report on, the times described here in we’re not received in any kind of a deal with the maker. We buy them, test them, and use them, just as you would, with our very own money – Guaranteed!

That ain’t how we play…


I tweak and republish this post annually; I think you’ll see why when you read it.

See, I’m not out to be tragically hip, in fact quite the contrary. Or maybe Matthew Selman said it best; “I wish there was another word than foodie; how about ‘super food asshole’, or ‘pretentious food jerk’?” I just don’t wanna go there.

Granted, there are a lot of great food blogs out there, but right now, many are judged ‘Great’ because somebody took a really, really nice pic of some food, or is on the fast track to be the next Food Channel Super Food Asshole. Frankly, when the ‘best’ food blog sites reject people because they don’t meet criterion such as that, I’m more than not interested, I’m actively turned off.

I write about food from some pretty simple perspectives. I’m interested in sharing recipes, methods, processes and such. I’m interested in sourcing, using wisely, and preserving food that is good for you, in a world where much of what we are offered to eat is not very good. I’m interested in the science behind cooking, because I’ve never liked simply being told to ‘do it this way.’ I trust that if you’re reading this, you’re interested in these things as well. To be honest, if no one read this blog, I’d write it anyway, because I do it for me first and foremost; I gotta share what I love. That’s just how I’m wired.

So, when I look at ‘real’ food blogs, I see the stuff that, fairly often, folks ask me about here, or more to the point, ask me why I don’t do these things. There are three oft repeated comments, and they are,
Why don’t you list nutritionals and calories,
Why don’t you post prep and cooking times, and
Why do you post exotic ingredients that I’m not likely to have?

So, in a nutshell, here’s why;

Frankly, listing nutritionals means, more than anything, that I am determining what kind of portion size you and yours eat, and frankly, I don’t have any idea about that. If I list a casserole recipe and you make it, how much do you eat? How about your partner? Do you have seconds, are there leftovers, and on and on. This ain’t a restaurant, and I’d bet your house isn’t either; neither of us needs everyone to eat the same portion. For the record, I predominantly do recipes for two, with planned leftovers, the idea being general efficiency, and the fact that anything good will be great the next day. Other than that, you’re kinda on your own. I mean I can give you a great biscuit recipe, but how big you make ’em, and how many y’all wolf down is kinda your gig, right?
Don’t get me wrong, nutrition IS important and should be monitored in some way, shape, or form. The best way to this is to buy carefully and thoughtfully. Buy locally whenever you can. Read the labels on food and avoid the stuff that’s truly bad for you. Grow anything and everything you can. Preserve what you buy or grow so that you can notably extend the time it is available to you. Make everything you can, from scratch, at home. That may sound more intensive than what you do now, but if you really care about nutrition, you’ll do it. And as far as we go, whenever you need or want detailed nutritionals on our recipes, just click on our link for Calorie Count and go to town. There’s a mobile version out for your Apple or Android smart phone as well now.

Next comes prep and cooking time.


Weeeeeellllll, how do I say this? Listing prep time is, in my not even remotely close to humble opinion, one of the dumbest things I’ve ever read. The problem is actually pretty obvious. Listing prep time says we all prep at the same level, and nothing could be further from the truth. Heck, I have three preppers in my cafe and they all perform differently… So really, the question is who’s prep time are we talking about? Mine? Yours? Emeril’s? I’ve been cutting things for decades and have pretty damn good knife skills; do you? I can stem, seed and core a tomato blindfolded, without cutting myself, in about 15 seconds; can you? I don’t even think about process and procedure any more, it just comes naturally; does it for you? And if your answers are ‘No’, does that make you slow? If I can prep Dish A in 10 minutes and you take 20, should you not make that dish? Of course not! And really, that’s just the tip of the iceberg. How about what ingredients you have right on hand when you start your prep, how well equipped your kitchen is, how your day went, how many rug rats are flying around your feet, or how many critters need to go out right NOW?! Get the picture? My bottom line is simple – Who gives a rats ass how long it takes if you have the time and want to make it? If you’re cooking regularly, you either already have a decent sense of what you can and will accomplish in a given time, or you will develop one in time. If you really do like cooking and want to do it, you’ll do it.

Finally, there’s the exotic ingredient thing. Yes, I have a whacky spice cabinet. You may or may not have a pantry like ours, but I really don’t think that matters. We have all this stuff because we dedicated lot of time and energy into developing and perfecting recipes to share with y’all. Whether or not you need that much stuff is up to you. Does a couple avocado leaves and a little annatto really make or break good chili? If you’re asking me, I think the question is rhetorical. And frankly, I don’t buy the ‘why do you use ingredients I’m not likely to have’ complaint for a second; in this day and age, almost anyone in this country, and many others, can get anything they want. I recently shared a bacon recipe with a pal from South Africa. He ended up having to go all over creation to find several ingredients, but he did it, ’cause he really wants to try my recipe. Kinda like that last discussion on prep and cooking, huh? Ive mailed corn meal to Australia and mustard seed to Israel; if you can’t get something you wanna try, hit me up, I’ll help. I’ve also gotta point out that we constantly encourage and desire experimentation, so if you’re making it, put what you like in it: Give us credit the first time, and then it’s yours…
I say that if you love cooking and great food, maybe you should check out Tasmanian Pepperberry, or Urfa Bebir; who knows what you’ll do with them?

We do this because dear friends who love to grow, cook, preserve and explore as much as we do asked us to. We do this because we have a love for good food and cooking shared. We do this because we hope to inspire such in y’all. If that ain’t good enough, so be it.

Salt Cured Egg Yolks


There’s no telling how long people have been preserving eggs. As one of natures most amazing sources of energy and great taste, there’s always been great interest in having them available whenever desired. Whether by brine, smoke, or chemistry, there are a bunch of ways to do it. And it’s a natural progression to go from preserving the whole egg to just focusing on the yolk, since that’s where all the really good stuff is – and if you’re going to do that, there’s nothing easier or more effective that a simple salt cure.

Egg yolks are a nutritional powerhouse. All the fat and roughly half the protein an egg possesses is in there, along with a very long list of other things – carbohydrates, amino acids, vital trace nutrients, minerals, vitamins, and yeah, a healthy shot of cholesterol, but that’s had a bad rap for far too long. Donald K. Layman, Professor Emeritus of Food Science and Nutrition at the University of Illinois has gone so far as to say that, “cutting dietary cholesterol is almost irrelevant when it comes to promoting healthy blood cholesterol levels and heart health.” While that’s not an endorsement to go off and start an all Twinkie diet, it does get eggs and a bunch of other formerly vilified foods off the hook.

Century Egg - Seriously acquired taste
Century Egg – Seriously acquired taste

There are a raft of preserved egg and yolk examples out there. The Chinese alone have been doing this for hundreds of years, exemplified by the so called Century Egg, which appeared in Hunan province during the Ming Dynasty. This, like rotten shark, is an acquired taste to say the least – They make durian seem tame – and yes, I’ve tried one, and I won’t do it again. To be fair, it’s the smell more than the taste that’s severely off-putting – think of a multi-feline cat box unchanged for weeks, and you get close.

Smoked eggs are sublime

Smoked eggs are as they sound, done either with cold or hot smoke. They too are sublime – The smoke, and as such choice of wood used, adds a lovely depth and complexity to the egg – It exemplifies egg versatility to a surprising degree.

Salt cured whole eggs

Then there’s the brined or salt cured whole egg, which is an entirely different experience – good ones are lovely, like a really good egg with over the top concentrated richness and umami. The star of course, is the yolk.

This whole exercise begs the question – why would I want to do it? Well, you either love egg yolk or you don’t – If you don’t, go out and play – if you do, read on. Egg yolk has a savory, smooth taste absolutely brimming with umami, and they’re pretty, to boot. If we can create a version of that which intensifies the umami, and makes them instantly usable whenever the whim hits, it’s worth doing.

There’s also the transformational consideration – Great food is all about taking something common and doing uncommon things with them – When the whole process is stunningly simple, it’s that much sexier in the end run – And salt cured egg yolks are very sexy indeed. What you end up with is something that you can and will grate, with a gloriously bright yellow color. Preserved yolk tastes like buttery cheese – rich but not cloying – with a high level of umami added to whatever floats your boat – And it will, believe me – On pasta, pizza, salads, veggies, you name it, a little grating of this is stunningly good.

On to the process. It is a very simple thing, albeit there are a couple of versions, and we’ll cover both herein. As with all things simple in cooking, the first and most critical consideration is ingredient quality. If ever there’s a time to buy the freshest, most local eggs you can, this would be it. Since we’re merely concentrating that which already exists, mediocre will certainly breed mediocre. What you want is a stellar egg, one with a lovely orangish-yellow yolk, as fresh as you can get. Ditto for salt – you don’t need fancy, but you do want pure – high quality, coarse kosher or sea salt, with absolutely nothing else in it, is the key. Once you’ve got these together, do the deed the same day – It doesn’t take long, and that way you’re assured of taking full advantage of fresh stuff.

Set yolks in the salt cure

As for specific methodology, as mentioned, there are two primary schools – One uses just salt for the cure with passive secondary drying, while the other employs a salt and sugar cure coupled with mechanical drying in an oven or dehydrator. Both work fine, so it comes down to your predilection, and how fast you want to get done. Again, it’s so simple, it’s highly worth trying a batch of each and making your own comparison. From there, you can tweak whatever you like best to make it yours. Here’s the drill.

In both methods, the first step is the cure. You need a bunch of salt for this, depending on how many yolks you plan to do. Again, it’s super easy to do, so start with maybe four yolks, try out the results, then try the other method, pick your fave. To process a dozen yolks, you’ll need a pound of coarse kosher or sea salt. If you use the sugar/salt cure, it’s a 50%-50% blend of each – Use regular old cane sugar for that – Nothing fine or fancy needed. That’s the only difference in the cures.

Once you’ve chosen your cure, get an appropriately sized container big enough to hold how ever many yolks you want to process, as well as a bunch of cure. I like food storage containers with a snap fit lid for this – It’s gonna go in the fridge for a week, so it’s nice to have something that’ll stand up to daily use and exploration. Word to the wise, if you’ve got a bunch of folks in your house, tell them what you’re doing and point out the container – that can go a long way toward not having your stuff tossed or played with.

Pour an even layer of cure about 1/2″ thick into the container, then form a series of evenly spaced divots to receive how ever many yolks you’re gonna cure.

Have a second airtight container ready for your egg whites. Carefully separate yolks from whites, (You can and should freeze the whites for a future endeavor.) Slide a yolk into each little depression in the cure.

Now carefully cover the yolks with a nice, even layer of cure – Here again, you want about 1/2″ or so of cure over the tops of the yolks.

Seal up the container and slide it into the fridge, and leave it alone for a week.

Once your week is up, pull the yolks. Fill a small bowl with warm water, and have a clean piece of cheese cloth handy.

Cured
Cured

Take each yolk out of the cure, and brush excess cure off. Dip the cheese cloth into the water and use that to gently clean as much cure off of the yolks as you can – At this stage, they’re still a little tacky, which is just fine – Don’t freak out if the cleaning process is taking a bit of yolk with it, but again, be gentle.

Now comes the division between finishing steps.

If you’re going the passive route, then all you need is some more clean cheese cloth. Wrap each yolk in a hunk of that and tie it off with kitchen twine.

After that, hang it from a shelf in your fridge so that each yolk has good air flow all around it. Leave them there for at least a week, and two is better. When that’s done, you’re done, and you can go to town with them.

If you prefer the faster mechanical method, then you’ll set your oven or an adjustable dehydrator to 200° F. Put the yolks on a silicone pad or parchment if you’re using the oven, onto a rack if you’re going dehydrator. Let the yolks dry for 45 minutes. Remove from heat, allow to cool to room temp before refrigerating.

Grated salt cured egg yolk

Either way you choose, the yolks, refrigerated in a non-reactive, airtight container will last at least a month, (but they won’t, ’cause you’ll scarf ’em down.)

Salt cured egg yolk on house made pizza - Si!
Salt cured egg yolk on house made pizza – Si!

Now, back there a ways I mentioned that you can tweak things, and you can – herbs and spices in the cure are par for the course, so have some fun, use your imagination, and let me know what you come up with, yeah?