Memorial Day Twist


Ah the holidays of summer!  Each is and should be seen with very particular focus. That is, view them as a day to cook, eat, read, enjoy each other and little else!

Memorial is the first of these, of course, and we used it as a chance to do a nice Surf & Turf dinner.

For the Surf, we went with some fresh caught gulf shrimp, which I marinated in citrus, chipotle chile, salt and pepper, a very straightforward preparation as we always do here.

The dominant sub-theme to this post is food safety, so let’s talk about handling proteins.  We paired some nice T bone steaks with the shrimp. I pulled the steaks out just long enough to apply the rub, and then put them back in the fridge right away. Shrimp came out for thawing in very cold, running water, (Which gets it done as quickly as possible), deveining, (Which you must be conscientious about!), marinating, and then also went straight back into the fridge. NEVER leave proteins out in room temperature long enough for them to get into the Food Temperature Danger Zone! I’ll add that these shrimp were stated to be ‘Cleaned with tail on,’ and there’s a lesson to be learned there. They were lovely shrimp, sweet and tasty and smelling good right out of the package, but very few of them were actually clean – Moral of the story, check and correct, don’t assume! Post marinade and immediately before cooking, I hit the shrimp with some melted butter and more fresh squeezed citrus.

Steaks got a nice simple rub with a bit of olive oil to make sure everything sticks nicely.

Fresh sweet corn got butter, salt and pepper of course!

Onward to GrillLand!

The real story here isn’t the Memorial Day meal, it’s the aftermath! Yes, once again I am harping on leftovers, because that is the real deal when it comes to creativity. You’ve probably heard the term ‘Garde Manger’ before, right? Know what it means? Literally, it’s ‘Keep to Eat,’ AKA, the art of creative use of leftovers.

In a restaurant, just as in your own home, wasting food is not only wrong, it’s a waste of money as well! If you follow what we do here and subscribe to the concept of using the best ingredients you can find and afford, then you certainly can’t abide by allowing leftovers to go to waste, right? Granted, a next day turkey or steak sandwich is great, but what about letting great ingredients speak again in something a bit more creative than that? It’s easy, and fast and fun to remake a meal into something equally wonderful yet completely different, so let’s Garde Manger this Memorial Day feast!

M and I love Tex Mex, and we live in the heart of that country. It inflects our cooking more often than any other style, not because it’s local, but because we love it that much. As such, we decided to let these wonderful leftovers find a new voice as beautiful, fresh tacos.

First, we prepped our steak to become taco meat and it couldn’t be a simpler process. I cut the meat down into bite sized pieces. Note that the steak is fairly rare, which is how we like it when we grilled it. I’ll cook accordingly to assure a nice medium-well condition when reheated, which gets the food quickly to a ready-to-eat internal temperature of 165º F.  In this case, I braised the beef in a nice bottle of Shiner Bock, with no other seasoning added.  That nice rub we cooked into the steak will incorporate with the simmering beer to make a wonderful complex taste!

Meanwhile, M does up some fresh veggies for taco garnish; nice crips lettuce, cilantro, jalapenos, tomato and a 50%-50% mix of radish and sweet onion fits the bill just so.

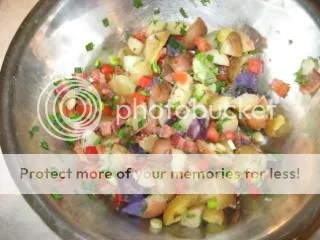
Now, let’s address that wonderful sweet corn. Here’s another food that will go bad pretty quickly and, more to the point, I’d bet 90% of it gets thrown out after the Big Meal. Thanks be that sweet corn makes some of the finest salsa there is! We went with a nice sweet corn pico de gallo here, simply cutting the corn from the cobs and adding that to diced onion, cilantro, tomato and jalapeno, with fresh citrus juice and a dash of salt and pepper. The taste is out of this world and the corn adds a great textural pop as well.

We topped all this great stuff of with warm, fresh flour tortillas, light and tasty!

And there ya go! Maybe 20 minutes work in the kitchen, and you’ve taken a traditional grilled meal and twisted it 180 degrees into something unique and incredibly tasty. More to the point, being creative with leftovers means you got your money’s worth and then some!

A final note/reminder on safe leftover use. With every meal, you need to keep food out of the temperate danger zone. Cold means under 40º F and hot means over 140º F, period! Under or over those temperature constraints means you’re safe. In the middle for any significant length of time just plain ain’t good. Reheating hot stuff means an internal temperature of 165º F, which will kill the vast majority of nasties we don’t want to consume. Proper handling also means getting foods up or down to safe temperature ranges quickly. If you’ve made soup, and have some left over you’re gonna cool, you want it below 40º F fast, as in a matter of minutes, no more. Use an ice bath to cool quickly and a reliable thermometer to confirm you’re there!

Always keep in mind what you have to work with, and plan your preparations based on avoiding spoilage. Proteins often go bad first, so use them first. If you’re cooking with leftovers the next day, freshness shouldn’t be a problem, assuming you’ve stored things properly. If you’ve made a wonderful dish, side, etc that will store well as is, then properly contain it, freeze it and use it as you see fit. Keeping freshness in mind at all times will help you create great dishes and keep everyone safe as well.

Strawberry Rhubarb Pie


My absolute favorite pie of all time is Strawberry-Rhubarb, (Followed closely by Cherry). The sweet of fresh berries combined with their tart side, and the wonderful tang of Rhubarb is truly hard to beat. Here’s a an easy to make recipe for the whole shebang!

The root of any great pie of course is the crust, so let’s chat about that for a sec. Probably safe to say that the number one sin committed in the name of bad pie crust is excessive handling. Pie crust will end up flaky and light if you use the right ratio of ingredients and handle it as little as possible.  When the ingredients are just mixed and holding together is the time to stop and let it rest!

The Kitchenaid crust recipe is my go-to, so here it is. If you don’t have a mixer, no problem. Use your fingers or two butter knives to cut and mix ingredients and, as with the mixer version, stop playing with the crust as soon as it holds together.

Crust

2 ¼ cups all purpose flour

¾ cup shortening, chilled

2 teaspoons butter, chilled

4 – 6 tablespoons of very cold water

Sift flour and pour into mixing bowl. Cut shortening and butter into roughly ½” cubes and add to flour. Using the flat beater, mix on low speed for about 30 seconds until shortening chunks are roughly pea sized. Slowly add water a tablespoon at a time until and only until the dough forms a ball. Stop mixing, wrap dough in plastic and refrigerate for at least 15 minutes. Roll dough out to roughly 1/8” thickness and place into pie pan.  For moist filing pies, blind bake the crust prior to filling. To blind bake, put crust in a preheated 425º F oven for 6 to 8 minutes until it browns lightly. Allow crust to cool completely before ya fill it!

Filling

1 1/2 cups granulated white sugar.

3 tablespoons tapioca.

1 teaspoon ground nutmeg.

4-6 stalks fresh rhubarb, rinsed, end cut off and chopped to roughly 1” pieces.

1 ½ cups fresh strawberries, rinsed, tops cut off and halved.

2 tablespoons butter, well chilled

Dash of salt.

Combine all ingredients except the butter in a non-reactive bowl. Mix gently until fruit is thoroughly and evenly coated with other ingredients. Pour filling into cool, blind baked crust.

Top crust method is up to you!  You can do woven, solid, whatever you please. If you do a solid tip crust, cut several slits a couple inches long in the top crust to avoid Exploding Pie Disorder!

Bake in a preheated 425º F oven for 15 minutes. Reduce heat to 350º F and continue baking for 20 minutes. Remove pie and place on a cooling rack. Allow to cool thoroughly before serving, (To avoid Sloppy Pie Syndrome!)

Vanilla ice cream with a nice, fresh mint leaf on top of your first slice does nothing wrong at all, (Especially of the ice cream is freshly homemade…)

Cheers!

Party at our place, for HOW MANY?!


If y’all are anything like me, you like a party now and then, but once push comes to shove, you’re probably more jazzed about a party at somebody else’s house, right?

Imagine then, my trepidation when M announced that we were going to host a surprise birthday party for her pal Deb and that roughly 30 folks would attend… Oh, and of course, we’d be cooking! So we got to work and made plans and a menu.

Needless to say, ya don’t celebrate the Big Six Oh without proper fanfare. I did the shopping while M put the final touches on the yard…

We went with pulled pork sandwiches, roasted chicken with a southwest flair, an incredible wild rice salad, coleslaw, killer shrimp hors d’oeuvers, (AKA horse doovers), and called it good.

The pork got a rub of black pepper, brown sugar, cumin, sea salt, garlic, onion and powdered hickory smoke powder, (From Butcher and Packer, just smoke essence mixed with dextrose – Amazing stuff!) It went low and slow, (275 F), for most of the day and came out, well, real good let’s just say!

The chickens were done up with a green chile and herb rub, (Dried Hatch chile powder, dried orange and lemon peel, Mexican oregano, sea salt and pepper), and stuffed with oranges, onion, cilantro, and olive oil.

M did the wild rice salad – Minnesota wild rice, dried cranberries, apples, red onion, toasted pine nuts, red bell pepper, and a white balsamic vinaigrette – It was incredible!

Coleslaw was green cabbage with shaved carrot, garlic chive and cilantro from the garden, and our semi-homemade dressing, (Mayo, sugar, apple cider vinegar, creamed horseradish, celery seed, salt and Pepper.)

Then there were M’s bacon and pineapple wrapped shrimp with a citrus chile glaze…

M outdid her self in the house and yard, I must say…

We had plenty of libations, both leaded and un…

And check it out; the cake mirrored the invites!

The guest of honor was completely surprised and everyone had a great time, us included!

House Made


The theme of today’s Big Wild show was Walleye recipes; I don’t have any fish around, (Wish I did, because after talking about it, I’m hungry.)  Here are the two variations we covered, plus some semi-homemade sauces to make things really cool:  While these are basic recipes you’ve probably had before, I’d bet a lot of y’all haven’t made your own sauces for these variations; once you do, you’ll never go back to store bought!  Note also that these would work great with a bunch of fish; cod, snapper, tilapia…

Beer Battered Walleye

Cut Walleye fillets into appropriate size for frying, 3” to 5” long by 1.5” wide or so would be just fine.

Heat peanut oil to 375º F in a deep fryer or deep pan.  Prepare batter;

House Made Beer Batter

1 12 oz. bottle of beer, (Anything decent, but please, no light!)

2 cups all purpose flour, sifted.

¼ teaspoon salt

¼ teaspoon pepper

Option:  Shake or two of ground chile

½ cup Flour for dredging

Douse fish in batter, then quickly dredge them through flour. Tap off any extra flour and, with a slotted spoon, carefully lower fish into hot oil.  Make sure your oil stays at or slightly above 375º F to keep fish from getting greasy.  When fillets are golden brown, (About 4 to 5 minutes), remove and place on paper towel to cool.

Serve with House Made Tartar Sauce, (See below) and;

South by Southwest Cole Slaw

A nice, basic coleslaw with a little edge to it…

For the Dressing:

1 cup real mayonnaise

¼ cup granulated sugar

1 tablespoon apple cider vinegar

½ to 1 tablespoon creamed horseradish

¼ teaspoon celery seed

Salt and Pepper to taste

Mix all ingredients in a non-reactive bowl; take your time and pay attention to the sugar, you want it to dissolve and blend in completely; until the gritty appearance and mouth feel is gone, keep blending!  Allow to chill, covered, for at least 30 minutes

For the Slaw

4 cups cabbage, red, green or both, finely shredded.

¼ sweet onion, shredded

¼ cup cilantro, shredded

1 Teaspoon mild chile powder, (Green or red as you prefer)

Mix all ingredients in a non-reactive bowl.  Add dressing and toss to coat thoroughly.  Refrigerate and allow to blend for at least 15 minutes.  Serve cold

House Made Tartar Sauce

Making your own basic sauces like this is a real treat!

1 Cup real mayonnaise, (Unless you must, no reduced fat or fat free!)

1 Tablespoon Pickle Relish, (I like sweet relish; use what you prefer)

1 Tablespoon fine minced shallot (or sweet onion)

Juice from ½ to 1 fresh lemon

Salt & Pepper to taste

Optional:  Shake of ground chile powder (I like Tabasco)

In a non-reactive bowl, throw in the mayo, relish, and shallot or onion; mix all these together well.

Begin with ½ lemon and slowly squeeze in the juice, (Remember, no seeds!), and make several taste tests for the level of tartness you like; use more or less lemon as you prefer.

Add a shake of salt and/or pepper as you prefer; do this sparingly and taste test after allowing seasoning to blend and sit for 30 seconds or so.

You can add a very light shake of chile pepper on top of the salt and pepper or in place of the pepper, as you see fit – I like all three!  Note:  I am referring to dried and powder chile, not to chili powder; there’s a big difference and chili powder would confuse this sauce!

Cover the bowl with a paper towel or plastic wrap and refrigerate the sauce for at least 30 minutes, (An hour is better), serve cold with additional lemon wedges and a dusting of finely diced parsley for your fish.

Lemon Dill Walleye

Here’s a non-fried style that will let the delicate flavor and feel of Walleye really shine,

Place Walleye fillets on a sheet of aluminum foil.

Blend;

1 stick of butter, room temperature

Juice from ½ to 1 lemons

1 teaspoon finely minced dill, (Dried OK if that’s what you’ve got!)

¼ teaspoon onion powder

¼ teaspoon celery seed

few shakes of Salt & Pepper

In a non-reactive bowl, cream butter and then add all other ingredients and mix thoroughly.  Coat both sides of each filet by hand with the mixture.  Seal fillets in aluminum foil and grill (Outside, on your grill!), for about 15 to 20 minutes; open the packet and test the fish, (Careful of steam!); remove when cooked through and allow to cool for 5 minutes prior to serving.

Burger Heaven


Are there burgers in Heaven? Well, if not, then we got a problem…

What American comfort food is rootsier than Da Boigah? After a particularly grueling week at the café, and for quite literally the first night I’d be able to cook for in something like a week, I ad killer burgers on the brain. In case you haven’t figured it out yet, my absolute Job #1 reason for cooking is to make great things that Monica loves: There are lots of reasons to cook; love is the best one there is, hands down, end of story… (And M knows and loves a good burger!)

Now, as soon as I knew that’s where I was goin’ for dinner, I started thinking sides; naturally, my first inclination was to pull out the deep fryer and go for classic, twice-fried frites, but… Well, we are getting older and we do have to nod to the 21st Century and maybe at least try to be a bit healthier than that, right? That said, spuds not being part of the side was not an option, so I decided to go with a nice, fresh spud salad; we’ll do this one with olive oil, fresh citrus and vinegar, so we’ve got a lighter take on potato salad we’ll amp up with some fresh herbs. Ready? Let’s rock!

If you’ve ever had a truly amazing burger at a local joint, I’ll bet you 10 to 1 that they either grind their own beef, or have their regular supplier do that for them: Custom ground and seasoned burger, done fresh, is what separates Holy Crud from Ho Hum in Burgerland.

So off I went to the market, where I found nice chuck steaks for $4 a pound, (They were marked ‘For marinating’); that’ll be the heart and soul of our burgers. The relatively high fat content coupled with nice big chunks of meat is gonna be great, but it does need a little help to put it over the top; I went with aged, Choice Tenderloin, which I found for $9 and change a pound, which ain’t bad, (And we’re only buying a half pound so…). I ended up with a mix of roughly 2:1 Chuck to Tenderloin.

I found fresh baked onion rolls for buns, and more of that really nice medley of red, white, and blue potatoes we had a little while back; they’re not only pretty, they’re real tasty; I can quickly become a creature of habit when I find something really good out there…

A quick note on shopping and hunting; our closest market happens to be an Albertsons; don’t discount a chain store just because it’s a chain store. This one, and many like it, are more often than not staffed by professionals with years of experience; yes, their bakery mostly does stuff I don’t want, but there’re real bakers back there, believe me; the quality and variety of fresh bread and rolls they put out daily is really quite good; you may need to dig around a bit to find something great, but often enough, you will. Likewise, their meat department may not be as good as some of the artisan solo outfits and Carnicerias we enjoy here, but they usually have good stuff and those folks behind the counter are real butchers; they love to have you ask for something special, believe me! We can’t go for the high end every day, and nor should we; find what’s good, close at hand and go with it.

OK, so once we get home, I stuck the beef into the freezer for a little bit. Any time you’re grinding meat, making sausage, etc, you want your protein as cold as you can get it; this will help keep the fat and meat in a proper matrix while you work with it, thereby avoiding mushy, unpleasant results; more importantly, cold keeps your food out of the temperature danger zone, thereby avoiding making you and your loved ones sick; always a plus, that, eh?

I set up the grinder attachment on the ol’ KitchenAid, cut the beef up into strips manageable for the hopper and got to seasoning. As with sausage making, you can season ground meat before or after you grind it, of course; I prefer doing so before, because you get a more even distribution of spice as the meat is grinding. For these burgers, I went with Hawaiian flaked salt, fresh ground pepper blend, (Black, red, white, green; our go-to mix), onion powder, celery seed, granulated garlic, smoked paprika, and a dash of Worcestershire. I seasoned with a fairly light hand, because we just want to accent the meat’s great flavor, not blow it out of the water… So into the grinder she goes, using the coarser of the two plates I have available. I gave the freshly ground burger a few tosses to make sure everything was well blended, then covered it and stuck it in the fridge to think about things for a while.

While the burger was incorporating all those flavors, I put the spuds on to boil. Just a note on water; it’s sad to say that not all tap water is created equally these days, (Especially coming from a kid who grew up drinking from streams and lakes and even garden hoses!) My bottom line on cooking with stuff is simple; if it does not look, taste, feel and smell right, do not cook with it! The concept of taking, say, a nasty bottle of wine and cooking with it because it wasn’t good enough to drink: Negative, Ghost Rider; that’s a no-no! Same goes for a thing as elemental as water. If yours doesn’t taste good to drink, do what we did and get a decent filter for your kitchen tap; from home brewed coffee to things you boil for dinner, everything will taste better; you can thank me later…

A trip out to the herb garden found Garlic Chives and Cilantro looking very nice indeed, so I took some of those, then added fine diced green onion, red bell pepper, and fresh tomato: All that, plus a few pieces of great Apple smoked bacon, will go into our spud salad.

For the salad dressing, I squeezed the juice from one lime and one lemon, and then added a couple tablespoons of grapefruit juice; I whisked some nice extra virgin olive oil into that at a roughly 2:1 ratio, added a dash of sal de mere, fresh ground pepper, and celery seed, and there you have it. I quartered the spuds, put everything into a stainless bowl to mix and then into a ceramic bowl, covered in the fridge, for a good hour to allow everything to blend: As M rightly points out, stuff like this salad are gonna be great tonight but much better tomorrow; like good soup or stew, salads marrying a bunch of wonderful flavors are gonna be at their prime round about 24 hours later…

OK, back to the burgers and the fun part. I formed four thin, wide patties, then cut up some of my stash of 2 year old WSU Creamery White Gold Cheddar and placed a nice layer of that in the middle of one patty. Then we assemble; a layer of burger, then cheese, then burger, seal and plump up the edges of each so we have a nice round patty of uniform thickness throughout. I let them hang in the fridge for 30 minutes or so to marry flavors further.

And that’s that; the burgers hit the grill over nicely glowing coals for about 4 minutes each side, with the cover on and vents wide open. I put the buns in a warm oven with a little dish of water to get nice, moist heat going. Finally, I sliced onion, tomato and pulled some lettuce leaves. M got condiments out and we were good to go.

At the point that she turned to me, burger in hand, with that serious knit-brow look and said, “This is, without a doubt, the best burger you’ve ever made; seriously…” I considered my mission a success…

Where’s The Beef?


Right here, A. R.!

My friend Adam Rafferty, guitarist/composer/performer extraordinaire, responded thusly to our last recipe entry:  “Where’s the beef?”  Of course, he’s right, so Buddy, this one’s for YOU!

Got a new Baby Weber table top grill unit; I had one of these years ago and loved it; I’d bet there are still some Ski Patrollers at Mount Baker who recall hot lunches in the summit shack with great fondness, as I do, (Yes, I hauled it to the top, with charcoal and lunch fixin’s, on the chairlift, in a backback…)  What better time to do up a nice beef offering?

If you’re gonna grill, then nice steaks aughta be on the top of the ‘What to make’ list, so that’s where I went.  Got some nice, thick, local T bones and away we go!  I paired those with a roasted vegetable medley and a romaine wedge salad; the counterpoint of cold, crisp lettuce with hot, roasted veggies and tender beef was simply amazing, just like it should be.

I prepared a fresh rub for the steaks; I wanted smoky as my main note, so the following went into a spice grinder:  You’ll note some granulated and powdered ingredients here; I know I always tout fresh, but for rubs, dried/powered/granulated is preferred.

The Rub

1 tablespoon Black/Red/White/Green Pepper corn medley

1 teaspoon whole coriander

½ teaspoon each Alder smoked salt and kosher salt

½ teaspoon granulated garlic

1 teaspoon smoked paprika

¼ teaspoon onion powder

¼ teaspoon celery seed

½ teaspoon hickory smoke powder 

All that got a quick shot in the ol’ spice grinder; the steaks got a jot of good olive oil, and then I liberally rubbed all exposed sides of the steak.  Once they’re well coated, they go to the fridge to get acquainted with their new skins for a half hour or so.

For the veggy medley, I used the following:

Red, white, and blue baby potatoes, left whole

½ sweet onion, rough chopped

½ sweet red bell pepper, rough chopped

Handful of cherry tomatoes

Juice from one lemon and one lime

Liberal sprinkling of olive oil

Sprig of fresh Cilantro

Couple sprigs of fresh Thyme

Salt & Pepper

Since my new grill is itty-bitty, the veggies went into a baking dish, in a 375 oven until fork tender, (About 30 minutes).  Note that the veggies were cut to be roughly the same size to aid in everything cooking fairly evenly.

For the salad:

Heart of Romaine, trimmed and sliced in half

3 green onions, trimmed and outer layer peeled

Handful of cherry tomatoes

sprinkling of grated 2 year old WSU Cheddar

For the dressing:

3 Parts good Olive Oil

1 part White Balsamic Vinegar

Salt & Pepper to taste

1 shake of dried Tabasco chile

The steaks go on the grill with my age-old proper cooking method; 1 classic rock and roll song per side, (No In a Gadda Da Vida, drum solos or extended dance versions!). 

Pull ‘em off the grill and let them rest inside for about 5 minutes before slicing for serving – They were, FYI, perfect; no need for any other seasoning whatsoever, just as it should be.

Plate it all up and there you go, couldn’t be easier; simple, good food, prepared and cooked well; everything sings very sweetly together!

So A. R.?  There’s the beef, Brotha!