Sensible Salmon Leftovers


Last time around, M and I did our Seattle re-immersion dinner with some killer local salmon.

We bough the whole fish, got it filleted, and froze half, but even after seriously porking out, we had a pretty good hunk of leftovers, so what to do?

Cold salmon with lemon? Salmon salad? Salmon and scrambled eggs? All winners, but after looking over our fish, we thought it was a bit dry; the skinny end was left, strangely enough, and with a new stove we aren’t used to, we’d hit it a bit hard. That helped lean our recipe decision toward something moist and rich. here’s our variation on a classic Alfredo

Salmon Alfredo

3 Cups whole Milk
2 Tablespoons Unsalted Butter
2 Tablespoons AP Flour
1 1/2 cups flaked salmon
1 Cup diced vine ripe Tomato
1/2 Cup fresh grated Parmigiano Reggiano
Juice of 1 small Lemon
1/2 teaspoon Lemon Thyme
Sal de Mer & Grains of Paradise to taste

Melt butter in a 4 qt sauce pan over medium heat, and allow to brown slightly.

Add flour and blend thoroughly, allowing to heat through until it starts to bubble.

Slowly add milk, taking care to maintain blend; in other words, don’t break the roux. Heating a mixture of flour and butter takes advantage of the elastic nature of the bonds created therein, and is truly the heart of a good roux. Done classically, you heat, stir and add with painful slowness, and truth be told, that’s what it takes to create and hold the fantastic variations made from this simplest of combinations. When done right for home work, the flour-butter mix will look and feel like a batter, and as you slowly add the milk, it starts to look like mashed potatoes, or maybe thick custard. Add a little milk, let the mix heat through, add a little more, and with care and patience, you’ll have a lovely cream sauce.

Once the basic sauce is done and heated through, it’s time to add your goodies. Note that for the cheese, M went with the grated Parm and some rind too, since it’s a fave of ours. Cheese is added first and allowed to melt through.

Now throw in the salmon and tomato, and finally the seasonings, and adjust to taste.

Turn the sauce down to low and allow it to blend for a bit while you prep the pasta. We went with locally made, dried fusilli, since it has nice surface area and little grooves in the outside surface that are really great at holding sauce. Boil well salted water, add a bit of olive oil and throw in your pasta. When it’s on the chewy side of al dente, pull it off the heat and drain, but don’t rinse. Throw hot pasta into a bowl along with a tablespoon or two of the pasta water, then add your sauce and toss.

We served ours with a nice little salad of local greens and sourdough toast points, and you can too!

Be True To Yer Stew


It’s a heinous but true story that when we first got together, Monica pretended she couldn’t cook. She claims, (Then and now), that coming upon a man who loved to cook and did so “Better than I ever could,” (Total BS, BTW), led to her fib. She got away with it for the better part of a year, the little rat…

One of the many things she does far better than I do is genuine stew, the real article, the full meal deal. That said, I wish to formally protest her statement that what I make is “Real good soup;” it’s stew dangit, just made kinda differently than hers!

Hmmmph…

Anyway, since last week we cleaned out the freezer, I promised that I’d share her killer stew recipe, so here it is.

She made this with beef that needed to be used, but as mentioned on The Big Wild the other day, this makes a great Game Bag Stew – Use venison, pork pheasant, goose, duck, whatever ya got, or a combination thereof – Yes it does work, so try it, whenever you want people to eat it and then give you that look and make helpless yummy noises until they get up for seconds. Equal portions of the proteins are fine, or place heavier emphasis on one or two if that’s what you got and that’s what you like.

M’s True Stew
This is a gorgeous peasant stew, rich and flavorful!

Cube up your proteins to reasonable bite size pieces

Mix 1/2 cup flour, a teaspoon of salt, 1/2 teaspoon pepper and a shake of cayenne in a zip lock bag. Dump in your flesh and shake thoroughly to coat. Heat a nice big pan to medium high with 2 tablespoons of vegetable oil until almost smoking hot, then toss in your flesh and brown thoroughly.

NOTE: Real observant readers will have noted that M used Grains of Paradise; also known as melegueta pepper, alligator pepper, Guinea grains or Guinea pepper, this pungent spice is to regular pepper as table salt is to Sal de Mer, so check it out…

Remove your flesh, place it in a skillet and into a 225º F oven. Allow the meat to cook low and slow for at least 2 hours. When fork tender, remove from the heat and set aside. Put 1 teaspoon of salt, 1/2 teaspoon pepper, a shake of cayenne and a shot of oil into a bag and throw in your spuds. Shake until thoroughly coated and throw them into the oven next to the meat for 45 minutes.

Returning to your nice big pot, turn the heat back up to medium high and once heated, deglaze with 1 cup of red wine.

Turn heat down to low, scrape all the naughty bits together with the wine, and simmer until reduced by half.

While that’s working, clean and size as desired pearl onions, carrots, green beans, celery, green cabbage, parsley and one nice fat orange.

Transfer your wine and nasty bits reduction to a stock pot and add 2 cups of stock, (Really up to you; we use dark chicken stock the most, but beef, veggie or chicken is fine too!) and two cups of water, and bring up to just below a rolling boil. Throw everybody into the pool, reduce the heat to a simmer and let it work its magic for at least 4 hours and longer as you can stand.

We added this killer cheesy cornbread to our feast.

1 1/2 Cups White Corn Meal
1/2 Cup All purpose flour
1 Cup Whole Milk
1 Egg
4 Tablespoons Shortening
Pinch of Salt
1/2 Cup grated Sharp Cheddar Cheese

Pour cornmeal into a bowl and add the milk; mix well and allow to sit for 15 minutes.

Mix remaining dry ingredients, (Including the cheese), in a large bowl.

Melt shortening, then combine all ingredients and mix by hand to a nice, even batter consistency.

Place the pan(s) you’ll do the bread in into a 400 oven, with a small dot of shortening in each pan, or tablespoon full if using a single pan. When the shortening is melted and sizzling, remove the pan , pour in the batter and return to the oven.

Bake at 450 for 20 to 25 minutes, or until golden brown. Serve hot!

Enjoy!

E & M

Defrosting the Fridge, or deciding on a Snack?


Yet another chapter in the Great Book of Use Your Leftovers! I’ve said it before and I’ll say it again; you can and should do something fun with leftover grits, so just do it!

Confession time; when I made that steak din din the other day, I had this leftover feast in mind. Many moons ago, I stayed a few nights at The Edgewater in Seattle; their breakfast menu included an incredible prime rib hash, and I’ve been chasing it ever since.

You might have noticed, I like simple things; great ingredients, well prepped and cooked, and that’s that. I took the veg medley from the other night, cubed up some of that incredible T bone and threw it all into a sauté pan and let ‘er rip; no additional anything needed.

Three eggs over medium, fresh sourdough toast, a little more of the precious WSU Cheddar, and a shot or two of Frank’s.

Total prep and cooking time, maybe 15 minutes; I took longer than that to savor every bite. Life is very, very good…

P.S. Don’t forget da bonz! I saved these for Bandito, although they’re dang near as long as he is…

Leftovers III – The Final Frontier


So, we did wild rice and chicken and a wonderful meal, then we had more chicken in a nice salad for the first leftover flight, and that was killer too, but…

Open the hangar door and what do we find on day 3? Still more leftovers! OK, there are two viable schools of thought here:
1. Make less food, dummy, and
2. USE what you make when you make a lot!

Of the two options, I like to use what we make; maybe it’s the restaurant roots, maybe it’s just ojos grandes, but either way, we CAN make a concerted effort to not waste food and still enjoy fresh ideas each and every night.

Here’s a for instance for y’all: We love comfort food, (Obviously), and fairly often, this takes the form of casseroles. In so doing, we discovered that if we make a cream-based sauce concoction, (Our faves are the venerable macaroni and cheese, and tuna-noodle, which we will cover here shortly!), we tend to eat it all up within a day or so: On the other hand, when our invention is tomato based, although they’re really yummy, we don’t tend to eat those so quickly, which can lead invariably to waste. The solution? We make the same big initial batch, but instead of putting everything in one casserole dish, we use ramekins, and freeze about half for later dining pleasure. Simple you say? Sure is; so why did it take us years to figure that out? (Don’t answer, that was a rhetorical question…)

Anyway, here are standing before the open fridge, and what we have left is wild rice. So what to do that’s fun and yummy and new?

Soufflé, of course!

I LOVE eggs, not the least because they’re so versatile. Using eggs as a light, fluffy component to bind and enrich other great stuff, (Read wild rice and great cheese in this case), is just a wonderful thing indeed. It looks tough, but it’s not really, and it’s always a joy to pull out of the oven!

Cheese Rice Souffle

The basics of soufflé cooking are really quite simple – Again, it may look fancy and difficult, but it ain’t – Dive in and have some fun!

4 eggs
1 cup milk
3 tbsp flour
3 tbsp butter
1 1/2 cups cheese

Couple of key things for y’all – First and foremost, pull all your ingredients an hour or so before you start to cook; you want this stuff at room temp. Secondly, don’t dilly dally while you’re doing this – Because we’re going to beat egg whites with a lot of air, which is critical to the pretty appearance we’re after, you need to keep things moving along – Not frantic, just steady as she goes!

Preheat your oven to 350° F.

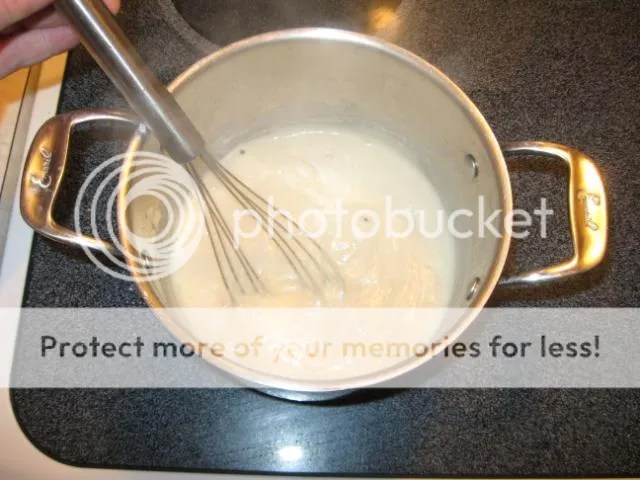
OK, you’re going to do a slightly heavier version of a classic white sauce, AKA béchamel, if you want to get all continental about it.) So we start with a roux, which is nothing more than fat and flour in equal measure: Your butter goes into a sauce pan until it’s melted over medium-low heat. Add your flour and whisk the two together into a paste. Now it’s time to decide whether you like your roux dark or light; if it’s light, (Less of a browned butter taste, naturally), we’ll move right into adding milk. If you prefer things a bit darker, as we do, then allow that butter and flour mixture to gain a little color first. Add your milk VERY slowly, so that you’re never outpacing the elasticity of the flour/butter mixture. Once it’s nicely whisked together, remove the pan from the heat and set it aside for a few minutes to cool.

Note: Classic béchamel has some seasoning involved, FYI; usually onion, salt and pepper. In this application, we’re gonna forgo further seasoning until we got to building our final soufflé mix.

Separate your eggs and put them into small bowls as follows:
3 egg yokes
4 egg whites

Now, as for cheese, what you use is what floats your boat! We used 2 year old WSU Cougar Grate Gold, and incredible white cheddar produced at the Washington State University Creamery, (Which you can find and buy online just like we do, and if you got any jones for killer cheese, you WILL do that!). Grate your cheese.

Whisk your egg yolks until they’re well blended. Now add cheese and egg yolks to your white sauce and mix them together well.

Question you might just ask at this juncture: “OK, Ace; we’re making a soufflé, and I’ve heard of soufflé dishes – How important is that?
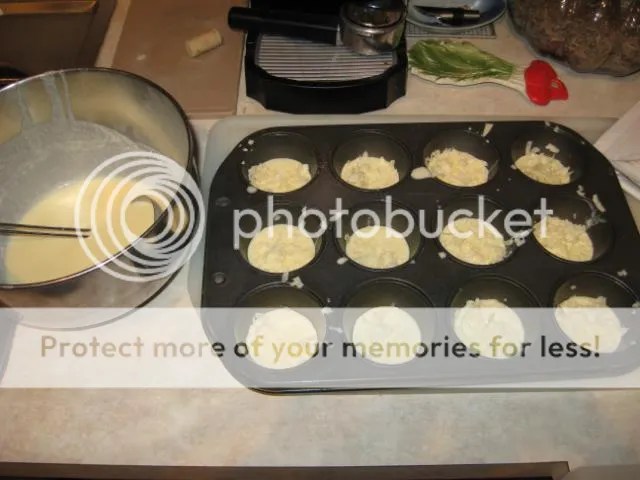
EXCELLENT question! Answer; pretty important! A soufflé dish has straight sides, and believe it or not, the wonderful thing y’all are about to make needs and wants those straight sides to climb up. The good news is, they’re available all over the place and cheap. You can also use straight sided ramekins to make individual soufflés, as we did.

Prep a soufflé dish by lightly buttering the sides and bottom, and then lightly coat that with flour: The butter keeps the little beast from sticking, and the flour gives ‘em something to grab ahold of as they make their way to the top!

Put your egg whites in a non-reactive bowl, (I like glass best), and start beatin’ ‘em. You want to beat your whites stiff, but not dry.

‘Nuther Question Time! “Stiff but not dry? I thought we were making food here?”
Good point – You’ll see a number of instructions down the line for the level of egg yolks to be beaten to; soft peak, stiff, dry among them. Once you do this a few times, it WILL make sense to you! When beating, you’re really just adding air to the egg whites; they have a great affinity for holding air in a matrix. As you incorporate more and more air, the volume of the whites increases and the consistency goes from a definite liquid to more of something that starts to look solid to you. At the low end of this semi-solid phase, if you take a beater or whisk and flip a little pit of the mixture straight up, it’ll kind of hold a little peak, like a soft serve ice cream cone, kinda – That’s a soft peak. Beat a bit more and the mix will start to look almost rigid; do the flip again and your little peak will stand pretty much straight up – That’s a stiff peak. Beat it more and you’ll notice that the mix doesn’t glisten as much, and starts to look kinda like Styrofoam; that’s dry – Get the picture? Good; onward!

OK, now your whites are to the stiff peak phase. Poke a finger into your wet mix, (The sauce, egg and cheese stuff), and make sure it’s not hot to the touch; we want to mix, not cook at this phase, OK?

Gently scoop your egg whites into the wet mix and, using a spatula, GENTLY fold the white thoroughly into the mix. Remember, we spent a bunch of time and effort getting all that air in there, so don’t let it out – Slow and easy on the folding!

Pour your soufflé mix into your prepared pan or ramekins. Slide ‘em gently into a middle rack in the oven and bake at 350° F for 20 to 30 minutes. They should rise to and over top of your dishes and look amazing when you open that oven; that said, remember what happened to our popovers? It happens. To everyone. Some time. DON’T worry if they’re not picture perfect, ‘cause they’re gonna be perfectly delicious and there’s always next time!

Enjoy!

Round II – USE Those Leftovers!


Well, as often happens with great food, you find you’re cookin’ hungry and maybe, just maybe, find your ojos were bigger than your estómago and you end up making a lot more than one meal’s worth of grub!

What to do? Well, there’s always snacking ‘till it’s gone, but come on, gang, let’s get organized and do something cool with grits that good, huh? When it comes to stuff like we made the other night, you gotta give it a little pizzazz again, even for the reruns, and most importantly, it’s gotta be easy, ‘cause you already paid your dues with the original prep, right? Right! So, no problema, let’s use the stuff that will go bad first, (Chicken), and make something good and cool to look at for tonight.


Chicken Salad with Cheese Biscuits, (Sort of…)

First and foremost, make it EASY! A nice green salad to start, cut your remaining chicken breast into rounds, and off you go!

We cut a grapefruit into supremés, which sounds hoity toity, but simply means we took a sharp paring knife and cut the beautiful meat away from all the fibrous stuff and skin, leaving perfect bites of very tart, juicy fruit – They look cool and taste even better.

For the dressing, we went with a grapefruit vinaigrette, by substituting freshly squeezed grapefruit juice for vinegar, then whisking that into olive oil at a 2:1 ratio of oil to juice, and adding a dash of salt and pepper.

Biscuits were made by a basic popover recipe, but they did not rise all that well, as you can see… (WHAT? You made something that DIDN’T TURN OUT LIKE YOU THOUGHT IT WOULD? And you not only ATE IT, but SHOWED IT TO US??!) In a word, yup. Fact is, best laid plans of mice and men, yadda yadda; I’ve made thousands of popovers, but sometimes they don’t pop – In this case, the most likely culprit is fat, (AKA the WSU aged cheddar we used in the little buggers); fat and popovers don’t get along all that well, hence the lousy rise. That said, they still taste fantastic and to throw them away would be criminal; that goes for MOST of your future cooking oopses – If it tastes good, eat it, and unless you’re trying to impress somebody really important, serve it – We’re all human, we all make mistakes, and some of those are still delicious, OK?

Popover batter is dang near crepe batter; the diff between the two is steam – That’s what lifts popovers high and leaves crepes flat as a, well… pancake, of course, (Sorry…). We’ll cover popovers thoroughly soon, and make them right to boot, so stay tuned – In this case, they didn’t rise well, so they become… Cheese biscuits, (Ever watch Chopped on the Food Channel? Ever see a pro have something go wrong and change the name of what they were serving as a result?)

This was a delicious, fresh meal; the veggies and tart dressing were a perfect counterpoint to the savory chicken.

Welcome to cooking…