OK, have had a ton of requests for more detail on comfort food faves and mac and cheese as I do it in particular, so here ya go!
If and when we do a restaurant, mac & cheese will be a mainstay, and I’ll guarantee in advance that, while it likely will never be the same twice, it’ll always make you come back for more. Here’s my secret, honed over decades of serious research…
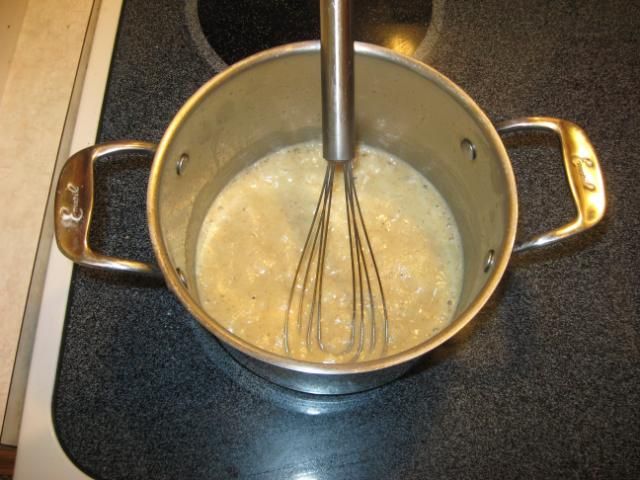
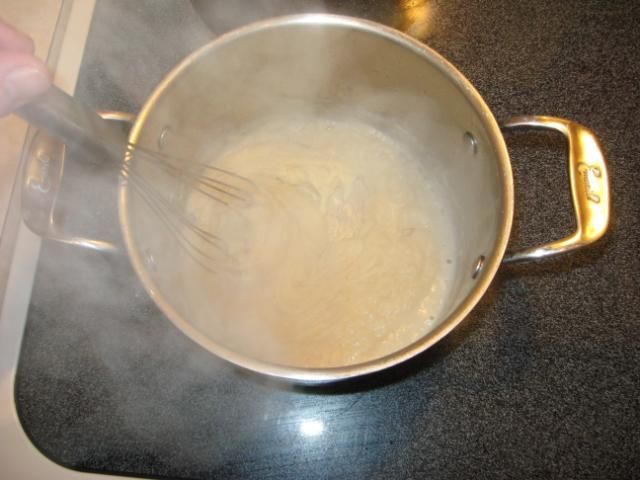
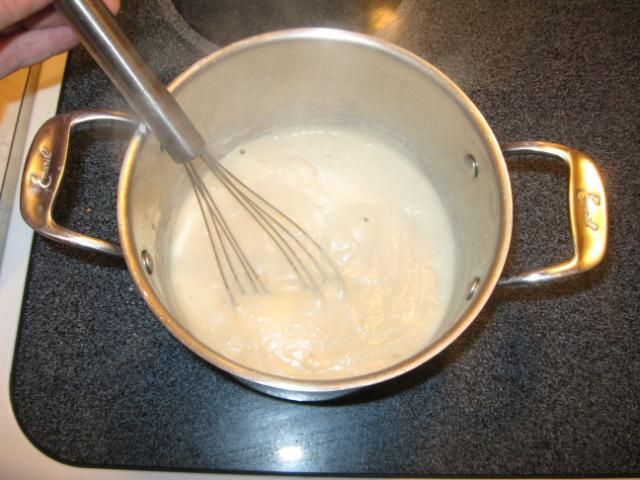
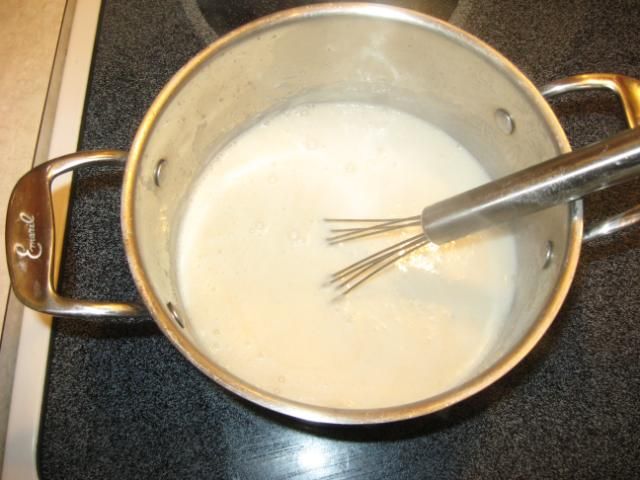
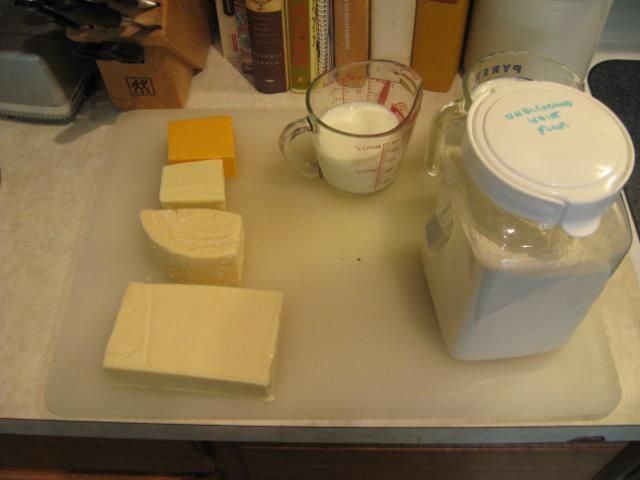
The Roux
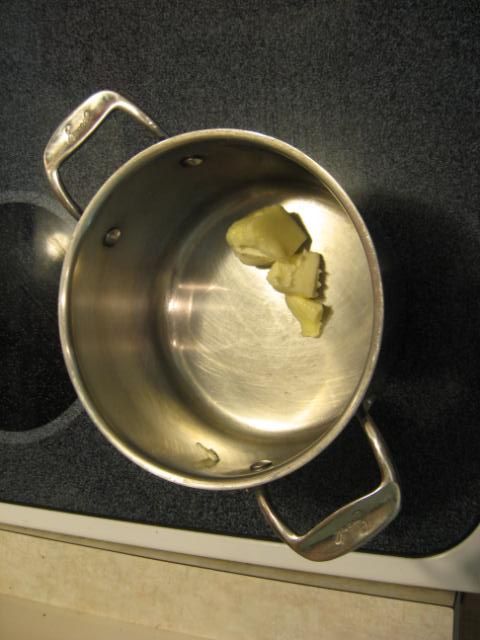
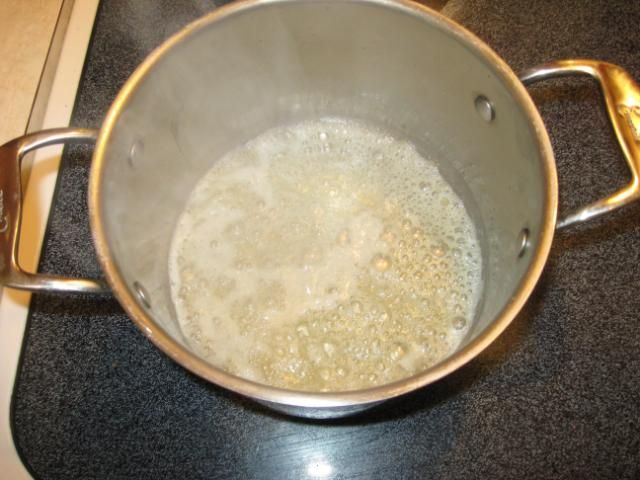
3 Tablespoons unsalted Butter.
3 Tablespoons Flour.
3 cups Milk.
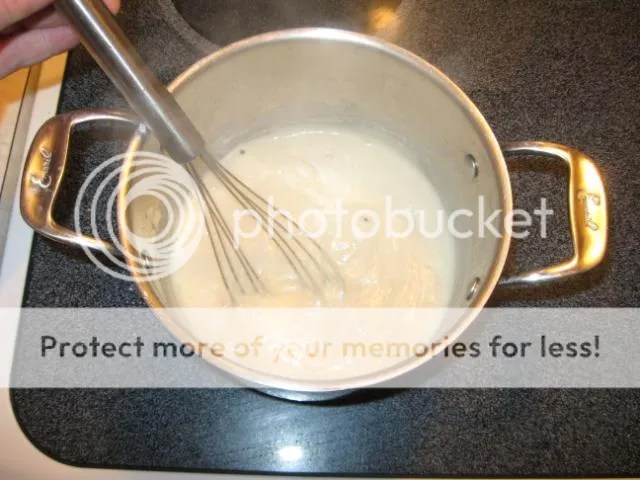
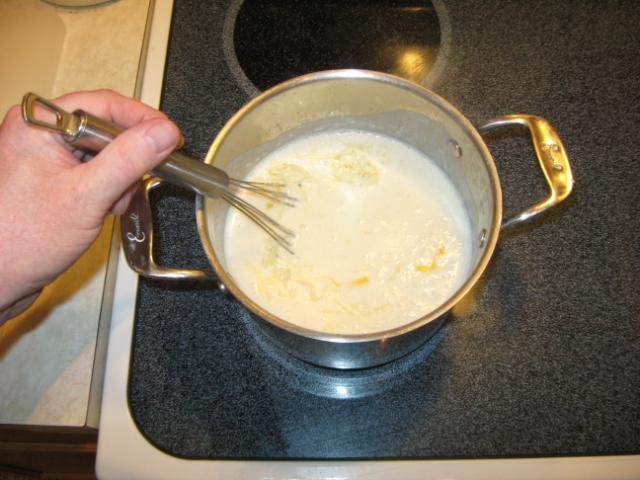
Roux is the key to sauce, as far as I am concerned. I have an idiosyncrasy about roux making that was shown to me many moons ago by a French Chef in a French kitchen, and it was sooo durn good, I’ve done it this way ever since. The bottom line is this; never break the roux. What I mean is this: You’re adding fat and starch, (Well, gluten), to liquid to make the resultant sauce thicker. Therefore, you want the chemistry that adds those qualities maintained. The how-to is simple: As you mix flour with butter, and then add liquid, do it slowly enough that you start with almost a paste, and maintain that stretchy, thick consistency throughout your mixing. Add milk slowly, a little at a time, incorporate, allow it to get back up to heat and repeat until all the liquid is added – In other words, do not mix butter and flour and then just dump in milk – Doing that defetas the purpose of the roux completely, for my mind… The other consideration is the shade of your roux. The beauty of roux to me is the simplicity. When roux is cooking alone, it’s that sweet, bready, rich theme we want to exploit. Personally, I like my roux for stuff like this to be nut brown, the color of done shortbread, before I start adding milk. You do what smells, looks, tastes and feels best to you! Hopefully, this series of pics will illustrate my ramblings adequately…
The Cheese
2 to 3 cups of your choice, shredded.
Here’s where that statement above about my stuff never being quite the same twice comes to fruition. Put simply, I open the fridge and use what’s there and floats my boat at the moment. If you buy and eat good cheese, you quite simply cannot fail in this regard. And frankly, why do the same old thing all the time? variety is the spice of life, so mix it up! If you come upon a really spectacular blend, (And you will), write it down, take pics and do it again, by all means, but first, ya gotta discover!
Tonight, I found a bunch of candidates and decided upon a four cheese blend. I went with Swiss and Jack as dominant notes, (About a cup each), and extra sharp yellow cheddar with 2 year old WSU white Cheddar as minors, and there’s your cheese chord!
Add cheese about a half cup at a time and allow to incorporate and heat thoroughly before ya throw in more.
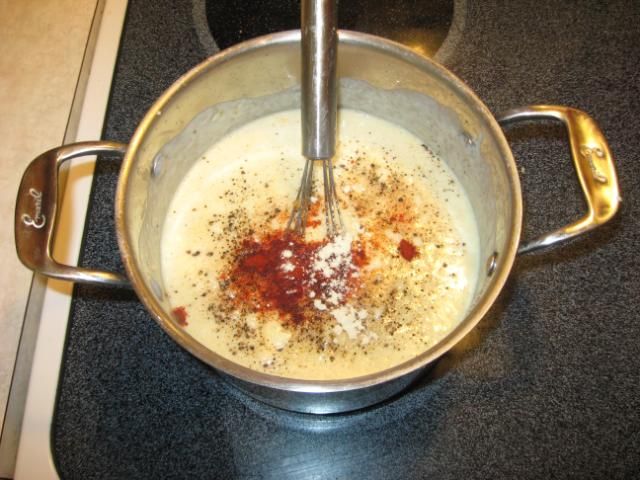
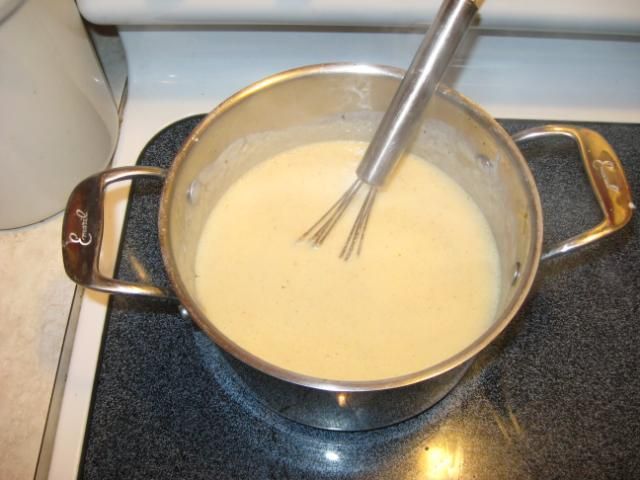
Once that’s all in, it’s seasoning time. Here again, other than salt and pepper, there are no hard and fast rules. Do what smells, looks, feels and tastes right! Tonight, salt, pepper, garlic, onion powder, smoked paprika and a shake of dried Tabasco chile was the stuff. Blend well and then take your sauce off the heat, and start into pasta.
Pasta
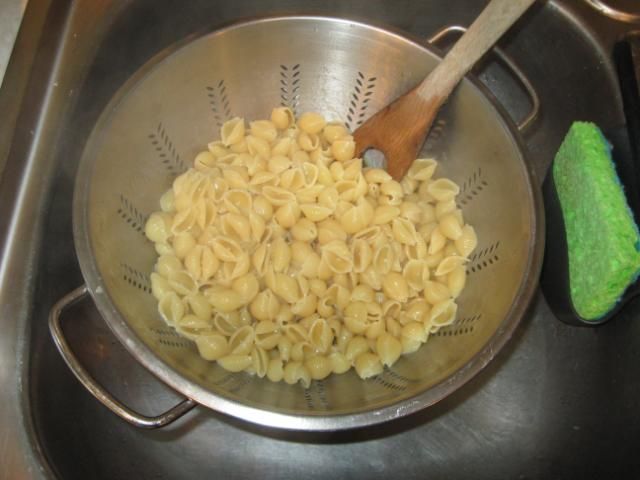
Use roughly 12 ounces of what you like
Yep, that’s it. We don’t use long and skinny stuff, for obvious reasons, but you could if you like it! We like shells a lot because they act like little boats for the sauce, but macaroni, fusilli, rotini, bowtie, radiatori, ruote, whatever floats your boat, throw it in!
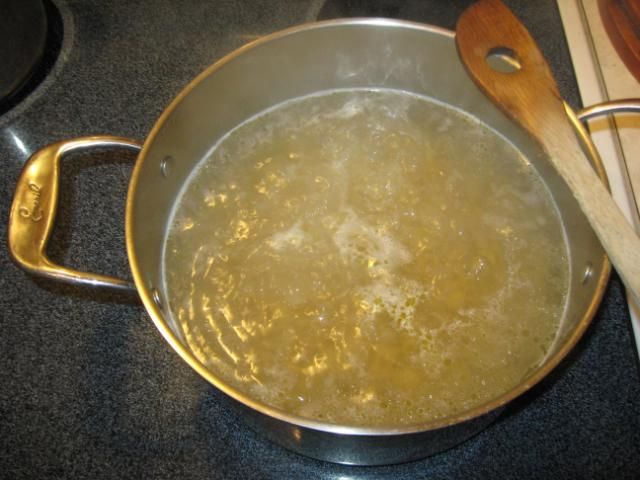
Make sure your water is well salted, (As in about like seawater) and lightly oiled. Boil pasta to firm al dente, then drain and toss to remove al excess water.
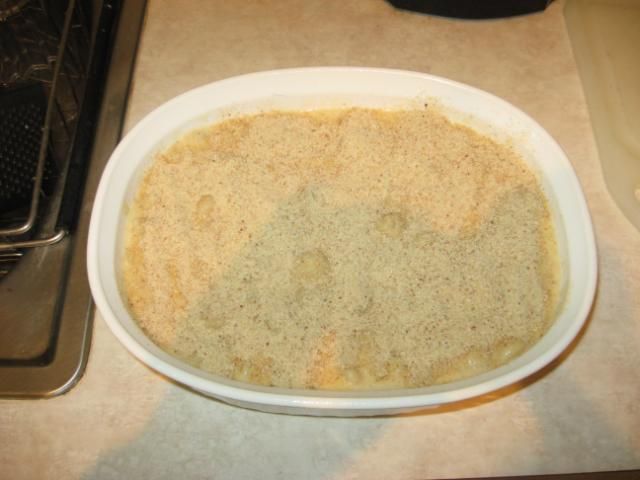
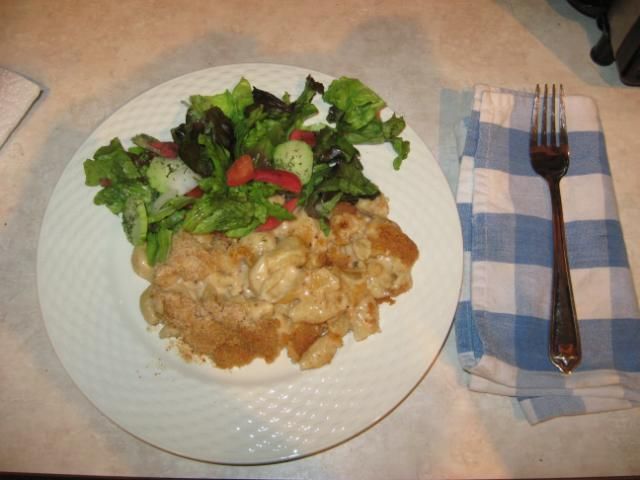
Throw your pasta into a lightly oiled baking dish, add the sauce and mix well. Don’t put so much pasta in there that things will be dry. Mac and cheese needs to be luxurious, decadent, rich and creamy, not dry and pasty! I top with something, again, whatever floats my boat, but I always top. The nice, crunchy crust is a great addition and it helps seal in the casserole too. I’ve used everything from panko bread crumbs to crushed jalapeno potato chips and everything in between; again, it’s about what you have and that feels good!

To bake or not to bake; there ain’t any question…
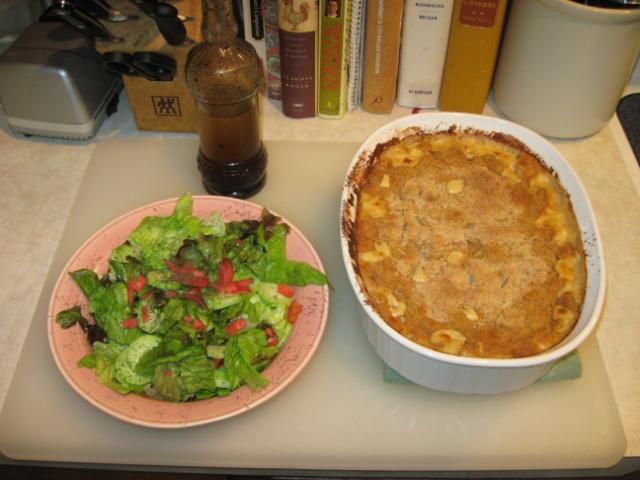
Bake, plain and simple. 350 F for 30 minutes, preheat your oven first, of course. Baking infuses and blends flavors, textures and smells. Do it – Eating something like this without doing so is like taking the middle out of an Oreo, throwing it away and just munching the wafer – Good, but not right…
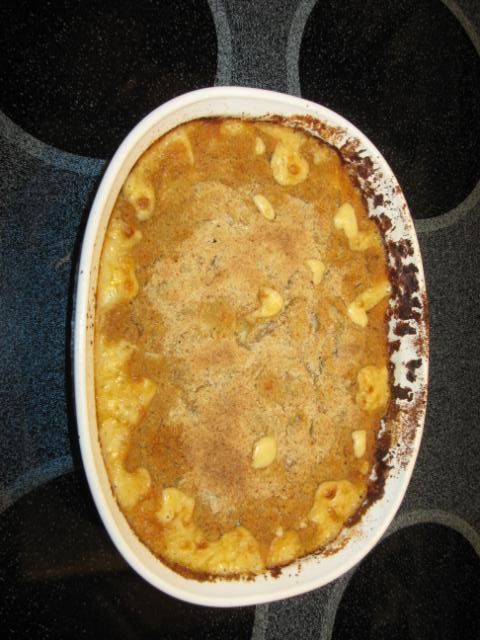
See? doesn’t that look incredible?!
Yes. Yes it does…
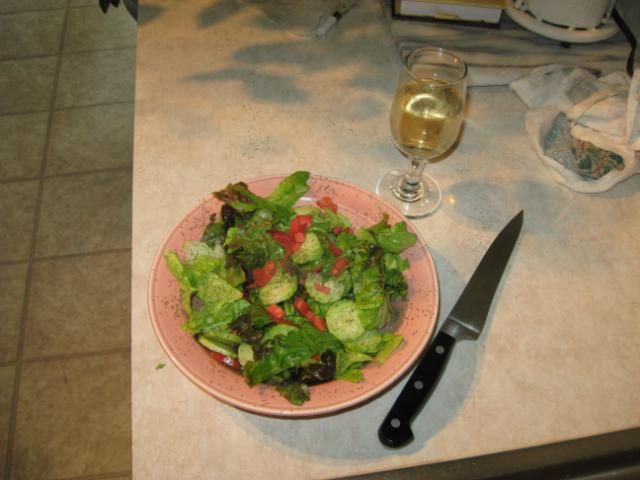
Pair It
Now, I am the first to say that stuff this good don’t need nuthin’ to help it, but that would be wrong. Pair your mac with a nice, light salad. That will provide a counterpoint to the incredible richness, help clear your palate, let you eat and appreciate everything more, and that’s good! Monica did a beautiful job with fresh greens, onion, pickled radish, homegrown tomatoes and cucumbers, dusted with dill, and tossed with a light balsamic vinaigrette – Perfect counterpoint!
And there you have it – The cat’s outta the bag – Bon appetit!