Kool Kamp Kookin’


So, folks do ask quite often, “Do you guys really cook like this all the time?”

The answer is, for the most part, yup!

Probably the easiest way to see if its true would be to follow us on a recent camping trip – For the record, yeah, we do bring knives and significant utensils, and 2 cooking surfaces, in this case, a 2 burner Coleman and a Weber Q series grill. That plus a good selection of non-stick pans and our trusty Lodge dutch oven gives the flexibility we need.

Our herbs and spices are pared down to what we really use; sea salt, ground pepper blend, granulated garlic, Mexican oregano, dill, and sage.
We bring all staples with us, anything special that we’ve planned, and then fill in with a last minute shop at the local store.

We focus on breakfast and dinners, and a picture’s worth a thousand words, so Let’s have a look at what we built!

First night dinner is salmon, grilled asparagus, homemade pasta salad and sourdough rolls…

Breakfast key word is Hearty

Night 2, beef stew!

And as Ivy can attest, you do not have to rough out out there!

Chili Bonus for Tailgate Rubbin’


This week launched our inaugural article as the resident Chef for American Boomer magazine. Check that out if you haven’t, and not only for our stuff, but for the gorgeous fall pics and great articles.

We threw a bonus chili recipe in at the last minute for that piece, so I thought we’d one up that with some pics, since we didn’t have time to shoot for the mag. This variant is slightly different than the one published, as this is what we had on hand and what i felt like using; recipes should always be flexible…

E’s Classic Chili
1 lb each pork and beef, cut into strips and cubed or ground as you prefer.
1/2 sweet Onion
2 – 6 sweet Bell Peppers
1 – 4 Jalapeno Chiles, (Ours came from our pals at Neighborhood Gardens and had some definite fangs on ’em!
1 14.5 oz can each of black, kidney, and great northern beans, (Use dried if you have time, they’re worth it)
28 oz. can crushed and peeled tomatoes, (Fresh are fine, but you’ll get less juice)
Tablespoon Chili Powder
1-2 cloves fresh Garlic
1 bottle of beer, (Your choice, I like to use lighter stuff like Pilsner)
2 Tablespoons Oil

So, we start with the flesh, of course, and I prefer roughly 50%-50% beef to pork, and a fairly fatty cut of both. With the trust Kitchenaid set up for a chili grind, (Read bigger of the two discs supplied), we’re good to go. I like to season the meat as it’s being ground, so a healthy dusting of the house made chili powder gets applied, (And more on this shortly)

Note that one member of the family pays rapt attention to this process…

Add beans and tomatoes to a tablespoon of oil in a pot big enough to hold your whole creation.

Chop onion and fine dice garlic. Put onion into a medium hot pan until they’re starting to turn translucent, then add garlic and saute both for a few minutes more, then add to the big pot.

Toss peppers and chiles onto a very hot grill or place under a broiler and blister all sides. Set aside to cool enough to handle. Stem and field strip all, then chop and add to the pot.

Heat the the other tablespoon of oil in a hot pan and then toss in your flesh. Brown thoroughly and then with pan still hot, add bottle of beer. Reduce heat, allow to simmer until meat is cooked through, then add it to the party.

Allow the chili to simmer on low and adjust seasoning as needed. I think at least 2 hours is called for and as many as 8 – Low and slow is the key to building and blending great chili flavor.

You see spelling variants of chile versus chili everywhere these days. I’m not gonna claim to be the point at which the buck stops in this debate, but I’ll happily outline our take on the vernacular. Chiles as we refer to ’em means the peppers themselves, the capsicum fruit, pods, etc, whilst chili means the savory dish flavored with the former, and ne’er the tween shall meet. That said, here’re some notes on house made chili powder for y’all.

Classic chile powder has claims on it from Mexico to Texas to everywhere else in the southwest. Classic chili powder is not simply ground chiles and nothing else; it is in fact a blend and the other stuff is every bit as important. Try this as a starting point and then vary further as you see fit.

House Made Chili Powder

2-4 Tablespoons dried chiles of your choice, (I used Jalapeno, Tabasco, and Red Hatch)
1 teaspoon Cumin seed
1 teaspoon Mexican Oregano
½ teaspoon Sweet Smoked Paprika
½ teaspoon granulated Garlic

Put everybody into a spice grinder or molcajete and grind fine. Pour through a fine mesh sieve into a glass bowl; don’t push stuff through – If it doesn’t fit, let it be. We use a lighter chile load and variety for a mild powder, and more and heftier for hot. Place into a shaker top spice jar and enjoy; try this blend on soup, eggs, grilled cheese, roast chicken, baked potatoes, etc, etc…

We made some cheddar cornbread for our batch tonight; it was given rave reviews by all!

And it was maybe just a bit on the hot side…

Homeward Eats


After 11 years, M and I arrived back home in the Northwest, specifically, the Seattle area. After getting moved and settled, our first outing together was, naturally, food based.

We headed for downtown Seattle and started at Salumi for lunch; since we were going shopping and had been absent for so long, getting fortified beforehand is always wise…

Salumi is famous for their sausage and rightfully so. That said, it’s tiny and easy to miss; here’s the store front:

The way you find it is by looking for this; the big line out front.

What you get is simply perfect. Go ahead and just try to go without taking some snausage home with you.

Truth be told, there’s just been a pregnant pause while I headed for the fridge to snag salumi, bread and dijon mustard…

Fortified, we headed for, naturally, the Pike Place Market. “Tourist trap!” you yowl? Yeah, I s’pose so, but on the other hand, if you lived downtown and didn’t shop here on a daily basis, what kind of twit would you be? So suspend your disdain and dive in; there’s a reason some of these vendors have been here for many decades. And besides that, it’s gorgeous.

We were after fish, of course, as anyone in their right mind deprived of great seafood for a decade plus would be. Pure Food Fish Co., here since 1911, is an example of all that is great about the market. Super fresh, friendly, and absolutely willing to do as much or as little to your catch as you want them to.

We were after Salmon, naturally, so it was time to choose. In the Pacific northwest, you have five primary varieties of Salmon; King, Sockeye, Coho, Pink, and Chum. They can also be called, in the same order, Chinook, Red, Silver, Humpback and Dog.

What does all this stuff mean and are there genuine differences between them, you ask? Yeah, there are, and they do mean something worth knowing.

King is just that, the best tasting, fattiest flesh with the most melt-in-your-mouth texture there is, hands down. Sockeye is not far behind, truth be told, and there are plenty of folks who chose this variety first every time. Silvers, which run quite shallow in the fall and fight like all get out, may be “Middle of the Pack” salmon, but for me they’re #1. Pink and Chum are not the top of the heap in terms of taste, color, or texture, though Chum roe is highly prized for sushi and likely the most oft harvested.

After looking everybody over, we went with local, wild caught red King. Planning, as usual, to do several meals with this gorgeous fish, we bought a whole and had it fileted. Had we more fridge and kitchen space, we’d have asked to have the rack and head bagged up and taken it home to make stock with.
<img src="http://i2.photobucket.com/albums/y24/AerieGuitars/Food/Photo10.jpg

Having accomplished so much so quickly, (Ahem…), we stopped into a peaceful Uli’s Famous Sausage and Bierstube for a refreshing lager. And speaking of snasauge, had we not done Salumi, we sure would’ve dove in here, as you better if you’ve not already!

Next came Frank's Produce yielded new potatoes, Walla Walla sweet onions, fresh green beans and lemons. Off we go!

A final stop at Pears for a bottle of Mountain Dome bubbly and we’re good to go.

So, back at the ranch, simple rules the roost.

The veggies are rinsed and dried, tossed in extra virgin olive oil, diced shallot, salt and pepper and then roasted.

A filet goes on a broiling rack, then gets a simple baste of unsalted butter, lemon juice, brown sugar and bourbon. Into a 350 oven, we allow 10 minutes for each inch of thickness, measured at the thickest part of the filet. The thinner end is turned to the slightly cooler side of the oven, thick part to the middle.

With lightly toasted local sourdough to sop up juices, that, as the saying goes, is that.

Next time, round 1 of leftovers!

The Eternal Search for Perfect ‘Za


Home made pizza that is…

If y’all hang here at all, you know that we believe home made to be best. That said, and just being honest here, if we were the best at everything, we’d never go out to eat. We do, of course, therefore, it stand to reason that there are folks out there better at some things than us. At least for the time being…

We love pizza, and we love to make it, because ours is really good, buuuuut; it wasn’t so good that we couldn’t find better out there.

Notice the past tense, wasn’t…

We’ve been working on our pizza for a long time, and I am happy to say that, truly, I think we’re there now. What we’re about to share is as good as almost anything you can find out there and way better than most, so here’s the scoop!

CAVEAT 1:
We’re making here what to us is as close to the genuine Pizza Napolitana as we can do. We are talking about, then, a pizza with a very thin crust across most of the pie, with a relatively thick and tall edge. For variations, there really are only two; either Pizza Marinara, (Tomato, garlic, basil, and extra virgin olive oil), or, as we’ll do here, Pizza Margherita, with tomato, mozzarella, Basil and extra virgin olive oil. That said, of course you can and should make pizza with lots more than this on it, but when you’re going for the best, you really do want to keep it simple and true to the deep roots.

CAVEAT 2: If you’re going to make really good pizza, then everything you use must be top notch. No, you don’t do this every time you make pizza, but when you’re out to make really, really good pizza, then it’s gotta be top shelf all around. That means from water to cheese and everything in between, no cheap stuff. And yes, it really makes a difference…

Dough:
2 1/2 to 3 1/2 cups Antimo Caputo 00 Flour
1 cup GOOD water, (Spring water or, at the very least, filtered)
2 Tablespoons Extra Virgin Olive Oil
1/2 teaspoon Salt
1 package active dry Yeast

Heat your water to about 100º F.

Dissolve yeast thoroughly in water, then add olive oil, salt and 2 cups of flour. You can either do this dough by hand or mixer, (As long as it’s done on low speed).

Thoroughly mix everything, and keep adding flour until the dough is still moist, but not sticking to your hands when lightly floured, (Or to the sides of the mixing bowl).

Knead by hand or mixer for about 6 minutes, until dough is elastic and smooth.

Place the dough in a lightly oiled, non-reactive bowl, cover with a clean, dry cloth, and place the whole thing into your fridge overnight.

“What?” you cry, incredulous, “Over night in the fridge??!

Yeah. Really. See, this is, in fact, one of the secrets of really good pizza dough and really good pizza.

First and foremost, yes, dough will indeed rise at refrigeration temperatures. it rises slowly, which lets you get away with overnight, but it will most definitely rise. It’s called a Cold Rise, and here’s why you wanna do it.

Mixing and initial kneading gets everything together and the process begun. The rest and first rise is when fermentation starts. The second rise, or proof, loosens up gluten. Baking finishes the magic, with a bunch of chemical reactions that makes that final, incredible pizza.

When dough is fermented/risen in warm conditions, it happens quite quickly; this is why you can make pizza dough in under an hour, start to finish. Doing so, however, has definite shortcomings. Rather than making great tasting and performing dough, what you get are some off flavors you don’t want, (Sour, for one), and a lack of complexity that, all by itself, can be the difference between OK and great.

A cold rise slows down the reactions, allowing more desirable and complex flavors to develop, and you end up with a much better texture to boot; and that, of course, is exactly what great pizza is about.

When you pull your dough and are ready to bake, either toss it or stretch it by hand but do not, ever. roll it out – You kill all that hard work when you do. 90% of your pie should be almost thin enough to see through; the edges should be left pretty much inflated from the rise and about 1″ high.

Sauce:
Plain and simple, you gotta make your own, period, end of story. Now, next thing; for sauce, good canned tomatoes are better than fresh, 9 times out of ten. Really. See, most of the year in most places, tomatoes just are not that spectacular. If you’ve ever grown your own maters, (And you’d better if you can, dang it), you know that any of those are far superior to anything you can find in the store. Unless you’re growing, or hooked up to Community Supported Agriculture, or a great farmers market, (And again, if you can do one of those, you sure better be!), buy good canned tomatoes for your sauce. And I mean the premium brands at your store, not the stuff in a white can with big black letters. If you can find genuine San Marzano tomatoes, definitely try them, but believe it or not, I like Trader Joe’s better.

Here’s what we do for a basic 16″ pizza.

1 12 oz. can crushed or ground Tomatoes, (try Trader Joe’s, they’re surprisingly good)
6 – 8 leaves Fresh Oregano, chiffenade(1 teaspoon if dried)
2 – 4 cloves fresh garlic, minced
1 teaspoon extra virgin olive oil
1/2 teaspoon balsamic vinegar
1/4 teaspoon salt
A few twists of fresh ground pepper

That’s it. Put everything in a bowl and motor boat it until it’s nice and smooth; you can use a blender if you don’t have a boat motor, (AKA, immersion blender). Put in a non-reactive bowl and allow to blend for at least 1 hour, and overnight is much better. If you feel things are too liquid, put your sauce over medium low heat and gently allow it to reduce. Low and slow for that, as in barely a simmer. Don’t get things too dry; keep in mind, you’re going to cook very hot long enough for that to have some affect on your sauce.

Toppings:
Make your own mozzarella, and if you’ve never done that, then definitely make your own! It’s easier than you think and oh so much better! If you can”t do that, get premium fresh mozzarella, as local as you can.

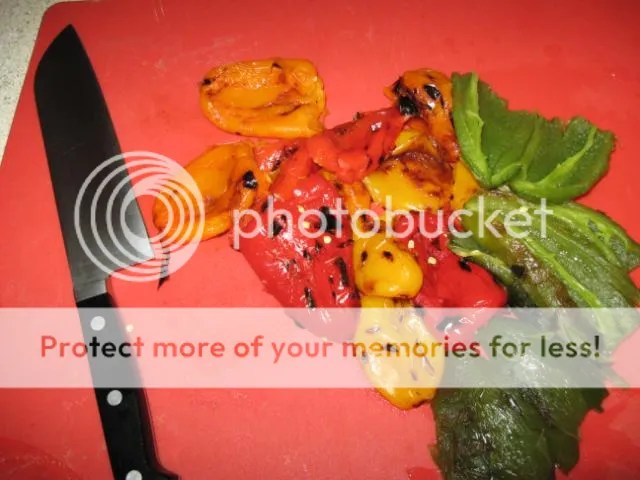
Fresh, from your garden, or a friends garden, or a neighbors garden or a farmers market or CSA; anything else just don’t cut it…

Same as above. We used some gorgeous locally grown heirloom ‘maters for this pie and they were Put it all together.

Baking:
For great pizza, you need a stone of some kind. You just do, unless you have your own pizza oven like my friend Mr. Z.
Crank your oven up as high as it will go. Seriously, pedal to the metal, all you’ve got Scotty.
Put your stone in the oven and leave it there for 45 minutes, until there’s no doubt in the world that sucker is hot.

Assemble everything lickity split and get it in the oven. 5 minutes at full bore will do the deed.

Now, enjoy. Have seconds. Smile at each other.

Yeah, it’s that good…

Oysters, Love ‘em or Hate ‘em?


‘Cause there ain’t no in between! You either hear folks say ‘Yum’ or ‘Etch!’; I’ve never heard a “Oh, they’re kinda OK…” from anyone, have you?

Alright, first to the basics!

If you’re gonna do oysters and you don’t live near where they come from, then get them from a place where they do, that you know if the best, freshest you can get, period! We don’t do oysters often, but when we do, we get really good ones and we do it from somebody who needs and wants the business. Take this opportunity to help out folks from the Gulf, you’ll make their day, get great food, and do good in the bargain. Here are some great options for y’all.

Zirlott’s is from coastal Alabama; family run, great food, great folks.

Tony’s Seafood in Baton Rouge is the same thing; local, fresh, great folks!

Now, a few points about delaing with ’em after you got ’em. Fresh oysters must be alive just before consumption. There’s a simple test for this: oysters must be capable of closing the shell tightly.
Open oyster? Knock on the shell; a live one’ll close up and is therefore good to go.
If they’re open and stay that way, they’re dead, so chuck ‘em, don’t shuck ‘em!
A dead oysters, or oyster shells filled with sand may stay closed, but they ‘clack’ when ya rap ‘em – That’s a no go too, (And why they’re called ‘clackers’)

Shucking oysters requires skill, ‘cause live oysters outside of water close themselves in with a powerful muscle to seal in their juices and survive.

The generally used method for opening oysters is to use a special knife (called an oyster knife, a variant of a shucking knife), with a short and thick blade about 2 inches long.

Best advice if you’re new at it? Buy ‘em shucked! If not, get a cut-proof glove for your holding hand! If you’re lucky enough to not cut yourself with the knife, you likely will on the oyster shell itself, which can be razor sharp, so be sober and extra careful throughout the process!

Slip the blade in at the hinge in the rear of the shell. Twist the blade until you hear and feel a slight pop. Now slide the blade upward to cut the adductor muscle (which holds the shell closed). Bingo, you’re there.

So, how to eat ’em?

On the Half Shell
Straight away, on a bed of ice. Slice lemons, fine dice onion or scallion, have a bottle of hot sauce on hand, and maybe some really nice fresh cracked pepper. Slide, don’t chew – If you’ve ever done that, you won’t likely do it again…

Deep Fried
Shuck and remove oysters from shell, rinse and trim thoroughly.

Build a dredge:
Mix well in a bag
1 cup all purpose flour
2 tablespoons corn starch
1 teaspoon kosher salt
1/2 teaspoon pepper

Pop oysters into the dredge bag and shake a few times. Tap excess dredge off before placing in the fryer.
Heat your oil to 375 degrees F and keep it there; that means introducing a single oyster at a time and allowing a little pause for your fryer to recover the desired temp before you add more: Keep the batches to 4 or 5 tops. Doing so assures you of light taste and minimal sogginess.

Pair with fresh homemade fries, onion rings, or coleslaw. Have plenty fo fresh sliced lemon ready too.

Oysters Rockefeller
8 large raw oysters.
1 Cup spinach, cooked and drained.
2 Tablespoons onion, chopped.
1/2 Tablespoon parsley, chopped.
1/2 stick Celery.
2 Tablespoons soft breadcrumbs.
1 tablespoons of butter.
1 lemon, sliced
Dash of salt
Dash of hot sauce.

Open the oysters, remove from their shells and drain. Reserve the shells.

Fill an baking dish, (Or individual ones), with rock salt.

Place reserved shells in each dish and put an oyster in each shell.

Saute your spinach in a little olive oil.

Rough chop the onion and parsley, (You can put ’em together, no problem).

Crush or juice celery and reserve 1/2 teaspoon juice.

Add celery juice, salt, hot sauce and breadcrumbs and saute over medium high heat for 2 to 3 minutes.

Spoon about 1 tablespoon of spinach mixture over each oyster.

Bake in a preheated oven at 400°F for 10 minutes, (Sauce should be bubbling nicely.)

Serve with plenty of lemon slices.