We can pickle that!


If you love pickles like we do, you’ve pretty much always got several jars in your fridge. In addition to cukes, we’ll typically have store bought capers, olives, and pepperoncini. That list is a great source for fridge pickling brine you can now add to carrots, chiles, green onions, green beans, radishes, garlic, and whatever else strikes your fancy. 

Got a favorite brand with a just right pickle flavor? Save that brine and jar, and replace those kosher dills with a mix of jalapeno, garlic, onions and carrots. Top things off with fresh vinegar if needed, and you can add additional pickling spices as well if you like. Allow your new batch to marinate for 2 or 3 days, and you’re back in business. Fridge pickled goodies will last a month or two, although they’re so good, they’re unlikely to survive that long.

Try something a bit outside the box, like pearl onions in leftover caper brine, or cherry tomatoes in pepperoncini brine; experimentation is bound to lead to fresh ideas and new favorites. Let that outside the box thinking color your spice selection as well. Here’s the perfect chance to experiment with a single jar; develop something you love and you can expand to a batch run later. In addition to providing wonderful treats for a Bloody Mary or martini, pickled veggies add great zing to everything from salads or omelettes to soups and stews.

Next time you’re in the produce aisle, see what looks good and grab a little extra to pickle with. As always, carefully inspect and chose top quality for this endeavor. Try something that maybe you think you don’t like or aren’t that familiar with, like Bok Choi, Fennel, or turnips. A quick pickle brings a very tasty note to an otherwise dull character; try pickled celery and you’ll see what I mean.


Once you’re home, thoroughly rinse your produce in clean, cold water. For radishes, carrots, chiles, green and sweet onions and cukes, top, skin, seed, core, etc, and then cut them into whatever form you prefer your pickles in.

Fo green beans, corn, or peas, a quick blanch and shock will help preserve texture and color. Bring a large pot of well salted water to a rolling boil, and have an ice bath standing by that, (50%-50% ice and water).

Toss your veggies into the boiling water for about 30 seconds, the transfer them with a slotted spoon and plunge them into the ice bath. Leave them there until they’ve cooled completely. Remove and you’re ready to pickle.

When you’re ready to pickle, pour the remaining brine into a clean bowl or pitcher. Wash your jars thoroughly, and either sterilize them in your blanching bath, or run them through your dishwasher. Do the same with lids and rings.

For whatever you prepare, make sure they’re well packed, with at least an inch of brine above the tops of the contents, and seal the jars well.

Oh, and don’t forget to dust the rim of your Bloody Mary glass with chile salt.

Anthony Bourdain hates your garlic press.


In his epic tell all, Kitchen Confidential, my favorite kitchen kermudgeon, Anthony Bourdain, had this to say about garlic.

“Garlic is divine. Few food items can taste so many distinct ways, handled correctly. Misuse of garlic is a crime. Old garlic, burnt garlic, garlic cut too long ago and garlic that has been tragically smashed through one of those abominations, the garlic press, are all disgusting. Please treat your garlic with respect. Sliver it for pasta, like you saw in Goodfellas; don’t burn it. Smash it, with the flat of your knife blade if you like, but don’t put it through a press. I don’t know what that junk is that squeezes out the end of those things, but it ain’t garlic. And try roasting garlic. It gets mellower and sweeter if you roast it whole, still on the clove, to be squeezed out later when it’s soft and brown. Nothing will permeate your food more irrevocably and irreparably than burnt or rancid garlic. Avoid at all costs that vile spew you see rotting in oil in screw-top jars. Too lazy to peel fresh? You don’t deserve to eat garlic.”

Ah Tony Bourdain, never at a loss for words…
Is he over the top?
Absolutely.
Is he correct?
I’d say 90% yes, but let’s just break down his specific contentions to be sure, shall we?

First off, we have the implied divinity of garlic: Is he right?
In a word, yup.


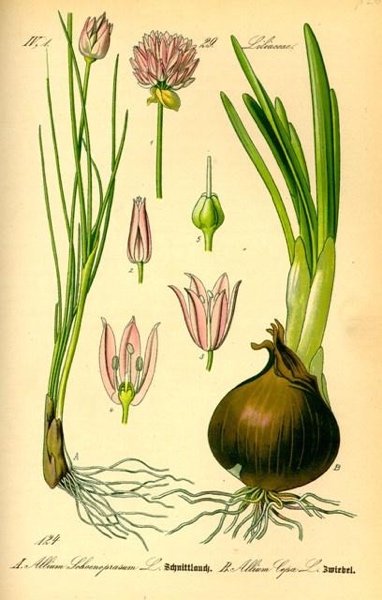
Allium Sativum, of the Family Rosacea, (why it’s sometimes called ‘the stinking rose), is indeed magic, and its broad, utilitarian beauty is admirable. No other veggie has that ethereal combination of bite, heat, and sweet that garlic packs. What the author doesn’t note is that all garlic is not created equal. There are hundreds of cultivated garlic varieties worldwide, which is great if you’re a gardener or know a generous one. If you have a green thumb and your cultivation zone can handle it, by all means grow it. Just Google ‘Heirloom garlic starts’ and you’ll find a veritable cornucopia of options. Otherwise, hit up your local farmers market or CSA and load up when the magic is in season.

Great garlic is usually not available year round to the vast majority of us. As such, some plan for preservation is in order. Drying is your best bet; while there is a certain loss of flavor, it’s a given that great garlic dried will be better than OK garlic fresh, so it’s worth the effort. You should peel the cloves, and at the least, cut ’em in half, though you can chop or mince if you like; process in a dehydrator or warm oven until they’re light and dry to the feel.

Please know that garlic in oil is not a safe methodology; garlic is a low acid food, and you’re begging for botulism here. Making garlic oil in small batches and freezing it is A-OK. Puree your garlic, mix it with good olive oil, strain it through cheese cloth or a fine, double sieve. This is another perfect ice cube tray application – freeze it that way and pop a cube out for use.

You can and should pickle garlic, it’s delightful and has a complexity like no other. Finally, garlic salt or pepper are nice options as well. Kosher or sea salt both work fine, though the uniform grain of kosher probably works best; for garlic pepper, use whole black tellicherry berries. 1/4 cup of garlic for each cup of salt or pepper will do the trick. Preheat your oven to warm, or 180° F, and line a baking sheet with parchment paper. Peel the garlic cloves, then add them straight away with the salt or pepper to a food processor. Process for about 30 seconds, until you’ve got a uniform texture. Spread the results into an even, thin layer on your baking sheet. Bake for about an hour, until the results are crisp and dry. You do not want them to brown, so keep an eye on things. Transfer the salt or pepper back to the processor using the parchment. Pulse a few times to break things up to an even consistency. Stored in airtight glass jars, your housemade lovelies are good to go for 3 or 4 months.

If the grocery is your only option, then what you’re likely to find will break down into three varieties; Softneck, Hardneck, and Elephant. 

Softneck Garlic is the most common variety you’ll find; this is the fat, white head of multiple cloves with several layers of papery, thin skin surrounding that you can score for roughly .50¢ a pop. It’s also the easiest variety to grow in a backyard garden. Softneck garlic has a fairly strong garlic bite and a sweet, pungent odor. Most garlic heads that have been braided together are softneck varieties. Common Softneck varieties include California Early, California Late and Creole.

Hardneck Garlic is a bit less common, but still can be found in grocery stores. Hardneck features lovely shades of purple through brown, with thin skins and larger and fewer cloves than the softneck stuff. These varieties are generally somewhat stronger in flavor and scent than the soft stuff, and they generally don’t store as well, so it’s prudent to use them quickly after you buy. Commonly found Hardneck varieties include German Extra Hearty and Roja.

Elephant Garlic is the third variant you’re likely to find. It features a big ol’ head of very large cloves that can approach shallots in size. Prized for its subtle, mild flavor and scent, elephant garlic is great for folks who don’t like their garlic too assertive.

Onward! Bourdain’s next claim is that garlic “can taste so many distinct ways, handled correctly,” and that “misuse of garlic is a crime;” he is spot on here, though there are a couple of critical points left unstated.
First off, what the artist formerly known as Chef doesn’t say is this; more than how you prep it, the most important caveat for “correct” is how much garlic to use. Garlic is by nature potent, and this is why so many cooks over-season with it. Too much can bring out the negative aspects of its character every bit as much as improper cooking can. My simple rule is this: If the dish you’re making has garlic in the title, then you should use enough to bring it to the forefront of the flavor profile. When this is the case, do consider what form you’re going to use the garlic in. Let’s say you’re making garlic lamb or chicken; whole, peeled cloves added to a brine or marinade, or braised or roasted with the protein will deliver a lot of garlic flavor without blowing your socks off. Fewer cloves minced, diced, or crushed can be every bit as potent or more so than whole peeled cloves.
If garlic is not in a lead role, err to the side of caution and use less than you think you should. Let’s take chili for example – Garlic belongs here, but not as a dominant note. You’re after the subtle, sweet mouth feel a little garlic adds to a dish like this, so a moderate sized clove, one clove, will do for a whole pot of chili. That’s what I mean by subtle use; folks won’t even necessarily know garlic is there, but it will add that certain je ne sais quoi nonetheless. Consider adding peeled, whole cloves to soups, stews, and low and slow braised or roasted dishes; that’ll impart a nice, subtle background flavor, and some lucky diner gets to find a treat as well.

Next comes old garlic, and that is indeed a crime of epic proportion. Add to this, sub-par garlic. Since in large part we’re talking about gathering here, (AKA, shopping), then with whichever variety you’re hunting, do your due diligence. Choose firm, uniform heads with no soft spots, off colors, or smells. You should squeeze and scrutinize garlic as you would any other veggie you pay good money for.
Then there’s the storage thing. I’ll just tell ya straight up that garlic does not belong in the fridge, ’cause that will encourage sprouting, which leads pretty quickly to off flavors. Keep your garlic in a well ventilated, dry container, out of strong, direct sunlight. Garlic will last a month or two so stored, but as cheap as it is, you’re best served to buy a small head at a time and use it promptly.
When you’re ready to use the stuff, fresh garlic cloves should be firm and creamy white in color; if they’re yellowish, have brown spots, and/or are starting to sprout, toss it. That stuff will have a hot, bitter taste that is quite off-putting.

Burnt garlic comes next, and should we even have to say no to that? Actually, we do, because it happens far too often. Burnt garlic brings out the worst in this heavenly stuff, turning complex, sweet and pungent to bitter, sour, and overpowering. It will overwhelm everything else in a dish in a New York minute. Understanding how and why garlic burns is the key to avoiding this mess. Throwing garlic into a dish too soon often leads to burning: In a little oil in a saucepan over medium high heat, any form of processed garlic can and will burn within a minute or two at most; that’s why it should always be the last thing you add. Longer cooking under any kind of high heat will make garlic taste bitter, even if you don’t burn it. Smashing, pressing, mincing, dicing, and slicing garlic releases more flavor than cooking with whole cloves, but it also makes for a bunch more surface area that can potentially burn.
This ties into Anthony’s next assertion, castigating “garlic cut too long ago and garlic that has been tragically smashed through one of those abominations, the garlic press.”


For the former, he’s right on the money. The longer garlic sits after being cut, the more the essential oils and compounds that make it great begin to break down into other, much less desirable constituents. Ideally, it should be prepped 5 to 10 minutes prior to cooking with it; this little rest helps stabilizes the garlic, making it more resistant to heat.
As to the latter, I respectfully disagree. Pressed garlic is no more a crime than puréed, smashed, or minced.
Furthermore, there not only is a place for all these variants in cooking, they may actually be good for us.

Garlic contains a sulfoxide derivative of the amino acid cysteine, called Alliin, as well as a catalyzing enzyme, Alliinase. In a whole clove, these constituents remain separated within the cell structure. Slicing, chopping, mincing or pressing garlic ruptures the cells, releasing these elements to combine and form a new compound, Alliicin, the primary biologically active compound within garlic. Alliisin is garlic’s defense mechanism, released to ward of pests in the natural world. It is responsible for the pungent aroma, as well as the bite/heat/power of the stuff. Alliicin has known anti-fungal and anti-bacterial properties, and may aid in the reduction of atherosclerosis, decrease blood pressure, and provide anti-inflammatory properties as well.
In short, sorry Tony, but chopping, mashing and yes, even pressing garlic finely, produces more Alliisin, and coincidentally, provides the strongest garlic bang for the buck.
He goes on to vilify any form of processed garlic sold in a jar, and for the most part, he’s right. That stuff is far from fresh, and whatever methods are used to shelf stabilize it aren’t anything you should be hankering for.

Next, Bourdain encourages us all to enjoy roast garlic, and upon this there can be nothing negative said.
Roast garlic is indeed food of the gods, and here’s how you do it.

Preheat your oven to 400° F and place a rack dead in the middle.

Prep whole heads of garlic by removing the thicker outer papery layers.
Leave the skins on the individual cloves and carefully remove about the top 1/4″ of each, exposing the cloves.

Drizzle a little extra virgin olive oil in each clove, then loosely cover them with aluminum foil.

Roast for about 30 minutes until the tops of each clove is golden brown and they’re soft to the touch.

Allow the cloves to cool until handleable. Use a small fork or knife to extract the soft garlic and spread it onto fresh, crusty bread. Welcome to Heaven.

If roasted garlic is heaven, confit garlic is Valhalla.

Peel a few heads of garlic down to whole cloves.

In a small sauce pan over medium low heat, heat extra virgin olive oil through, then add the garlic, making sure all the cloves are fully submerged. Heat slowly but thoroughly for about an hour, until the cloves are soft. Keep the heat low so that the garlic doesn’t brown. Serve spread onto fresh, crusty bread with a nice glass of red.

Lastly, Le Tony notes, “Too lazy to peel fresh? You don’t deserve to eat garlic.”
And on that final note, we disagree completely. 

As I mentioned before, great garlic dried is really good garlic, especially if you made it at home.


That ain’t how we play…


I tweak and republish this post annually; I think you’ll see why when you read it.

See, I’m not out to be tragically hip, in fact quite the contrary. Or maybe Matthew Selman said it best; “I wish there was another word than foodie; how about ‘super food asshole’, or ‘pretentious food jerk’?” I just don’t wanna go there.

Granted, there are a lot of great food blogs out there, but right now, many are judged ‘Great’ because somebody took a really, really nice pic of some food, or is on the fast track to be the next Food Channel Super Food Asshole. Frankly, when the ‘best’ food blog sites reject people because they don’t meet criterion such as that, I’m more than not interested, I’m actively turned off. 

I write about food from some pretty simple perspectives. I’m interested in sharing recipes, methods, processes and such. I’m interested in sourcing, using wisely, and preserving food that is good for you, in a world where much of what we are offered to eat is not very good. I’m interested in the science behind cooking, because I’ve never liked simply being told to ‘do it this way.’ I trust that if you’re reading this, you’re interested in these things as well. To be honest, if no one read this blog, I’d write it anyway, because I do it for me first and foremost; I gotta share what I love. That’s just how I’m wired.

So, when I look at ‘real’ food blogs, I see the stuff that, fairly often, folks ask me about here, or more to the point, ask me why I don’t do these things. There are three oft repeated comments, and they are,
Why don’t you list nutritionals and calories,
Why don’t you post prep and cooking times, and
Why do you post exotic ingredients that I’m not likely to have?

So, in a nutshell, here’s why;

Frankly, listing nutritionals means, more than anything, that I am determining what kind of portion size you and yours eat, and frankly, I don’t have any idea about that. If I list a casserole recipe and you make it, how much do you eat? How about your partner? Do you have seconds, are there leftovers, and on and on. This ain’t a restaurant, and I’d bet your house isn’t either; neither of us needs everyone to eat the same portion. For the record, I predominantly do recipes for two, with planned leftovers, the idea being general efficiency, and the fact that anything good will be great the next day. Other than that, you’re kinda on your own. I mean I can give you a great biscuit recipe, but how big you make ’em, and how many y’all wolf down is kinda your gig, right?
Don’t get me wrong, nutrition IS important and should be monitored in some way, shape, or form. The best way to this is to buy carefully and thoughtfully. Buy locally whenever you can. Read the labels on food and avoid the stuff that’s truly bad for you. Grow anything and everything you can. Preserve what you buy or grow so that you can notably extend the time it is available to you. Make everything you can, from scratch, at home. That may sound more intensive than what you do now, but if you really care about nutrition, you’ll do it. And as far as we go, whenever you need or want detailed nutritionals on our recipes, just click on our link for Calorie Count and go to town. There’s a mobile version out for your Apple or Android smart phone as well now.

Next comes prep and cooking time.


Weeeeeellllll, how do I say this? Listing prep time is, in my not even remotely close to humble opinion, one of the dumbest things I’ve ever read. The problem is actually pretty obvious. Listing prep time says we all prep at the same level, and nothing could be further from the truth. Heck, I have three preppers in my cafe and they all perform differently… So really, the question is who’s prep time are we talking about? Mine? Yours? Emeril’s? I’ve been cutting things for decades and have pretty damn good knife skills; do you? I can stem, seed and core a tomato blindfolded, without cutting myself, in about 15 seconds; can you? I don’t even think about process and procedure any more, it just comes naturally; does it for you? And if your answers are ‘No’, does that make you slow? If I can prep Dish A in 10 minutes and you take 20, should you not make that dish? Of course not! And really, that’s just the tip of the iceberg. How about what ingredients you have right on hand when you start your prep, how well equipped your kitchen is, how your day went, how many rug rats are flying around your feet, or how many critters need to go out right NOW?! Get the picture? My bottom line is simple – Who gives a rats ass how long it takes if you have the time and want to make it? If you’re cooking regularly, you either already have a decent sense of what you can and will accomplish in a given time, or you will develop one in time. If you really do like cooking and want to do it, you’ll do it.

Finally, there’s the exotic ingredient thing. Yes, I have a whacky spice cabinet. You may or may not have a pantry like ours, but I really don’t think that matters. We have all this stuff because we dedicated lot of time and energy into developing and perfecting recipes to share with y’all. Whether or not you need that much stuff is up to you. Does a couple avocado leaves and a little annatto really make or break good chili? If you’re asking me, I think the question is rhetorical. And frankly, I don’t buy the ‘why do you use ingredients I’m not likely to have’ complaint for a second; in this day and age, almost anyone in this country, and many others, can get anything they want. I recently shared a bacon recipe with a pal from South Africa. He ended up having to go all over creation to find several ingredients, but he did it, ’cause he really wants to try my recipe. Kinda like that last discussion on prep and cooking, huh? Ive mailed corn meal to Australia and mustard seed to Israel; if you can’t get something you wanna try, hit me up, I’ll help. I’ve also gotta point out that we constantly encourage and desire experimentation, so if you’re making it, put what you like in it: Give us credit the first time, and then it’s yours…
I say that if you love cooking and great food, maybe you should check out Tasmanian Pepperberry, or Urfa Bebir; who knows what you’ll do with them?

We do this because dear friends who love to grow, cook, preserve and explore as much as we do asked us to. We do this because we have a love for good food and cooking shared. We do this because we hope to inspire such in y’all. If that ain’t good enough, so be it.

Maitake Madness

Also known as Hen of the Woods, Maitakes are a fabulous treat.


Our dearest friends Christy and Grant, who were largely responsible for this blog coming to be, are inveterate growers of mushrooms. They have fine crops of quite a few fairly exotic and more-often-found as wild varieties growing on their northern Minnesota spread. All that said, they still like to forage, and yesterday, they happened on a real treat and a rarity in their neck of the woods, a 10 pound Maitake mushroom.

Take note – that’s a 16″ ruler!

If the Japanese name for these beauties doesn’t strike a chord, you may know it as Hen of the Woods, Rams Head, Sheeps Head, or the Signorina mushroom. They’re widely prized for eating by numerous cultures. Maitake and its close cousin, Chicken of the Woods, are two of my all time favorite fungi; they have a bright, savory taste profile that even folks who “don’t like mushrooms” will likely dig. Grifola frondosa is the formal name for Maitakes, which are native to the northeastern US and Japan. They grow in clusters at the base of trees, and are particularly fond of oaks. As with all fungi, you should forage only what you can 100% positively identify. Note that Maitakes, like many fungus, becomes just too tough to eat when they get long in the tooth.

Chris asked for some recipe ideas, which we’ll definitely do, but first, a few words on preserving. If you’re lucky enough to come upon a big stash of wild mushrooms like this, you absolutely must preserve some to enjoy in the dark months down the road. Freezing or drying are both viable options.

For either freezing or drying, thoroughly but gently wash each head until the rinse water runs clear.

Separate the heads into smaller, cauliflower-like stalks, and rinse the remaining stalks thoroughly again.

To freeze, allow the stalks to air dry. Arrange stalks on a cookie sheet with room for air flow around each. Place in your freezer overnight.

Frozen stalks can be vacuum sealed, or tossed into ziplock bags that you then suck the air out of. Frozen mushrooms will keep for 4 to 6 months frozen.

To dry Maitakes, place them in a dehydrator, or separated on a cookie sheet in an oven on warm, with the oven door opened slightly. Dry until the stalks are light, shriveled and snap easily without bending, even at their thickest points. Drying has the added advantage of making a big batch of mushrooms much easier to store. Well dried mushrooms will store for up to 12 months.

OK, ’nuff on preserving, let’s cook; here are three recipes that will work wonderfully with Maitake, or dang near any other wild mushrooms you like, solo or blended.

Mushroom Pho

FOR BROTH:
1 Quart cold Water
1 Quart Vegetable Stock
1 Pound Maitake Mushrooms
8-10 Ounce package Rice Noodles
1 Sweet Onion
1-2 Serrano Chiles
3-4 cloves Garlic
2 Tablespoons Mirin, (Rice Vinegar OK for sub)
2 Tablespoons Black Peppercorns
1 Tablespoon Sichuan peppercorns
3″ to 4″ fresh Lemongrass (1-2 tablespoons)
2″ piece fresh Ginger root
10-12 sprigs fresh Cilantro
Soy Sauce to taste

For Garnishing,
Radishes
Fresh bean sprouts
Fresh Cilantro
Fresh Mint
Fresh Basil leaves
Fresh Limes

Combine water and stock in a stock pot over medium high heat.

Rough chop onion and mushrooms. Fine dice chiles and lemongrass. Mince garlic, cilantro, and ginger.

Sauté onions and garlic with a little vegetable oil until they start to caramelize, then toss them into the stock pot.

Deglaze the sauté pan with rice vinegar. Add a tablespoon of soy sauce, allow to heat through. Add chiles, lemongrass, and ginger and sauté until the chiles start to soften. Add another tablespoon of oil and toss in the mushrooms. Sauté for about 5 minutes until heated through, then set mushrooms aside and toss the rest into the stock pot.

Combine peppercorns in a piece of muslin or a reusable tea bag. Toss them into the pot. Add the chopped cilantro and give everything a good stir. Add soy sauce if you need more; if it’s a bit strong for your taste, squeeze in half a lime instead.

Reduce heat to low and let simmer for two to four hours. Remove the peppercorns.

Boil the rice noodles in a separate pot per directions on the bag.

Thinly slice radishes, quarter the limes, rough chop cilantro, mint, and Basil.

Give every bowl a healthy dose of broth, mushrooms, and noodles. Everybody gets to add sprouts, radish, cilantro, mint, and basil as they see fit.

Serve with icy cold Singha Malt Liquor.


Savory mushrooms are incredibly delicious combined with wild rice and a delicate soufflé; the combination is sublimely flavorful and surprisingly hearty.

4 oz. Wild Rice
1/2 Cup Maitake Mushrooms
1 1/2 Cups Half & Half
1 Cup Extra Sharp White Cheddar Cheese
4 Egg Whites
3 EggYolks
3 Tablespoons unsalted Butter
2 Tablespoons All Purpose Flour
1/2 teaspoon Sea Salt
1/2 teaspoon fresh ground Grains of Paradise

Prepare rice according to directions.

In a sauce pan over medium heat, melt butter, then add flour, salt and pepper. Cook the roux for 2-3 minutes, stirring constantly, until you get a nice color to it.

Add the half & half, stirring constantly, until sauce starts to bubble. Add the cheese steadily in 1/4 cup batches, allowing each to melt completely before you add more. Once all the cheese is incorporated, remove from east and set aside.

In a chilled glass or stainless steel bowl, whisk egg whites until they hold a stuff peak. Set aside in the fridge.

In a separate bowl, whisk the egg yolks until they’re thick and lemon colored.

Gradually add the yolks to the cheese sauce, stirring constantly so egg yolks don’t curdle.

Add the rice to the blend and incorporate thoroughly. Cool the blend in hand fridge for 15 minutes.

Preheat oven to 375° F.

Lightly butter and dust with flour a 2 quart soufflé dish or individual ramekins.

Gently fold the beaten egg whites into the rice mixture. Gently pour the mix into the soufflé dish.

Bake for 20 minutes or until the soufflé has risen and is golden brown.

Serve piping hot with a fresh green salad and a nice Chardonnay.


Finally, here’s a fantastic mushroom pâté that’ll blow your socks off, as well as your guests’.

1 Pound Maitake Mushrooms
8 Ounces Chèvre
1/2 Cup fine diced fresh Shallot
1/2 Cup dry White Wine
3 Tablespoons unsalted Butter
2-3 cloves fresh Garlic, minced
2 Tablespoons fresh Parsley leaves, minced
1 teaspoon fresh Lemon Thyme (1 teaspoon dried, any variety, is fine)
1/2 teaspoon Sea Salt
1/4 teaspoon freshly ground black Pepper

Trim stems, wipe clean, and coarsely chop the Maitakes.

In a large sauté pan over medium heat, melt the butter. Add the shallots and garlic and sauté, stirring steadily, until they start to go translucent, about 2 to 3 minutes.

Add the mushrooms and continue to sauté and stir until the Maitakes are wilted and starting to brown. Add the wine, thyme, salt, and pepper, and continue to sauté and stir until the wine is nearly all absorbed, about 5 minutes. Add the parsley and sauté for another minute.

Transfer everything to a food processor. Add the chèvre and process until all ingredients are thoroughly combined. Taste and adjust seasoning.

Transfer to a glass ramekin or bowl, cover and refrigerate for at least 3 to 4 hours to allow pâté to set.

Cut a fresh baguette into round about 1/2″ thick. Rub the rounds lightly with a clove of garlic and toast them on both sides.

Serve pâté with toast rounds and a nice, cold hard cider.