Far and away, the questions I hear most often when it comes to cooking with milled corn products are these;
‘What’s the difference between corn meal and corn flour’,
‘Can I make the same recipe with either,’
‘What’s the difference between corn meal and grits, or polenta,’
‘What’s the difference between white and yellow corn meal or flour,’
‘What’s the difference between corn flour and Masa?’
The answer to the first is, the degree of milling – meal is coarser than flour, and to further confuse things, there is quite a bit of variety of meals out there. Steel ground yellow cornmeal, probably the most common variant found in the U.S., has the husk and germ of the corn kernel almost completely removed. As such, it’s kind of the equivalent of bleached, enriched wheat flour; a lot of the stuff that is good for you, along with a chunk of the taste, has been removed. Stone-ground cornmeal retains some of the hull and germ, and as such also has better flavor and nutritional properties. It is more perishable, but will store longer if refrigerated. White cornmeal, made from white corn, and also can be found in steel ground or stone ground variants.

The answer to the second is, technically, I guess you could, but you wouldn’t get the same results, and you probably wouldn’t like one of the variants. Recipes designed for meal want a different texture than those made with flour; think cornbread versus a biscuit, and you get the gist.
The answer to the third is, maybe nothing, but if there is a difference, it’s a pretty fine point of variance in the coarseness of milling. Google the difference between grits and polenta and you’ll see a firestorm of opinion akin to asking ‘What is real chili?’ I have the solution for you; avoid the controversy and go find a bag of Bob’s Red Mill Corn Grits, also know as Polenta. Works great for both; debate over…

The answer to the fourth is, it depends on who you ask. Some will tell you that the only difference between the two is the the color; that may or may not be true, as there is more than one variety used for making the things we eat. In any case, the bottom line is that they are absolutely interchangeable in recipes.
And finally, for question five, corn flour and masa harina are quite different preparations of corn. Masa harina is corn flour that is ground from dried hominy. White, yellow, or blue corn is used for making hominy, also known as posole or pozole. The corn is boiled in a solution containing powdered lime, then washed, dried, and ground to form masa harina. Masa is the only thing to use for making corn tortillas and tamales, far as I’m concerned. Untreated corn flour is basically fine-ground cornmeal. I use it in recipes where I want corn flavor without the gritty texture of corn meal. Corn flour contains no gluten, so makes a good substitute for wheat flours in pan and short bread and cake recipes, though the proportions may need a bit of tweaking to get just right. If you sub corn flour for wheat flour in a rising bread or cake recipe, you need to add vital wheat gluten, since corn has none.


While we’re describing the various things corn is made into, let’s not forget cornstarch. Cornstarch is obtained from the white heart of the corn kernel. It’s a tasteless, fine powder that is very useful as a thickener; it boasts twice the thickening power of wheat or corn flour. It’s best to stir cornstarch into water first before it is added to other foods, so that it can be incorporated without getting lumpy; use enough water to make a loose slurry as opposed to a paste when you mix it. One thing to note if you’re on the other side of the pond; cornstarch is referred to as corn flour in England.
There is a broad assumption that white corn meal is preferred in the South and yellow is preferred in Texas and the rest of the U.S. While that statement certainly was true in the past, it’s not so valid as it used to be. The population base that made that a fact has aged and died, frankly, and the following waves are more likely to experiment, mix, and match.
All your meals, flours, and masa should always be relatively fresh. Stored in a cool, dry place in an airtight container, you can expect around 6 months of use from them.
As mentioned above, there are several varieties of corn used for making the stuff we eat and cook with. Here’s a brief primer that will help you get a better grasp on things. This is a fairly rudimentary outline. For many decades, corn in America, like beer and cheese, was reduced to a few basic varieties; that trend has changed radically in the 21st Century. Heirloom varieties have exploded in the last 15 years; this has tumbled out to the folks growing their own, as well as to small cottage industries. As such, varieties have expanded and reemerged in unprecedented numbers. This is most definitely a good thing.
Dent (Zea mays indenata)
Dent or Field corn may be either white or yellow, and is predominantly used for processed foods, industrial products, and as livestock feed often used as livestock feed. No-name, really cheap corn meal or flour may be made from this variety. Dent kernels become notably indented at maturity, hence the name for the variety.
Flint (Zea mays indurata)
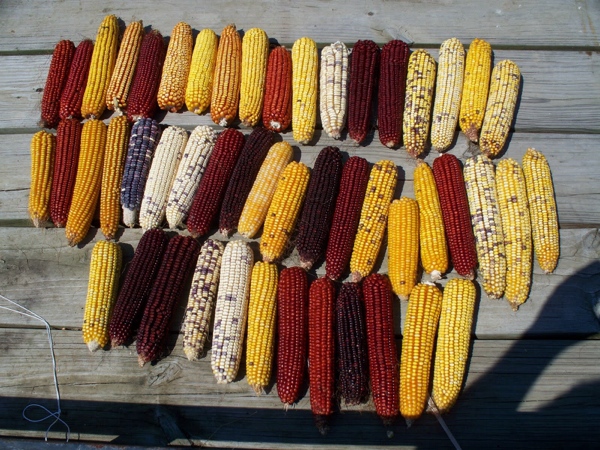
Flint or Indian corn is used for similar purposes as dent corn, as well as for decoration come fall. This variety is distinguished by a hard outer shell and kernels with a wide range of colors. When you see blue, red, or white flours, meals, chips and tortillas, you’re looking at flint corn. The variety is named for it’s hard or ‘flinty’ exterior.
Sweet (Zea saccharata or Zea rugosa)
Sweet corn is the variety we eat as corn on the cob. It is also canned and frozen. Seldom used for feed or flour, this variety is named for its higher sugar content, (around 10%, versus maybe 4% for Field corn). THE thing to remember is that roughly half the available sugars in sweet corn degrade notably within 24 hours of picking; if ever there was a thing you wanted to get locally from a good CSA, sweet corn is it.
Flour (Zea mays amylacea)
Flour corn has a soft, starchy kernel that lends itself well to grinding, so it is the primary variety used by companies in the U.S. to make meal and flour. Flour corn is primarily white, although it can be grown in other colors, including yellow, red, and blue. One of the oldest varieties, flour corn was grown by Native Americans before the rest of us showed up here.
Popcorn (Zea mays everta)
Popcorn is a variant of flint corn, with a soft starchy center surrounded by a very hard exterior shell. When heated, the natural moisture inside the kernel quickly turns to steam and builds up enough pressure for the kernel to explode, exposing the white starchy mass we like to graze on. All types of corn will pop to some degree, but they won’t necessarily have enough starch to turn inside out, or an outside layer that will create enough pressure to explode. One of the oldest forms of corn, evidence of popcorn over 5,500 hundred years old has been found in New Mexico.
OK, so enough learnin’, lets talk about what you should have in your pantry if you want to build corn recipes. The bottom line is that corn flours and meals are cheap and readily available, so you should aim for stocking the same stuff I do. Remember that quality counts; opt for fresh and local whenever you can and you’ll never go wrong. I stock white corn flour, masa, and white and yellow corn meal, and grits/polenta.
Alright, now we’re ready to cook. Here’re my go-to recipes for corn bread, tortillas, grits, and polenta.
Urb’s Corn Bread
1 1/2 Cups Yellow Corn Meal
1/2 Cup Corn Flour
2 teaspoons Baking Powder
1 Cup Whole Milk (or, in order of rising decadence, Half & Half or Buttermilk)
1 Egg
4 Tablespoons Lard (Unsalted Butter is fine)
1/2 teaspoon Sea Salt
Optional Additions:
Add 1/2 Cup extra sharp Cheddar or Pepper Jack cheese.
Add 1 – 3 seeded, cored and diced Jalapeño chiles.
1 ear of corn on the cob, cut down to kernels
Preheat oven to 400° F
Pour cornmeal into a bowl and add the milk; mix well and allow to sit for 15 minutes. This is a biggy in terms of making moist cornbread.
Mix remaining dry ingredients in a large bowl.
Melt the fat, then combine all ingredients and mix by hand to a nice, even batter consistency.
Place the pan(s) you’ll do the bread in into the oven, with a small dot of fat in each pan, (Or a tablespoon full if using a single pan).
When the fat is melted and sizzling, remove the pan, pour in the batter and return to the oven.
Bake for 20 to 25 minutes, until golden brown.
Serve Hot with, as Julia Child would say, ‘lots and lots of butter!’

Corn Tortillas
2 Cups Masa Harina
1.25 to 1.50 Cups hot Water
In a mixing bowl, combine the Masa and water by hand and blend until you get a nice, consistent dough that does not stick to your hands. You don’t want the dough too dry, either; shoot for a dough that holds together, isn’t sticky, but feels moist to the hand.
Roll the dough into 12 equal balls and allow to sit for about 10 minutes.
Whether you use a pin or a press, cut a gallon plastic storage bag into two equal sheets and place a ball of dough between them, then press or roll to roughly 6″ around.
In your pan or comal over medium high heat, cook the tortillas until you see that nice brown blistering form on each side. Each side will get 30 to 60 seconds of cooking time.
Stack your finished wrapped tortillas on a warmed plate under a clean towel to keep them warm.

Grits
1/2 Cup Bob’s Red Mill Grits
1/2 Cup whole Milk, (Half & Half, Whole Cream, and Buttermilk all work even better)
1 3/4 Cups Water
3/4 teaspoon Sea Salt
1/2 teaspoon freshly ground Pepper
Options:
1/4 Cup grated Extra Sharp Cheddar Cheese
2 Slices crisp cooked, thick cut bacon, chopped
In a saucepan over medium high heat, combine milk, water, salt, and pepper and bring to a rolling boil.
Shake grits into the center of the pan, stirring constantly to avoid lumps.
As soon as all the grits are incorporated, reduce heat to low and cover. You want your grits to cook at a low simmer, so keep an eye on that and adjust heat as needed.
You’re going to cook your grits for 20 minutes, but set a timer for 5 minutes and stir the grits, (So, you’re going to stir every 5 minutes for a total of 20 minutes).
After 20 minutes, taste your grits; if they’re not tender enough, cook for another 10 minutes, stirring after 5 minutes.
If you’re adding cheese and bacon, you can toss it in for the last 5 minutes of cooking, or offer it at the table with butter.

Leftover Grits?
Spread grits about an inch thick in a glass baking pan or oven proof skillet and refrigerate until firm to the touch.
Cut grits into roughly 4″ squares, season lightly with salt and pepper, then dust both sides with Wondra flour.
Fry in 2 ounces of butter and 1 ounce light vegetable oil, turning once, until golden brown. Served with red eye gravy, this is the bees knees.
Red Eye Gravy (Serves 2)
1/4 Cup Vegetable Oil
1 smoked ham steak, (About 1/2 Pound)
1 1/2 Cups brewed Coffee
1/2 teaspoon Sea Salt
1/4 teaspoon fresh ground Pepper
1-2 shots Tabasco Sauce
In a cast iron skillet over medium high heat, heat oil until shimmering.
Fry ham steak until nicely browned, remove to a warm oven.
Deglaze skillet with the coffee, stirring to incorporate all the juices and little bits of ham stuck to the pan. Season with salt and pepper
Bring liquid up to a high simmer and cook until gravy reduced by 1/3 and nicely coats a spoon.
Serve with grit cake, game and a over medium egg for a true little slice of breakfast heaven.
Basic Polenta
6 Cups Water
2 cups Bob’s Red Mill Corn Polenta
3 Tablespoons Unsalted Butter
1 teaspoon Sea Salt
1/2 teaspoon fresh ground Pepper
1/2 Cup hard Cheese for topping, (Parmesan, Romano, Asiago)
1/2 teaspoon Extra Virgin Olive Oil
In a large, deep sauce pan over high heat, bring water and sea salt to a boil.
Add polenta gradually, stirring constantly to blend.
Reduce heat to a low simmer; you’ll cook polenta for about 30 minutes, so set a timer to stir and check the progress of the dish every 5 minutes. Make sure to stir gently but thoroughly, all the way to the bottom to check for sticking and burning.
When the polenta is very thick, stir in the butter and then season with salt and pepper.
Oil a glass baking pan; spoon the polenta into the pan, even out with a spatula, and allow to set for 15 minutes, until very firm to the touch.
Cut polenta into thick slices and serve hot.
Top with freshly grated cheese.