Duck a la Y’all


This weeks Big Wild featured duck, so here are a few thoughts to flesh out that discussion.

First consideration is that all ducks ain’t created equal! If you’re adverse to the funky, gamy character of wild meats, steer clear of the fish eating ducks like Mergansers and Scaups. Of all the species hunted for game, these guys tend to be quite fishy tasting and their fat is very gamy. Wood ducks and Teals are your best bet for a tamer, more palatable taste profile.

Season also has bearing on taste and condition of course; the character of the meat certainly changes if your duck is in migration mode versus stocking up for winter months, as a fer instance.

With any species, it’s best to field dress and clean promptly and thoroughly, and get the bird cooled below 40 F as soon as possible. Food safety rules apply to wild as well as tame game!

I think that brining a wild bird is almost always a good idea prior to cooking. 1:16 salt to water is a good rule of thumb, so 1/4 cup salt to 1 quart of water. Brine your bird from anywhere from a couple hours to overnight, then rinse thoroughly by running the bird through at least 3 fresh water changes and minor soaks. You can use alternatives to water if you want to de-funky the taste of your bird further; citrus juice replacing all or part of the water is nice, and apple cider is exceptional.

Here’s the game plan for a basic roast duck.

Prick the skin liberally to allow fat to escape.

Stuff the bird with,
1 medium Sweet Onion
1 Orange
A few stems Cilantro
1 teaspoon ground Sage
Salt and Pepper to taste

Rough chop fruit and veggies, mix all thoroughly in a bowl and stuff bird liberally.

Truss your bird with kitchen twine so thickness is as uniform as possible.

Roast at 300 F with wings toward the side wall of stove and breast toward the middle, until internal temperature of meat at the thickest part reaches 160 F.

Start with the duck breast side down and flip roughly half way through roasting process.

Remove the bird and allow to rest for 5 to 10 minutes before carving. Meat should look, feel, and smell cooked, and juice from wing to body joint should run clear when checked.

Cook wild rice, brussels sprouts, green beans, or asparagus as a side with crusty, fresh bread and a nice, cold white wine of your choice.

Enjoy!

Saved by the Squees!


Almost nothing about moving from Texas to The Great Northwet struck as deep as chiles, or rather, the sudden lack thereof…

Used to growing a veritable cornucopia of our own, as well as being able to find damn near anything in the store, we were faced with no crop and slim pickings up here.

As the first hints of fall drift in the morning air, we contemplated accepting what was and heading for Whole Foods to grab some long-distance Hatches for a bare bones tied-me-over.

Imagine then our surprise and delight when a package from our dear friends at Neighborhood Gardens arrived from Hackensack MN; we truly had no idea what they’d sent, but knew that every care package was delicious to a T. The Squees moniker, BTW, comes from the fact that our pals Grant and Christie who own and run NG live on Squeedunk Lake up there in Cass Co., MN.

When I cut the first line of tape and the scent of fresh chiles escaped, I couldn’t believe my nose! Digging in further, here we’re bags of Hatch, Jalapeño, Super Chile, Cherry, Poblano, Serrano, and Pasilla, all gorgeous and ready to preserve – Heaven!

How they knew I don’t know, but bless their hearts! If ever there was a ringing endorsement of Community Supported Agriculture, this is it – Fresh, organic, varietal and right on time!

We got busy ASAP, and divided things up for storage; large chiles went to the grill for roasting, and then were vacuum sealed and sent to the freezer. the vacuum sealing virtually assures that no freezer burn will dim the flavor or appearance of these beauties over the long winter months, and they take up a lot less freezer room processed this way. A basic vacuum sealer is very affordable, and even better, this is one of those kitchen gadgets that’s often bought or received and never used, so you can find them cheaper yet on eBay, Craig’s List, etc.

The smaller varieties went into the dehydrator with the thermostat set for 145 F and were dried thoroughly. The chiles can then be vacuum sealed if not needed in short order, or stored in glass jars, out of direct sun; they’ll last a year or two easily.


To use frozen, roasted chiles, just pull them out and let them reach room temperature. It’s generally best to seed, strip membranes and skins prior to use, but if we’re making a sauce that will be blended and strained and the variety isn’t too hot, we’ll just pull the stems and seed base and call it good.

Dried chiles can be tossed into the spice grinder and processed into anything from a rough grind to a powder depending on what you’re making. We keep shakers of fine ground Tabasco and Jalapeño chiles handy at all times, as we find they add a very nice brightness to a myriad of dishes.

If your proposed dish needs the chiles whole and/or reconstituted, just plunk the desired amount into clean, tasty water and allow them to return to their natural state. Depending on how hot the chosen chile is and your desired heat level, you may want to remove stems, seeds and veins prior to soaking. By the same token, you might want to use the tea you infused while rehydrating your chiles as part of a sauce or salsa as well.

As always, be careful when handling hot chiles. Everyone has a different threshold, but prudent and cautious are always the bywords when handling a hot variety like Habanero or Ghost chiles. Always jeep in mind that damn near any variety can and will produce the occasional mutant, so even mild varieties can sometimes back a wallop. It’s always better to be age than sorry, so use gloves, keep your hands away from sensitive body parts after handling, and thoroughly clean any and all tools used in processing chiles.

Google CSA (Your town) and see what’s out the waiting for you!

Thanks again Squees, we love y’all!

Checking in with Chef Claycamp


Now truth be told, I just met Chef Claycamp for the first time a couple weeks ago, so this check in was in fact, a first.

I knew of him, of course, as I’m sure most devoted American foodies do. The creative genius behind Culinary Communion, Gypsy, Vagabond, Muse, the Lunch Counter, and the Swinery, his resume and reputation espouse the two things I really love about cooking, sharing what you know and great meat.

Fans of Anthony Bourdain’s No Reservations will remember his Seattle episode and the meal Chef Claycamp prepared therein. Watchers may not know that, due to an offhand remark regarding imported cheese, the Chef still can’t cross International borders without being hassled by Customs. Ya hear that Bourdain? Call ’em and say y’all were just joshing, ‘K?

In partnership with Proprietor and owner of Castle A Farms Tiffany Hudson, Claycamp will act as Executive Chef at Cassoulet, set to open on the 5th of September. Cassoulet is located north of Bellingham in a truly gorgeous chunk of Whatcom County.

Our Daughter-In-Law, Miranda, has joined the staff, and was kind enough to invite us to a test run of one of the menus. That’s an invite you don’t say no to, of course…

On a beautiful summer evening, we descended on a truly warm and inviting space and joined the friends and families of the staff for an incredible evening of food, wine and great conversation.

Tiffany is simply a joy, all around. She spent two years working on a traditional family farm in Varcaturo, Italy, a province northwest of Naples in the southern part of the country, and absorbed volumes of traditional techniques and methods for planting, farming and preserving food. As will happen to darn near anyone steeped in the traditions of the Italian countryside, (My Sis studied in Perugia), one becomes inexorably woven into the fabric of the place and finds it very hard to leave. Tiffany’s solution was to transplant that vibe to her own Castle A Farms and now to Cassoulet.

I won’t divulge everything we had in detail. I’ll just say that it was fantastic and we’ll be back. Several of the dishes, (OK, the Corsican lamb and the shrimp and grits), were truly stellar.

The seating is comfortably family style and will accommodate about 40 folks.

Great food, staff and wine generates conviviality, which is quite simply the essence of a truly great meal. We’ll let Cassoulet and their staff explain the nuts and bolts of how things work; know that everything will change day to day based on what’s locally available, and that pretty much everything that can be is locally sourced. There’s a nice little bar, and even here you’ll find a nice selection of local wine and spirits, (The Ebb & Flow gin from Seattle was sublime).

We’ll just close by saying that virtually every aspect of the experience was wonderful. When you leave full and grinning from ear to ear, what more could you ask for?

Put Sept 5th and Cassoulet on your calendar and we’ll see y’all there.

Cukes-R-Us


M and I just got back from an amazing dry run meal at Chef Gabriel Claycamp’s soon-to-be newest undertaking, Casoulet, (More on that shortly!), and found this email waiting from Christy and Grant at Neighborhood Gardens:

Hey, guru of the kitchen! It’s cucumber overload season. Can you give us a bunch of ideas to get beyond cucumber sticks and cutting them into salads?

And, of course, the perennial question of what to do with all the summer squash/zucchini. Naturally we can google, but then we are overwhelmed with major junk recipes. We would prefer your expert guidance.

Overwhelmed in Northern Minnesota

My answer? Of course! I mean, be still my heart; anything and everything cuke is near and dear to us! So, here’s some ideas for immediate use, as well as long-term storage and enjoyment.

First, some general thoughts.

Cukes are great on sandwiches and they aren’t used for that as much as they could and should be; add them to your favorite toppings, or try replacing lettuce with super thinly sliced cukes.

Cukes make great faux noodles; they’re great sliced thin, lengthwise, and used like lasagna for a cold variant of the dish. You can take it one step further and turn those long, thin slices into spaghetti wanna-be’s as well. Both are tasty and visually very cool.

Few things are more genuinely refreshing during a hot summer than a nice, cold, cucumber salad. Variations are endless, but simple is always best for a starting point

For the salad:
3 Cukes, sliced very thin
1 Tomato, cored, seeded and diced
1/2 sweet Onion, sliced thin and quartered

For the dressing
:
The classic vinaigrette ratio is 3:1 oil to acid, but this is not in any way set in stone. Deepening on the strength and nature of your constituents, let alone your personal taste, you can and should tweak that ratio to your liking. For this salad, we’ll do a classic recipe, but here again, this combination of ingredients lends itself to many variations on the acid side; orange, lemon, lime, or grapefruit juice replacing the vinegar are all delightful. For something this delicate, the oil should always be extra virgin olive oil.

3/4 cup Extra Virgin Olive Oil
1/4 cup Balsamic Vinegar
1/2 teaspoon dill
Salt & Pepper to taste

Combine all veggies and toss. Add the dressing and toss liberally. Allow to sit, chilled, for at least 30 minutes for the flavors to blend. Truly goes great with dang near any meal.

Tzatziki is one of our all-time favorite sauces; if you’ve not tried it, you simply must.

Tzatziki

1 8 oz container of Greek Yogurt, (You can use regular too)
1 med cucumber
2 tbspn olive oil
Juice from 1/2 to 1 lemon, (As you like it)
1 tspn dill, chopped fine, (You can sub spearmint)
2 cloves of garlic, minced
salt to taste

If you don’t have Greek Yoghurt, plain will do, but find Greek if you can; it is richer, tangier and thicker, all of which are good things when it comes to Tzatziki.

Line a colander or strainer with paper towel and drain the yogurt for 15 to 30 minutes; this is critical in avoiding a runny final product.

Peel, seed and grate cucumber. We used Armenian from our garden, which have wonderful taste and nice, firm flesh. Any decent cuke will do, but make sure it is nice and firm.

Combine everything and mix well by hand, as blending or processing will make your yogurt break down.

Place in a non-reactive bowl, cover, and refrigerate for 1 to 2 hours. This stuff just goes well on dang near anything, but certainly does shine with lamb or pork. Try it as an omelet with feta or mizithra.

And of course, you simply gotta do a quick pickle!

Choose glass jars for your pickles, (And of course, pickle jars work great!). Wash your jars really well and rinse thoroughly.

Cut your cukes into flat slices or quarters lengthwise and size them to the jars you’re using. Keep in mind that the bigger the cut, the longer it takes for everything to infuse.

Pack your jars full but not too full; leave enough room for plenty of brine. Make sure you’re leaving at least 3/4″ from the top of the jar.

For spicing, use a 1/2 teaspoon of dominant notes and a 1/4 teaspoon of minors. Our go-to pickling spice blend includes a Pepper blend (Red, white,black, green) and whole coriander seed as the dominants, with juniper seed, mustard seed, fennel seed, cumin seed, whole garlic cloves, and dill as the minors. Drop the blend right into the jars in equal measure.

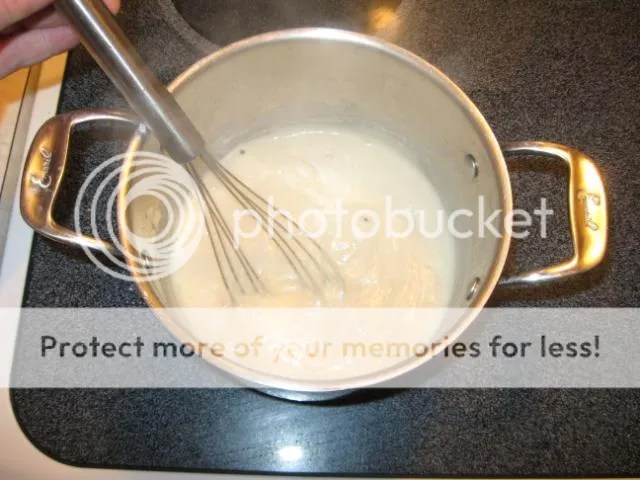
For the brine, bring to a boil and stir until well dissolved and combined:
1 cup vinegar
1 cup good water, (Meaning, if you don’t drink your tap water, don’t use it!)
1 Tablespoon non-iodized salt (Iodine makes things turn funky colors and adds a nasty metallic taste, so don’t go there. Use pickling salt, it’s a better mousetrap.)
OPTION: 1 teaspoon of sugar if you like a sweeter pickle

Pour the hot brine over your cukes, making sure they’re completely covered.

Seal your jars; you’re not canning, per se, so you can reuse old lids if they’re clean, and you can reuse original pickle/sauerkraut/whatever lids too.

Refrigerate your jars and do your best to let things work their magic; resist the urge to sample for at least a week, and two weeks are better yet – The longer they hang, the better they get.

Fridge pickles are good for at least 3 or 4 months, if they last that long.

Preserving cukes.

So, you grew or bought a huge patch of cukes, whataya gonna do to keep them for the long run?

Head on over to The National Center for Home Food Preservation and find everything you need to know about virtually any method you’d like to try.

The first and most obvious preservation option is pickling, and this time, we mean water-bath canning as opposed to fridge pickles. The beauty of ‘real’ pickling versus fridge pickling is longevity. Where fridge pickles will last a few months, water-bath canned pickles will easily last a year.

Cukes can be dried and still retain enough flavor and character to be worthwhile for certain uses. You’ll find an excellent how-to paper from the University of Colorado at NCHFP.

What about freezing? Well, the answer for doing so as they stand is, not really. You can., however, do a freezer pickle and you’ll find those do quite well indeed. Simply use the recipe we showed above for fridge pickles and refrigerate your cukes for 24 hours. Transfer pickles to freezer bags or containers along with a little juice and freeze. If you have a food saver / vacuum sealer, they work even better.

And finally, if you still have left overs and can’t think of anything to do with them, then get in your ride and haul ’em over to your local food bank; sharing is always a good option! In fact, maybe you aughta do that first, eh?

Sensible Salmon Leftovers


Last time around, M and I did our Seattle re-immersion dinner with some killer local salmon.

We bough the whole fish, got it filleted, and froze half, but even after seriously porking out, we had a pretty good hunk of leftovers, so what to do?

Cold salmon with lemon? Salmon salad? Salmon and scrambled eggs? All winners, but after looking over our fish, we thought it was a bit dry; the skinny end was left, strangely enough, and with a new stove we aren’t used to, we’d hit it a bit hard. That helped lean our recipe decision toward something moist and rich. here’s our variation on a classic Alfredo

Salmon Alfredo

3 Cups whole Milk
2 Tablespoons Unsalted Butter
2 Tablespoons AP Flour
1 1/2 cups flaked salmon
1 Cup diced vine ripe Tomato
1/2 Cup fresh grated Parmigiano Reggiano
Juice of 1 small Lemon
1/2 teaspoon Lemon Thyme
Sal de Mer & Grains of Paradise to taste

Melt butter in a 4 qt sauce pan over medium heat, and allow to brown slightly.

Add flour and blend thoroughly, allowing to heat through until it starts to bubble.

Slowly add milk, taking care to maintain blend; in other words, don’t break the roux. Heating a mixture of flour and butter takes advantage of the elastic nature of the bonds created therein, and is truly the heart of a good roux. Done classically, you heat, stir and add with painful slowness, and truth be told, that’s what it takes to create and hold the fantastic variations made from this simplest of combinations. When done right for home work, the flour-butter mix will look and feel like a batter, and as you slowly add the milk, it starts to look like mashed potatoes, or maybe thick custard. Add a little milk, let the mix heat through, add a little more, and with care and patience, you’ll have a lovely cream sauce.

Once the basic sauce is done and heated through, it’s time to add your goodies. Note that for the cheese, M went with the grated Parm and some rind too, since it’s a fave of ours. Cheese is added first and allowed to melt through.

Now throw in the salmon and tomato, and finally the seasonings, and adjust to taste.

Turn the sauce down to low and allow it to blend for a bit while you prep the pasta. We went with locally made, dried fusilli, since it has nice surface area and little grooves in the outside surface that are really great at holding sauce. Boil well salted water, add a bit of olive oil and throw in your pasta. When it’s on the chewy side of al dente, pull it off the heat and drain, but don’t rinse. Throw hot pasta into a bowl along with a tablespoon or two of the pasta water, then add your sauce and toss.

We served ours with a nice little salad of local greens and sourdough toast points, and you can too!

Homeward Eats


After 11 years, M and I arrived back home in the Northwest, specifically, the Seattle area. After getting moved and settled, our first outing together was, naturally, food based.

We headed for downtown Seattle and started at Salumi for lunch; since we were going shopping and had been absent for so long, getting fortified beforehand is always wise…

Salumi is famous for their sausage and rightfully so. That said, it’s tiny and easy to miss; here’s the store front:

The way you find it is by looking for this; the big line out front.

What you get is simply perfect. Go ahead and just try to go without taking some snausage home with you.

Truth be told, there’s just been a pregnant pause while I headed for the fridge to snag salumi, bread and dijon mustard…

Fortified, we headed for, naturally, the Pike Place Market. “Tourist trap!” you yowl? Yeah, I s’pose so, but on the other hand, if you lived downtown and didn’t shop here on a daily basis, what kind of twit would you be? So suspend your disdain and dive in; there’s a reason some of these vendors have been here for many decades. And besides that, it’s gorgeous.

We were after fish, of course, as anyone in their right mind deprived of great seafood for a decade plus would be. Pure Food Fish Co., here since 1911, is an example of all that is great about the market. Super fresh, friendly, and absolutely willing to do as much or as little to your catch as you want them to.

We were after Salmon, naturally, so it was time to choose. In the Pacific northwest, you have five primary varieties of Salmon; King, Sockeye, Coho, Pink, and Chum. They can also be called, in the same order, Chinook, Red, Silver, Humpback and Dog.

What does all this stuff mean and are there genuine differences between them, you ask? Yeah, there are, and they do mean something worth knowing.

King is just that, the best tasting, fattiest flesh with the most melt-in-your-mouth texture there is, hands down. Sockeye is not far behind, truth be told, and there are plenty of folks who chose this variety first every time. Silvers, which run quite shallow in the fall and fight like all get out, may be “Middle of the Pack” salmon, but for me they’re #1. Pink and Chum are not the top of the heap in terms of taste, color, or texture, though Chum roe is highly prized for sushi and likely the most oft harvested.

After looking everybody over, we went with local, wild caught red King. Planning, as usual, to do several meals with this gorgeous fish, we bought a whole and had it fileted. Had we more fridge and kitchen space, we’d have asked to have the rack and head bagged up and taken it home to make stock with.
<img src="http://i2.photobucket.com/albums/y24/AerieGuitars/Food/Photo10.jpg

Having accomplished so much so quickly, (Ahem…), we stopped into a peaceful Uli’s Famous Sausage and Bierstube for a refreshing lager. And speaking of snasauge, had we not done Salumi, we sure would’ve dove in here, as you better if you’ve not already!

Next came Frank's Produce yielded new potatoes, Walla Walla sweet onions, fresh green beans and lemons. Off we go!

A final stop at Pears for a bottle of Mountain Dome bubbly and we’re good to go.

So, back at the ranch, simple rules the roost.

The veggies are rinsed and dried, tossed in extra virgin olive oil, diced shallot, salt and pepper and then roasted.

A filet goes on a broiling rack, then gets a simple baste of unsalted butter, lemon juice, brown sugar and bourbon. Into a 350 oven, we allow 10 minutes for each inch of thickness, measured at the thickest part of the filet. The thinner end is turned to the slightly cooler side of the oven, thick part to the middle.

With lightly toasted local sourdough to sop up juices, that, as the saying goes, is that.

Next time, round 1 of leftovers!