Superior Ramen at Home


Ever had fantastic ramen? If so, I’m willing to bet that, like me, you wanted to know how they did that. Fortunately, it’s entirely within our wheelhouse to make fantastic ramen at home. Let’s check out the keys to making ramen at home that will knock your socks off.

While a steaming bowl of ramen seems the essence of simplicity, the magic is in the details. There are five critical elements to a stunningly good bowl of ramen – broth, tare, noodles, toppings, and oil – so let’s dive in.


Broth is the undeniable heartbeat of a great ramen bowl. You can make it from whatever you wish – poultry, beef, pork, shellfish and fish, or veggie – In the version you’ll see images of here, I used homemade Parmigiano stock. Get into the rhythm of throwing leftovers into a stock pot and making your own on a regular basis. It’s delicious, beats the hell out of anything you can buy, and simple to do. If you want to make authentic ramen broth, dive into a browser search – you’ll find tons of recipes for everything from Chintan (clear soup) to Paitan (white soup).


Tare (Tar-eh) is the secret weapon to great ramen you might not have heard of. The literal translation is ‘dipping sauce,’ clearly indicating that you’ll find it in many places other than a ramen bowl, but therein, it’s absolutely critical. Broth is generally clean, light stuff – the essence of what it was made from, but not highly seasoned. In a great bowl of ramen, the broth stands out as something very different – bold, rich, loaded with umami – and tare is where most of that comes from. 

What tare is made from in any given great bowl is often a mystery – It’s each cooks special magic, and I t’s up to us to parse out what we‘re tasting and formulate our own. Fortunately, there are lots of clues – you’ll find ramens named for a key tare ingredient – Shoyu (soy), Miso (soybean paste), Shio (salt), or Tonkotsu (pork bone) to name just a few. A browser search will turn up a wealth of starting points for you, and of course you’re welcome to riff off mine, so long as you go on to make it your own. 

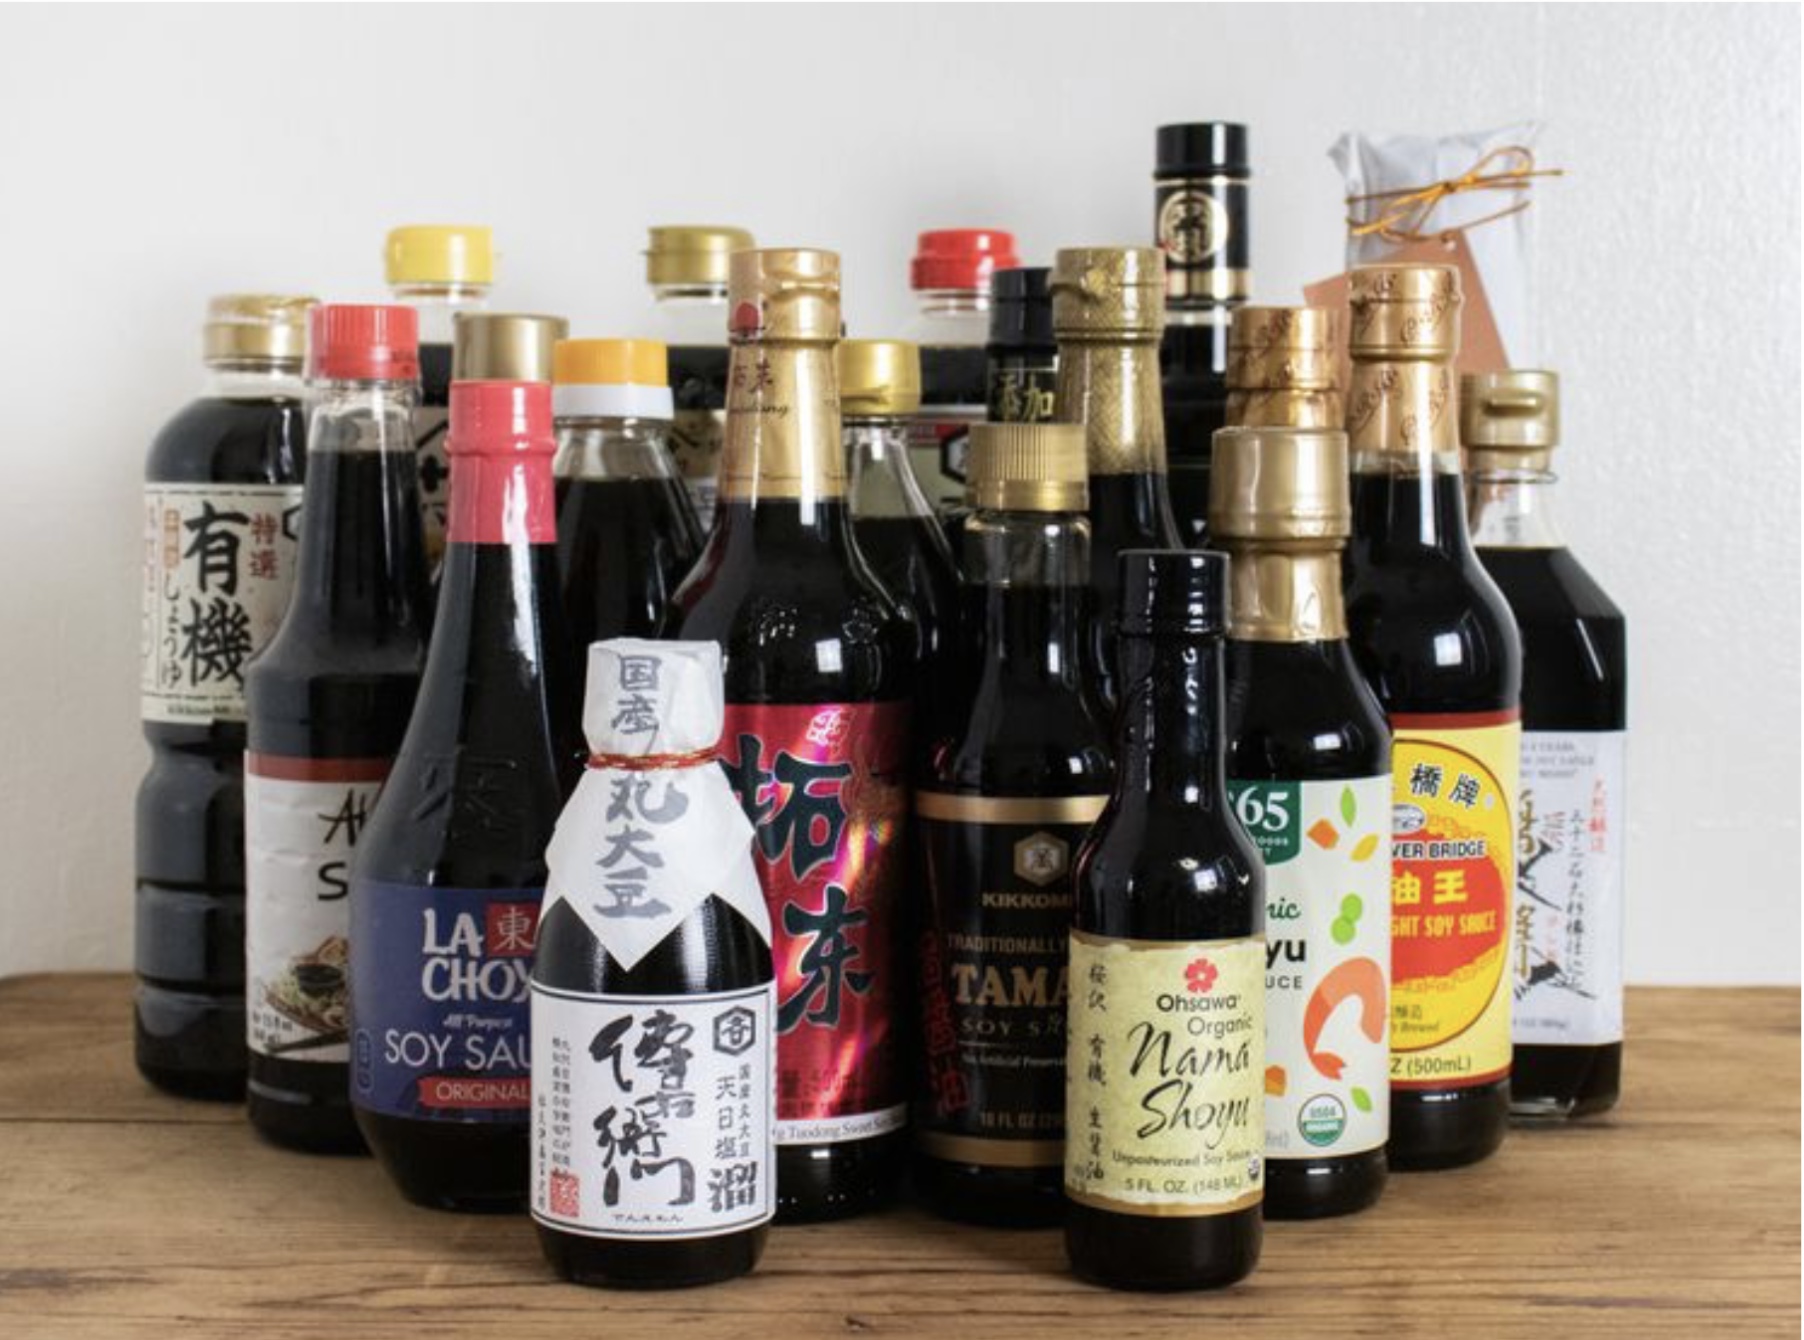
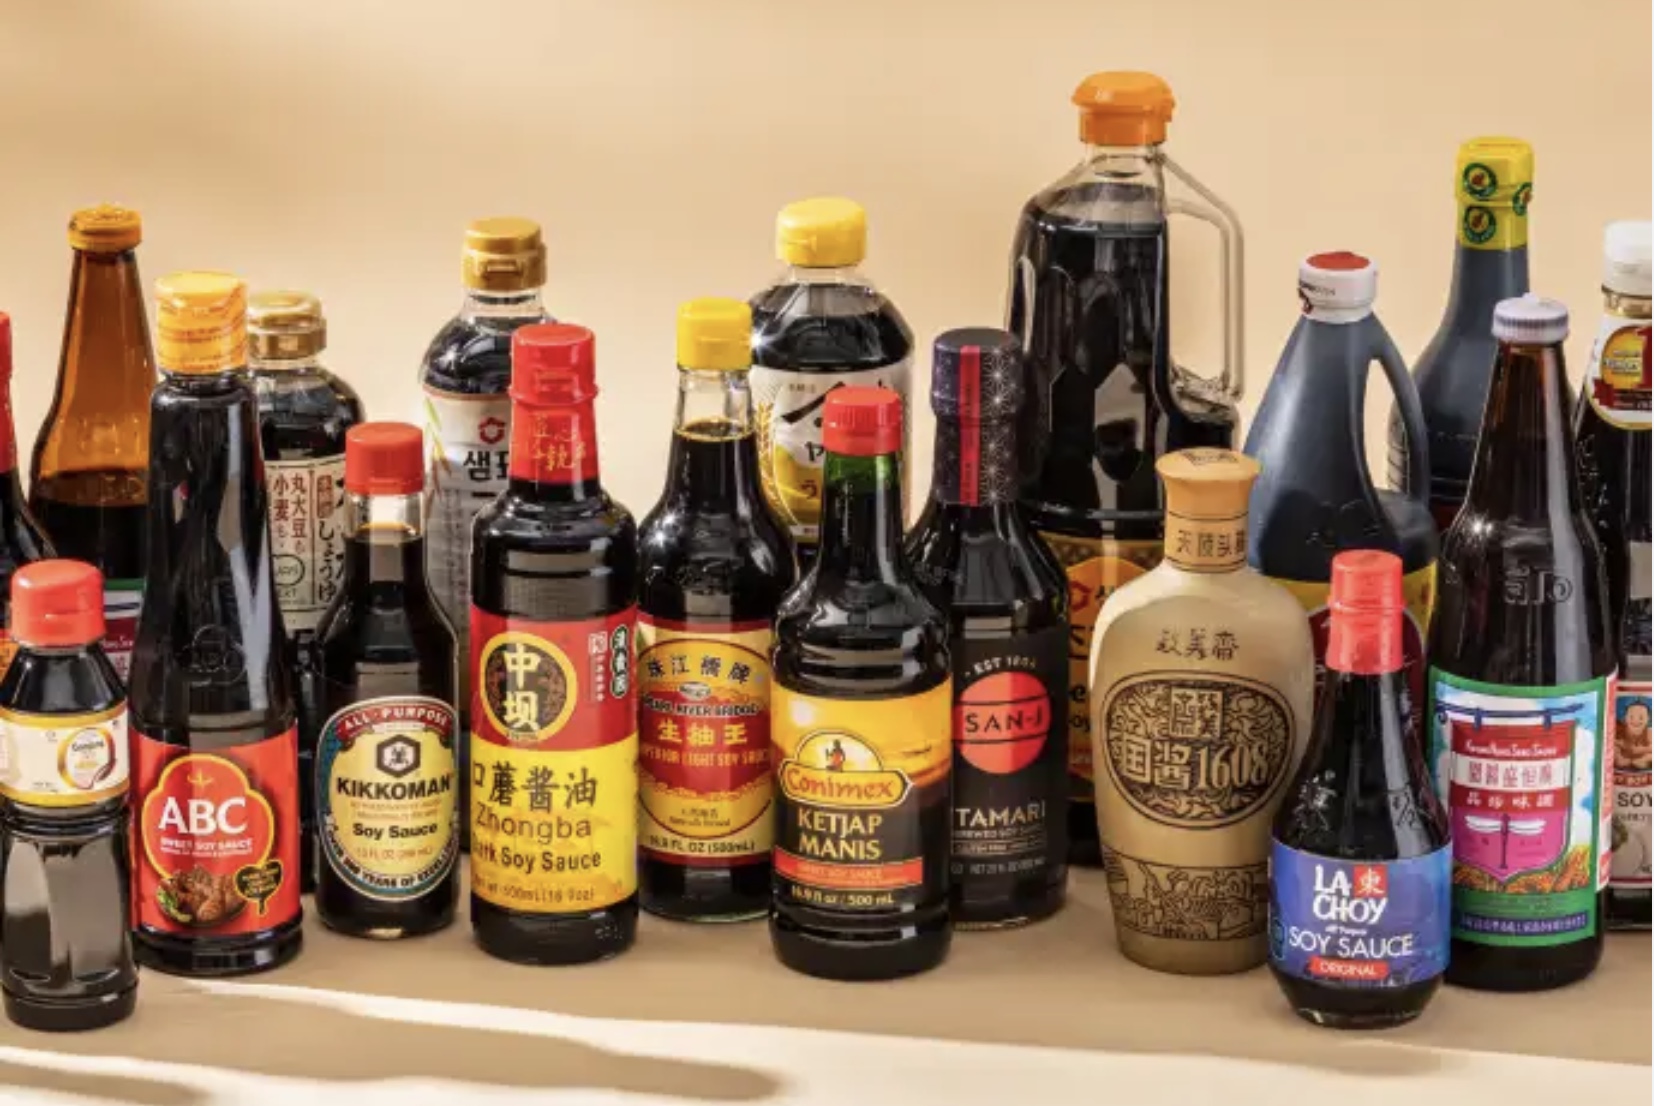
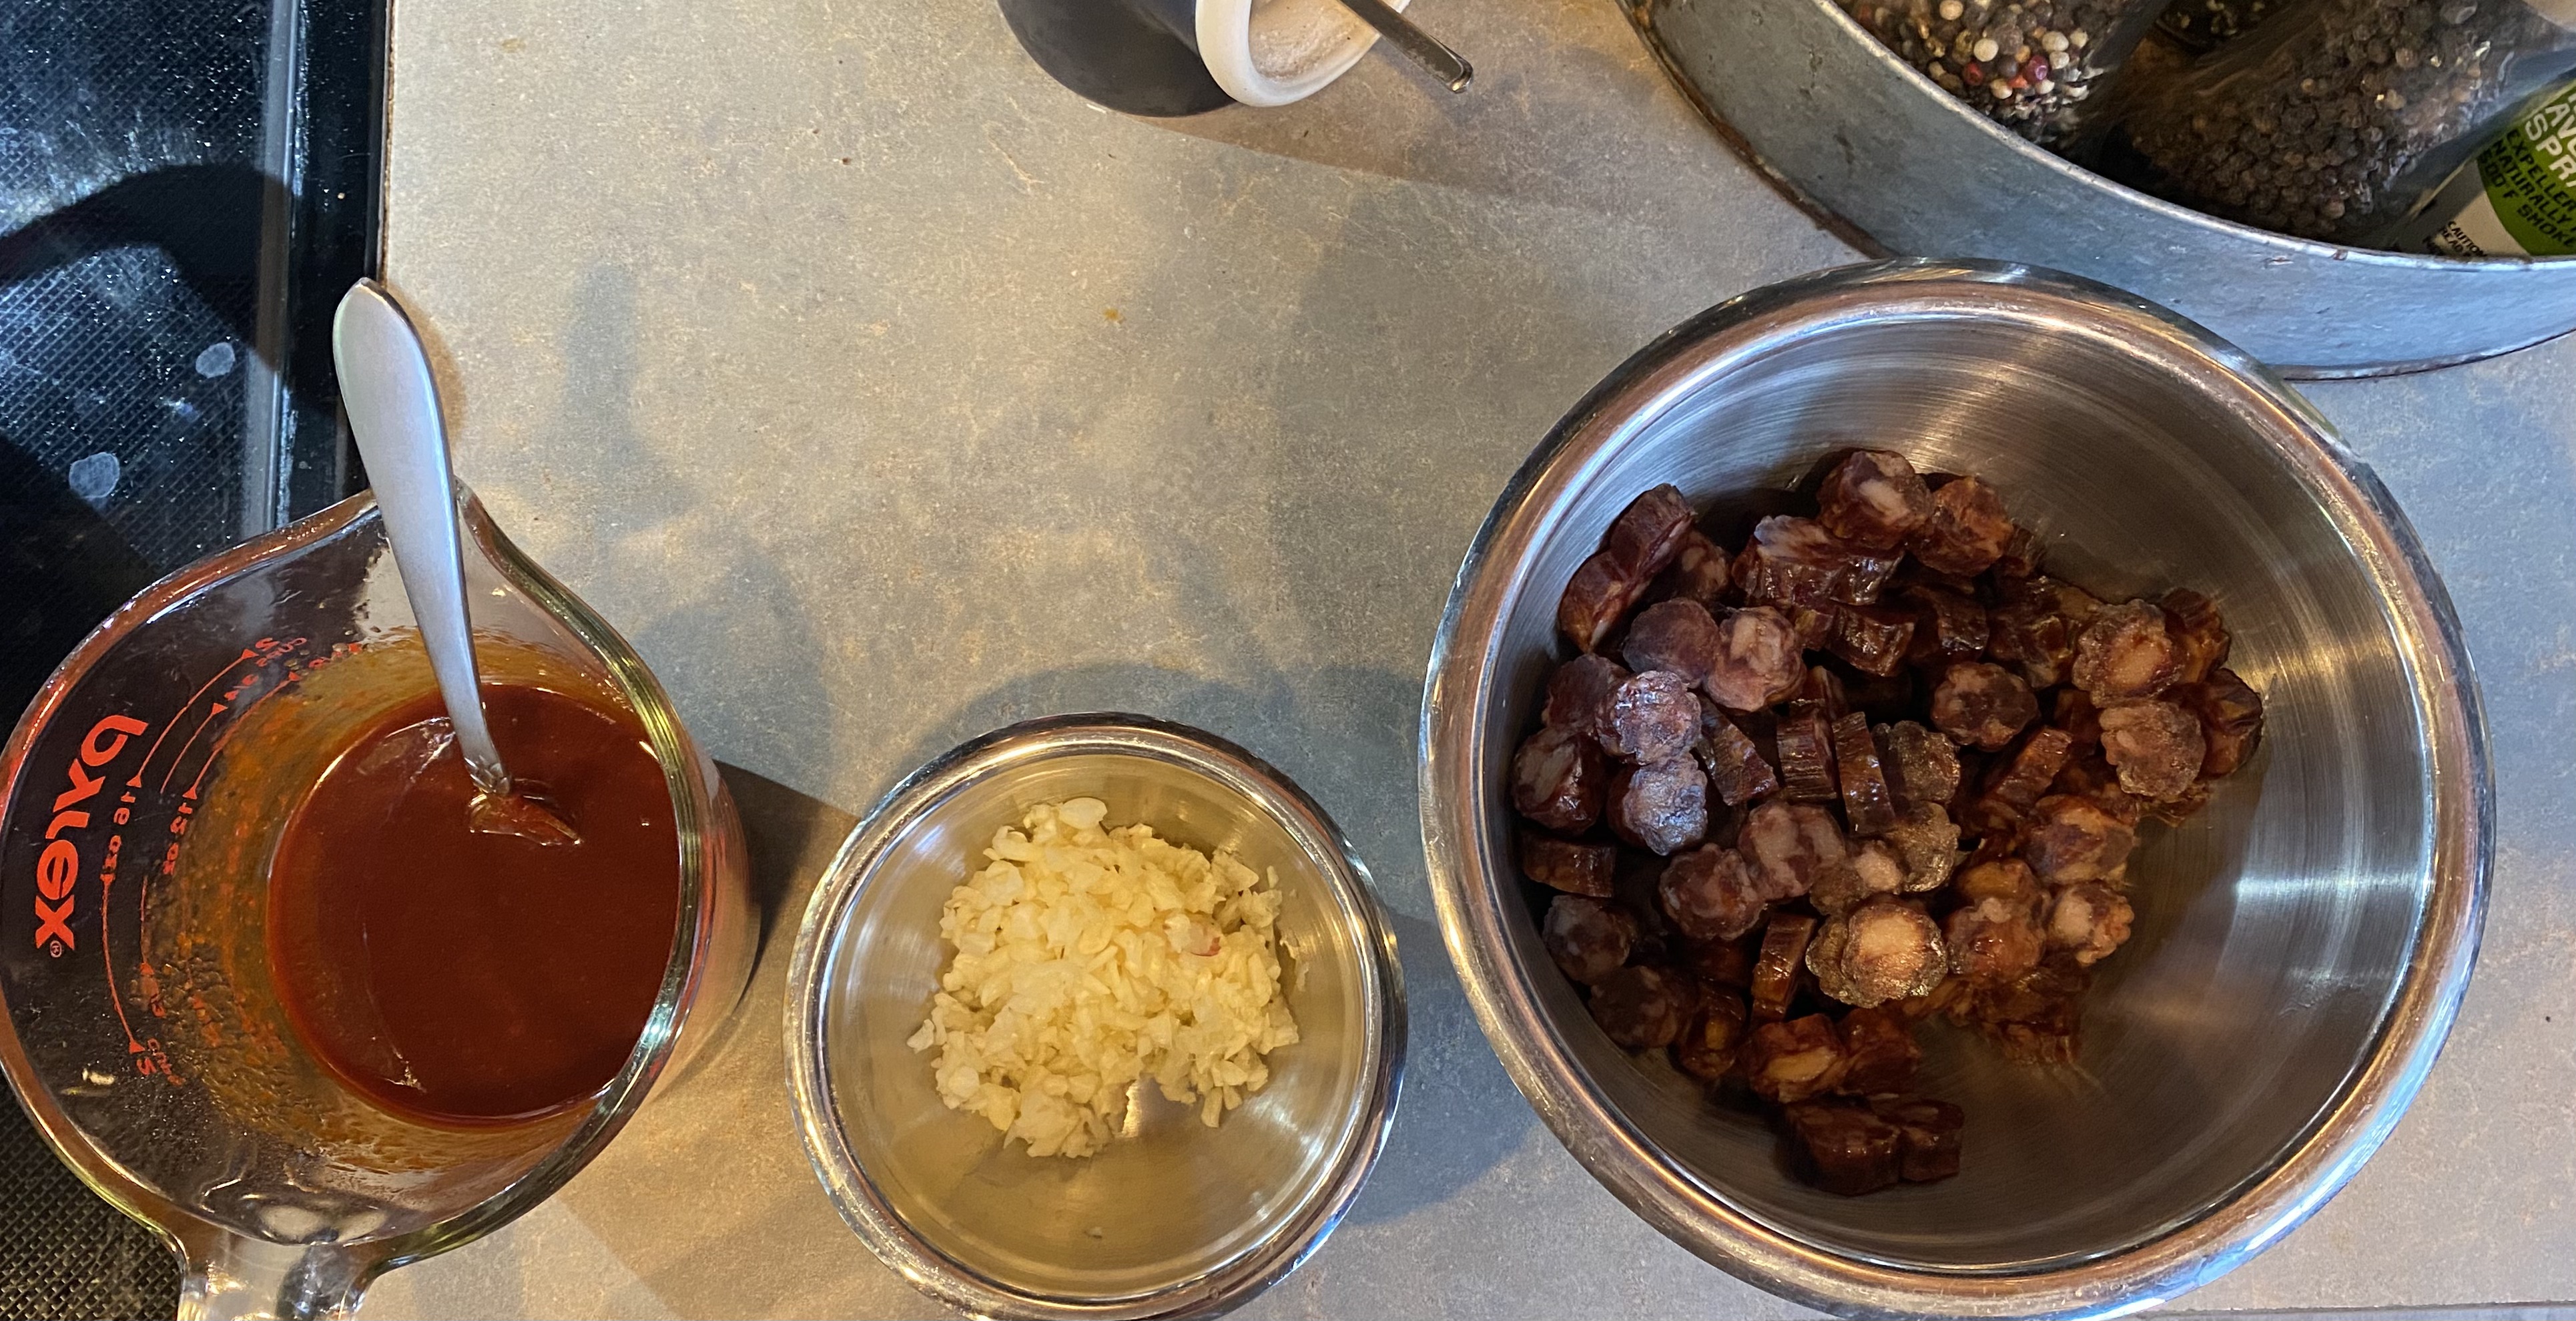
Think of tare as a chord – pick out your key or dominant note, and then add whatever else you like, (I find Dornberg and Page’s The Flavor Bible indispensable for work like this). Tares are very likely to include soy sauces, mirin, rice vinegar or rice wine, sake, or kombu. As you’ll see below, I went quite far afield in a search for a balanced tare with touches of salty, sour, sweet, and heat – and tons of umami. Tare should be the first thing added to the bowl when you’re doing final assembly – that’ll fully incorporate with the broth.


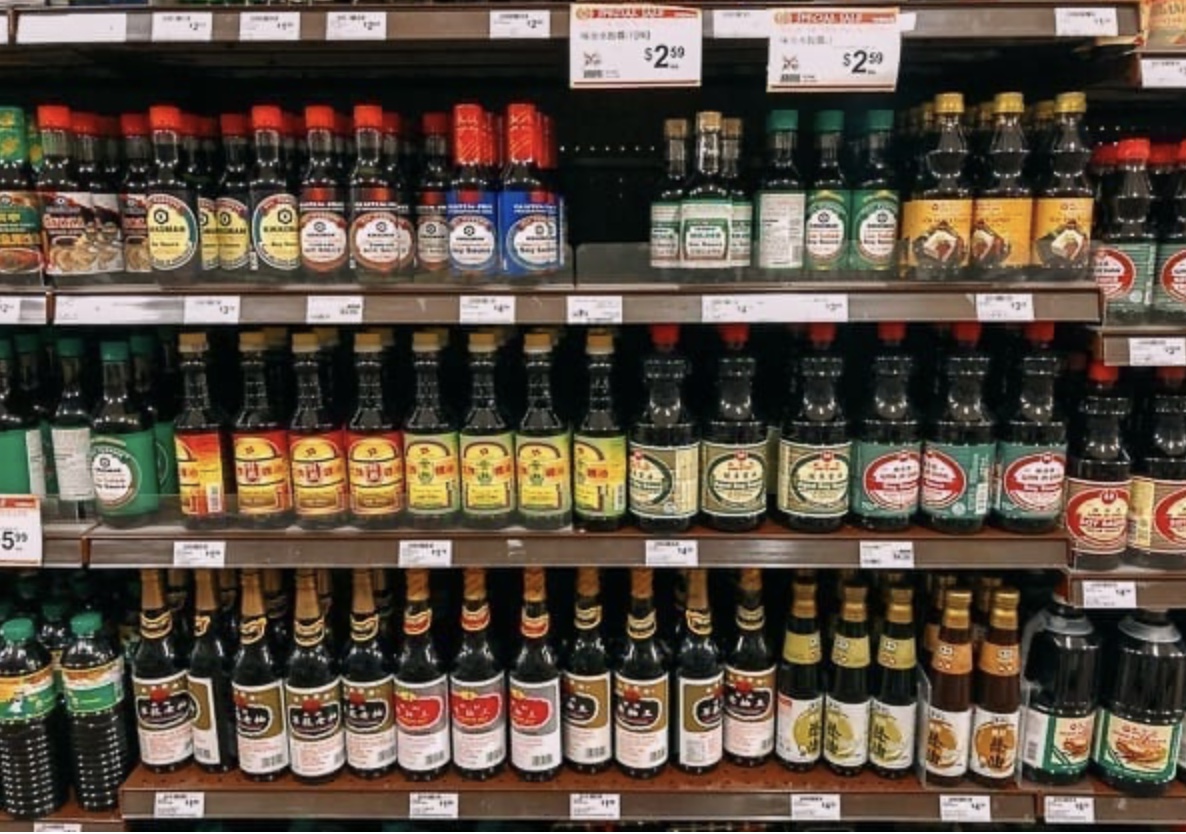
Noodles, the right noodles, are arguably critical to killer ramen. Technically, we’re talking about a Chinese-style alkaline noodle, comprised of wheat flour, water, a little salt, and Kansui, aka lye or alkaline water. It’s widely used in world cooking, and while it’s true it’s highly caustic stuff, won’t hurt ya deployed in tiny amounts for noodle making. Now, you can make ramen noodles at home, or even convert pasta to a reasonable facsimile if you’re so moved – but know that DIY for really good ones is not easy at all, and may well lead to more frustration than fun. Truth be told, most restaurants buy theirs, so go visit your local Asian grocery – there’s a ton of variety, as you can see here at Vancouver’s T&T Supermarket.


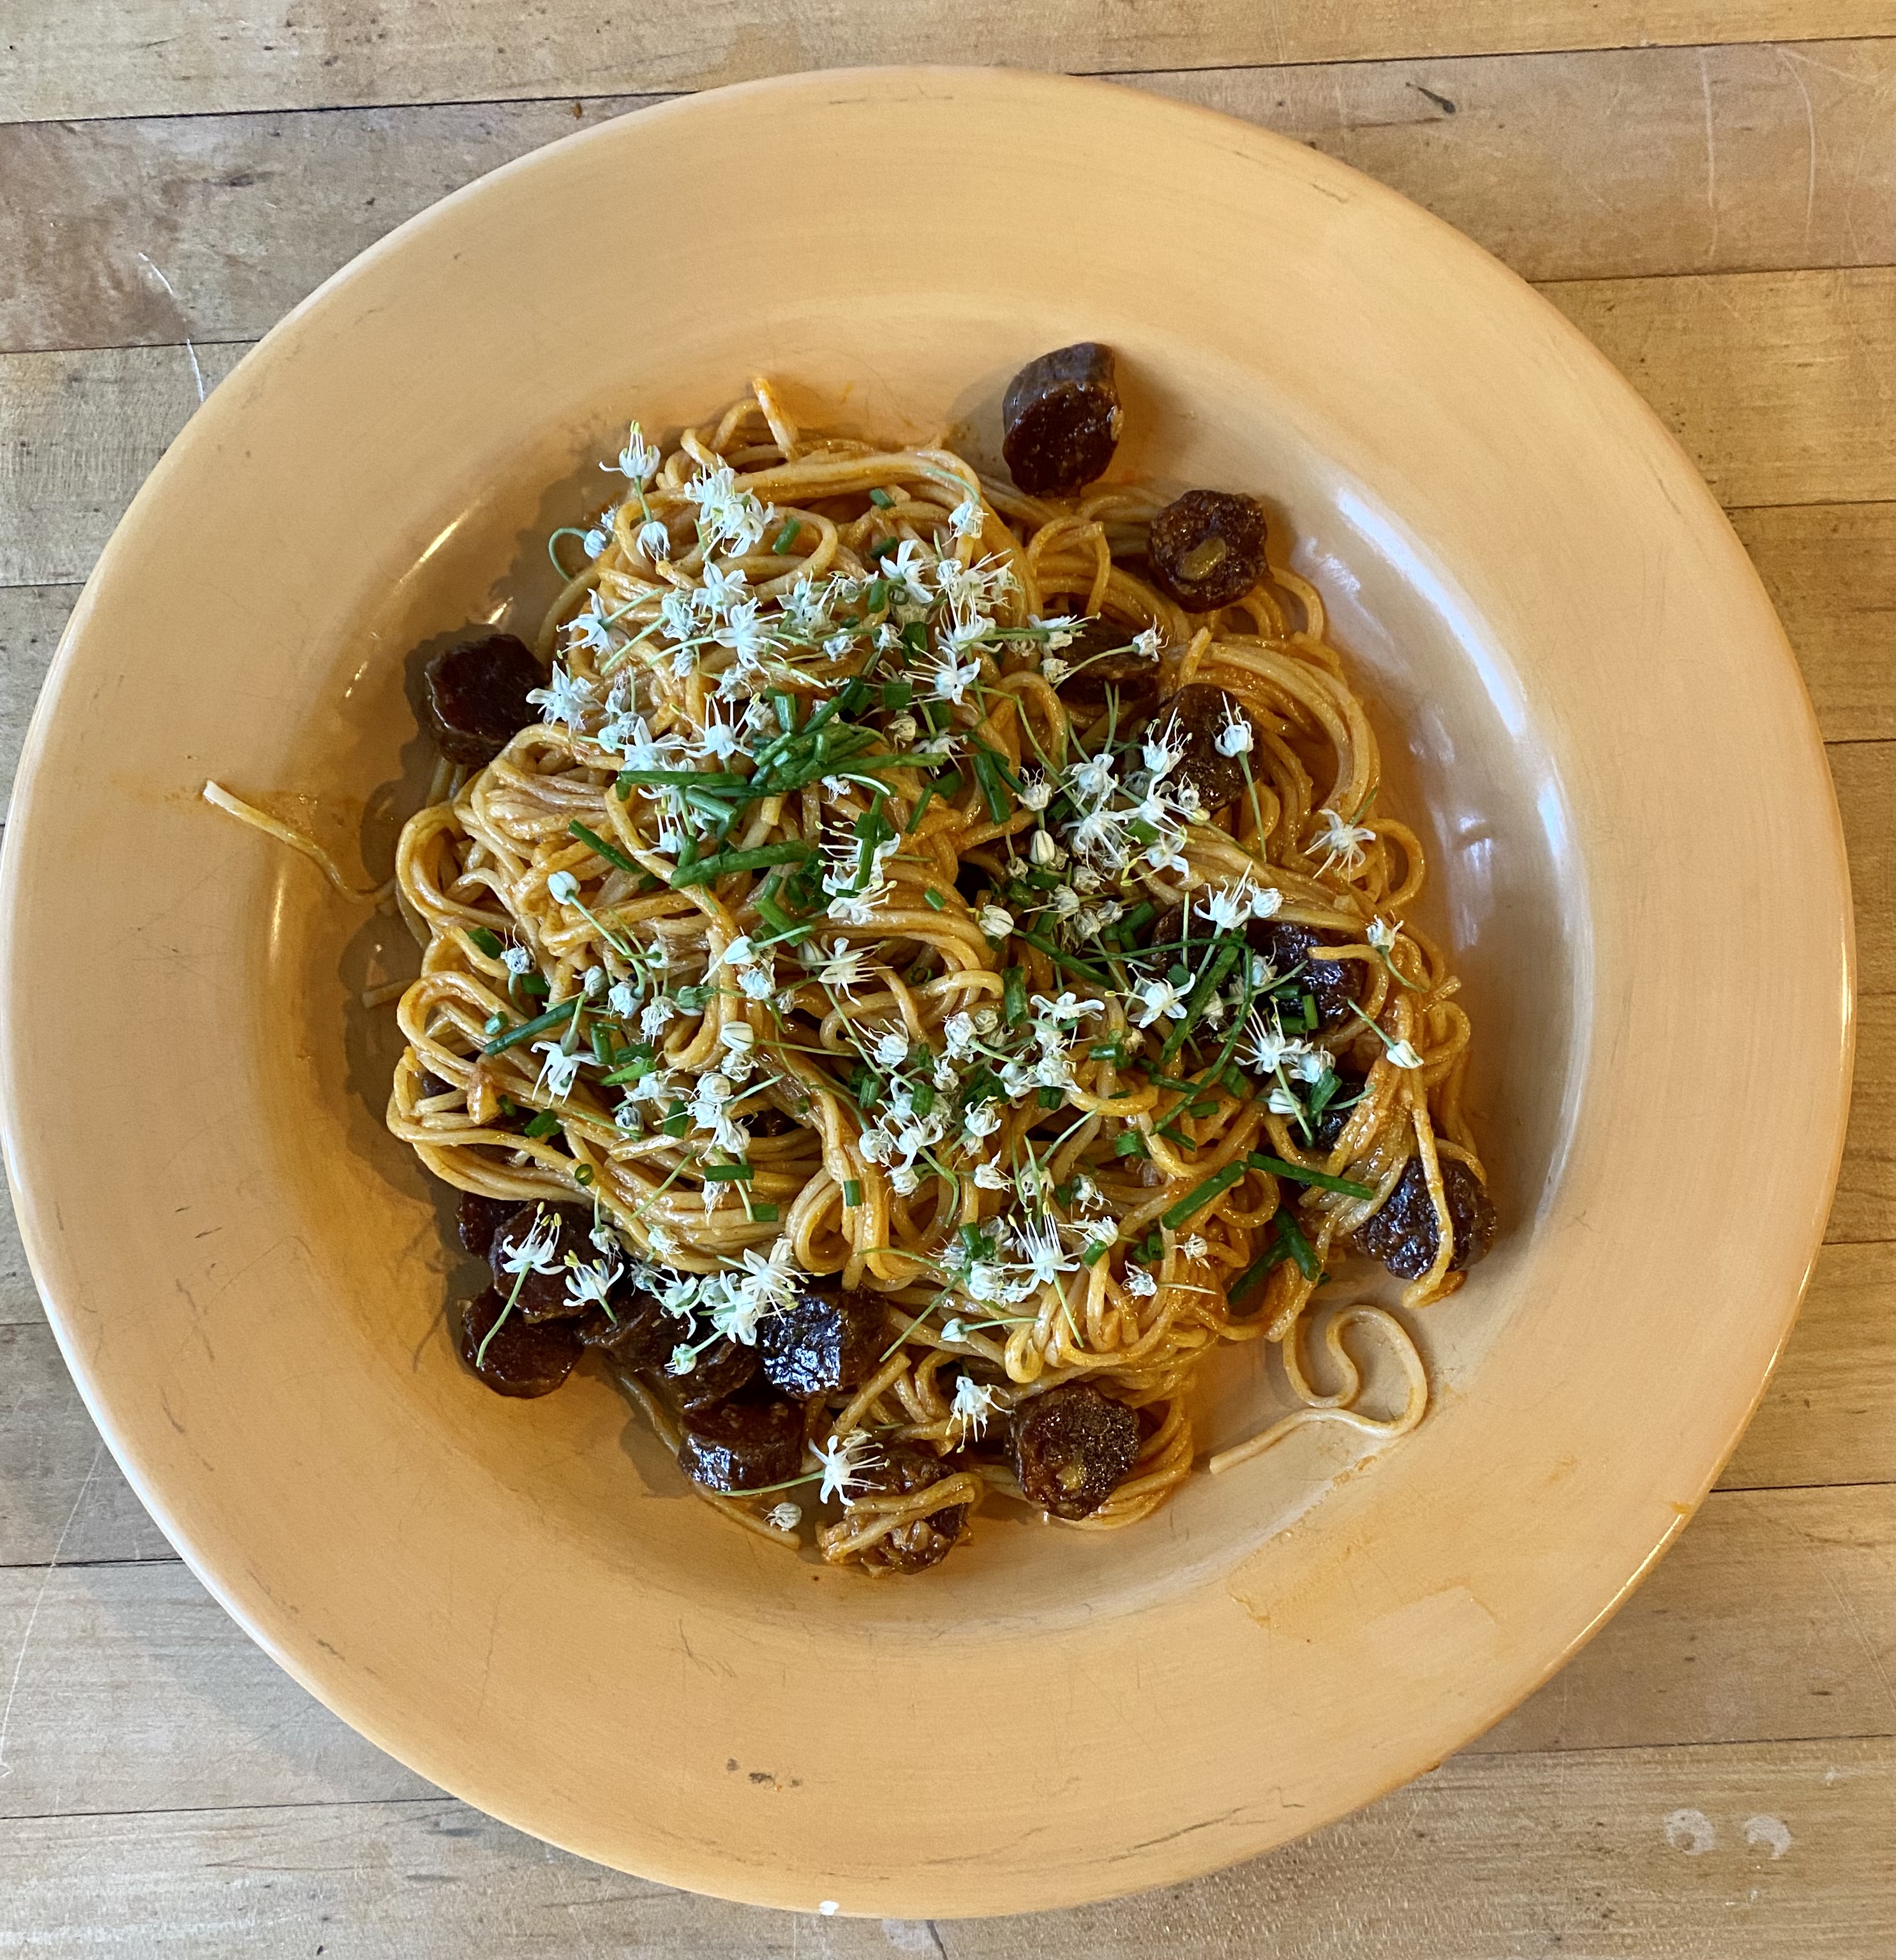
Toppings are the element that will provide you with lots of flexibility and creativity. You can go from super simple to wild as you like – it’s your ramen, so the sky’s the limit. Toppings might be anything from slow simmered chashu pork, to the sublime ajisuke tamago – marinated ramen egg. Try snappy quick-pickled veggies, bamboo shoots, water chestnuts, scallions, nori, or your fave mushrooms. Use your imagination and dress that bowl up, paying attention not only to taste, but composition as well.


Finally there’s Oil, and it’s the one secret ingredient most likely to be missed – and it absolutely, positively must not be – it’s a critical element for some very good reasons. Oil is yet another place to add a little something, usually aromatics, that’ll make your ramen special. Secondly, oil is hydrophobic – it doesn’t mix with water much at all, (and broth is basically water.) When you add a little bit of oil to the bowl, (and you’ll add that at the start of composition, with the tare), it’ll float to the top once everybody is in the pool. The oil helps extract flavor from the broth, and adds its own subtle notes – it also seals the dish somewhat, helping your ramen to stay hot.

So there ya have it – Now let’s deploy. Below is what I did in most of the images you see here – riff off of that and make one your own.


Urban Ramen

Feed 2, maybe – scale accordingly 

1 Quart Broth (preferably homemade, whatever variety you dig).

Tare – see below, and plan on 2 Tablespoons per bowl.

Ramen Noodles – Most of what we buy are around 8” long – a bundle roughly the size of a quarter per person is the minimum measure.

Toppings – Don’t be stingy – a cup of each for two people should do.

Oil – see below for a recipe that’ll last a while – Plan on 1 Tablespoon per bowl.


For the Oil

Makes a lightly flavored oil – you can load it heavier if you like.

1 Cup Avocado Oil – (Canola is fine)

2-3 fat Cloves Garlic

2 teaspoons Asian Chile flake (whatever you like)

2 finger pinch of Salt

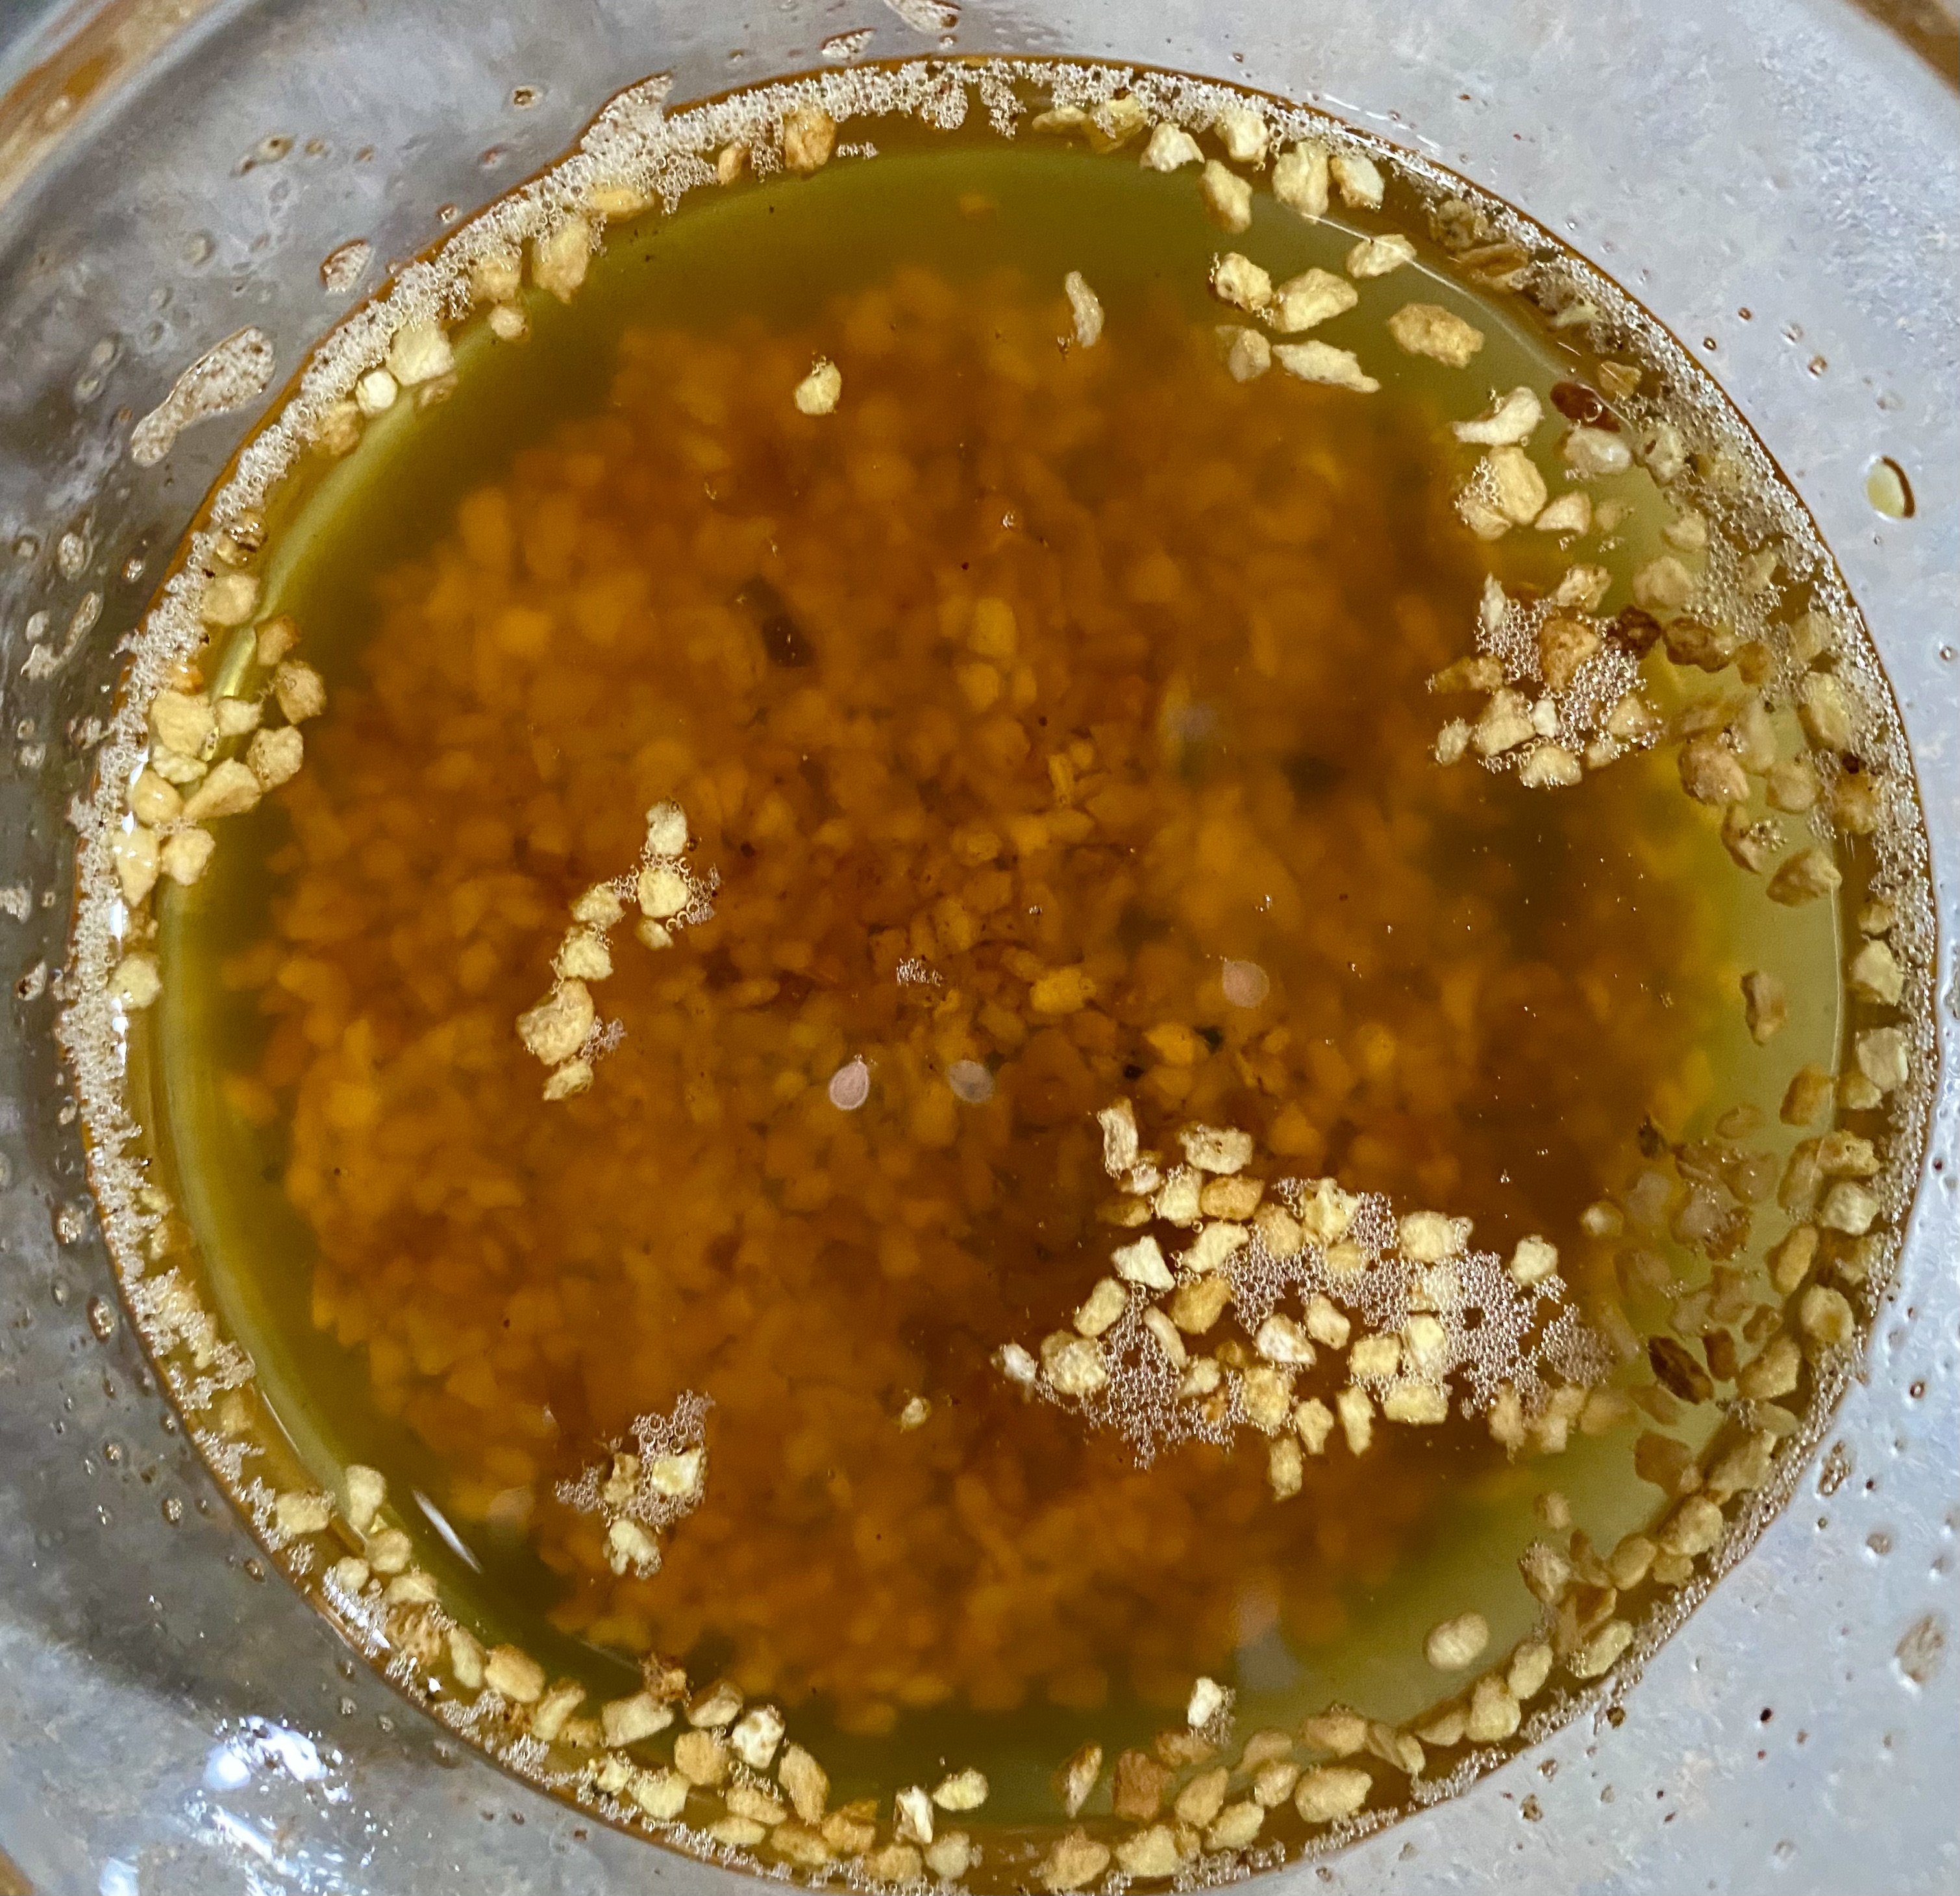
In a small, heavy bottom sauce pan over medium heat, add the oil and garlic.

Use a kitchen thermometer to closely monitor oil temp, and reduce heat as soon as you pass 200° F – you want to stay right around 225° F, which means barely a bubble now and then – no higher, or oil and garlic will take on a nasty burned smell. Cook for 30-60 minutes until the garlic is golden brown, and check on it frequently!

Put the Chile flake in a small steel or glass mixing bowl. 

Remove oil and garlic from heat and slowly pour over the oil. I add about a tablespoon of minced, roasted garlic at this point – it adds a nice color and toasty flavor to the mix. 

You should get a nice little sizzle and foaming from the Chile as the oil hits it. Add the salt and stir to incorporate.

When the oil has cooled, you can strain off the chiles and garlic, or leave them in as you please, (personally, I’m eatin’ that garlic post haste)

Store refrigerated in an airtight glass container.


Urban Tare

Notes: The vinegar used here is incredibly complex, intense, 10 year old Chinese stuff. If you love amazing vinegar, go to http://www.themalamarket.com and buy some. Good quality, barrel aged Jerez vinegar would be a great sub.

You can make your own Shichimi Togarashi, or buy it – See below

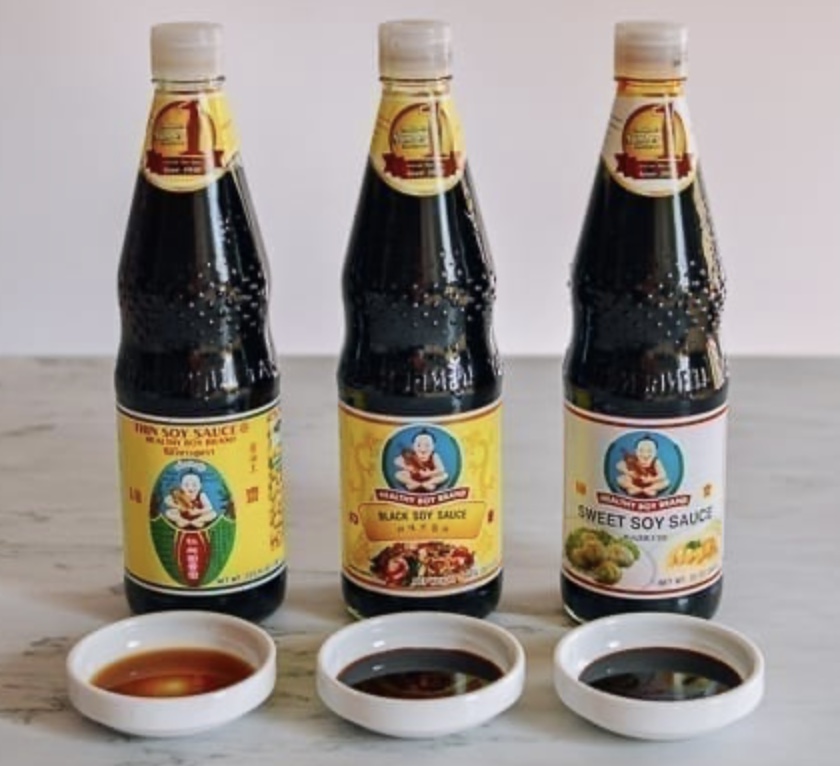
1/2 Cup Dark Soy Sauce 

1/2 Cup Double Black Soy Sauce 

1 Cup Mirin

½ Cup Sake

1/4 Cup Honey

2 Tablespoons Baoning Vinegar (Jerez is fine)

3-4 cloves fresh Garlic

2-3 Scallions

2” piece fresh Ginger Root

1-2 Tablespoons Shichimi Togarashi spice blend (see below)

2 finger pinch Salt

End trim, smash, and peel garlic.

Peel and rough chop ginger.

End trim, peel and rough chop scallions.

In a heavy bottom saucepan over medium heat, add all of the ingredients and whisk with a fork to thoroughly incorporate. 

Bring the mix to a gentle boil, then reduce heat to a simmer. 

Cook until the sauce has reduced by half and thickened enough to nicely coat the back of a spoon, about 15 to 20 minutes.

Remove from heat and pour through a single mesh strainer into a clean glass container.

Store refrigerated and air tight.


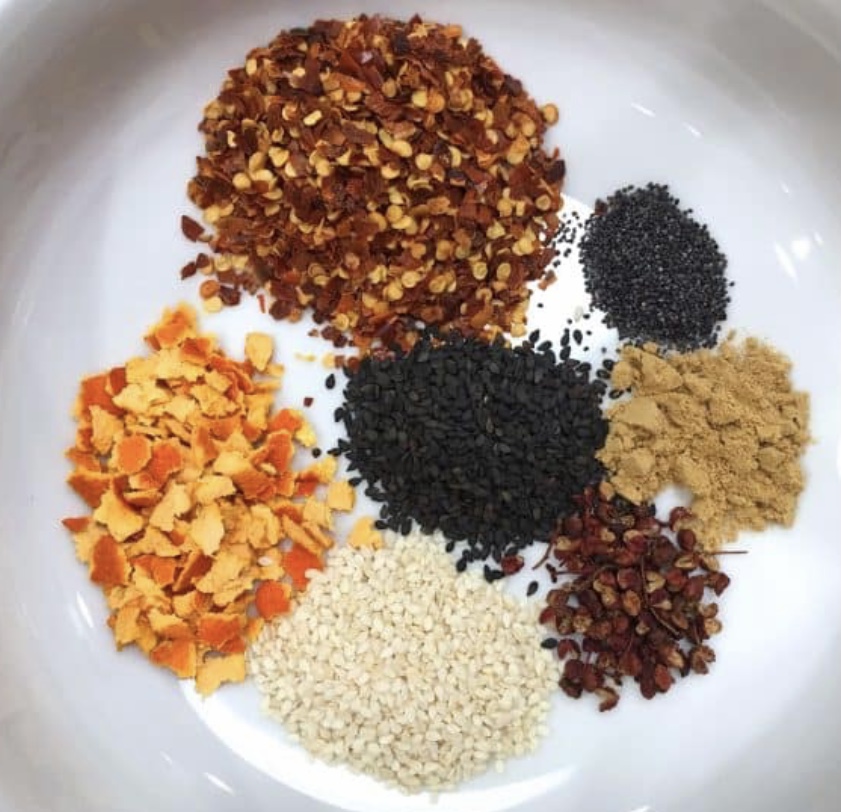
Shichimi Togarashi Spice Blend

This stuff rocks on and in all kinds of stuff

2 Tablespoons Red Chile flakes (Use what you like – Your local Asian grocer should have plenty)

1 Tablespoon dried Orange Peel 

2 teaspoons White Sesame seeds

2 teaspoons Black Sesame seeds

1 teaspoon Sichuan peppercorns

1 teaspoon Ginger powder

1/2 teaspoon Poppy seeds

1/2 sheet toasted Nori

In a clean, dry cast iron skillet over medium low heat, add the sesame seeds, Sichuan peppercorns, and poppy seeds.

Lightly toast, attending constantly, until fragrant. 

Immediately remove from the skillet and transfer to mixing bowl to cool.

Hand crumble the Nori.

Place all of the ingredients in a spice grinder and pulse until coarsely ground – don’t overdo it, you want a coarse blend.

Transfer and store in a clean, dry, airtight glass jar.


When you’re ready to rock – 

Put your broth over medium heat, and add anything to that you feel like doing. Reduce heat to a bare simmer and let it do its thing while you build everything else.

Prep your toppings and set either as a mis en place for you to use or at table for diners to load their own.

Notice that additional proteins are not considered a critical element – That said, they are common toppings. You may do anything from firm tofu to pork, poultry, beef, or soft boiled egg.

If you’re doing a quick pickle, prep and start that before you make oil and tare.

Anything else, from kombu to shiitake, can be quickly portioned.

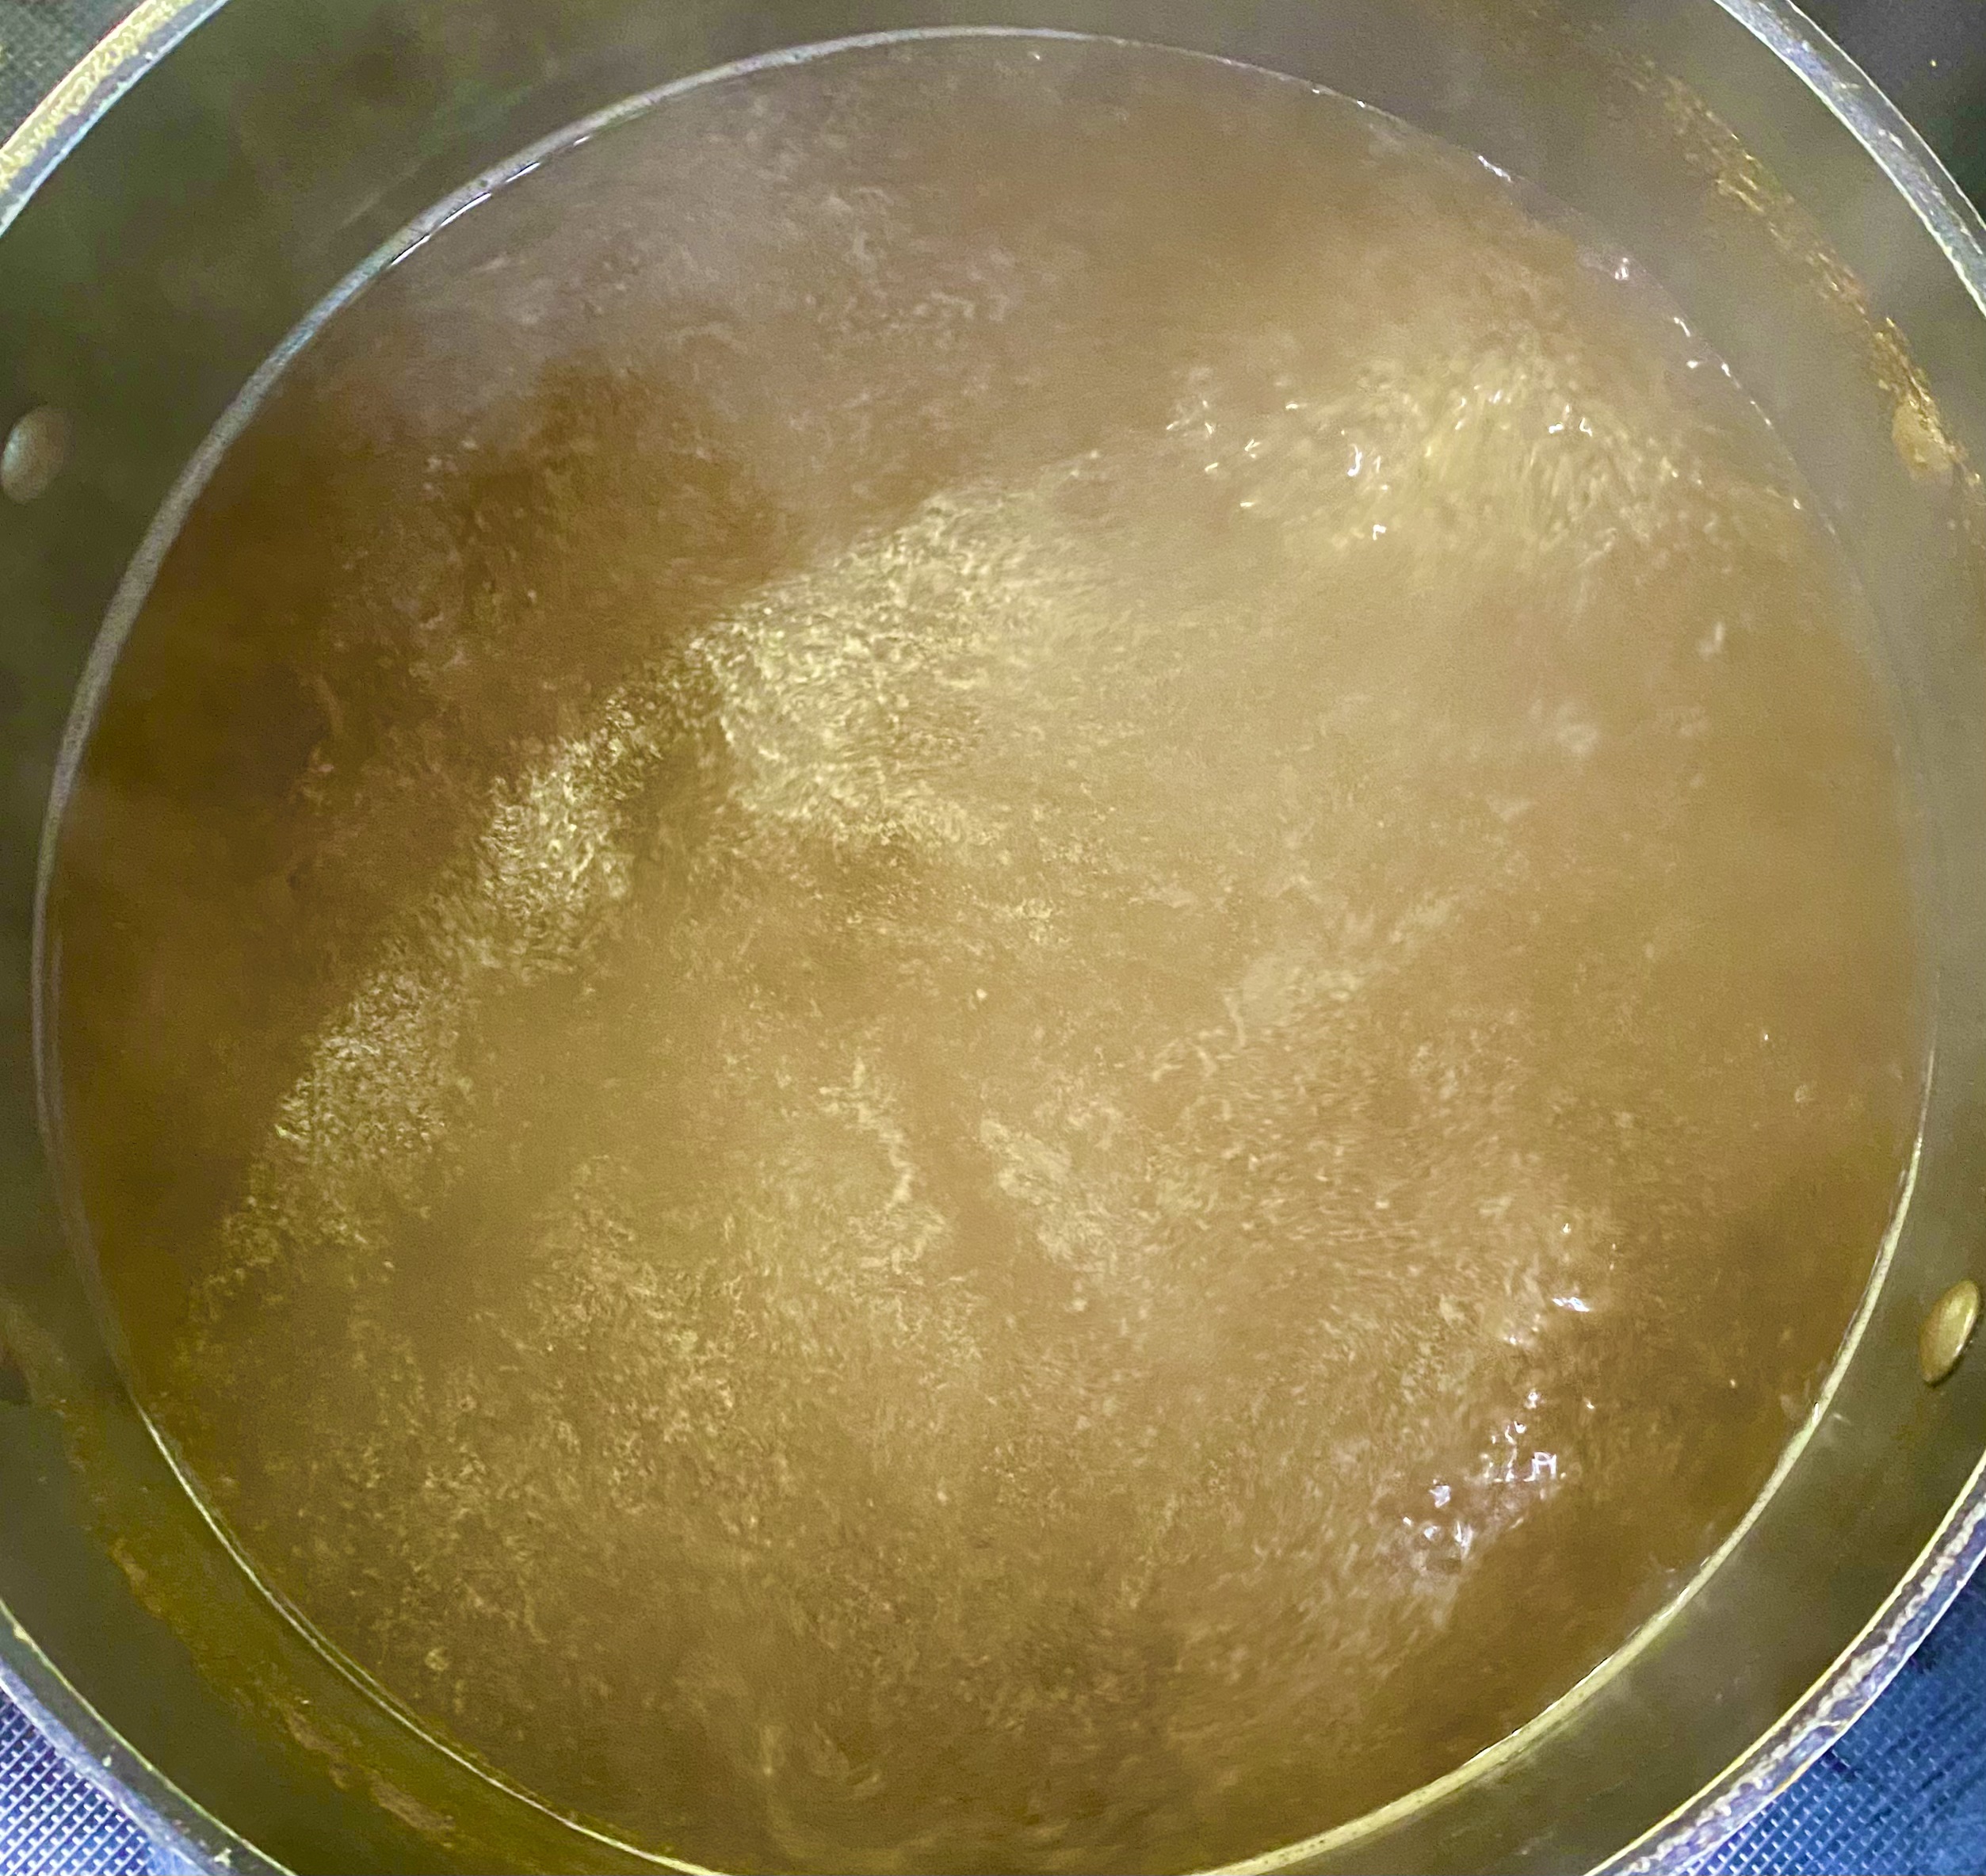
Prep your noodle boiling rig and colander for draining.

When you’ve got a vigorous boil, add noodles and stir in – they cook quickly, usually only 3-4 minutes, so stay with them. 

Pour noodles into colander and give them a quick rinse with fresh water to remove excess starch and alkalinity.

Put noodles back into the dry boiling vessel, add a tablespoon of your oil, and toss to coat thoroughly.

Assemble your bowls – Tare and oil go in first, then broth, then noodles, then toppings.


Serve immediately, and devour with many yum yum noises.

Doin’ The Soy Sauce Shuffle


Christy Hohman is our tribal Sister, archeologist extraordinaire, and a wonderful cook to boot. She also keeps me honest here, and recently came through again – she wrote, ‘I was stumbling through soy sauce on Amazon today and thought: I bet Eben could steer me through this maze. So, maybe a post on Urbanmonique? Different kinds of soy sauce? Different uses? And what about that amino stuff that some people use instead? From an inquiring mind in Minnesota where the closest Asian Market is at least three hours away.’ The topic turned out to be another one that I thought I had covered in depth, only to find out that I really had not. So it’s definitely time to fix that, so strap in – here we go.


Soy sauce originated in China, with references as far back as the third century BC. In the mid 13th century, a Zen Buddhist monk, Shinchi Kakushin brought the recipe for the precursor of modern soy sauce back to Japan.


This sauce, jiàngyóu, was quite thick, kind of like Moromi miso is today and very similar to the consistency of the mash from which modern soy sauces are pressed. Eventually it was noted that the liquid that leaked out of that thicker stuff was really tasty, and the making of thinner soy sauces began.


Traditional soy sauce is made with soy beans and wheat, or just soy, depending on the country and sauce desired. These ingredients are cooked down into a thick paste. After the mash cools, a salt brine inoculated with the natural fungus Aspergillus sojae is introduced, and carefully controlled fermentation follows. When fermentation is completed, the mash is pressed to expel soy sauce. 

Soy sauce spread widely across the Far East, and as it did so, it changed to reflect the preference of the various countries it landed in. We might think that soy sauce is the same stuff everywhere, but that’s not so. Every iteration of it is unique, and variants abound.


The good news is that real deal soy sauce is widely available and well worth you searching it out. Between a blossoming of interest here and the expansion of global economies, some really good stuff can be found. So let’s look at some of the varieties of soy sauce you can find readily, what makes them different, and what they’re really good for.

First rule of thumb – if you’re cooking Chinese, use Chinese sauce, and so on – whatever regional or National cuisine you’re cooking will have its own sauce, and if you want to make that taste authentic, you want the right soy sauce. These options are generally not expensive, and will last a good long time, so if you’re into it, go for it.

Some Important Caveats – 

1. What I’ll outline is what floats my boat, and your mileage may vary – plan on doing some experimenting, especially if something I recommend really doesn’t sit well with you. If you Google ‘great soy sauce from ______,’ you’re gonna find more than a few rabbit holes to wander down. 

2. This surge of availability for great soy sauces also means that you can spend a hell of a lot of money – if you can and want to, go for it – but you needn’t do so to have good options at home. Yes, chefs in high end restaurants are using better stuff than you will be, and that’s OK – that’s why we go out to eat now and again.

3. What most Americans are familiar with when we speak of soy sauce is, at best, a pale shadow of the real stuff. It’s the equivalent of ultra light beer – it really doesn’t have any flavor other than salty – and that’s a shame. If you think you don’t like soy sauce, that’s probably why.


Chinese soy sauce can be a bit challenging – there are so many versions, and depending on the region and language dialects, it can be hard to know exactly what you’re getting. Narrow things down to two or three good quality options, and you’ll be set.

Light Chinese – This is kinda the EVOO of Chinese soy sauce. It’s a first pressing sauce, and if a recipe you’re working with simply calls for soy sauce this is your go to. It’s perfect for marinades and stir frying, and will do OK as a table condiment. My go to here is Pearl River Bridge brand – so much so I buy it in 60 ounce bottles…

Dark Chinese – This sauce is darker, thicker, and sweeter than Chinese light, usually due to added sugar – it tastes less salty because of that addition, but it is in fact higher in sodium. Dark is used as a finishing element to a sauce or stir fry, to add color and mouth feel – Whereas light soy gets used a lot, this sauce is deployed a bit more sparingly. Again, I opt for Pearl River Bridge.

Double Black Chinese – sweeter and thicker than dark, due to added molasses. Used much as black is, where additional thickness and sweetness is desirable, say for pork belly, or a simple noodle dish where you really want sauce to stick. I like Koon Chun brand here, but you could just as easily add molasses to dark and do just fine.


Japanese soy sauces are almost as challenging as Chinese – there’s a lot of variety, and you can get into über expensive artisanal stuff real fast. That said, there are five variants to consider if you’re diving into the deep end. Note that if you really wanna get authentic, Kikkoman offers Japanese made versions of their sauces that I recommend here.

Koikuchi Shoyu (dark) – easily 80% of Japanese soy sauce produced is this version. A blend of soy and wheat yields a nice balance of salt, sweet, bitter, and umami – it’s used broadly for cooking and as a table condiment. For every day use, I like Kikkoman Organic.

Usukuchi Shoyu (light) – Very salty, light colored sauce, used sparingly in cooking to add flavor without altering color a bunch. Some brands get the salty, slightly sweet flavor here by adding mirin or sugar. I like Kikkoman here again, but make sure you’re getting Light, not Lite – the latter is a low sodium product with less than optimal taste.

Tamari Shoyu – The Japanese version of Chinese dark soy – thicker, denser, a bit sweeter and less salty than koikuchi shoyu, the good stuff is made with just soy beans and no wheat. For building marinades that pack flavor and stick well, like teriyaki, this is what you want – it’s also great as a table condiment. I really like Kishibori brand – it’s a 1 year barrel aged sauce with no junk in it, and has fantastic taste.

Shiro Shoyu (white) – Used almost exclusively for flavoring soups, this is not a must have, but is a great thing to have when you want to get soy sauce flavor with virtually no dark coloring. Almost golden in color, it packs plenty of flavor. I like Takuko brand here – good flavor and won’t break the bank.

Saishikomi or Kanro Shoyu (twice-brewed) – This stuff is amazing – it’s dark, thick, slightly sweet, and packs an intense umami burst. This is pretty much purely a table condiment, used for dipping – it’s excellent with fish and beef. It’s pricy, so not an everyday thing in my book. Yamasan Kanro Shoyu is my go to.


Korean Soy Sauces – Korea makes great soy sauce, different enough from either Chinese or Japanese to matter. There are a couple variants here, depending on what you’re fixing to make.

Ganjang or Whe-Ganjang – This is the every day soy sauce to reach for when you’re cooking Korean. Used for marinating, stir frying, grilling and sashimi. Read labels buying here, as added high fructose corn syrup is kinda common. Chung Jung One Naturally Brewed is my go to – no junk and great flavor.

Guk or Jip Ganjang – Used almost exclusively for cooking in soups, stews, and veggie sides. This version is made with nothing but soybeans and is aged for 3 months or longer – it’s the modern swing at what used to get made at home, hence gip (house) ganjang. I really like Wholly Ganjang if you can find it – nothing there but water, soybeans and salt, and aged 3 years, outstanding flavor. If you can’t find that, Q-Rapha Premium is also outstanding stuff.


Thai soy sauce – there are four major variants here – light, black, mushroom, and sweet. The light is the every day cooking and table sauce. Black is thicker and sweeter and used for coloring dishes and adding a little stickiness, just like the Chinese version. Sweet is, well, sweeter, with often quite a bit of sugar, and the mushroom is what it says it is. There is a subtle, fundamental difference with base Thai sauce versus Chinese or Japanese – Thais traditionally make their sauce with a mix of soy and wheat, with a fairly high soy ratio – it’s also notably thinner. FM2¢W, I buy a very decent light sauce, Golden Mountain, and then sweeten, thicken, or flavor that as I see fit. I get a fresher taste, frankly, because there’s a lot of junk in a bunch of those alt sauces.

Without short changing to much, I’ll just say that’s a pretty good tour. There are more, believe me! From Datu Puti in the Phillipines and Jalen dark in Malaysia, to Myanmar and Cambodia, there are variants all over the place, let alone in well established expat communities. Like I mentioned, you can go way deep worm-holing this stuff, so unless you’ve got a cabinet space ready just for soy, pace yourself. Oh, and for the record – yeah, I do…

Now, just in case you thought I forgot, here’s a few words on, ‘that amino stuff that some people use instead.’ As I often do here, I’ll leave the final word to Guru Harold McGee, who has this to say about ‘chemical soy sauce’ in On Food and Cooking – ‘Industrial producers have been making nonfermented approximations of soy sauce since the 1920s, when the Japanese first used chemically modified soy protein (“hydrolyzed vegetable protein”) as an ingredient. Nowadays, defatted soy meal, the residue of soybean oil production, is broken down—hydrolyzed—into amino acids and sugars with concentrated hydrochloric acid. This caustic mixture is then neutralized with alkaline sodium carbonate, and flavored and colored with corn syrup, caramel, water, and salt. Such quick “chemical” soy sauce has a very different character from the slow fermented version, and is usually blended with at least some genuine fermented soy sauce to make it palatable.’

As Clint Eastwood has been known to say when directing a film, ‘that’s about enough of that.’

A Riff on Eric Kim’s Gochujang Buttered Noodles


The New York Times cooking app is a wealth of inspiration – great ideas from one of the greatest food towns in the world can’t be anything but good. Last week, Sam Sifton spoke to something that I’ve preached over and over here – When you find a recipe you love and make it a few times, you’re bound to make changes by preference or expedience. Either way, what you land on becomes yours, and that’s as it should be.

Sam offered Eric Kim’s Gochujang Buttered Noodles, and then wrote of the variations he’s done with it – He subbed ssamjang for gochujang and frozen dumpling for the noodles, and another version with lap cheong Chinese sausage over Korean rice cakes. 

He finished the piece with this exhortation – ‘So this weekend, I put the challenge to you. Make Eric’s dish as he intended, or take it in whatever direction your pantry allows and your taste desires. Cook in confidence. It’s just butter, garlic, spice, sweetness, umami and starch. Perfection every time.’ So I did.

What I used was a lovely exercise in utilitarianism – I mentioned what I had in mind to the family, and suggestions for this and that came back to me. As Sam points out, this is a can’t lose dish, and whatever you do to it is gonna rock – so I’m passing the challenge off to y’all. Dive in and let me know what you come up with – for the record, I sent a thank you to Sam, along with a pic of the finished dish.

Notes – 

As Sam noted in his piece, make sure you find Gochujang paste, not sauce – you want the purest essence of those lovely sun dried chiles you can find – the sauce version tends to add a bunch of stuff you don’t want or need. Note that gochujang can be downright nuclear, so read the label and ask your grocer how hot the stuff you’re contemplating is. I buy what’s labeled as Medium Hot, and it’s still got plenty of kick – when it’s combined with great vinegar and honey, it’s stunningly good.

Use the best vinegar you’ve got – Erik Kim recommends sherry or rice for the dish. For the former, find a genuine Spanish Jerez, one that carries the D.O.C. symbol. It’s far cheaper than balsamic, and is truly delightful stuff. If you opt for the latter, make sure it doesn’t say Seasoned on the label – that’s got added sugar you don’t want. I went with the best thing I have – a smoky, subtle 10 year old handmade Baoning Chinese vinegar.

I garnished with sweet onion flowers and chives fresh from the garden – Use what you have and love, it’ll be perfect! Eric recommends thinly sliced scallion or finely chopped cilantro on his dish.

If you opt for lap cheong sausage, it should be fully cooked when you buy it – but make sure that’s the case!


A Riff on Eric Kim’s Gochujang Buttered Noodles

12 Ounces dried Ramen Noodles

8-12 cloves fresh Garlic

6 Ounces Unsalted Butter

1/4 Cup Gochujang Paste

1/4 Cup Honey

1/4 Cup Rice Vinegar

Salt and ground Pepper to taste

Optional: 8 Ounces Chinese Lap Cheong Sausage

Garnishes as you please


Peel, end trim, and mince garlic.

In a glass measuring cup, combine gochujang, honey and vinegar – whisk with a fork to thoroughly incorporate.


If adding sausage, slice into roughly 1/4” thick rounds and place in a bowl for service.

Prep garnish and place in a small bowl for service.


In a stock pot over high heat, boil noodles in salted water, per directions for whatever you’re using.

In a heavy sauté pan over medium low heat, add 4 ounces of butter and heat until melted.

Check noodles – turn off burner, transfer to a colander to drain, reserving 1 cup of pasta water.

Put drained noodles back into the pot, and place pot on the still hot burner (don’t turn it back on – residual heat is all we need here).

Add the garlic and sauté until soft, about 2-3 minutes.

Add gochujang/honey/vinegar and whisk to thoroughly incorporate.

Cook sauce for 3-5 minutes until it’s notably reduced and thickened.


Add sauce and remaining 2 ounces of butter to the hot noodles and stir to thoroughly coat and incorporate everything. Add splashes of pasta water until you get the consistency you like.

Season lightly with salt and pepper to taste.


Serve it up with your garnishes, devour, and make yum yum noises.

Asian Chicken Lettuce Wraps


It’s finally warmed up around here, and the garden has wasted no time in playing catch up. When M and I went out for a look and saw a bunch of gorgeous lettuce, she said ‘lettuce wraps,’ and I got busy.

Are you one who sneers at lettuce? If you’re of the opinion that lettuce, like celery, is a tasteless veggie, you’re not all that wrong – far too much of what we find in grocery stores is a pale shadow of the real deal. Like commercial apples not so long ago, what you find in stores is iceberg, romaine, and one or two varieties of leaf – they’re usually not local, and they’re not grown for taste – they’re made to travel and store well, and that’s why they generally suck. The image below underlines this trend. That’s a field of iceberg lettuce – Study that and ask yourself, when was the last time the iceberg you saw in the store looked like this?

A field of iceberg lettuce

Lettuce is a member of the daisy family – Asteraceae. It was first cultivated in Egypt around 3,500 years ago, grown for seeds that produce cooking oil, (and in some places still is). It was initially a plant 2 to 3 feet tall that looked like a mutant head of Romaine. Lettuce spread quickly, courtesy of the Greeks and Romans, and by the first century AD, had taken root across the known world. China leads world cultivation these days, by leaps and bounds in fact – And yes, it’s still grown in Egypt. There are six major cultivars – Leaf, Cos (Romaine), Crisphead (Iceberg), Butterhead (Boston or Bibb), Celtuce (Stem), and Oilseed. From those big branches stem hundreds of varieties, many of which are imbued with marvelous taste and texture – And you can grow many of them, so do – Make a salad from lettuces out your own garden, and you’ll know it’s wonderful stuff.

Common Lettuce Varieties

Lettuce, (and plenty of other leaves), have played a part in cooking and eating pretty much since us apes went bipedal – Food has been cooked in, plated on, served with, and wrapped in them – and still is. Little bites of meat, fish, poultry, or starchy vegetables wrapped in leaves, especially lettuce, is ubiquitous throughout Asian cuisines. I love such things, because you get a purer taste of what you’re eating than you would with something starchy, like bread, tortillas, pancakes, masa, or any of the other myriad sandwich wrappers employed – it’s also generally pretty darn healthy and remarkably tasty.

Celtuse, or Stem Lettuce

The challenge comes in finding lettuce strong and tasty enough to do the job. Romaine will work, but it usually tastes like cardboard. What you want is something from the Butterhead cultivar – a lovely head of Butter, Boston, or Bibb lettuce. These are robust enough to handle being stuffed, are far prettier than most other varieties, and taste great. They can be a bit pricier than simpler stuff, but if you get 12+ wrappable leaves out of a head, it costs about the same as dozen tortillas.

Butterhead Lettuce, AKA Butter, Boston, or Bibb

Chicken is a great protein for doing up an Asian inspired wrap dish, but so would fresh, firm tofu, fish, pork, or beef. If you use meat, it doesn’t have to be fancy – there’s a marinating step in this recipe, so even tougher cuts will get some time and help toward breaking down tougher tissues. A lot of the chicken lettuce wrap recipes out there advocate breast, but I do not – that is about the most expensive piece you can find, and the standard American white meat chicken breast hasn’t much flavor – yes, a marinade will help fix that, but why not use something that has some? Skin on, bone in thighs are the trick – Lots of flavor, cheap, and easy to prep – and a lot more authentic to boot.

As for that marinade – Rather than go for something point specific, I built a reasonably faithful mashup that holds true to regional cuisines and is a bit exotic to us Americans. Thai, Vietnamese, Japanese, Chinese, and Korean cuisines all use soy sauce, albeit they have specific variations they prefer – those are worth checking out, as they’re quite distinct. Hoisin sauce also crosses several borders, it’s often thought of as a generic Asian barbecue sauce. Rice wine and sesame oil are ubiquitous as well.

Notes –

1. Since this is a marinating recipe, you’ll need to allow time for that.

2. I pickled or dressed some of the veggie filling options, because we like that sort of thing- you don’t have to if it doesn’t float your boat – I included recipes just in case, as well as for peanut sauce.

Urban’s Asian Inspired Chicken Thighs

Chicken and Marinade:

1 1/2 to 2 Pound Chicken Thighs (Bone in, skin on – if you go boneless/skinless, a pound is plenty)

1/2 Cup Light Soy Sauce, (as in, light versus dark, not ‘lite’ as in abomination)

1/4 Cup Hoisin Sauce

2 Tablespoons Rice Vinegar

1 Tablespoon Sesame Oil

1 Tablespoon Agave Nectar

1-3 fresh Serrano Chiles

1” chunk fresh Ginger Root

2 fat cloves fresh Garlic

1/2 teaspoon Fish Sauce

Rinse, stem and dice chiles – you can field strip the membranes if you’re a heat weenie.

Peel and mince the garlic and ginger.

Combine everything but the chicken in a non-reactive mixing bowl, whisk to incorporate, and allow to marry at room temp while you prep the chicken.

Bone in, skin on chicken thighs – where the flavor is.

Remove skin and extra fat from thighs, then debone – the skin will pull off easily from one side, and the bones are mostly loose – a little careful paring will free them.

Field stripped chicken thighs

Toss your bones and skin into 6 cups of water with a little onion, celery, and carrot and you can simmer up some stock to have on hand for whatever – Most of the fat in chicken skin is unsaturated, BTW.

Cut the chicken into roughly 1/2” slices across the short side of each thigh.

Pack the sliced chicken into a bowl or storage container and pour the marinade over it – work it in so that everything is well coated. Marinate refrigerated for at least 2 hours, and 4 to 6 is even better.

Lettuce and Fillings –

10-12 leaves Butter Lettuce

1 Cup Mung Bean Sprouts

1 packed Cup Savoy or Napa Cabbage

1/2 Cup Carrot

1/2 Cup Sweet Onion

1 Cup cooked Thai cellophane noodles

1/2 Cup Roasted Peanuts, rough chopped

1/2 Cup Cilantro, rough chopped

Rinse and pat dry sprouts.

Slice cabbage into roughly 1/2” shreds. If you like this dressed, add 1 tablespoon of roasted sesame oil, and 2 teaspoons of rice vinegar, and toss to coat.

Slice carrot into roughly 2” matchsticks, and onion into 2” pieces

Pour boiling water over noodles in a mixing bowl and steep for a minute or so, until they’re al dente. Pour out hot water and rinse noodles with cold water, then drain. Place in a bowl with a teaspoon of avocado oil and mix by hand to coat the noodles.

Put the onions and carrots in a small non-reactive bowl, and add

1 Cup White vinegar

1/2 teaspoon Celery Seed

1/2 teaspoon Coriander

1/2 teaspoon Turmeric

Whisk with a fork to incorporate and let the mix marinate at room temperature

If you like peanut sauce, here’s my fave version –

1/2 Cup smooth natural, unsweetened Peanut Butter

2 Tablespoons Light Soy Sauce, (See above, not ‘lite’)

1 Tablespoon Rice Vinegar

1 Tablespoon Agave Nectar

1 Tablespoon fresh Lime Juice

1-2 teaspoons Sriracha Sauce

2-3 Cloves fresh Garlic

1 Tablespoon fresh lime juice

1/2” fresh Ginger Root

1-3 Tablespoons Warm Water

Peel, trim, and fine grate ginger and garlic.

Combine everything but the water and whisk with a fork to incorporate.

Add water, about a tablespoon at a shot, until you each the sauce consistency you like.

Allow to marry for 30 minutes prior to serving.

Sautéing Asian marinated chicken thighs

When you’re ready to eat, set all the fillings out in bowls so folks can load up at the table.

Separate lettuce leaves, then gently wash in cold water and pat dry with a clean towel. Arrange on a platter.

Pour out most of the marinade, but leave the chicken well coated, and some of the goodies too.

In a large skillet over medium high heat, sauté the chicken until fully cooked, stirring and flipping steadily, about 4-6 minutes. This is also a great thing to stir fry in a wok, if you’re of a mind.

Urban’s Asian Chicken Lettuce Wraps

Transfer chicken to a serving platter, top with a few chopped nuts and some cilantro, and dig in.

Char Siu Pork


There are likely few carnivores out there who don’t know and love Char Siu pork, the ethereal ‘Chinese Barbecued Pork.’ Served with nose-searing Chinese mustard and toasted sesame seeds, it’s not only a killer snack, it’s fabulous in fried rice, or with fresh apple slices and sharp cheddar cheese. By request, I’m republishing this revised version of this post, with more thoughts on which cuts of meat to use, and instructions for cooking inside as well as grilling – Enjoy!

Char Siu Pork makes great spring rolls
Commercial Char Siu Pork

To know Char Siu is to love it, but perhaps not so much the price – an 8 ounce package of the stuff from anybody good can set you back $8 to $12, or a whopping $16 to $24 a pound. You can do far better at home, and make something that becomes your signature version as well – the dish is easy and fun to make.

The Char Siu we know and love has its roots in Cantonese cooking, that which comes by way of Guangdong province, and its capital city, Guangzhou. Good Cantonese cooks are revered throughout China and the world. The hallmarks of the style are fresh, local ingredients, well balanced dishes, and preparations that compliment, but never overpower the star of the show. Unlike many other Chinese cuisines, Cantonese cooking doesn’t use a lot of fresh herbs, relying instead on dried and prepared spices and sauces.

Many of these are so mainstream that they are widely considered generically ‘Chinese’ – everything from Hoisin, Oyster, and Plum sauces, to sweet and sour, black bean sauce, and shrimp paste. The master sauces from which a wealth of dishes spring is reminiscent of classic French cooking, right down to Master Stock, used for braising and poaching meats and fish.

Char Siu is, in fact, one of those master sauces, used for pork, chicken, and wildfowl. The combination of sweet, savory, and exotic is the fuel that makes the barbecued pork so damn good. There are a few things you must put into a Char Siu marinade in order to faithfully reproduce the dish, and a few others you can use if you wish. As with many dishes and cuisines, there really is no one right way – If you like it, make it that way, and make it yours – that’s how cooking is supposed to work.

Traditionally, Char Siu is cooked over charcoal, and when possible, it’s a must do when you make it at home. The meat isn’t smoked, per se, but it does get, (and need), that unique touch of flavor that only cooking over coals can provide. That said, if it’s really icky outside, you can certainly do this in the oven with great success.

One interesting note – What’s often perceived as a smoke ring with this meat, (a la American pit barbecue), is actually all brought on by the marinade – And there are a lot of commercial makers who add some kind of red food coloring to the mix to enhance that effect – Naturally, we’re gonna pass on that latter option.

We often use tenderloin for this dish, but depending on where you are, you’ll find it made from belly, shoulder, or butt as well. What you don’t want is too lean a cut – I know that might seem counterintuitive if what you’ve experienced is only the commercially made stuff like the image above – but have you ever noticed how that stuff is often really quite dry? They use that cut for longevity, not flavor.

Real deal char siu needs some fat for the rich marinade to work with, so choose something that’s got some on board, and don’t trim too much off. Prepare whatever you choose so that it’s maybe 3” thick, tops, and you can go thinner if you want to cook smaller, faster batches. When it comes to grilling or baking, make sure the fat side goes up, so that glorious stuff can render and work it’s way through the rest of the meat as it cooks.

Here then is our spin on Char Siu. We recommend using pork tenderloin for the meat. It has the perfect size, fat to lean ratio, and relatively quick cooking time for this dish.


Char Siu Pork

1 1/2 to 2 pounds Pork (belly, tenderloin, shoulder, or butt)
2 Tablespoons Dark Soy Sauce
1 1/2 Tablespoons Honey
1 1/2 Tablespoons Hoisin Sauce
1 Tablespoon Red Fermented Bean Curd
1 Tablespoon Toasted Sesame Oil
2 teaspoons Rice Wine Vinegar
1 teaspoon Oyster Sauce
1/2 teaspoon Chinese Five Spice
1/2 teaspoon sweet, smoked Paprika
1/2 teaspoon ground Black Pepper

Combine all marinade ingredients in a small non-reactive mixing bowl and whisk with a fork to fully incorporate.

Place the pork and marinade in a ziplock bag and expel as much air as possible.

Gently massage the marinade onto the pork, coating evenly and thoroughly.

Refrigerate for at least 12 hours, and for my mind, 48 hours is best – The longer you go, the more pronounced the effect of the marinade on the pork.

Char Siu Pork Marinating

To Grill –

Light a lump charcoal fire in a grill and allow the coals to become white hot.
Set up a two zone grill, with the coals all on one side, and a drip pan only under the other side – This is indirect grilling, and makes not only perfectly roasted meats, but almost eliminates the possibility of burning expensive flesh – Kinda like a convection oven, only way cheaper…

Setting up a 2 Zone Grill

Open the bottom vents on the grill about half way.
Place the marinated tenderloins over the drip pan on the cool side of the grill.

Setting up a 2 Zone Grill

Give them a baste with a little more of the marinade.
Place your lid on the grill, with the top vents over the meat, on the cool side.

Setting up a 2 Zone Grill

Open the top vents about half way.
You do not need to turn the meat; check on it, and baste a bit, about every 10 to 15 minutes.
Use all the remaining marinade to baste.
When the internal temperature of the tenderloin reaches 155° F, remove it from the grill and set it aside to rest for 15 minutes – DO NOT cut into the meat until it rested!

Cut the tenderloin on a bias, at about a 45° angle, and serve with rice and steamed veggies.

For the Oven –

preheat oven to 350° F and set a rack in an upper slot.

place pork in a broiler pan with about 1/4” of boiling water within.

Grab a small basting brush and set the marinade bag in a small bowl beside the oven.

bake pork for 15 minutes, then brush marinade liberally onto the exposed surfaces.

At the 30 minute mark, reduce heat to 225° F, brush in more marinade, and continue cooking.

Cook until internal temperature of the pork reaches 155° F, then remove from oven.

Allow a minimum of a 10 minute rest before slicing.

Devour at will.

Five Spice is good for way more than just Chinese cooking.


Chinese five spice powder – Got it in your spice cabinet? Odds are good that you do, but they’re also good that you haven’t used it for anything other than that one Chinese recipe you tried way back when and bought the stuff for – Am I right or am I right? I’m here today to fix that, and to tell you why you should -Five Spice is good for way more than just Chinese cooking.

Classic Five Spice, although more is OK

So, what exactly is five spice? That depends, frankly, on where in China you ask the question. This blend is relatively ubiquitous in Chinese cooking, and culinary regions from all points on the compass points lay claim to its origin. There is, however, some general agreement about the intention of that ancient founder – To provide the culinary equivalent of Unified Field Theory – one powder to rule them all – Five spice touches on sweet, sour, bitter, heat, and salty – A blend for all things, if you will.

Now, that said, five spice is as unique as any other legendary thing. What that means is that every home cook, restaurant chef, and spice purveyor has their tried and true personal blend, and each and every one of those is the best, no questions asked. Truth be told, they’re all correct, because when you make it yours, its exactly what you want it to be – That’s the beauty of discovery and refinement. The end result of today’s exercise should be just that for y’all.

The big question, of course, is this – What are the Five Spices? Turns out, the title is a bit misleading. Take a look at the ingredients on the commercial stuff out there and you’ll find anywhere between five and ten ingredients – Interesting, yeah? That’s because ‘Five Spice’ speaks to the five flavors the blend contains – Sweet, sour, bitter, heat, and salty – Cover those, and the number of ingredients used to achieve it is open for interpretation.

The generally recognized standard however, is star anise, clove, Chinese cinnamon (Cassia), Szechuan pepper, and fennel seed, but again, you might also find regular cinnamon, ginger, nutmeg, licorice, anise, turmeric, black pepper, sea salt, and mandarin orange peel as well. There’s nothing wrong with all that, frankly, though as with all things in discovery, it’s best to go to the classic roots first, and then branch out to make it yours.

For us here in the U.S., the blend has an exotic feel to it that can be a real treat for breaking up the ol’ routine. The combination of what Chinese culinary tradition refers to as hot (cinnamon and Szechuan pepper), and cold (fennel and clove), tastes does a really cool double duty with meats, especially fatty stuff – It highlights richness as it cuts through the fat – A neat trick, that.

If you have Asian grocers in your area, check them out and see if they make their own blends – If not, they’ll likely have a favorite that they sell – Diving into those is like touring the regions and towns folks come from – You’ll get a different swing on things from each one.

So, what exactly would you use this stuff on when you whip it out? The quick answer is that five spice is tailor made for proteins – Beef, pork, and poultry will all shine, (and frankly, you can’t make great char sui pork without it), as will tofu, and beans. For dang near anything you’re going to grill, barbecue, or smoke, it makes a fantastic rub. Five spice does great in flour, starch, or bread crumb coatings for fried foods, too. And frankly, there’s nothing in there that wouldn’t go great with savory eggs and veggies. And believe it or not, it’s great for baking too – Add it to a savory scone, pancake, or waffle recipe, for instance.

A note of caution for using five spice on things other than fatty meats – The blend can overpower a recipe really quickly, so a little bit goes a long way. The blend does best when it has some time to work, so employing it in marinades and rubs works best.

The gist of all this is that while five spice is a necessity for many Chinese dishes, it’s great to think outside the box and try it with other stuff as well – It’s easy enough to add a dab to a sample of something you’re cooking – A great way to expand your horizons. This is a blend that, while fundamentally simple, belies that label with a truly fascinating and complex palette of flavors.

Here’s a basic recipe to get you started – Again, use it as a springboard to tailor your own custom blend. As with all herbs and spices, freshness and quality are critical. Harkening back to that bottle you’ve got in your cabinet, chances are good it’s old, and maybe not the best stuff you could find, right? So, go to a known, high quality purveyor like World Spice, Penzey’s, or Penderey’s and buy your stuff there – They really truly don’t cost more than the junk in most stores, and the quality is far superior. Finally, it’s always a good idea to buy whole spices when available as well – They’ll stay fresher longer.

House made Five Spice

Classic 5 Spice Blend

1 Tablespoon whole Szechuan Peppercorns
3 whole Star Anise
1 stick Cassia Bark (AKA Chinese Cinnamon)
2 teaspoons whole Cloves
2 teaspoons whole Fennel Seed

Allow a dry, cast iron skillet to heat through over medium heat.

Add Szechuan pepper, star anise, cloves, and fennel seed to the pan. Toast the spices until they’re notably fragrant, about 3 to 5 minutes. Keep the spices moving constantly to avoid scorching.

Remove from heat and allow to cool to room temperature.

Add the toasted spices and cassia to a spice grinder, blender, mortar and pestle, or whatever you use to grind spices. Pulse the blend to a uniform rough powder.

Store in a clean glass container with an air tight lid – Keep in mind that all spices like a cool, dark, dry environment for storage. Spices are good for about 6 months, properly stored.


Here’s a couple of rubs to get you started.

5 Spice Java Dry Rub

2 teaspoons 5 Spice Powder
1 teaspoon fresh ground Coffee
1 teaspoon Dark Brown Sugar
1 teaspoon Sea Salt


5 Spice Wet Rub

1 Tablespoon Avocado Oil
Juice & Zest from 1 small Lemon
1 Tablespoon 5 Spice
1 teaspoon Sea Salt