Hey, Cheese Cloth, Here!


Cheesecloth is indispensable in the kitchen; it’ll drain house-made cheese or yoghurt, strain stock, hold a bouquet garni of fresh herbs, or steep hops in beer. If you don’t have a generous supply of good quality stuff, you need to get some.

If you’ve bought cheese cloth only from the grocery store or a craft supply place, you’ve likely never been exposed to good cheese cloth. That slack stuff is good for little; it’s far too loosely woven to do good duty straining, holding house made cheese, or draining yoghurt.

What you need is real cheese cloth!

The genuine article is woven from clean, in-dyed cotton thread. The weave is relatively light, of course, as it must be to do what it does best. These basics are where the similarities between the crappy stuff one usually finds and the real meal deal end.

Cheesecloth is graded by weight, determined by the thread count and weight. The are five common grades, from #10, which is what you usually find, through grades 40, 50, 60, and 90. The bottom line is that #90 cloth has more than double the vertical and three times the horizontal threads per inch that #10 cloth does; a whole different animal completely. While the crappy stuff is gonzo after one use when it does little well, #90 cloth is robust, reusable, very pleasant to work with and does a fantastic job with everything from stock to cheese.

Finding the real deal at decent cost and as notable options for quantity can be a bit of a chore, so let me spare you the mundane.

The eBay seller Ladygal0_3 sells multiple grades, will cut them to size for you, and often offers very useful quantities a with free shipping. Their prices are excellent, the service top notch and the shipping is fast.

So go get you some!

E

Soups On!


If We had to pick one thing that separates really good restaurant quality food from most home cooked stuff more than any other, it wouldn’t be unreasonable to vote for making good stock.

Now, that’s a process that scares some folks, and it shouldn’t. Making stock need not be super laborious or scary. We’ll show you a very effective, relatively quick and easy method.

So, first things first, what is stock, and especially, what is stock vis a vis broth? In simplest terms, stock comes from bones, while broth comes from meat. Think of stock as the root of superior soup, sauce, or maybe risotto. I’ve heard broth spoken of as seasoned stock, and that’s not far off the mark. That said, there is certainly an enhanced mouth feel and richness to stock, brought forth by the gelatin released from bones, that you just don’t get anywhere else. Certainly, what you make at home from great ingredients will always beat the pants off anything store bought and stock is no exception: When you want to pull out the stops and make a personal culinary statement, make it in house.

The first and most important step to take toward home stock production is to not throw out the bones, carcass, etc of your last wonderful roast, chicken, turkey, etc – Keep ’em and freeze ’em and set ’em aside for future use. If you get meat in volume as we do, You can ask for beef/veal/etc bones from your provider: If you hunted your own, save that stuff you might otherwise throw out and put it to good use; be it beef, chicken, grouse, pheasant, bambi, moose, buffalo, etc, they’ll all make fine stock, (And making stock is also a great opportunity to clean out the ol’ freezer).

In many restaurants, ‘Dark Chicken Stock’ has replaced veal stock as the go-to root of great soup, sauce, etc. If you’ve read that on a menu or seen it online, I bet you wondered what the heck they were talking about, right? The sole difference between light and dark chicken stock is whether or not the bones have been roasted; same goes for beef, veal, etc. Roasting yields a deeper, richer flavor profile.

So, let’s do some up and see where it takes us.

For this exercise, we chose beef, since down there in our freezer there were a couple of packets marked ‘soup bones’. Unwrapping those guys, I found a bunch of meat on some beautiful big hunks of bone, so I trimmed that off and set it aside for marinating; more on that in a sec. And FYI for your nice big stock pot full of finished product, you’ll want a couple pounds of bones to work with.

Preheat your oven to 325 F, and set dem bones in a baking pan. Now it’s mirepoix time, an essential component of great stock. You’ll want a mix of roughly 50% onion to 25% each of carrot and celery. You can whack all of that into nice big chunks, then toss everything into the baking pan with the bones. Give everybody a nice drizzle of extra virgin olive oil, and a bit of salt and pepper.

 photo 3015B2BB-9354-4C4A-A900-6C512E8602BB-398-0000002682E2CCA3.jpg

Toss the whole shebang into your preheated oven and let ’em get it on. Leave the mix in until you start to see light browning on the bones and veggies, about 1.5 to 2 hours.

While your bones are roasting, turn your attention to the meat. If your bones had generous flesh attached as ours did, use it; you don’t need any fancy cut, in fact, the cruder the better – Time and marination will make that stuff fork tender in the end run, believe me. We went for a simple marinade of:

2 cups red wine
2 Tablespoons olive oil
1 clove garlic, rough chopped
1 Sprig fresh rosemary
A shake and a grind of Sea Salt & Black Pepper

Place everything into a glass dish and refrigerate overnight.

 photo E6D4D96C-F993-4DF2-BB39-9E3B39DC7557-398-00000026876B5E29.jpg

Back to the bones and mirepoix. Fill a stock pot with a gallon of nice, clean water over high heat. Toss in everything from your baking pan. Add a couple of Bay leaves. Once the mix starts to boil, crank the heat down to a nice, slow simmer and let things take their course. You’ll lose some volume to evaporation, and that’s just fine. Leave the pot on over that low heat all day; at least 6 hours and up to 8 is just fine.

Remove your pot from the stove, cover and refrigerate overnight, (Or stick it out on the back porch if its cold out).

In the morning, you’ll find a nice, gooey layer of fat has formed on the top of your pot. Carefully ladle that off and discard. Now, using a sieve or a chinoise, remove all the chunky stuff from the liquid.

 photo D371D12C-C4C7-41F9-9E73-E405B7D7966D-398-0000002692C6BD54.jpg

You should end up with something that looks about like this:

 photo 392F7F45-3EFA-4562-B453-F5519E46F5F3-398-000000268CAC0B70.jpg

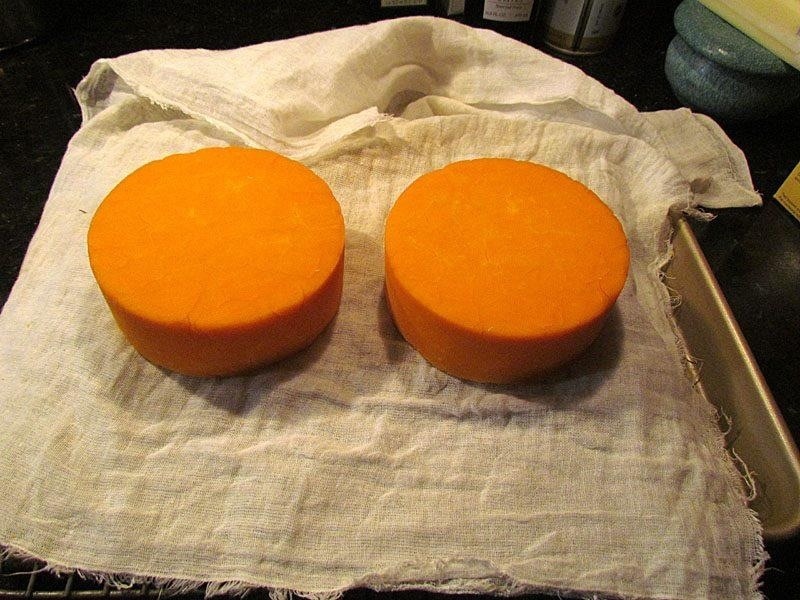
Now we’re gonna do some reasonable clarification. You’ll need that sieve or chinoise, plus a decent chunk of cheese cloth; if you don’t have any handy, most grocery stores sell it. If all you find is the very loose weave stuff that looks like badly spun spider web, no worries, it’ll work fine so long as you have a length of a few feet, which is what most packages contain. Take the cheese cloth and fold it into a nice, thick blanket and line your sieve with that. Carefully pour your rough stock through, then do it again and again; you want to get maybe 5 or 6 pours through your home-made filter, so go slow and let that cheese cloth absorb all the crusties. When you’re done, your stock will look like this

 photo E2ECAE17-6C4A-4EE8-9750-1556F38718E1-398-000000268FB7BF64.jpg

Maybe not textbook perfect, but when you take up a spoonful of that lovely stuff and it looks kinda like this, screw the textbook…

 photo 7811D1DB-6873-4624-B84F-73F1503F8842-398-000000269958193B.jpg

That, friends and neighbors, is beautiful stock.

You can stop right there and move on to making soup, or you can freeze the stuff for future use, or you can put it back on the stove and simmer some more, reducing it by roughly 50% and end up with some truly wonderful glace, that thick, flavorful, intense root for sauces, soups and all kinds of experiments. If you go the glace route, try freezing the results in an ice cube tray; then, when you need a little something to really kick up a sauce or soup or stew, you just pop out a cube or two and viola, instance intense flavor…

So there you have it, serious homemade goodness; you can do this with veggies, fish, chicken, turkey, pork, beef, whatever floats your boat – So, what kind are y’all gonna make first?

Kinda Corny…


We love house made corned beef and pastrami, fine examples of easy to make and highly satisfying charcuterie. I was somewhat dumbfounded when a reader noted “Why bother? It’s cheap to buy at the store?”

Weeeellllllll, the why bother part is because what you make at home will always, with a bit of practice and patience, be far superior to anything store bought. As for the cheaper part, I seriously doubt it, given that you can use very inexpensive cuts of meat, and the processing cost comes from your hands, not your pocket.

House made provides you the luxury of choosing the cut and origin of meat to use, as well as customizing your spice/pickling/corning blend. Just because the common version is corned beef doesn’t mean you can’t use venison, pheasant, moose, or elk; you can and should, in fact, and if some purist insists that what you made isn’t the real thing, well, all the more for us… And just as we all have favorites for BBQ rubs, you’ll develop a similar hankering for your own special spice blends for corning.

We hear a lot of questions regarding the term ‘corned’; it came into common use in the 16th Century and stems from the Anglo-Saxon word for grain or granule, referring to the salt used to cure or pickle. It’s a bit of a stretch, I know, but suffice it to say that ‘corn’ was a catch-all term for any local grain, and in a pinch, salt would qualify, (Sorry, couldn’t resist…)

The next most common question we hear is ‘What’s the difference between corned beef and Pastrami?’ The answer is, not as much as you might think. It has to do with the most common cuts used and the curing process. While either variety can be made with brisket or round, pastrami is sometimes made from the plate cut as well. As for process, either can be made by wet brining, though pastrami is fairly often done with a dry rub in the first stage of curing, then pepper crusted and lightly smoked. These are generalizations, of course; the end product varies as widely as the fancy of the makers.

Having grown up in Massachusetts, I am very fond of New England Boiled Dinner, that ethereal combination of corned beef, cabbage, potatoes and carrots, daubed liberally with fresh horseradish. If you’ve never tried it, you should. I also absolutely adore the Reuben sandwich, which, as blasphemous as it may sound, I make with either corned beef or pastrami.

If you get interested in the art of meat curing, AKA charcuterie, you’ll find a myriad of resources online and if you’d like a great reference volume to add to your cookbook library, check out Ruhlman and Polcyn’s Charcuterie.

So, all fact checking and history aside, how do you make this stuff? We’ll focus on corned beef this time and save pastrami for another day.

You’ll need a brine solution and a spice blend. If any or all of this seems overwhelming, go the easy route and grab a pre-blended pickling spice from one of the suppliers listed in our links; down the line, for all things pickling, you can and should do a bit of study and build your own signature blend.

The recipes here will work for a 2 to 3 pound corned beef; you can scale up or down as you like, but this is a very manageable starter size.

For the Brine:

1/2 Gallon nice, clean water
1 Cup Sea Salt, (Do not use iodized!)
1/4 Cup Dark Brown Sugar
3 teaspoons Curing Salt (AKA Pink Salt, or sodium nitrite)
2 Tablespoons Pickling Spice

Set water in a saucepan over high heat and bring to a boil. Toss in salt, sugar, curing salt and spices and boil until all granules are dissolved. Remove from heat, transfer to a mixing bowl and set over an ice bath for a rapid cool.

Once the brine has cooled to room temperature, place your meat in a glass container big enough to have it covered by at least an inch or two of brine. If you just don’t have a suitable container, you can use a doubled large zip lock bag.

Cover the meat with brine as noted above, at least an inch or two above the meat. If your cut tries to float, you’ll need to weigh it down so it remains completely submerged. If you go the ziplock route, squish all the air out and put the bags in a pan in case of a blowout.

 photo E0DF1E5C-082C-4DFA-9BF2-457AB46A2859-1159-000000BEB923B5DE.jpg

Put your bounty into the fridge where it will live for the next 6 or 7 days. Make a note to self to flip the meat daily, to make sure everything gets a nice, even brine soaking.

On the appointed day, pull your corned meat out of the fridge, and rinse it gently in very cold water.

 photo 7A52148C-EC24-41A4-A53D-B3515E3FC932-1159-000000BD20CBC3DC.jpg

Put the meat into a pan just big enough to hold the cut. Cover with water to about 2″ above the meat. Add another tablespoon of your pickling spices to the pot, bring the heat up to high until you reach a rolling boil, then reduce to a simmer and cook until fork tender, about 2 to 3 hours.

 photo 021DFCB1-3628-44AB-8D36-D742733EF143-1159-000000BD2742E1B8.jpg

Remove the meat from the pot, set on a cutting board and allow to rest for at least 10 minutes before slicing. Your finished product will last a good 5 to 7 days in the fridge, (As if it’ll survive that long…)

 photo 42A0A5C0-0D74-4B30-8632-63D22FC41E4A-1159-000000BD2C6183DE.jpg

Toss potatoes, onions, carrots and cabbage into your reserved boiling liquid until they’re just fork tender, and then enjoy that New England Boiled Dinner!

E & M

The Tzatziki of the Lambs


We did a show for the boys recently, the idea being for the male of the species to somehow convince the female to cook for him. Now if that works…

The Greek wanted something Greek of course, so I suggested a nice roasted leg of lamb with Tzatziki, so we’ll cover that here.

If you’ve never had Tzatziki sauce before, you’ve got a real treat in store. Tzatziki is, hands down, one of the finest uses for cucumber. In Greek cooking it’s often served with lamb as we suggest, but I’m here to tell y’all that Tzatziki is excellent on eggs, fantastic on flat bread, pleasant on poultry, and beautiful on burgers; in other words, like hot sauce, it’s good on durn near everything!

Whip up a batch and enjoy!

 photo Tzatziki_zpseee80e70.jpg


Classic Tzatziki Sauce

1 8 oz container of Greek Yogurt, (You can use regular too)
1 med cucumber
2 Tablespoons Extra Virgin Olive Oil
1 fresh lemon
1 teaspoon Dill, (You can also use mint)
2 cloves Garlic
Salt to taste

Line a colander or strainer with paper towel and drain your yogurt for around 30 minutes, (Critical step to avoid runny Tzatziki, and even more so if you’re not using Greek yoghurt).

Peel, seed and grate the cucumber.

Juice the lemon and reserve.

Do a fine chiffenade on the dill or mint.

Peel and mince the garlic.

Combine everything in a non-reactive bowl and mix well by hand, (Blending or processing makes your yogurt break down).
Refrigerate covered for 2 to 3 hours.
Serve chilled

Real Deal Greek Roast Leg of Lamb

Disclaimer; I’m Scots, Welsh, and Dutch, and M carries German and Norse blood. We’ll lay claim to this being a genuine interpretation of a classic by way of the truly born and raised Greek cooks who we kind enough to share their passion.

A fair number of folks in this country don’t care for lamb because they find it gamey. It can be, but we’re here to say that the rest of the meat eating world can’t be all wrong. Great lamb comes from choosing good meat, to proper preparation and cooking, and that’s what we’ll relate here.

My Greek pals will tell you that lamb is always cooked to well done, a key consideration in avoiding funky, off-putting flavors.

Be sure to trim the lions share of the fat prior to roasting as well. This recipe will provide a fine feast for 6 to 8.

5 lbs bone-in leg of lamb
16 – 24 small new potatoes, (Variety of your choice, or mix and match)
2 tablespoons olive oil
12 cloves garlic
Zest of two lemons, grated
2 tablespoons Oregano
2 tablespoons Rosemary
1/2 cup extra virgin Olive Oil
1 cup dry Red Wine
3/4 cup fresh Lemon Juice
1 tablespoon Dijon Mustard
salt and Pepper to taste

Wash the lamb thoroughly and pat dry with paper towel

Peel and dice 8 cloves of the garlic and toss them into a non-reactive bowl large enough to hold all the ingredients.

Add 4 teaspoons each of oregano and rosemary, a 1/4 cup of the olive oil, the wine, and the lemon zest and juice.

Place lamb in the bowl, rubbing it in and turning to coat well on all sides; cover and refrigerate overnight.

Crush remaining cloves of garlic and combine with the mustard and the rest of the oregano and rosemary.

Remove lamb from marinade and reserve all the marinade.

With the tip of a paring knife, poke a bunch of holes into the lamb on all surfaces.

Hand rub the garlic-herb-mustard mixture thoroughly over the lamb, pressing into incisions as much as you can.

Gently coat the lamb with 2 Tablespoons of olive oil and sprinkle liberally with salt and pepper.

Preheat oven to 350 F.

Place the lamb on a rack in a shallow roasting pan.

Toss potatoes in the reserved marinade from the lamb with 2 additional tablespoons of olive oil added; coat thoroughly. Pour everything into the roasting pan, all around the lamb.

Roast uncovered for 90 minutes, then turn the lamb so that it develops a nice crust on both sides. Toss the potatoes to recoat them with the marinade as well. Roast for another 45 minutes, (total roasting time – 2 hours and 15 minutes).

And as our Greek pals insist, serve nice and hot, with plenty of fresh, crusty bread, a big ol’ salad of onions, peppers, tomatoes and olives in vinaigrette, and plenty of red wine.

εύγευστος! (Delicious!), right Greek?

Enjoy!

20130125-102550.jpg