At’sa Pasta!


M told me Sunday morning I was cooking with chicken again. She liked the fried just fine, but wanted something more delicate and complex, so naturally we opted for fresh pasta, in this case, fettuccine, which is so good tn sucking up and holding flavor.

The difference between any store bought pasta and making your own is like Little League versus MLB – They’re both a lot of fun, but…

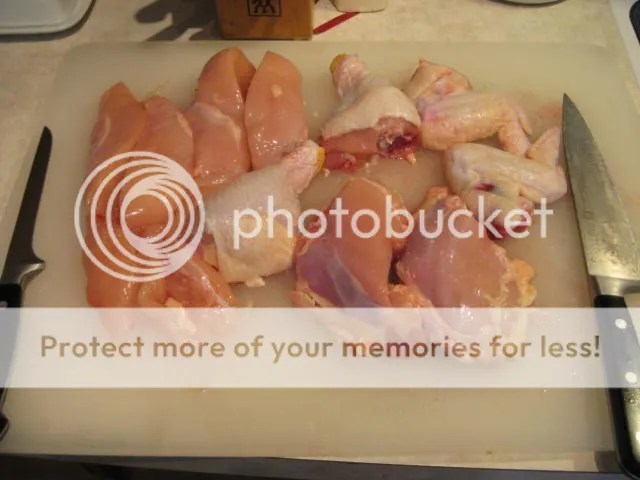
First, a couple of nice, chemical-free chicken breasts get trimmed and dropped in a non-reactive container and covered with whole, organic milk. Remember that chicken breasts trimmed and skinned have very little fat. Easily the worst crime I see and taste on a regular basis is dry chicken. Soaking yours in milk for 2 to 6 hours will yield juicy, flavorful bird.

Next, the pasta.

This is an all-purpose flour only recipe that we got from Mario Battali’s book. Truth be told, we prefer 50% semolina, 50% all purpose blends for pasta, but we know not everybody has semolina on hand, so this one’s for y’all. This recipe will yield 4 generous servings; we make it all and freeze half for later.

3 1/2 cups unbleached all-purpose flour
4 extra-large eggs (5 large)

Here’s classic pasta prep. Make a big ol’ volcano of your flour, with a nice big Saint Helen’s gap in the middle for the eggs.

In a bowl, lightly beat the eggs until they’re evenly blended.

Pour the eggs into the flour and with a fork, combine the edges of the flour into the eggs. Keep nudging the flour up the edge so you’ve got an even stream being fed into the blend.

When it feels and looks like you’ve done all you can do with the fork, get your hands into the game.
knead by pressing your palms into the dough, give it a little flip and knead again.

You can dd more flour if things are too sticky, and a little ice cold water if it’s too dry, but go easy on the agua.

Knead for 3 or 4 minutes until the dough feels elastic and slightly sticky.

Knead another 3 minutes and flour your board lightly if your dough start to stick to it.

Now, it’s rest time; note that both the knead and the rest are critical for great pasta, so don’t skimp! Wrap your dough in plastic wrap and let it sit for 20 minutes at room temperature. Now, you’re ready to make noodles

There are lots of ways to make noodles. If you don’t have a pasta maker, get a rolling pin and more flour, and roll the dough to your desired thickness. You can cut your noodles with a paring knife and who cares if they don’t look perfect? I’ll guarantee you they’ll eat perfect…

If you pasta at home on a regular basis, you’ll want a machine of some kind to do it with. We have the classic Marcato hand machine with a slew of attachments, so we can do everything from angel hair to lasagna. They last for ever, they’re a joy to use and they make killer pasta. We use a simple pasta drying rack to hang the goods between steps.

Note that M keep the machine and the dough lightly floured throughout – Don’t miss that step!

Onto the chicken et al!

My mind’s eye went straight to citrus and fresh herbs, so off we go to the garden for oregano, as well as garlic chives and cilantro for the salad, of course.

Here’s what I used for the chicken

2 Chicken breasts, skinned, trimmed and soaked in milk
2 lemons, halved
1/2 bulb Shallot
2 – 3 cloves Garlic
1/4 cup Capers
3/4 Cup chopped Tomato
Sprig fresh Oregano
3/4 Cup dry White Wine
Salt and Pepper to taste, (In this case, Alderwood Smoked Salt and Grains of Paradise)
Extra virgin Olive Oil

Cut chicken into medallion size, roughly 1.5″.

Fine dice garlic, dice shallot, rough chop tomatoes, and chiffenade the oregano.

Heat a tablespoon of olive oil to a saute pan over medium high heat. When the oils hot, add shallot and tomato and saute for a minute or two.

Add oregano and garlic and saute for a minute longer.

Remove veggies into a bowl, reheat pan and add chicken. Brown over medium heat until cooked through.

Deglaze pan with the white wine, add back veggies, add capers, and squeeze lemons over all.

Saute over medium low heat until reduced by roughly 25%.

Meanwhile, M handles salad, a must-do with this dish; we used straight oil and vinegar for dressing.

Prep pasta water with generous salt and a little olive oil, (You want pasta water to be a bit lighter than sea water, but not much)

Fresh pasta goes very quickly; we’re talking two minutes here, so stay close and test and get it off the heat!

Bring your pasta pan, undrained, to your saute pan as soon as the pasta is done. Carefully ladle past into the saute pan and make sure you get a little pasta water in there too!

Give everything a good blend and allow the pasta to soak up the sauce for a couple minutes, then serve directly.

If you like cheese, go for it; we used a little Romano and Asiago for ours…

M feels plating is important, even at home. She didn’t like my one plate job, she went for the bowl for pasta and plate for salad and bread. Here’s hers versus mine:
The winner?
Why, both of us, of course!

Let me tell you,
It
Was
Incredible!

Even better than it looks!

Best Fried Chicken Ever…


The other day on The Big Wild, the boys and I were talking chicken. I said then and I’ll say now, it’s one of my favorite things to cook and eat, hands down. Y’all missed the pre-show banter, where I told them about the episode of Portlandia where the restaurant patrons wanted to know the gender of the chicken and if he had any friends…

Anyway, if you’re gonna do chicken, there are plenty of ways to do them, but the pinnacle, the top o’ th’ heap, that which must be done is fried; and if you’re gonna do fried, you gotta do it right, and this, friends and neighbors, is the right way to do it…

SPOILER ALERT!! If you want to make the best fried chicken ever, it does not happen in an hour, or even overnight; in fact, if you back-to-backed the process as best you could, it takes 24 hours to make it happen.

Is it worth it, you ask?

Yes.

Fact is, if you’ve been to any one of a number of legendary chicken joints, especially tradition-laden ones, I will dang near guarantee you that they go to this level of prep to make what drives you crazy, preys on your mind and sends you back again and again for more – Trust me…

That said, it’s not hard, it just takes time, so here we go.

Step One:
The bird.
You’ll want a whole frier, and if you can get one that doesn’t have all sorts of artificial crap in it, you should.

Step 2:
Brine that bird. What, and why, you ask? Brining creates a delicious, juicy chicken, plain and simple. It’s scientific fact and not fiction that it works to do exactly that; trust me… You can add stuff to the brine if you want some additional flavor notes; Bay leaf, sage, basil, pepper, citrus, garlic, whatever you like is cool – The brining process will help carry flavors into your bird beautifully.
Put 1 cup of kosher non-iodized salt and 1 cup of granulated white sugar into 1 gallon of water over medium high heat and stir completely until all is dissolved; don’t allow the mixture to boil. Cool your brine completely by dropping the pan into an ice bath. Place the bird into a non-reactive vessel that will allow the brine to completely cover and refrigerate, covered, for 8 to 12 hours.

Step 3:
Butcher that sucker. If you’ve never done this, you should, in fact, you need to. You want, naturally, 2 drumsticks, 2 wings, 2 backs, and 2 breasts: I like to quarter the breasts into strips, because they cook better and are more reasonably portioned than the big kahuna, capiche? Do not freak out if where you cut what doesn’t come to you right off the bat; it will with time and it is an excellent skill to exercise.

Step 4:
Buttermilk up! nothing brings richness and fights off funky notes like buttermilk – This is the finest use I know of for that noble beverage. Rinse the bird thoroughly, by pouring out the brine, refilling the vessel and letting the bird sit for 15 minutes; repeat twice more. Then cover that baby in buttermilk and let it rest, refrigerated and covered, for 8 hours more.

Side note: THOROUGHLY clean everything that had the chicken in it or on it – We scrub and use Clorox cleanup for this.

Step 5:
Put on your coat. You gotta have a dredge of some kind and this is my fave, hands down. Mix well in a bag
1 cup all purpose flour
2 tablespoons corn starch
1 teaspoon kosher salt
1/2 teaspoon pepper
NOTE: in keeping with our blatant spice snobbishness, we used alderwood smoked salt and grains of paradise…
Insert chicken and shake until well coated.

Step 6:
Time to fry, baby. We use a very nice self contained indoor frier, but you can use whatever you have and are comfy with. The folks I got my routine from fried in lard, and I love that, but I love my arteries too… We use Tri-Fry, which is a blend of Canola, Grapeseed and Safflower oils that’s cholesterol and sodium free, high in Omega 6 and Linoleic Acid and a bunch healthier than a lot of alternatives; try it, you’ll like it.

Make sure your oil is at 375 degrees F and keep it there; that means introducing a couple of pieces of chicken and giving things enough time for your heater to recover the desired temp before you add more: Doing so assures you of light taste and minimal sogginess, which is, of course, highly desirable.

We paired our chicken with mashed spuds, pepper gravy and handmade coleslaw and dressing – It works really well…

Enjoy!

Gentlemen, Clean Yer Freezers!


For 25 points, identify the following protein:

Didn’t think so…

But seriously folks, and as the title alluded, I speak mostly to the gentlemen, since it is us who stuff said freezers with all things good and delicious; that is, until we forget what’s in there and let ’em go faaaar too long…

Late winter is a perfect time to get into that beast, inventory what’s there with a critical eye, toss what needs to be tossed and cook what must be cooked before it too goes to the great beyond.

This line of reasoning naturally brooks the question, “Can food go bad in the freezer?” The answer to which is a definite ‘Yup!’

Keep in mind that freezing does not kill bacteria, yeast, mold, etc, it just pretty much keeps them from multiplying. In other words, if there was something funky prior to freezing, it could indeed reappear when thawed. Additionally, freezing does not do any favors for food quality, taste, etc; over time, great stuff will become good and good stuff, well… You get the picture.

So how long should you leave stuff in the freezer before the quality starts to degrade? Depends on what it is! For answers to this and other burning freezer questions, (Sorry), hop on over to the USDA’s Food Safety site and read for yourself; there’s a handy chart at the bottom of this freezer article that details recommended freezer storage guidelines. You’ll also find the National Center For Home Food Preservation a wealth of good info, so scope that out too.

In general terms, when cleaning out your freezer, look for things like the pic above, the obvious victims of freezer burn, poor packaging, etc, and single them out for further inspection. If flesh looks substantially different than it usually does when thawed, (Darker, off color, dried out, etc), then you should give it the heave ho; trust me when I say if it looks funky, it’ll taste funky, and could be dangerous.

When you package for freezing, head back to the NCHFP site and read up on best practices.

The time to clear out your freezer is also the time to clean the bugger; this should be done at least annually,
and naturally, the best time do the deed is when sticks are low.

Pull everything out and put it into a fridge or alt freezer, (I KNOW many of y’all have more than one, right?).

Turn off, unplug, and thoroughly defrost your unit.

Once it’s to room temp, clean the insides thoroughly; I like Clorox cleanup for the job, but dish soap and water works fine too. Remove and clean all the shelves, racks, drawers, etc as well.

Do a rinse wipe with a solution of 2 Tablespoons of baking soda to a quart of warm water, then wipe that down with a clean, dry cloth.

Don’t forget the unseen parts! Pull the freezer from it’s normal locale and clean underneath. Inspect the back and clean that as well, (And the top), and dust the coils if your unit has exposed ones.

If you don’t already have one, buy a decent but cheap inside-the-unit thermometer and place in an easy to see spot. Our commercial units have thermometers on them, usually digital, but we don’t trust those; every unit, reach in or walk in, has a stand alone thermometer inside it. Optimal freezer temp for food storage is -15ºF to -5ºF; it should never go above 15ºF for any extended length of time.

Fire ‘er back up, let it get fully cold and then put your bounty back in. mark the calendar for the same time next year.

OK, that about covers it; now go have a celebratory beer or two, ya done good!

Oh, and stay tuned – Next post will cover building the perfect stew with all that lovely meat ya done kilt and gathered!

E & M

Do Right Feb 14th…


Alright, this one is going out, predominantly, to the guys out there!

On this weeks Big Wild broadcast, we discussed the delicate yet vital concept of cookin’ for your baby on the Day of Love. I’m gonna briefly flesh out some suggested we explored.

First and foremost, if you plant to cook for your sweetie on Valentines Day, then be you male, female, married, dating or trying for one or the other, heed this advice if you heed no other:
DON’T COOK WHAT YOU WANT OR WHAT YOU THINK THEY WANT TO EATAsk the love of your life some pointed questions and base your plan upon their answers, OK? And if you don’t know how to cook what they want, ask us or search elsewhere, find out and make it! There truly are few things nicer than cooking for someone you love, but listening to them and cooking what they really want is one of those…

That is lesson and job #1 for today.

Now, the second thing that came up was, well, errr, food that could possibly have certain advantageous side benefits, as in, in so many words, food that could make you and yours frisky; is there such stuff? The answer is a resounding Yup! As mentioned above, making what your love wants is the best plan; that said stuff like sparkling wine, oysters and chocolate are all reputed to get your motor running, so if your baby likes any or all of those…

Lets start with sparkling wine.

“Come quickly, I am tasting stars,”
Dom Perignon

That quote from the most famous Monk is a pretty good description of what the first taste of a good sparkler aughta be. Only those wines produced within the region of France that bears the name may rightfully be called Champagne; anything called that from somewhere else is simply false advertising.

I am recommending that you try something from the U.S., and that will be sparkling wine. Try something you’ve not tried before. I am not calling upon y’all to break the bank, but if you go this route, one or maybe two decent bottles in the $20 to $30 a pop range aughta do.

As discussed briefly, know what you’re getting before you spring for it. When it comes to sparklers, the terms you see thereon, such as Extra Brut, Brut, Extra Dry, Demi Sec and Sec are speaking to the level of sugar in that particular bottle. This stuff can be a bit confusing, so just remember that in this instance, The ‘Extra Brut’ is the least sweet and the ‘Sec’ the sweetest. Brut will serve you very well for paring with dinner, and yes, you sure can do just that!.

When you open sparkling wine, do NOT shoot the cork across the room. Not only is that potentially dangerous, (Specially after the first bottle when your aim sucks), but it does the wine no favors. Cover the cork with a cloth, grip it firmly and gently turn the bottle, allowing the cork to slowly loosen; if you do it just right, you just hear a little sigh of compressed gas as the cork leaves the bottle. Voila!

Last but not least, a decent, non-vintage sparkler should be not be served freezing cold, as doing so defeats much of the magic of complex flavors and tastes. Serve yours at around 42º to 45º F, and vintage stuff between 45º F and 50º F.

Here are some great choices.

The Sharffenberger Brut Rose from California is a fantastic wine with a touch of still red wine added to the mix. The result is tasty, complex and very refreshing. Around $20 a bottle

The Gruet Sauvage from New Mexico is a fantastic, dry complex sparkler often found for under $20 a bottle. Gruet also makes a wonderful rose sparkler fueled with 10% Pinot Noir.

Ted Marks owns my namesake Atwater Vineyards in the Finger Lakes region of New York State; in addition to some amazing still wines, their Cuvee Brut, (Especially the ’08) is a traditionally crafted wine with amazing depth and presence; around $30 a bottle.

The Mountain Dome winery is a tiny operation nestled in the hills east of Spokane, Washington; their non-vintage Brut is, in my opinion, among the finest sparklers from any country and far and away better than anything else you can find for around $20 a bottle.

For your own back yard, if you’ve not tried the Champagne Method sparkling Cider from AEppelTreow (Apple True) Winery & Distillery in Burlington, Wisconsin, you need to! Available from the makers.

Now, as for oysters, I have to be slightly defeatist and say that, if you don’t live reasonable close to a coast, then finding good, fresh oysters is tough and expensive. If you can get them and your baby loves them, then spring for as fresh as you can get; in fact, order ’em from the Gulf Coast and do those folks a favor! Simply shuck ’em and serve ’em on the half shell, (AKA sliders). A little chopped shallot, course salt, fresh lemon, or Tabasco are all allowable but anything more than that would be uncivilized…

So, on to chocolate. Here again, I must encourage you to go outside the norm; we’re not talking Hersheys or M & Ms, guys… It is easier than ever to find very decent chocolate in your local grocery, so go and do that. Chocolate nowadays is often rated for it’s cacao content. If you’re not familiar with this stuff, you can end up scratching your head wondering what’s what.
So when you’re cruising the aisles and see, fer instance, a bar of Sharffen Berger that reads 62% Cacao Semisweet, what the hell does that mean? It means that 62% of the total content in that chocolate bar is derived from the cacao bean, (As some combination of chocolate liquor, cocoa butter and cocoa powder), and the other 38% would be sugar, vanilla and stuff like that. Ya get it? So milk chocolate is gonna be low cacao percentage and real nasty dark chocolate is gonna be real high. Be forewarned, more is not necessarily better – The darker the chocolate, the more bitter takes over from sweet, so unless you and your squeeze really like that, stay below say 70% to 75% cacao.

Sharffen Berger, (No relation, as far as I know, to the wine folks), is readily available and very good chocolate.
Lindt is another very popular popular and is also good stuff.
Green & Black, and Dagoba are other premium brands you should be able to find without too much hassle.

Pair chocolate with fresh fruit as a wonderful desert course. Sliced apple, pear, berries, and even grapefruit make a fresh, tasty finish to a fine meal.

Now, as to all that stuff about whether or not any of this will further your chances of getting lucky, well… That’s up to y’all.