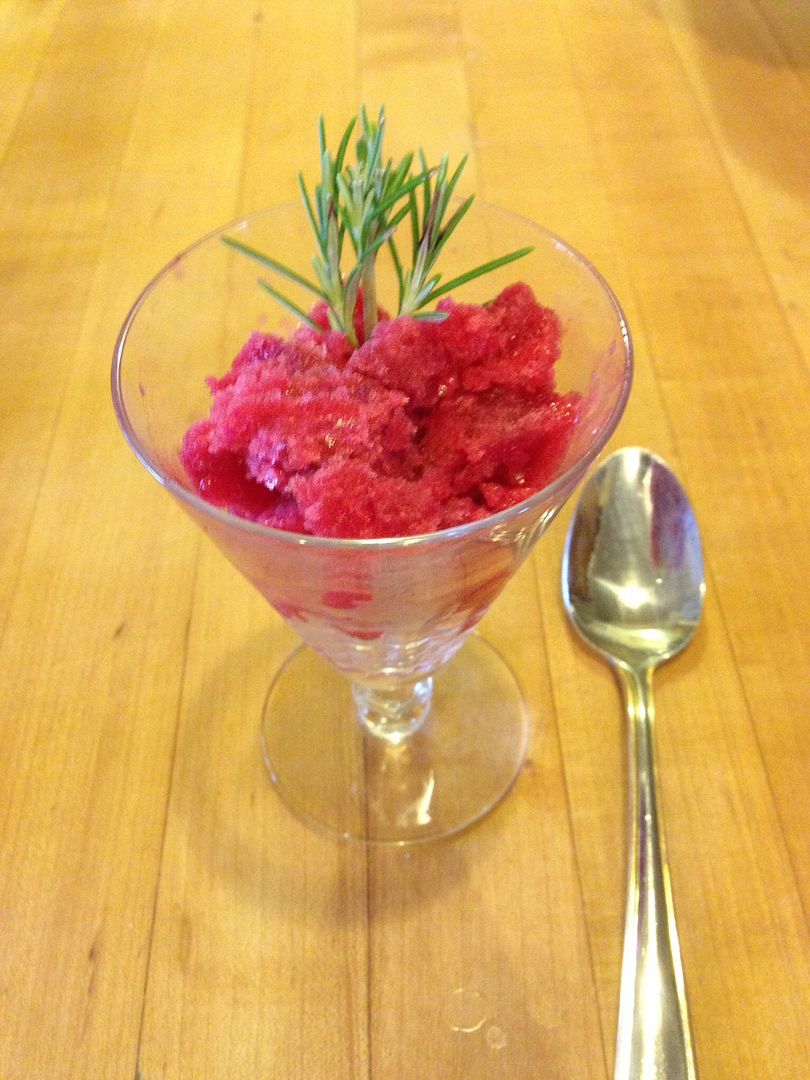
Granitas are a lovely, light alternative to ice cream or sherbet that contain no dairy at all and are super simple to make; if you’ve never tried one, it’s time. This version highlights the tart sweetness of cranberries and citrus and is, quite frankly, stunningly pretty.
We’re highlighting cranberries ’cause we typically just haul them out for the holidays, but that’s not right, (but go ahead and do so now, OK?) Cranberries are incredibly tasty, make gorgeous food, and are darn good for you as well. They’re not only rich in Vitamin C, but have excellent infection fighting properties as well, as anyone who’s had a urinary tract infection knows. Cranberries contain compounds known as condensed tannins, which are potent antioxidants with known anti-inflammatory properties. Cooking does not degrade tannins, so here’s a delicious little fruit that’s remarkably healthy even when we do stuff to ’em. Here’s how you granita.
1 Cup Water
3-4 fresh Navel Oranges
1 each fresh Lemon and Lime
1 1/2 Cups Cranberries, fresh or frozen, washed and sorted
1/2 Cup Agave Nectar or Honey
Thoroughly rinse cranberries and citrus. If your citrus has been waxed or treated, put them whole in a bowl containing ¼ cup white vinegar mixed with 4 cups cold water. Allow them to soak for about 15 minutes, then rinse in fresh water and dry with a clean towel.
Zest all citrus, then juice each into separate small bowls or cups.
In a heavy bottomed sauce pan over medium-high heat, add;
The water,
Cranberries,
1 cup of orange juice,
1 teaspoon lime juice,
1 teaspoon lemon juice,
The agave nectar or honey,
1/2 teaspoon of orange, lemon and lime zest.
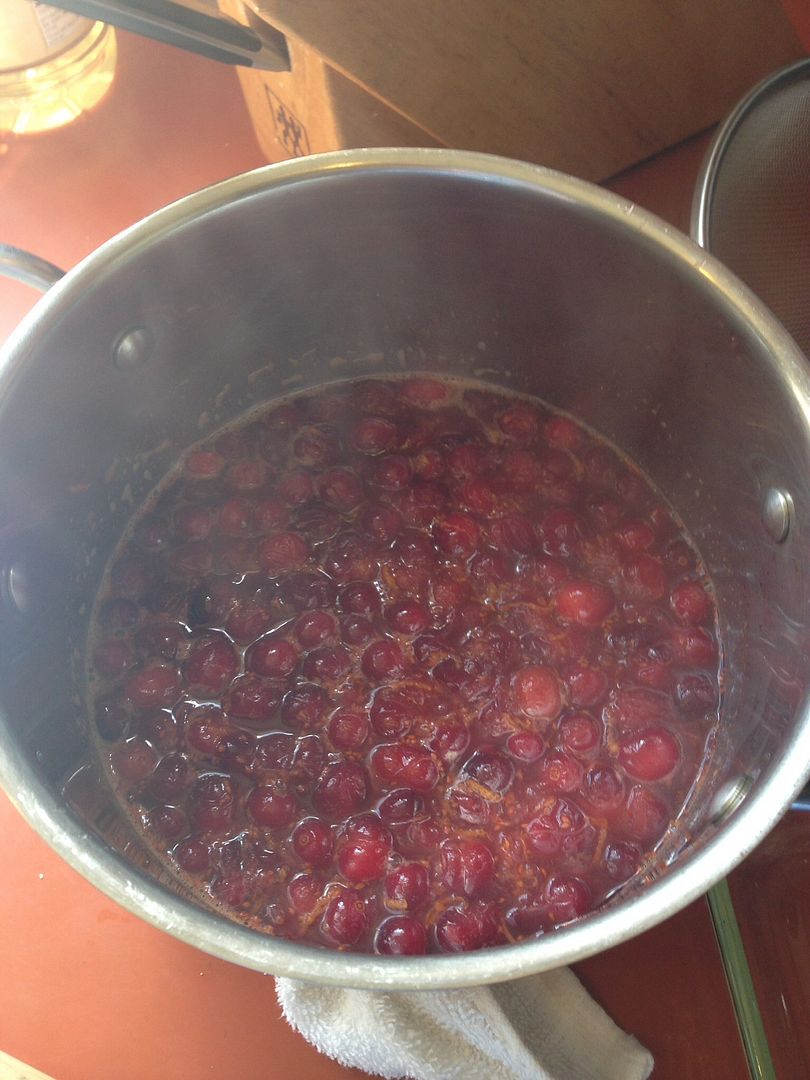
Heat to a fast simmer, stirring occasionally, until the berries start to pop, (about 5 minutes).
Remove pan from heat and purée the ingredients with a stick blender; be careful, the blend holds heat well and is sticky.
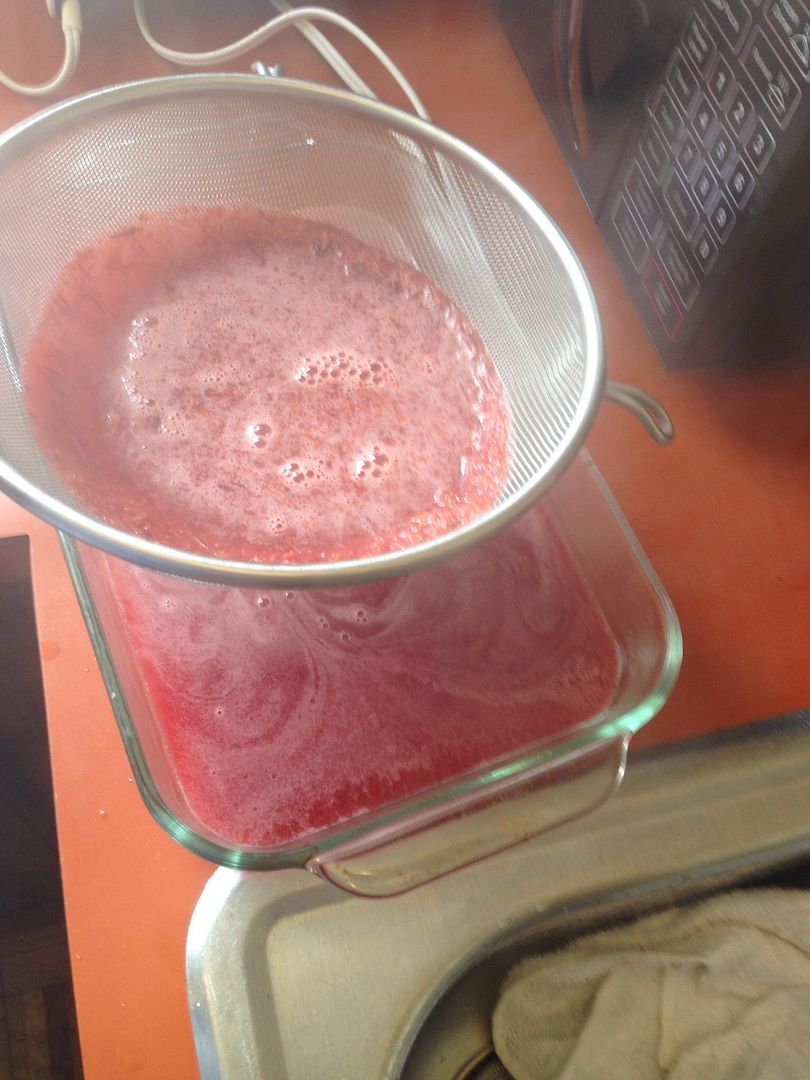
Carefully pour the mixture through a steel mesh strainer, into a glass baking pan, (around 9″ x 12″ is right, and a half cookie sheet with sides will work if you don’t have the pan).
Press gently on the mix with a spatula; you’ll end up with some skins and zest that won’t make it through the strainer.
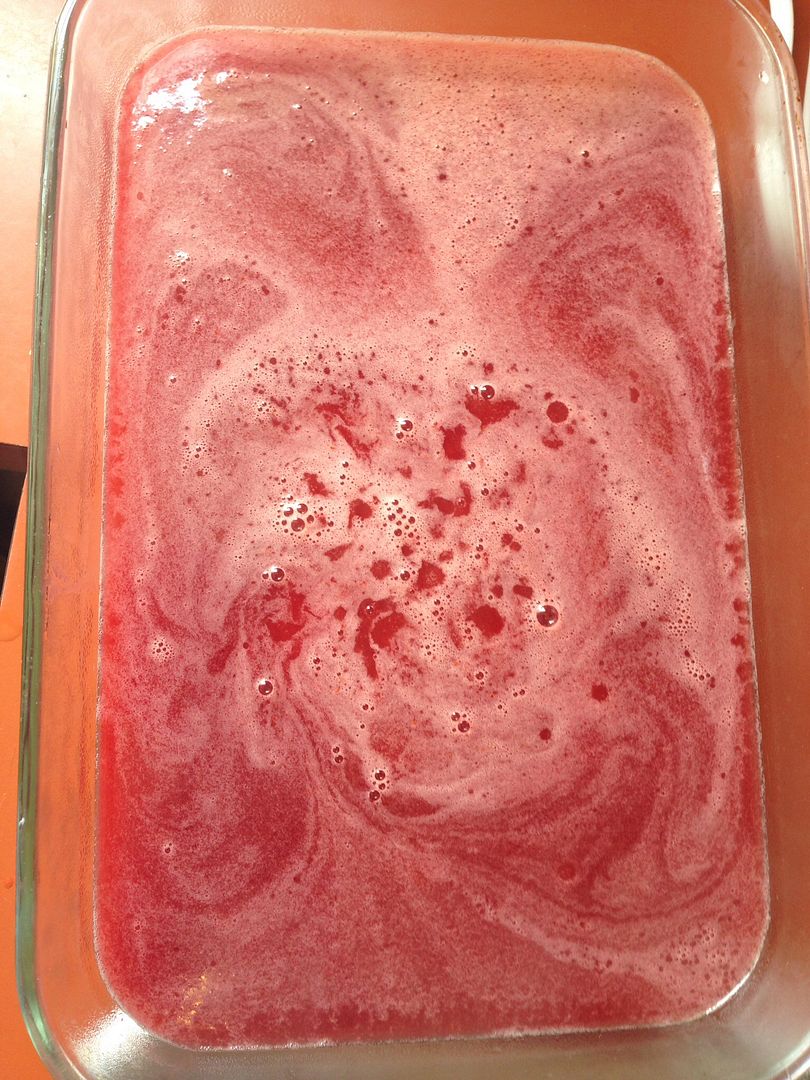
Slide the pan into your freezer for at least 4 hours, (and overnight is fine), along with 4 margarita or Marie Antoinette champagne glasses. Freeze until the granita is completely set.
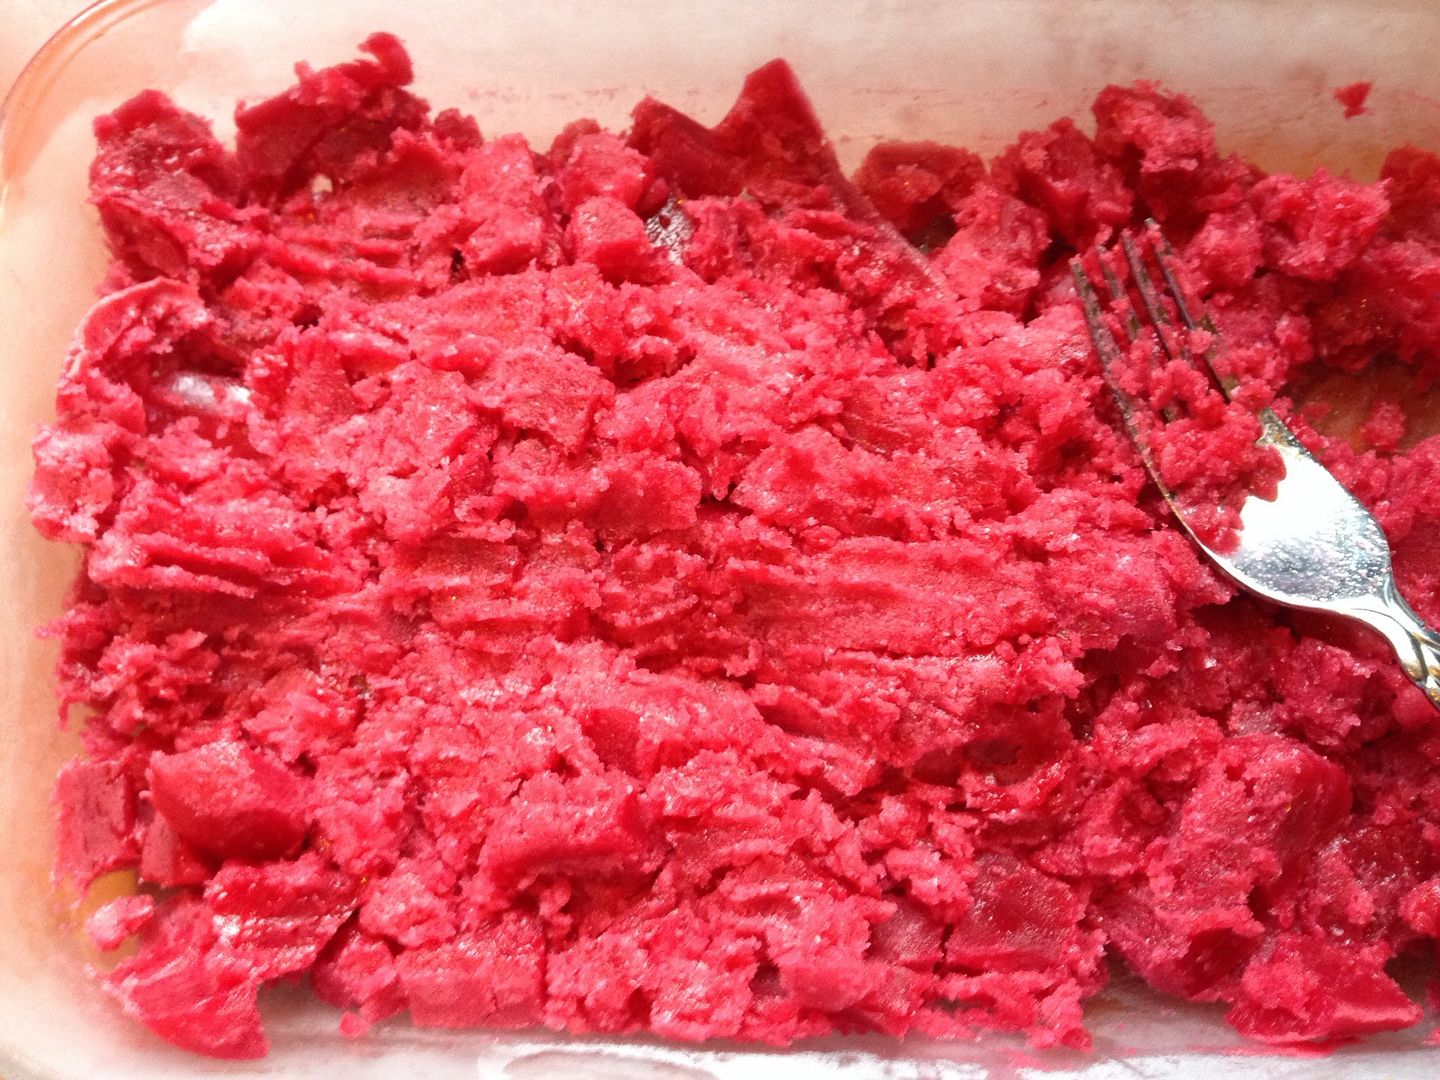
Scrape the granita carefully towards with a fork while holding the pan steady, until you’ve got a nice shaved ice consistency.
Scoop granita into the chilled glasses, garnish with a Rosemary sprig, and serve immediately.
When the garden churns into production mode, I get a serious salad Jones on a regular basis. There’s something about watering becoming an exercise in dinner recon and going outside to prep for dinner that seems very right to me. This seems like a good time to talk about building great salads, and what to dress them with.
When fresh veggies are abundant, they deserve some extra care, especially lettuces. If you’ve ever been served a salad that really popped for you, it’s a guarantee that the level of prep and presentation went well beyond what usually happens at home, even if things looked really simple. Recreating that at home is not difficult, and well worth the effort.
The first thing that really needs to get done is a gentle but thorough washing of anything and everything you’ve harvested. We don’t use any chemicals on our garden, but regardless, there’s dirt and maybe a critter or two that needs to be found and removed. This is also the time to inspect and remove any wilted or damaged parts. Have a big bowl of icy cold water ready beside your station, and drop stuff into it as you’re done with it. Even freshly picked greens start to lose water and crispness quite quickly when it’s hot out – The cold water will keep them in top form. After everything has had a good soak, change the water and let them have a second cold bath. These steps should be done right before assembly and service of the salad.
As you prep additional goodies for the salad, place them into sealable airtight containers, (preferably glass). A lot of us at home make too much, and mix it all together in one big ol’ bowl – Ask yourself how often you have that green salad again, until it’s gone? The jumbled mix invites things to go bad, and other ingredients to get thrown out – Like when your tomatoes or cukes go first, but they’re mixed with everything else, and… With everything prepped, offered, and stored individually, folks can build their own mix, and leftovers lend themselves readily to new dishes.
Invest in a container or two specifically designed for storage of lettuce and veggies. We have two that both have a drain tile over the bottom, snug fitting kids, and ventilation options. These things genuinely will store lettuce and veggies for longer and better than any other option we’ve tried – It’s actually pretty amazing – Lettuce and cabbage stays crisp and other stuff, from carrots and celery to chiles and green onions, last far longer.
Make dressings fresh, just as you do your salad. Building even relatively complicated dressings take no time at all, and is a delightful exercise. Dressings in big ass plastic squeeze jars isn’t how we should want things to be – That’s done for the benefit of the seller – not for us. Whip up what you need, plus some extra to go to lunch with you tomorrow. Building in smaller, fresher batches yields far superior results, and furthers exploration of what you really like – Maybe even your own signature thing – And that’s very cool indeed.
Fresh herbs rock in salads, within bounds of reason. When they’re fresh, herbs are at the pinnacle of their potency – Keep That in mind, along that with the fact that a whole sage leaf may be enough to season a whole batch of stew, and you get my drift. Use them sparingly – incorporated into dressings may be your best bet for balanced flavors that don’t overwhelm.
A basic lettuce blend is great as a base. If you’re of a mind to add more stuff like cabbage, kale, arugula, frisée, or chicory, keep in mind that not everyone may share the love – Allowing your crew to decide for themselves if they want to add them will often make for happier campers, and again, it gives you greater leftover flexibility.
Emeril Lagasse used to have a shtick on one of his shows, wherein he’d say something to the effect of, ‘I don’t know about where your lettuces come from, but mine don’t come seasoned.’ There’s wisdom there – Good greens certainly have flavor and texture, but a wee sprinkle of salt and a twist of pepper will make those different tastes pop all the more.
Finally, here are three dressings I’m really liking this summer.
Urban Dijon Vinaigrette
1 Cup Extra Virgin Olive Oil
1/3 Cup Aged Sherry Vinegar
1 Tablespoon Dijon Mustard
1 teaspoon Agave Nectar
1 sprig fresh Thyme (or 1 teaspoon dried)
1 clove fresh Garlic
Pinch of Salt
A few twists fresh ground Pepper
Trim, smash, and mince garlic.
Pull leaves from thyme stalk and mince.
Combine all ingredients in a mason jar and cover, then shake vigorously to combine.
Allow to marry for a few minutes, and shake again prior to serving.
Urb’s Herby Vinaigrette
This is a very vibrant dressing – Makes a great marinade for chicken or pork too.
Fresh herbs are best when you have them.
1/2 Cup Extra Virgin Olive Oil
1/2 Cup Avocado Oil
1/2 Cup Cider Vinegar
2 Tablespoons fresh Lemon Juice
1 Tablespoon minced fresh Garlic
2 teaspoons minced fresh Sweet Onion
3 teaspoons Oregano
2 teaspoons Tarragon
2 teaspoons Parsley
2 teaspoons ground Black Pepper
2 teaspoons ground Mustard
1 teaspoon Rosemary
1 teaspoon Lemon Thyme
1/2 teaspoon Salt
2 whole Bay Leaves
Combine all ingredients in a mason jar and cover, then shake vigorously to combine.
Allow to marry for a few minutes, and shake again prior to serving.
Urb’s Teriyaki Joint Dressing
If you’ve ever had teriyaki in the Pacific Northwest, you’ve had a variant of this dressing.
I love the stuff, and I bet you will too. If you go all out and make fresh mayo at home for this, it’s stunningly delicious.
1 Cup Mayonnaise
1/4 Cup Toasted Sesame Oil
1/2 Cup Rice Vinegar
2 Tablespoons Agave Nectar
2 Tablespoons Dark Soy Sauce
1/2 teaspoon Granulated Garlic
Combine all ingredients in a non reactive mixing bowl and whisk vigorously to combine.
Refrigerate for at least 30 minutes prior to serving.
With all that to consider, it aughta be a pretty swell salad season, don’t ya think?
Serendipity is a wonderful thing. Three years ago almost to the day, I posted this, and here we are full circle. Enjoy!
Received this PM earlier today, from alert and hearteningly honest reader Sarah, who lives in the wilds of Cleveland, Ohio.
‘Recently saw the photos of your wife’s garden. It just so happens that I planted peas for the first time this year, and lo and behold, they actually grew! I ended up harvesting a big pot, and then realized that I really don’t know the step by step for preserving these things! Naturally, I though of you, so, what do I do?!’
Well, Sarah, first and foremost, I hope you know how much it thrills us that you thought of us first with such a great question. Secondly, good on ya for asking, and third, your timing couldn’t be better – Monica and our two lovely Granddaughters picked a whoppin’ big bowl full of fresh peas last night – They’ve headed for the park, and I’ve been tasked with pea processing – so let’s get after it!
Freezing really is the best thing to do with fresh peas. You didn’t mention the variety you grew, so first we’ll touch briefly on the three most common versions, shell, snow, and sugar snap. Shell, (also called garden, English, or Sweet), are thin skinned peas with an inedible shell. Snow peas, (also called Chinese pea pods), are smaller peas with a thicker, edible pod. Sugar snaps, (or just plain snap), peas are a cross between the former and the latter, with a very thick, edible pod and relatively large mature peas.
Snap, Snow, and Shell peas, respectively.
For both snow and snap varieties, while you can and should eat some whole when they’re just picked, it’s best to remove the fibrous strings that run along the seams before you do so.
Regardless of what variety you’ve grown, you’ll want to freeze them. Canning peas is laborious, and frankly, doesn’t yield very good taste or appearance. Shell peas must, of course, be shelled prior to freezing. Snow peas can be frozen whole, as long as they’re blanched first – If you don’t do that process diligently, you’ll end up with nasty, mushy results.
With snap peas, I’ve found that whole peas just don’t freeze very well; they’re really delicate things, which is why their freshness is so fleeting. For my mind, it’s best to eat and cook whole peas at the peak of their freshness, and to shell anything you’re going to freeze. Don’t toss the pods however; sauté them in a stir fry, or better yet, make a pea stock, which makes a phenomenal base for split pea soup. Here’s how.
Fresh pea stock is great for split pea soup
Snap Pea Stock
10 Cups Water
4-6 Cups empty Snap Pea Pods
1/2 Cup Sweet Onion, rough chopped
1/4 Cup Carrot, rough chopped
2 Tablespoons Celeriac or Celery Leaf
1 teaspoon Lemon Thyme
1/2 teaspoon Sea Salt
1 Bay Leaf
Put everything in a large stockpot over medium high heat.
As soon as the stock begins to simmer, cover and reduce the heat until you’ve got a very slow simmer; cook for 45 minutes.
Pour the stock carefully through a chinoise, or a colander lined with cheese cloth into a clean mixing bowl.
Allow to cool to room temperature.
Transfer to clean glass jars, or a freezer bag. May be frozen for up to 4 months, or refrigerated for 3-4 days prior to use.
Pea stock is surprisingly fragrant, flavorful, and lovely stuff to boot
To preserve those peas, you’ll need to shell them. As with all production cooking processes, set yourself up an area where you can have everything arranged right at hand. To shell fresh peas, grab one and turn it wide seam side up, with the stem away from you. Grab the stem between thumb and forefinger, and zip it back toward you – that’ll remove the fiber along the seam. Now zip your thumb nail along the seam and viola, your pea will open up like a book. Push the peas out of the pod and into a mixing bowl.
Now it’s time to blanch. There are a lot of questions about blanching, and most, if not all of them are answered here at one of my favorite cooking sites, serious eats. Blanching is a short, high temperature cooking cycle done in boiling water, followed by an immediate plunge into ice water. We blanch for three reasons when – To
destroy enzymes that begin to break produce down once they’ve been harvested, to preserve great color, and to keep them crisp – All very worthwhile pursuits, indeed.
The fine print for blanching is that you want two things without question – First, you need water at a steady boil through the relatively short cooking time, and secondly, you need to plunge what you blanched into ice water immediately after cooking. Those things are non-negotiable for the success of the process.
The old adage about using lots of water to blanch really doesn’t translate all that well to home kitchens – The logic ran that a relatively large volume of water won’t lose temperature as drastically when food is introduced. That’s true for commercial stoves, but not so much for home cooks – If you’re blanching in small batches at home, a pot with one quart, (4 cups), of water will actually recover a boil far faster than larger volumes.
Second issue is salting. The sages say ‘salt heavily’, and to some degree, that’s true. You want water about as salty as the ocean, or about 3%. The wonderful website Pickl-It has a super handy brine calculator that’ll let you dial that right in, (and its 1 ounce of salt for 1 quart of water). Now, this requires weighing, because the fact is, all salt weighs differently. I can’t recommend a small kitchen scale enough – They’re cheap, easy to use, and if you get at all serious about baking, you’ll want to have one anyway. I’ll give you a cheat and tell you that 1 ounce of the most popular kosher salt is roughly 5 teaspoons. While Harold McGee notes in his epic reference volume, On Food and Cooking, that salt tenderizes veggies by interacting with natural pectins, this also means that too much can make your peas soft.
Finally, there’s time. I don’t know how many folks I’ve heard say that you ‘blanch for about a minute,’ and frankly, that dog just don’t hunt. Blanching time varies depending on what’s being blanched, and you should pay attention to that. The Reluctant Gourmet has published a great blanching time list, so head over there, read and heed.
OK, now we’re ready. It’s possible I just made blanching sound really laborious, but it’s not at all. Set up a station so everything is close at hand. You’ll want a stock pot of salted water, a large bowl with ice water, and a single mesh strainer handy.
Everything set up to blanch
Shelled peas do indeed blanch for about a minute. For peas, corn, and a whole lot of veggies that are small individual things, I add about a half tablespoon of butter to the blanching water. It doesn’t impart much taste, and it helps them freeze without turning into a block of peas or whatnot.
A little butter in salted blanching water helps frozen veggies seperate
Once your water is boiling merrily, throw in those shelled peas and count off a minute. As soon as the time is up, carefully pour the peas into a single mesh strainer and immediately into the ice water. Work the peas around gently with a slotted spoon to help them cool. Let them sit in the ice water for about 3 minutes, until they’re thoroughly cooled. Scoop off any remaining ice, pour the peas back through the strainer, then transfer them to a clean mixing bowl. Viola – bright, crisp blanched peas.
Blanched peas drained and ready for the ice water bathPlunge blanched peas into ice water immediatelyFresh peas blanched and ready for the freezer
Now it’s time to package for freezing. A vacuum sealer is the bomb for such things, but not everybody has or really needs one. Next best thing is a nice, heavy freezer ziplock style bag. Portion the peas into bags based on your anticipated use – I portion for two, as you can always whip out an extra bag for guests. Seal about 90% of the bag, then suck all the air out that you can, and zip it all the way closed while you’re still sucking. That’ll do about as good a job as possible to deter freezer burn and keep things fresh. Label your stuff with the date, pop them in the freezer and you’re good to go.
Fresh peas ready for the freezer
So, there you go, Sarah – Maybe more than you asked for, but hey – You got me started! Happy preserving.
Controlling food waste is critical to restaurants, and it’s no less so to home cooks.
One of the greatest challenges we face in the world is food waste. Yeah, we hear about it most when it’s colossal, like from countries, or major grocery and restaurant chains, but fact is, it’s every bit as pervasive and problematic right here at home, in our own kitchens. It’s time to talk about kitchen food waste, and act on that.
Dive into food waste numbers just for the USA, and prepare to be seriously bummed out. Overall percentage of what’s produced – 40%. 20% of what goes into landfills. According to a NRDC study in 2015, American households tossed $165 billion worth – That’s billion with a B – or roughly $2,200 per household. Worldwide, the figure is around 1.3 billions tons and $990 billion annually. Sobering figures to say the least. When you hear that the biggest problem with feeding the world isn’t the ability to grow it, it’s pretty much true.
What’s to be done then? Obviously those figures are completely unsustainable. While it might seem like little ol’ us are such a drop in the bucket that we couldn’t possibly alter those numbers, I beg to differ – Understanding the nature and magnitude of the problem is the first step. Every little bit helps, and frankly, we can fairly easily do more than just a little bit at home – That’s important not just to help stop wasting food, but to buoy our pocket books and consciences too.
Battling food waste is huge in the restaurant business, (is if you want to stay in business in any event). We track it closely, in order to construct a viable and effective plan to keep the numbers down. Recording waste lets us study things a bit and decide where the problem lies – That might be how much we order or prep, or a mistaken assumption about how much of what we’ll sell. Waste can also stem from over-portioning, or improper storage – There’s a lot to think about, but once you get a good system in place, it becomes a lot easier to manage.
Considering those figures on average waste are in tons and thousands of dollars per American household, I don’t think there’s any question about the importance of having a plan and system in place at home, is there? Same answer comes to mind for the question of whether or not the additional effort is worthwhile – If you didn’t cook at home a lot and care about that, you wouldn’t be here. What then is a viable and effective plan to help reduce food waste for the home cook?
First thing that comes to mind is how much perishable food we buy, and how often. For the former, we really need to plan our shopping, and not do any significant part of that willy nilly. Having a realistic shopping list, one based on what your household will actually in all likelihood eat in the period you’re shopping for, is key. Secondly, sticking to that list, (and never shopping when you’re hungry), is equally important – Impulse buying does no one any good.
A shopping list is a living thing, usually composed over several days. When it comes time to head to the store, a review is in order, to determine not just if you missed something, but also if there are things there you don’t really need – Especially when the items in question are perishable. If you love to cook and are always looking for new things to try, it’s easy to think you’ll make that crying tiger beef this weekend and then buy a bunch of stuff to do just that – If life then intrudes, you may well be left with things that end up getting tossed.
When you shop, you absolutely must pay attention and be picky, picky, picky. When I go, I see maybe a couple people other than me who are really and truly checking things out – Squeezing, inspecting, sniffing, and rejecting anything that doesn’t look spot on – checking packaging and expirations dates, (and that pickiness includes not buying something you wanted if there just aren’t any good ones that day.) Fact is, very few shoppers do that – Most folks grab whatever and take it home, and frankly, whatever usually goes bad really quickly. You get what you pay for, and if you’re assuming all produce, proteins, dairy, and other perishables are on equal footing, you’re being a pretty clueless shopper.
Same goes for meal planning. Avoiding waste means not buying for, or cooking far too much, for your household to reasonably use before it spoils. Yes, leftovers can and should be refrigerated or frozen whenever possible, but far too many fridges and freezers are filled with things that sit there until they are eventually thrown out – Be realistic about what you can, like to, and really will eat. As we advocate around here, plan meals around judicious and inspired use of leftovers – A single chicken used wisely is two or three great meals for a small family.
The concepts from that last paragraph are especially important for us empty nesters – We had kids and grandkids over for dinner last night, and prepared what was easily two to three times the normal amount of food we’d do up for a Sunday night as a result – That’s fine if it’s going to get eaten and/or sent home with the kids – but not so much if it’s happening several nights a week because we’ve forgotten that, these days, it’s just the two of us. Always keep in mind who you’re cooking for on a day to day basis.
How we store perishables, especially fruits, veggies, and proteins, is potentially a huge contributor to excessive food waste. Bags, plastic or natural, and most crisper drawers, do a fairly shitty job of maintaining fruits and veggies. Of course the first line of defense is knowing what should be in a fridge and what shouldn’t, (potatoes, tomatoes, onions, garlic, shallot, bananas and most citrus fruit don’t go in the fridge.)
We’ve researched a bunch of storage options, especially for veggies since they tend to go bad so quickly, and found that glass or rigid plastic containers with tight fitting lids do a great job for most things, while specialized containers for lettuce, cabbage and the like do an amazing job – We’ve extended the shelf life of a lot of things from 2 or 3 days to 10+ just by using the right container, as you can see from some of the images here in. Yes, they’re plastic in some cases, but they’re not even close to single use.
Realistic consideration of what you will cook in the next few days should dictate what gets refrigerated and what gets frozen. A lot of food gets wasted because we violate that rule. Expensive proteins, from beef to firm tofu, need to be scheduled for cooking, and that schedule stuck to – If you can’t or don’t, wrap them properly and freeze them well before they go bad, (and mark the packages for date and content.)
Yes, clearly marking what something is and when it got stored is critical. Everything in a restaurant gets FIFOd, (First In, First Out rotation), and our home fridges and freezers shouldn’t be any different. As for marking what they are, if you’re seriously thinking about trying to tell me that you don’t have, right now, containers in both appliances that you have no clear idea of the contents or age of, I’ll call bullshit on y’all. freezers need to be emptied, inventoried, and thoroughly cleaned at least twice a year, too – See our post on that.
Look this essay over and you’ll realize there’s really not that much here, and certainly not much that’s genuinely revelatory – Tackling a food waste reduction program at home is no more difficult than reading about it, frankly. That said, common sense goes a long way in the kitchen, just as it does in life, right?
‘Wait,’ you think, ‘is he writing about beans again? This cat has a serious case of OCD.’ For the record, I do not – I have CDO, as I prefer my maladies in alphabetical order – and yes, I am writing about beans again. Why? Because alert follower Mia, who hails from Charlotte, North Carolina wrote, ‘Love the blog, and especially the bean posts, as I’m trying to eat less meat and go easier on the planet a little. But I’m not finding a post that really explains the basic cooking process you use.’ I waded through 10 posts with beans in the title and discovered that she’s absolutely correct. Time to fix that, and delve into the magic of pot beans.
Mia’s also right about the fact that we here in America need to dilute our animal flesh eating habits to some degree. I’ve said it before and will again – great beans are every bit as good as meat, when they’re prepared with love and imagination. Of course doing any of that requires the goods to be available fairly quickly, if we want to compete with a chub of kick ass local ground beef. That’s where Frijoles de la Olla, Mexico’s version of pot beans come in to play.
Fact is, great beans aren’t gonna come from a can. The reason canned beans get used far more than dried beans is obvious – The former is ready to eat far faster than the latter – But it needn’t be that way. If you’ve poked around here, you know we advocate cooking major proteins in large batches at the start of the week, so that you can enjoy good meals quickly throughout your busy week. Pot beans are just the ticket for many days worth of delicious stuff.
I chose the Mexican iteration of pot beans because they’re simple, tasty, and can easily be morphed into a myriad of other cuisines at your whim. That said, every bean eating country has a version and they’re all, more or less, designed to do the same thing – provide a big batch of cooked beans to work with for the next few days. In France, they might be flageolates with herbs de Provence. In Italy, it’s a white bean with garlic, olive oil, and maybe a little chile. In Spain, it might be fabada beans with tomato, cumin, and onion. Truth be told, any of those deserve further exploration.
How you cook them really is up to you, (although diehards of the various options will naturally insist that their way is best.) Take all that with a grain of salt and do what you like, but again, save some future time for exploration too. Stove top is relatively quick, does a great job, and is easy to keep an eye on – You can always do low and slow in the oven for other stuff down the line.
Which beans to use? I say try them all, and don’t be shy. Our last two excursion were Mexican enfrijoladas and a glorious clay pot of Boston baked, both of which were made with French beans – Mogette de Vendée and flageolates, respectively. Both were spectacular, my point being that you needn’t be too tied up with using the ‘proper’ variety – Explore and enjoy, because there are a bunch of heirloom bean varieties out there, and you really, truly owe it to yourself to go find them.
Then there’s the question of what to cook them in. A decent stock or soup pot will work just fine and give excellent results. I will say that it’s probably best to steer clear of pressure cookers and instant pots with beans, unless you really know the cooking characteristics of what you’re working with, and the vagaries of the appliance.
Depending on the bean, the cooking time can vary from an hour and change, to several hours. While the lion’s share of the process is pretty hands off, you do need to keep an eye on things, to make sure you don’t turn a pound of heirloom loveliness to mush, (And if you do, no sweat – that just means that you’ll be making bean dip, purée, or enfrijoladas instead of whatever you had in mind initially – and they’ll be delicious.)
Finally, to soak or not to soak? I very rarely do so, but if that’s what you’ve always done and are comfy with, then do it. Soaking will shorten the cooking time somewhat, and some folks believe it helps beans cook more evenly – In any event, it sure won’t hurt. Plan on soaking for at least an hour and up to 4 – Any more than that is likely too much for good quality, freshly dried beans.
Frijoles de la Olla – Basic Pot Beans
1 Pound of good quality dried Beans
1/2 medium Yellow Onion
2 cloves fresh Garlic
Pinch of Salt
A few twists of ground Pepper
Optional:
A few sprigs fresh Epazote or Cilantro
A couple of Bay Leaves, (I like Turkish)
Stem and peel onion and garlic. Both can just be quartered, (as in, quarter the half, so you’ve got a bunch of 1”+ pieces of onion, and quartered cloves of garlic.)
Spread your beans out on a clean baking sheet and check for rocks and other debris, (I’ve never found anything foreign in Rancho Gordo beans, but even they recommend you do this, so…)
Pour beans into a colander and rinse in cold water.
Add the beans to a cooking vessel big enough to allow for significant expansion as they absorb water – A 3 qt. sauce pan does great for a pound of beans.
Add the onion, garlic, three finger pinch of salt, and a few twists of pepper. If you’re using any or all the optional, they can go in now too, except epazote, which is a finishing herb added at the very end of the process.
Add enough clean, fresh water to cover the beans by about 3 inches.
Turn the burner on high and let ‘er rip.
Keep an eye on things, and when you get a vigorous boil, reduce the heat enough to maintain a boil but not get crazy, and set a timer for 15 minutes.
When your timer goes off, drop the heat to just maintain a bare simmer, and cover the pot.
Continue cooking until you’ve got the doneness you’re after. You will want to keep an eye on water level, and maintain 2” to 3” above the beans – Add hot water from a kettle when you top things off – Again, they’ll usually absorb more water as they cook.
What is done? Personally, I want mine fairly al dente, so that I’ve got room for further cooking in whatever dishes I’m going to make without getting mushy beans – Other folks want theirs soft at this initial cook – You do what you like.
Beans are a potential food safety hazard just like other proteins. They need to cool down from cooking temp to under 41° F in 4 hours or less. Employing an ice bath around your cooking pot is the quickest and easiest way to get there.
Bean broth is great stuff and shouldn’t be wasted. Use it in soups, stews, sauces and whatever bean dishes you’re making.
Beans can be stored in the fridge for 3 to 5 days safely, and can be frozen for up to 4 months with little degradation of flavor.
friEither way, put them in clean, airtight containers with most or all of the broth. We use glass storage containers with snap lids for both jobs – That lets you portion for about what you want for a meal easily, and allows for quick thawing and cooking when you need them.
T’is the season for cookies, right? If you’ve got favorites or old family recipes that you love, I say cherish them, and certainly don’t mess with them – share them, and pass them on to your kids. If, on the other hand, you’ve tried other recipes and been sorely vexed and/or disappointed by the results, there’s a good chance you’re not to blame. Why is that? Most likely, it’s then that ratio thing – The thing that’s so vital to cooking, and especially to baking. Done right, cookies are easy as 1, 2, 3 – But not everyone follows the rules – It’s time to weigh in on that.
Which means we’re talking about that ratio thing – it’s 1, 2, 3, as in one part sugar, to two parts fat, to three parts flour. Subscribe to that, and the cookies world’s your oyster. Violation of this ratio, on the other hand, will likely not yield good results, and therein lies the problem with a lot of the recipes you find online, or in poorly researched cookbooks.
It would be fair to ask, how do I know this to be true? Well, let me say this about that. I got an idea for a dried cherry/chocolate/almond cookie, but was short on time and not thinking very clearly. I grabbed something off the net that was kinda close, and subbed my stuff for theirs – equal amounts of dried fruit and nuts, (albeit theirs used cranberries and walnuts). What I got was a very tasty cookie out of the oven, although they were a bit wetter and flatter than I wanted. The next day, they fell apart. Just sitting in a storage box, they fell apart – a box of somewhat gooey cookie crumbs. I grabbed that original recipe and took a closer look. Their ratio was somewhere around 3-3-2, flour to fat to sugar, and that would explain my less than stellar results. My bad, and lesson reinforced. If you know the ratio, it’s easier to start from scratch than it is to trust a recipe from somewhere else.
The first bake – The absolutely wrong ratio
The other major contributor to epic baking fails is the use of volume measurements in recipes, instead of weight. Most professional bakers around the globe weigh rather than measure, for very sound reasons. Weighing ingredients is far, far more reliable, because you get much more accurate ratios. Fundamentally, a gram is a gram the world around, but a cup most definitely is not. ‘1 Cup’ can mean anything from .85 to 1.20 of a US Cup, and that’s a wide enough margin to cause issues. It all adds up to the fact that, if you want to learn to bake really well, you’re going to need to start weighing ingredients.
That’ll require a decent digital kitchen scale, which are cheap and readily available. Get one that has a generous bowl for doing the deed, and portioning out ingredients for most home recipes is a breeze. Is it worth twenty bucks and a very simple learning curve to become a better home baker? Yeah, it is.
The very cool thing about all this is that it opens up the world of design-your-own recipes, rather than relying on someone else’s. The next thing you know, you’ll be using cookbooks for inspiration or reference, or for the love of what the author did, not because you need them to follow recipes.
Alright, so, if we’re committed, then let us examine ingredients a bit more, then a few thoughts on technique.
Flour. What type we use matters – unbleached white pastry or all purpose are the preferred options for cookies. Pastry flour has less protein than AP, (but more than cake flour), so it strikes a great balance of flaky and tender. Bleached is a no no, as the bleaching process messes with proteins, leading to reduced gluten production, (AKA cookies that don’t hold together well). Combining flours may be a thing you’ll want to do, depending on what you’re after. The classic Scottish shortbread recipe calls for unbleached all purpose white and rice flour, for instance. Whole grain flours add a denser, nuttier end result. A good rule of thumb is to use no more than 30% of those in your mix, (which doesn’t discount those who do a bunch more – to each their own.) Varied flour ratios lead to different results, of course. A higher proportion of flour versus the liquid contained in your chosen fat and eggs leads to a more tender crumb, (and a more delicate cookie.) A lower proportion generally produces a chewier texture. Note – if you do use a recipe that simply calls for flour, they mean unbleached white all purpose.
Sweeteners. Sugar isn’t the only thing you can or should use in a cookie recipe, but it’s far and away the most popular. In addition to its sweetening power, sugar helps cookies brown, (caramelization), and contributes to crispiness by sucking up some moisture from the dough. Sugar also helps cookies spread out as they bake, (and if the ratio’s off, as it was in my first go round, then oh boy, do they.) There are a bunch of sugars out there. Some folks think that pure cane tastes better than stuff made from sugar beets. There’s bakers sugar, which is a pure cane sugar that’s ground finer than the regular stuff – it does everything a bit more efficiently. Brown sugar adds a bit of moisture to the mix by virtue of added or retained molasses – That contributes to a softer, chewier texture.
Speaking of molasses, that and a bunch of other things, like corn syrup (uggh!), maple syrup, brown rice syrup, agave nectar and good old honey can also be used. I recommend keeping maple syrup to the adjunct column, (it’s strongly flavored and expensive). Honey and agave nectar are popular substitutions these days, and for good reason – They add flavor notes plain old sugar can’t, and have far greater sweetening power. Due to the latter consideration, there are adjustments that must be made when using them – Honey is roughly twice as potent as sugar, and agave nectar around 3/4 more, so sweetener volume, and overall moisture, must be tweaked accordingly. Both are also somewhat acidic, so you’ll want baking soda in your recipe to balance that out. Both should be added and blended with fat prior to adding flour, just as you would with sugar. Finally, it’s a good rule of thumb to reduce your baking temperature by 25° F, because both agave and honey brown faster than sugar.
Fats. Butter is far and away the most common version used, although there are far more options out there – shortening, lard, ghee, cream cheese, heavy cream, various cooking oils, or combinations thereof can and are used in baking. Using any of those will give you differing results, of course – While most of what’s listed above won’t make a huge difference in color or texture, they will in terms of flavor, so be prepared to experiment. That said, fats don’t just add calories, they impact every aspect of a recipe, from overall consistency, to how they bake. For instance, butter has a notably lower melting point than many of the others noted herein, so if you see a recipe calling for half butter and half shortening or lard, what the maker was likely after was a cookie that wouldn’t end up as thin and crispy as a pure butter version would. When and if you use butter, use unsalted, because salted varies widely in how much salt is onboard.
Not all cookie recipes contain eggs, but most do, and for darn good reasons – they contribute significantly to the whole shebang. Eggs act as the largely unsung framework upon which everything else in a dough depends. They add moisture, lecithin (an emulsifier that helps disparate constituents get together), fat, and of course, protein. They help gluten do its thing, and contribute appreciably to flavor, texture, and mouth feel.
Leavening of some kind is present in the vast majority of cookie recipes. Baking soda helps cookies rise, and as mentioned, can neutralize acids like sugar and honey which, left unchecked, can mess with browning. Baking powder will also give a lift, and contribute to a lighter texture as well. Both add lift by generating CO2. Baking soda is pure bicarbonate of soda, while baking powder is that plus cream of tartar (an acidifier) and starch, used as a drying agent. If you’ve never noticed, there are single and double acting baking powders – Single means it needs moisture to activate and must be baked right away – Double means some gas gets generated right away, but most does not until baking begins, so it can hang for a time without negative effects.
Salt may be a minor ingredient, but it’s a critical one. Its unique ability to enhance flavor, separating molecules and making them available to our noses, is unmatched. It also helps strengthen the proteins within a dough, contributing to a nice chewy cookie. There’s a bunch of salts out there, and we’ve covered a lot about them here, (including our recent post on plastics in sea salts). In addition to a whole raft of varieties, these days you can also readily find different grinds. Used to be you’d need to find pickling or canning salt for a fine grind – now that’s widely available, and that’s what you want for baking – it disperses and blends much better than the coarser stuff.
Alright, let’s discuss technique. This may seem fussy, but in the end run, if you’re after making more than just a good cookie, it matters.
It is a best practice to have all your ingredients at room temperature when you’re ready to make a dough. One of the key things we need to accomplish when we do that, is to allow combined ingredients to form an emulsion that will trap and hold a fair amount of air – that’s what expands when we bake, yielding a light, fluffy cookie. Having your fat and eggs at room temperature lets a creamed mixture do exactly that – cold ingredients will impede that process.
Next, sift your dry ingredients. If you don’t have a sifter, run them through a ingle mesh strainer into a mixing bowl. Sifted flour, leavening, chocolate, what have you, is lighter, and incorporates better than non.
Creaming is what it’s called when we perform the most critical step in great cookie making – combing the fat and sugars and whisking them into a smooth, fluffy emulsion. This uniform, air injected blend is critical – Leavening agents produce CO2, yes, but they won’t do it well if they don’t have the trapped air, combined with a well mixed emulsion to hold it all in.
Once you’ve added the dry ingredients to the wet and have them uniformly mixed, stop messing with the dough – Excessive handling leads to tough cookies.
Bake in the lower middle section of your oven, bake one sheet of cookies at a time, and spin the sheet 180° half way through the bake – All those little things add up to greater consistency and better goodies. If you really want to get after it, calibrate your oven with an external thermometer, so you know what yours really bakes at, (At work, we get right down to zone temps in our deck and rack ovens, so we know precisely where the hot and cold spots are.)
Here then is my correct recipe for chocolate, almond and cherry cookies. This will make 2-3 dozen cookies, depending on how big you portion. And yeah, it’s in grams – That’s how the rest of the world works, so we might as well get with the program. And yeah, I did give you volume cheats, too, just in case you chicken out – using those will still make a pretty good cookie.
10 grams Vanilla Bean paste, (extract is fine too – 2 teaspoons)
4 grams Baking Soda (1 teaspoon)
4 grams fine Salt (1/2 teaspoon)
Have your eggs and butter at room temperature before proceeding.
In a cast iron skillet over medium heat, toast the almonds, stirring regularly and keeping a close eye that they don’t scorch. Remove from heat when they’re golden brown and fragrant.
When the almonds have cooled sufficiently, chop them into roughly 1/4” pieces, and set aside.
Chop cherries into roughly pea sized pieces, and set aside.
Run flour and baking soda through a sifter or single mesh strainer, into a large mixing bowl.
For the lions share of the process, a stand mixer is preferred, but if you don’t have one, you can hand whisk – Just be forewarned, it’s going to be a bit of a workout.
In a stand mixer bowl set up with a paddle, add the butter and mix on low until it’s smooth and even – about 2 minutes.
Stop the mixer, and use a spatula to scrape the butter down from the bowl sides and paddle.
Add the sugars and salt and mix on low until the blend is smooth, about 1-2 minutes.
Again, stop the mixer, and use a spatula to scrape the creamed mixture down from the bowl sides and paddle.
Add an egg and the vanilla paste to the creamed mixture and mix on low until fully incorporated – No more than 30 seconds. Repeat the process with the second egg, and again, 15 to 30 seconds tops – You don’t want to over-beat the eggs.
With the mixer on low, gradually add the flour mixture, and mix until fully incorporated – Stop as soon as that’s achieved.
Remove the bowl from the mixer, and add chocolate, cherries, and almonds, and incorporate with a spatula, until evenly mixed.
Now that it’s mixed, you can chill your dough – for at least an hour, if you want a taller, lighter cookie. If you prefer things a bit flatter and crunchier, go ahead and bake. That said, if you’ve got a really warm kitchen, it’s a good idea to chill the dough for at least a half hour before baking, just to make sure things don’t get too loose.
If you don’t plan to bake right away, just transfer the dough onto parchment paper, and roll it into a log about 1 1/2” thick, then add a layer of aluminum foil. That’ll hold in the fridge for a week, no problem. It’ll also freeze well for up to a month – Just let the dough thaw for 15-30 minutes before cutting off 1/3” to 1/2” thick slices, and then bake away.
When you’re ready to bake, preheat oven to 350° F, and position a rack in the lower middle section.
Line a baking sheet with parchment, or use a silicone baking mat.
Scoop heaping tablespoons of dough onto the sheet, about 2” to 3” apart.
Bake for 12 to 15 minutes, spinning the sheet 180° at about 6 minutes in.
Remove the sheet from oven, and slide the parchment or silicone onto a cutting board, cooling rack, etc.
Let them cool for 10 minutes or so before you dig in, and for at least a half hour before you store them – an airtight glass container is best.