Beautiful Barbecue Beans


Wait, more on beans? Yeah, and here’s why. They’re genuinely good for you – They’re a nutrient dense food with antioxidant properties, and eating them regularly can help reduce your risk of a raft of nasty things like cancer, heart troubles, and such – Research it for yourself and see if I’m shooting you straight. 

Better yet, great beans are incredibly tasty and lend themselves to a wide variety of flavors and textures. Last night, when M announced pork ribs for dinner, I whipped up a batch of barbecue beans, (I winged it big time, but they were so dang good I just had to share them here.)

BBQ beans demand a great sauce, and that means made from scratch. The sauce not only provides rich counterpoint to a firm, creamy bean, it also helps make the low and slow cooking process as effective as it is.

First decision is what bean in what form should we use? Dried is my answer, and specifically, Rancho Gordo beans. These are superior beans to dang near anything else you’ve ever tried. If you think you don’t really like beans, try them, and they’ll change your mind – They’re that good. Next question, what variety to use? A lot of folks swear by Great Northern or Navy, and they’re not wrong, but my go to is an RG pinto – These are not the usual nondescript whatever bean most pintos are – These are rich, creamy, firm beans that soak up flavor while maintaining firmness and texture.

You’ll notice a couple other unique ingredients from Rancho Gordo in this recipe. I strongly encourage you to take the plunge and try them, they’re well worth it. They’ll add unique and subtle flavor notes to the finished dish you simply won’t get elsewhere, (but fear not – I’ll offer common subs as well.)

This recipe is scaled for a full pound of beans. While you might not need all that in one sitting, they’ll be fine in the fridge for 3 to 5 days, and if properly packaged, will freeze well for several months, (glass, airtight, minimal air space, will do the deed.) 

I’m calling for a Dutch oven to do the baking in, because a fair amount of y’all have one, (and you don’t, you aughta), but a heavy baking dish will also do fine. If you’re blessed with a clay cooking vessel, then that’s your go to for this dish.

Yes, there’s a lot of stuff in this recipe, but it’s not as complex or time consuming as it might appear, and the rewards are great. While there is always more than one way of building a dish, do try this one as noted. Note that I’m not calling for a pre-cooking soak of the beans – It’s not necessary for a long, low and slow cook like this, and it may well rob them of flavor. You’ll see that I call for salting the water the beans do their initial cooking in – Fact is the ‘never salt beans until they’re done or they’ll be tough,’ mantra is an old wives tale – High quality, fresh beans will come out tasty and tender every time with a little salt in the cooking water.

Granted, this isn’t a super low calorie dish – In fact, with some freshly baked cornbread, a dollop of sour cream and a good IPA, it’s a very hearty meal in and of itself.

Scratch made barbecue beans

Urban’s Barbecue Beans

1 Pound Rancho Gordo Pinto Beans, (and if you’re winging it, good quality Great Northern or Navy beans will do)

2 Cups House Made Chicken Stock, (good store bought will work fine)

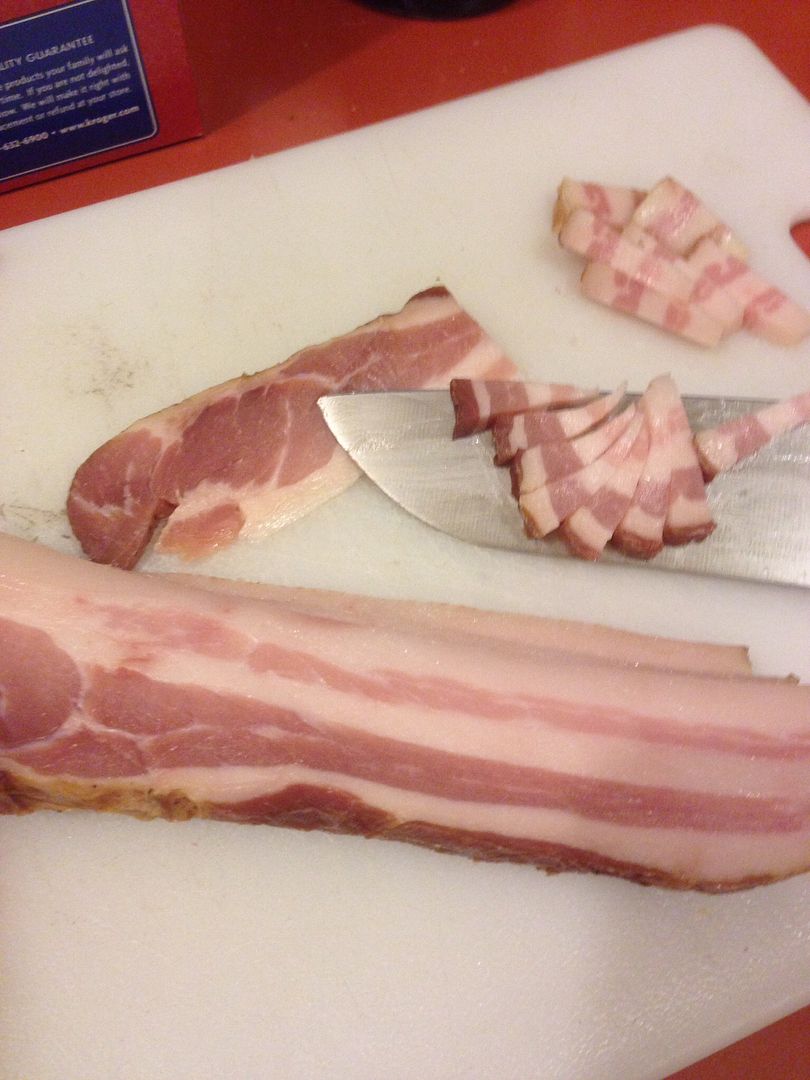
8 ounces thick cut Smoked Bacon

1 large yellow Onion, (about a cup and a half or so)

1-2 fresh Chiles, (I like Serrano, but Jalapeños are great too)

1/4 fresh Red Bell Pepper

2 cloves fresh Garlic

1 large fresh Tomato

1 Cup Ketchup

1/2 Cup dark brown Sugar

1/4 Cup Black Strap Molasses

2 Tablespoons Agave Nectar

2 Tablespoons Rancho Gordo stone Ground Chocolate, (other good Mexican disc chocolate is fine)

2 Tablespoons Rancho Gordo Pineapple Vinegar, (Live Cider Vinegar will do as a sub)

2 Tablespoons Yellow Mustard

2 teaspoons fine ground Black Pepper

2 teaspoons ground New Mexican Red Chile powder, (not chili powder, just powdered red chile)

2 teaspoons ground Celery Leaf, (1 teaspoon of seed or celery salt will do fine, if that what you’ve got, for the latter, omit the kosher salt below)

1 teaspoon Hot Sauce, (I prefer Tabasco, but use what you like best)

1 teaspoon fine kosher Salt

Bean Broth

Fresh Water

In a stock pot over high heat, add 6 cups of water, a tablespoon of salt, and whisk to dissolve. Add the beans and adjust water level to maintain at least 2” over the beans, (and more is totally cool).

Bring to a boil, then reduce heat to maintain a brisk simmer for 15 minutes.

cover the stock pot and turn the heat to the lowest setting you’ve got. 

Adjust water level if needed to maintain at least a couple inches above bean level. 

Cover, and leave beans to cook in the barely bubbling bean broth.

Check your beans every 30 minutes for doneness and water level – You want them not done, but very al dente, aka still kinda hard in the middles – and maintain that 2” of water above them. When you’re there, turn off the heat and slide the pot off the burner – This will typically take anywhere from 60 to 90 of cooking time minutes.

Drain the beans, reserving 2 cups of bean broth.

Now it’s time to assemble your mise en place – Use small bowls or dishes for your prepped ingredients.

Cut bacon into roughly 1/2” strips width-wise across each piece.

Peel and fine dice onion. 

Stem chiles (devein if you don’t want full heat), and fine dice.

Stem, trim, and fine dice red pepper.

Smash garlic with the side of a chef knife, peel, end trim, and then mince.

Cut tomato into roughly 1/4” slices, then dice.

You can combine onion, chiles, and red pepper in one bowl. Keep garlic and tomato separate.

Fine grate 2 tablespoons of chocolate.

In a non-reactive mixing bowl, combine ketchup, diced tomatoes, brown sugar, molasses, agave nectar, chocolate, vinegar, mustard, pepper, chile powder, celery leaf, hot sauce, and salt. Whisk to incorporate and set aside to allow flavors to marry.

Preheat oven to 300° F, and place a rack in a middle slot.

In a Dutch oven over medium high heat, add bacon and cook until the lardons are nice and crisp and most of the fat has rendered out. Carefully transfer bacon with a slotted spoon to a plate or bowl covered with clean paper towel – Let as much fat as possible drip back into the Dutch oven as you do so.

Add onion, chiles and red pepper to the Dutch oven and sauté until the onion begins to brown lightly, about 5 minutes. 

Add garlic and sauté until the raw garlic smell dissipates, about 1 minute.

Add chicken stock and deglaze any naughty bits from the bottom of the pan.

Add beans, bacon, and the sauce, and stir to incorporate thoroughly.

Add bean broth and stir until you get a consistency like a stew – Notably wetter than you want the finished beans, with about 1/2” of liquid above bean level.

Let the whole mix reach a simmer, stirring occasionally.

When you’ve got a simmer, cover the Dutch oven and slide that bad boy into the oven, (and don’t forget to turn your burner off.)

After 2 hours, uncover and check moisture level and bean doneness. 

If things get too thick, stir in a little more bean broth.

Total bake will typically take 3 – 4 hours – When beans are done to your liking, pull from the oven and let rest for 15 minutes before digging in.

Moros y Cristianos


Since rediscovering Rancho Gordo beans, and even joining the Bean Club, (which ain’t easy – It’s capped currently at 5000 members, it’s full, and there’s a substantial waiting list!), we’ve been more and more entranced with the diversity and wide ranging potential of bean dishes. These RG beans are just incredibly good, and you don’t need to be a Bean Clubber to enjoy them – Just head for their website, but be forewarned – This is the time of year when quite a few varieties are not available, a function of their small size and heavier than expected holiday demand. Fortunately, the dish we’re going to highlight today calls for black beans, and not only does RG have stunningly good options in that regard, but they’re in stock as I write, too. The Ayacote Negros are wonderful, as are the Midnight Blacks – so if this piece floats your boat, head on over to RG and snag some while the snagging is good.

Arguably, the most wonderful use for most wonderful beans are old school stuff that may have gone by the wayside, like Moros y Cristianos.

Great Cuban food always has Moros

If you’ve ever eaten authentic Cuban food, then you’ve likely had Platillo Moros y Cristianos. Also known as moro, moros, or arroz moro, this is the classic Cuban version of rice and beans. Widely served and loved in its home country, as well as throughout the Caribbean and the southeastern U.S., moros is a deeply nuanced dish with a wealth of wonderfully blended favors. Translated, moros y cristianos is Moors, (the black beans), and Christians, (the rice). The name harkens all the way back to the Islamic conquest of the Spanish peninsula in the 8th century. That event had profound effect on Spanish food and culture that resonates in this wonderful dish, for among many other staples, the Moors brought rice and beans, and a live of subtlety and complexity in cooking.

The Moorish influence on Spanish food and culture runs deep

Making moros y cristianos takes a bit longer than other variations on the theme, but rewards with truly amazing favors for your efforts. Served alone with fresh tortillas, it’s a deeply satisfying and filling treat. If you’re of a mind to pair with another protein, simple shredded beef, chicken, or pork is all you need.

image

For the Moros
2 Cups dry Black Beans
2 Tablespoons diced Onion
2 Tablespoons chopped Bacon
1 clove Garlic, peeled and rough chopped
1/2 teaspoon Sea Salt
1/4 teaspoon ground black Pepper

Preheat oven to 250° F.
In an oven-ready sauce pan with a tight fitting lid, add all ingredients, (and if you’re blessed with some kind of clay cooker, use that!)
Pour enough boiling water over the beans to completely cover by a good 2”.
Cover the pan and set on a middle rack.
Bake for 75 minutes, checking the water level after half an hour, and again at 45 minutes and an hour in. Add water as needed.
When beans are slight al dente, remove from heat and set on stove top, covered.

For the Cristianos
1 Cup long grain white rice
1/4 Pound Bacon
1 Cup diced sweet onion
3/4 Cup diced Green Pepper
1/4 Cup fine chopped Cilantro
3-4 cloves Garlic, peeled
1 Tablespoon Red Wine Vinegar
1/2 teaspoon Oregano
1/4 teaspoon ground Cumin
1 Bay Leaf
Sea Salt
Olive Oil

Using the flat side of a chefs knife, smash the garlic cloves, then sprinkle lightly with salt and allow to rest for five minutes.
Mince rested garlic into a paste and set aside.
Chop bacon, then add to a large sauté pan, (with a cover you’ll use later), over medium heat and fry until crisp lardons are formed, about 5 minutes.
Transfer bacon from pan to paper towels, leaving bacon fat in the pan.
Add two tablespoons of olive oil to bacon fat, bringing heat back up to medium.
Add 3/4 cup of the onion, pepper, and garlic to hot oil,and fat and sauté until the onion is translucent, about 3-5 minutes.
Add dry rice, bay leaf, cumin, oregano, stir all to incorporate.
Taste and add salt and pepper as desired.
Add Beans and their liquid, and the vinegar, then stir to incorporate.
Cover and reduce heat to low.
Simmer for 30 to 40 minutes, checking and stirring at around the 20 minute mark. Add a bit more water if things look too dry.

Homemade Moros y Cristianos

Serve piping hot, garnished with remaining onion and the cilantro, with fresh, warm tortillas.

Makin’ Bacon


Love bacon? Love good bacon? Seen the prices lately? Us too! That little revelation led us to home made, courtesy of Michael Ruhlman.

I started our odyssey with a search for pork belly locally, which wasn’t as easy to find as I thought it’d be. Eventually, we found roughly 15 pound packs at Cash and Carry for $3.15 a pound. We took that home, divided it into 2 1/2 pound batches, and went to town.

 photo IMG_0931.jpg

Our first batch was made straight from Ruhlman’s recipe. It turned out great, but it wasn’t exactly what I want in my perfect bacon. Having no doubt that experimentation is almost always a good thing, we analyzed the results and decided that Ruhlman’s would be, for us, perfect lunch and dinner bacon, but not breakfast. We found Michael’s recipe a touch salty, even when we’d carefully weighed the pork belly and salt; further, we felt that while the bay leaf, nutmeg, garlic and thyme in that recipe added glorious floral notes perfect for lardons, and stellar for carbonara, it was a bit much for our breakfast palate, so we set out to build our perfect breakfast bacon.

While one needs to stick pretty closely to the 1.5:1 salt to curing salt ratio for proper bacon, you have relative freedom with the other ingredients, so we revamped with our chosen notes, less salt, more sugar, Grains of Paradise for that unique pepper note we love, brown mustard seed for the tang, and a little smoke.

The results were spot on, and we’re happy campers!

2.5 pounds Pork Belly
1/4 Cup Dark Brown Sugar or real Maple Syrup
1 Ounces Flaked Salt
1.5 teaspoons Pink Curing Salt, (Sodium Nitrite)
2 Tablespoons Grains of Paradise, coarsely ground
2 teaspoons Brown Mustard seed, coarsely
1 teaspoon Smoke Powder

Mix all dry rub ingredients except the smoke powder together in a bowl.

 photo IMG_0930.jpg

Set your belly on a baking dish or sheet tray.

Rub the cure onto and well into all surfaces of the belly. Take your time and work it right in there evenly and completely.

 photo IMG_0932.jpg

Place your belly into 1 a gallon Ziplock bag, press the excess air out, and set it in the back of your fridge for 3 days.

 photo IMG_0938.jpg

On day 4, pull out your belly and rub everything back into the flesh again. Set ‘er back into the fridge for another 3 days.

And on the 7th day, there be bacon…

Pull your belly outta the bag, rinse your sink well and then stick the belly under nice, cold running water and rinse all the cure off, giving it a good rub as you do.

 photo IMG_0939.jpg

Preheat oven to 200 F.

Pat your belly dry with paper towels and set into a glass baking dish or a sheet pan.

Rub the smoke powder evenly and thoroughly into your belly.

 photo IMG_0940.jpg

Roast for 90 minutes, or until your internal temp reaches 150 F.

Remove from oven, allow to cool, and then repackage in a ziplock in the fridge. It’ll last as long as store bought, or maybe a bit less, since it has less bullshit stuff in it; anyway, I’d bet that after you try it, lasting long won’t be an issue…

 photo IMG_0944-1.jpg

 photo image.jpg

You can freeze bacon, but not for more than about a month. If you do freeze it, you’ll want all the air you can out of the bag so, again, vacuum sealing is best.

You can also sub Honey or Agave Nectar for the sugar and get some pretty nice flavor variations. Our family also likes peppered bacon, and for that we’ll layer on a bit of olive oil and ground, black pepper for the roast.

Big thanks to Michael Ruhlman for a wonderful charcuterie book, and for encouraging experimentation. Now it’s your turn, and make sure you try his recipe, because it rocks and it just might be your all-around fave!

Enjoy!

 photo image-1.jpg

It’s Fall – Time for Roasted Tomato Sauce.


It’s Fall, which means that here, anyway, the tomatoes rule the garden when many other crops have moved on. If you plant any reasonable amount of them, you run into ‘what to do’ quite quickly – It’s absolutely not OK to let them rot, of course – preservation is a must, but so is fresh use – When you can go outside and hand pick your tomatoes for any meal, its a thing to be cherished, far as I’m concerned.

Virginia Sweets on the vine, ready for dinner prep

Then you’re into a decision – whether to make something that uses fresh or cooked, but hey – Why not do both? there’s arguably no finer use of fresh from the garden tomatoes than great sauce for pasta and a nice, crisp salad on the side.

There’s a big camp behind the championing of canned tomatoes for sauces, and I get that – There are plenty of times when that’s what I’ll go for too – But not when a fresh alternative is right out the door. Besides, whether it’s a San Marzano, or any other designer breed, a canned tomato is still a canned tomato. It’s processed, and you simply must cook with them, if for no other reason than to disperse the taste of can. Frankly, I don’t care how good the original fruit was – It’s been living in a can, OK? All that aside, the canned camp will further exclaim that most tomatoes we can afford in the store suck for taste, and they would not be wrong – Excluding farmers markets and CSAs, and damn near anything you grow in your own garden, of course.

Finally, Canites claim their stuff has it all over fresh for juice, something you certainly desire in a good sauce. Depending on what you grow, it can take quite a lot of tomatoes to reach the equivalent of a couple of cans – Be that as it may, it’s my experience, and that of most gardeners I know, that home grown crop volumes are not a problem. Frankly, if you use more fresh tomatoes than you would canned in order to achieve a commensurate volume of sauce, one could logically argue that you’ll produce a richer, more complex product, (and the fresh pectin makes for nice thickening, too). Finally, roasting fresh tomatoes will produce all the lovely juice you could possibly want, and deepens the flavor profile as well – That’s game over, far as I’m concerned.

30 minutes at 400° F yields perfect roasted tomatoes

This year, we grew Mighty Matos, grafted plants that produce astounding yields and quality. Ours come from Log House Plants out of Cottage Grove, Oregon. If your local nursery doesn’t carry Mighty Matos, bug them until they do – The yield, quality, disease resistance, and heartiness of these plants is truly stunning. One of their varieties is the Virginia Sweet, a large, fluted, truly lovely little beast. What initially starts out as pale green ripens through orange to orange-red monsters of a pound or more – They’re an heirloom, beefsteak variety with a rich, tangy-sweet flavor that shines in sauces, salsa, and anything else you can think of. I highly recommend you try them next year.

Really, with ingredients this fresh, the trick is to go minimalist, and not add or do too much to what nature has already perfected. The recipe below makes plenty for 4 to 6 folks, or avanzi per due, (leftovers for two, I think…) A classic soffritto provides all the backbone you’ll need. You can scale this up or back quiet easily, too.

Fresh Tomato Pasta Sauce

12 – 16 fresh Tomatoes (pick enough to fill a baking sheet, and you’re good to go)

(Optional) 1 Pound fresh ground Pork

1/2 Cup Onion

1/2 Cup Carrot

1/2 Cup Celery

4-6 cloves fresh Garlic

1/4 Cup Extra Virgin Olive Oil

1/4 Cup hearty Red Wine

4-6 leaves fresh Basil

1 sprig fresh Parsley, (or 1 Tablespoon dry)

Shake or two of ground Chile

Salt and fresh ground Pepper to taste.

Dice onion, carrot, and celery, smash and mince garlic.

Roll and chiffonade basil leaves, mince the parsley.

Preheat oven to 400° F and set a rack in the middle position.

Cut all of your tomatoes in half, (if you like some fresh in your sauce, leave two or three out and just dice them)

Lightly oil a rimmed baking sheet, and add tomatoes, cut sides down. Season lightly with salt and pepper, and drizzle with a little more olive oil.

Roast for 30 minutes, then remove from oven and allow to cool enough to handle.

Measure and assemble remaining ingredients, then set your mise en place beside your stove for easy access.

When you cook, get your mise en place right, every time

In a stew pot, Dutch oven, or big, heavy skillet over medium heat, add the pork if you’re using that. Sauté until evenly browned, then transfer the meat to a large bowl, leaving the juices and fat in the cooking vessel.

Fresh ground pork isn’t absolutely necessary, but...
Fresh ground pork isn’t absolutely necessary, but…

Add the remaining olive oil to the pan and allow to heat through. 

Add carrots and sauté for a couple of minutes. Add onion and continue cooking for 2-3 minutes more, then add celery and sauté for a couple minutes longer. Add the garlic and parsley and sauté for another minute, until the raw garlic smell dissipates. Season lightly with salt and pepper.

Classic soffritto gives your sauce proper backbone

Let the pan heat for a minute, then add the red wine, and scrape all the naughty bits loose from the bottom of the pan. Allow the raw alcohol smell to dissipate before proceeding.

Add one cup of water and allow to heat through.

Add the tomatoes by hand, removing the skins as you go – They’ll be super soft and easy to squish right into the pot – stir to incorporate.

get your hands in there and squish those roasted ‘matoes!

Add the pork and stir to incorporate. Taste sauce and adjust seasoning as needed.

Allow the sauce to heat to simmering, then turn heat down to low. Continue a slow simmer for an hour or so, stirring occasionally. The sauce will be thin at first, but will thicken nicely as it simmers – Stop cooking when you’re sauce is a bit thinner than you like it, remove from heat, add the basil, stir to incorporate.

Simmer gently until you arrive at your desired thickness

If the sauce thickens or reduces too much for your liking, add enough water to get things where you like it.

Taste and adjust seasoning if needed prior to serving.

From garden to table in under 3 hours

The sauce will last for  a few days, refrigerated in an airtight, non reactive container, but I’ll bet it won’t last that long.

A Couple of Rancho Gordo Tweaked Recipes


I wrote about RG beans not long ago, and frankly, they’re still on my mind, as is their stunningly good Pineapple Vinegar. That combo had me digging through old favorite summer recipes and tweaking them for these newfound delights. So here, for your reading and eating pleasure, are a revamped teriyaki marinade, and an incredible three bean salad. Enjoy!

Summer is grilling season, and it wouldn’t be right without teriyaki in the mix. That pineapple vinegar inspired me to alter my go to marinade thusly.

Rancho Gordo Pineapple Vinegar powered teriyaki marinade

RG Pineapple Vinegar Teriyaki Marinade

1/2 Cup Chicken Stock, (Veggie stock or water are both fine too)

1/4 Cup Tamari

1/4 Cup Pineapple Vinegar

2 Tablespoons Agave Nectar

2 Tablespoons Rock Sugar (Dark Brown Sugar is fine too)

1 Tablespoon Toasted Sesame Oil

1 Tablespoon Arrowroot

2 Cloves fresh Garlic

1” fresh Ginger Root

Trim, peel, and mince garlic and ginger.

In a sauce pan over medium heat, combine tamari, vinegar, agave, sugar, sesame oil, garlic, and ginger.

Whisk to incorporate – When sauce begins to scale, reduce heat to low.

Combine arrowroot and stock, which to incorporate thoroughly.

Add stock mixture to sauce and whisk thoroughly. Allow sauce to heat through, whisking steadily, until it reaches the thickness you like, about 2-4 minutes.

Remove sauce from heat and transfer to a non-reactive bowl, allow to cool to room temperature before use – You can set up an ice bath in a second bowl to hasten that process if it’s hot where you are, like it was today where we is…

marinated skewers, full of summer goodness!

Separate some to use as a dipping sauce if desired.

That same stuff, along with dang near any or all RG beans, inspired this twist on Three Bean Salad.

Classic Three Bean Salad

Three bean salad is a delight in the dog days of summer – Cool, tangy, and hearty to boot. While I truly love the traditional base of pinto, wax, and green beans, you can and should do whatever mix you like – This is the perfect time of year to play with whatever is fresh at hand. The beauty of that freedom is that the dish really does change in very fundamental ways when you vary the bean trio, even with the same dressing. What I show below is my personal fave, but there too, you can and should go with what you’ve got fresh in the garden whenever possible. The mainstays to me are the rhythm section of that dressing – Rancho Gordo’s incredible Pineapple Vinegar, and fresh avocado oil – It creates a beautiful base to go just about anywhere from – I just got this stuff, and am absolutely enamored with it, so I re-did my go recipe, (which used live cider vinegar), to reflect same.

Bean salad should have whatever you love in it, period.

Speaking of Rancho Gordo, it’s there that a raft of stunningly delicious bean options await – Their heirloom stuff is so good, you can easily hop down the rabbit hole trying out different combinations. Their garbanzos, limas, and yellow woman beans make an incredible trio, with a delightful depth and breadth of flavors and textures, and again – That’s just one of many, many options. The quality of these beans is so far above anything else, you truly must try them.

Yet another combo...
Yet another combo…

Three bean salad definitely likes a little time for things to marry, so it’s a great dish to make ahead. And of course, if you have other veggies you love, that are ready to rock, add those too – You sure don’t need my permission!

Urban’s Go To Three Bean Salad

1 Cup Rancho Gordo Rio Zape Beans

1 Cup Fresh Green Beans

1 Cup Fresh Wax Beans

1 Cup Sweet Onion

1 stalk fresh Celery, with leaves

Sea Salt and fresh ground Grains of Paradise, to taste

For the Dressing

1/2 Cup Avocado Oil

1/3 Cup Pineapple Vinegar

2 Tablespoons fresh Shallot, minced

1-2 cloves fresh Garlic, minced

2 Tablespoons Agave Nectar

1 teaspoon fresh Thyme

1 teaspoon fresh Dill

1/4 teaspoon Chile flake

Rio Zape Beans should be cooked to al dente.

Blanch green and wax beans in boiling water until al dente, about 2-3 minutes – Have a bowl of ice water ready beside the stove, and plunge the beans into that as soon as they’re right.

Rinse and stem onion and celery, and then medium chop, (chiffonade celery leaf).

Rinse, stem and mince garlic, thyme, and dill.

In a large, non-reactive bowl, combine all beans, onion, and celery. Season with a three finger pinch of sea salt and a half dozen twists of grains of paradise – Gently toss to thoroughly incorporate.

In a second non-reactive bowl, combine all dressing ingredients and whisk to incorporate thoroughly.

Allow dressing to marry for 15 minutes, then dress salad with a steady drizzle – You may or may not want to use all of it, so stop when you’re happy with the ratio.

Allow salad to marinate, chilled, for at least 2 hours prior to serving.

Will do fine refrigerated for a couple days, if it lasts that long…

Real Deal Carnitas


So, I got this message from old friend and alert blog follower, Nancy ‘Nurk’ Swenson, about real deal Carnitas.

I’m looking for a recipe for pork carnitas. I made it about 3 years ago, but can’t find the recipe again. It started with melting lard, adding great spices (lots of orangey/yellowy ones, cumin etc). Then when it cooled enough to handle, you rubbed the pork roast/shoulder/piece of meat with the lard goo and double wrapped it in tin foil. It stayed overnight in the fridge. Then into a low oven in a dutch oven for like 8 hours. When you took it out there was a bunch of juice. You removed the tin foil, shredded the meat and over a 1/2 hour of occasional stirring, the juices sucked back into the meat. Lastly you threw it under the broiler to crisp up the edges. It was wonderful. Do you know this recipe or have a great one? We are having 10 people over for dinner and I want to make this again. Thanks. Love to you and Monica.

Well, first and foremost, love back to you and Steve! Naturally, I assumed that I sure do have a carnitas recipe onboard, and then I looked and… yeah, no. Hard to believe, but true, so it’s very much time to rectify that omission. So, Nurk? I got this, Pal.

Carnitas de Urban
Carnitas de Urban

First off, a bit of clarification – the literal translation of Carnitas is ‘little meats.’ This slice of heaven hails from the State of Michoacán, which lies due west of Mexico City, on the pacific side. A lot of folks seem to believe that carnitas are a specific vehicle, like a taco, burrito, tostada, etc – and that just ain’t the case – It’s the meat, the filling, the heart and soul of any and all such accoutrements. The typical cuts used to make carnitas are not unexpected – Here in El Norte, you’ll want a Boston Butt or similar heavily marbled shoulder cut, (and bone in, whenever you can get that). Mexican butchers call this cut the Espaldilla, and down there, it’s also used for stew meat and for making chorizo.

What you do with that cut to make carnitas is essentially confit – cooking pork in fat until the meat is meltingly tender and juicy. Confit is alive and well all around the world, especially since ‘experts’ stoped castigating animal fats for so many human ills. Confit began as a preservation method, sealing meat away from air and bacteria in a thick layer of fat. French versions are far and away the most widely known these days. There, the meat is salted, seasoned, and dried, then cooked low and slow to perfection. A second salting is followed by very careful removal of all meat remnants and juices from the fat, which is then poured back over the meat. Confit done this way will stay good for months, as it was intended to do – Tiding a family over from slaughter to the next.

What’s been lost over time is that fundamental use of confit for preserving food, rather than just flavoring it, along with the subtle depth and breadth of flavor that long, slow process of preparation, cooking, and preservation imparts, and that’s kind of too bad, frankly.

In Mexico, many cooks prepare carnitas by adding a shit ton of lard to a heavy, copper pan. When the lard is melted, the pork is immersed therein, along with seasoning – Usually some variation of chiles, garlic, and cumin. The meat is cooked low and slow until it’s fall apart tender, then the heat is turned up until the pork starts to crisp – At this juncture, it’ll shred easily, and can then be loaded into whatever – tacos, burritos, tortas, and what have you. Now that said, some folks sear the pork on high heat first, then do the low and slow, so really, there’s poetic license all over this dish. For my mind, searing or crisping can always be done right before service, and leaving that out leads to less loss of fat, more flavor, and a juicier, moister finished product – More on this below.

This kind of thing is wholly in keeping with our tradition of cooking something big at the beginning of the week. That makes for easy, fast meals in the ensuing days, as well as the opportunity to portion and freeze stuff for later inspiration. As such, when approaching carnitas, we’ll go for a truly big chunk of bone in, Boston Butt roast with lost of marbling.

Secondly, while I love fat, I really and truly don’t think it’s necessary to either get the cooking job done, or to impart adequate flavor when it comes down to it. The one we’re going to do up today is five and a half pounds, and as you can see, plenty fatty without being ridiculous. Believe me when I tell you, if you do a roast like this up low and slow, you’ll have all the fat you could possibly want or need, and then some – No additional lard needed, and you will get to use that in the end run. I’ll show you a brilliant cheat with this recipe that will recreate that elusive cooked in fat carnita taste, too.

Bone in Boston Butt pork roast

And so on to cooking method. You don’t need a big, heavy copper pan, (although if you’ve got one, go wild). For stuff this big, we’ve got several options, depending on how you want to do it, so method goes before vessel. My preference is stand alone slow cooker, but you can certainly do this in your oven with a dutch oven or a braiser – Something with a nice, thick, heavy bottom that will store and slowly release heat over time. Whatever vessel you choose, you want your pork and aromatics to pretty much fill the thing up, with a few inches of head space to spare. That will assure that the melting fat from the pork surrounds the meat, and does its thing during the cooking process.

A lovely Boston Butt, ready for cooking

Now, an aside in honor of my Friend, Gloria Goodwin Raheja, who guest cheffed here the other week. Her enthusiasm for the instant pot, (along with that of damn near everybody on the Vietnamese cooking group I’m a member of), lead me to buy one for my birthday. They are pretty dang amazing, and as a Gloria noted, meats done in this manner come out divinely, so there ya go – No, it’s not low and slow, but if you’ve got an hour and a half to work with rather than six to eight, there’s nothing wrong with doing up your carnitas in one.

Now, on to seasoning. The dominant veggie notes here need to be chiles, peppers, tomato, and garlic. Whether you use a slow cooker or the oven, this is going to be the bed you cook your carnitas on. What we’re doing is more of a sofrito than anything, (more or less the Spanish base mix, as opposed to the Italian soffritto – See our bit on aromatic bases here, if you’ve not already.) For my mind, additional seasoning should be pretty minimal. What I use is our signature seasoning salt, a notably smoky blend with major chile, paprika, garlic and onion notes, and a hint of sage. To me, it’s perfect for stuff like this – You can find that recipe right here, but I’ll list an alternative for the recipe as well.

mis en place for carnitas

Notes:
1. Again, if you do a large roast as we suggest, you’re going to have a lot more than one night’s meal – That’s the whole idea, really. You want to do the cooking in one day, cool and then refrigerate your roast overnight, then do your first meal the next day. Plan ahead for portioning and freezing the meat.
2. Remember that a recipe is a guideline, not gospel – Do what you like in terms of heat level, etc. just don’t go too wild first time out if you’re not quite sure of what a given ratio will do to the whole – The big picture idea of carnitas is a delicate balance.

Carnitas de Urban

4-6 Pound Bone In, Boston Butt Pork Roast
3-6 Chiles, (whatever you like – Our go to are Jalapeño or Serrano)
6-8 small Sweet Peppers
1/2 medium sweet Onion
8-10 whole cloves Garlic
1 15 ounce can diced Tomatoes
6-8 sprigs fresh Cilantro
Urban Seasoning Salt, or
1 teaspoon Sea Salt
1 teaspoon alderwood smoked Salt
1 teaspoon fresh ground Pepper
1 teaspoon smoked Paprika
1/2 teaspoon ground red Chile
1/2 teaspoon crushed Sage

Fresh corn or flour Street Taco Tortillas

For Garnish –
Lime wedges
Salsa or Pico de Gallo
Sour Cream
Avocado wedges
Shredded Lettuce and Cabbage
Pickled Onions or Radishes
Tomatoes
Sweet Peppers
More Chiles

Prepare a slow cooker, Dutch oven, etc for use. If you’re using the oven, set a rack in a middle slot and preheat to 250° F.

Rinse and trim chiles, peppers, and onion. Trim and peel garlic cloves.

Rough chop chiles, peppers, and onion, leave garlic cloves whole.

Arrange veggies evenly around the base of the cooking vessel.

Rinse and pat roast dry.

Combine seasonings in a small mixing bowl.

Rub roast lightly with vegetable oil and cover every surface evenly with the seasoning blend.

Place roast in cooker, add tomatoes evenly over the top, then sprigs of cilantro.

Cook low and slow for 6-8 hours until the roast is fork tender and reads an internal temperature of 145 – 150° F.

Real deal carnitas, cooked low and slow

Remove roast from cooker or oven and allow to cool in the cooking vessel, (You should plan for several hours of cooling – Never put hot food in the fridge or freezer.)

Once the pork has cooled, refrigerate it overnight, (or, if it’s done in the cold season and conditions allow, put it out on your porch overnight.)

Next day, skim the fat from the top of the cooking vessel and reserve – This is gold, don’t waste it.

Remove the pork and set that on a cutting board.

Pour off the cooking liquid through a colander or strainer – transfer to a clean mason jar and freeze for future soup or stew making. Discard the cooking veggies – They’re done like dinner after that long slow cook.

Portion the pork into meal sized chunks. Vacuum sealing is best, but if you don’t have one, you can place portions in an airtight container or jar and freeze, or wrap them tightly in a layer or two of metal foil. Make sure you mark what it is and when it hit the freezer, for future reference.

For dinner one, wrap however many tortillas you need in metal foil and set into a 150° F oven, on a middle rack.

Place a heavy, cast iron skillet on a burner over low heat, and add a tablespoon of the reserved pork fat.

Shred the pork, either by hand, or with two forks.

Prepare all your fixin’s as you see fit.

Carnitas, ready to load

Increase the heat under the skillet to high, until the fat is sizzling.

Sear shredded carnitas in hot fat

Add the shredded pork to the hot pan and sear it, turning steadily with two forks, until it’s evenly and lightly browned.

Seared carnitas, good as it gets

Transfer to a serving bowl, and go wild – There won’t be any leftovers, guaranteed.