Chimichurri 


On any given day when we’re preparing something in the kitchen, anything really, that little light bulb blinks on and we think, ‘This would be so much better with a sauce or marinade, or both.’ 99% of the time, we’re right, but what to make? When you’ve nothing definite in mind, and maybe even not 100% sure what you’ve got in fridge and pantry, the correct answer is Chimichurri, (or chimmichurri, if you really like Ms). 
Chimichurri is a green sauce designed ostensibly for grilled meats, but that’s frankly selling it short. It’s fabulous on pasta, goes great with fish, makes a great seasoning for soups and stews, and shines on roasted or steamed veggies as well – It’s even great on eggs. The popular claim is that this legendary creation hails from Argentina, the Holy Land of grilled meats, but its roots go deeper yet. Given the classical Spanish pronunciation of the word, with the initial ch spoken almost as a tz, and the double rr well rolled on the tongue, it’s a good bet that the origin of chimichurri lies with the Basque settlers who arrived in Argentina back in the 1800s. The Basque have a word designed specifically for the kind of spur-of-the-moment sauce we’re discussing here – Tximitxurri, which more or less means, ‘a mixture of several things in no particular order’. Perfect, right?

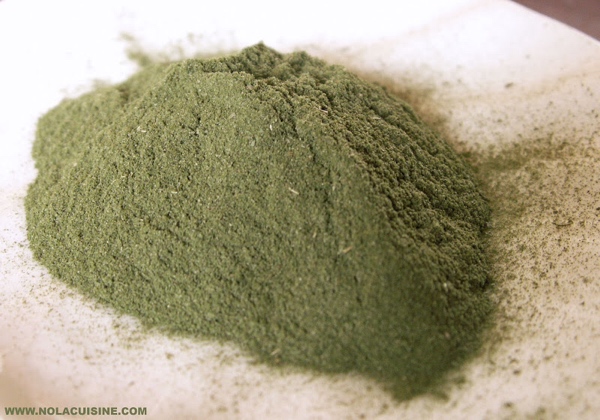
That’s exactly what chimichurri is. The classic version consists of flat leaf parsley, garlic, olive oil, red wine vinegar, and red pepper flake, but variants on this are not only OK, they’re expected. It’s very much like spaghetti sauce – Sure there’s a ‘classic’ version, but everybody makes theirs different, and all those variants are equally as valid. Chimichurri was designed to take advantage of what you’ve got on hand, and the beauty lies in the options. Other parsley variants, cilantro, culantro, kale, celery leaves, or arugula can replace the flat leaf. Onion or shallot can augment the garlic. Any one of a number of herbs can be added – smoked or sweet paprika, cumin seed, lemon thyme, or any variant of basil come readily to mind. Sweet pepper, chiles, tomato, tomatillo, citrus, all go great as well. The only limits are your imagination and what’s on hand.

Marinate meat or veggies in chimichurri for at least two hours and up to overnight, refrigerated and covered. Fish should go no longer than an hour or so, so as not to overpower it. Freezing chimichurri works great; it’s a perfect sauce to do the ice cube tray trick with; you can snap out a cube or more whenever you feel the need. While store bought is available, that’s just an absolute no no; making chimichurri is so quick and simple, there’s no reason not to make a fresh batch; you’ll save yourself from preservatives and stabilizers., too.

Here’re a few versions to get you started. Bunches of parsley, cilantro, etc, all pretty uniform these days: If I had to hazard a guess at the volume of 1/2 Bunch, I’d call it 2 Cups loosely packed.  

 
Classic Chimichurri

1/2 Bunch Flat Leaf (Italian) Parsley

8 cloves Garlic

3⁄4 Cup Extra Virgin Olive Oil

1⁄4 Cup Red Wine Vinegar

1 teaspoon Red Chile Flake

Pinch Sea Salt

Few twists fresh ground Pepper

Combine all ingredients in a blender or food processor and pulse until you have a smooth sauce.

Placed in an airtight, non-reactive container and refrigerated, it’ll last a week; frozen, it’s good for 90 days, easy.


Urban’s Chimichurri

1/2 Bunch Flat Leaf (Italian) Parsley

1/4 Bunch Cilantro

6 cloves Garlic

1 Hatch Chile, (Anaheim Pepper will work too)

3⁄4 Cup Extra Virgin Olive Oil

1⁄4 Cup Champagne Vinegar

2 Tablespoons Sweet Onion

1 Tablespoon fresh Lemon Juice

1 teaspoon Smoked Paprika

1 teaspoon Lemon Thyme

1 teaspoon Turkish Oregano

1/2 teaspoon fresh ground Pepper

Pinch Sea Salt

Combine all ingredients in a blender or food processor and pulse until you have a smooth sauce.

Placed in an airtight, non-reactive container and refrigerated, it’ll last a week; frozen, it’s good for 90 days, easy.


Red Chimichurri

1/2 Bunch Flat Leaf (Italian) Parsley

2 small ripe Tomatoes

6 cloves Garlic

1 sweet red Pepper

3⁄4 Cup Extra Virgin Olive Oil

1⁄4 Cup Red Wine Vinegar

2 Tablespoons Sweet Onion

1 Tablespoon fresh Lemon Juice

1 teaspoon Turkish Oregano

1/2 teaspoon fresh ground Pepper

Pinch Sea Salt

Combine all ingredients in a blender or food processor and pulse until you have a smooth sauce.

Placed in an airtight, non-reactive container and refrigerated, it’ll last a week; frozen, it’s good for 90 days, easy.


Tomatillo Chimichurri

1/2 Bunch Flat Leaf (Italian) Parsley

4 ripe Tomatillos

1 small ripe Tomato

6 cloves Garlic

1-2 Jalapeño Chiles

3⁄4 Cup Avocado Oil

1⁄4 Cup Cider Vinegar

2 Tablespoons Sweet Onion

1 Tablespoon fresh Lemon Juice

1 teaspoon Mexican Oregano

1/2 teaspoon fresh ground Pepper

Pinch Sea Salt

Roast tomatillos, tomatoes, and chiles under a broiler until skins are blistered.

Remove from heat and cool until they’re workable.

Remove skins, stems and seeds

Combine all ingredients in a blender or food processor and pulse until you have a smooth sauce.

Placed in an airtight, non-reactive container and refrigerated, it’ll last a week; frozen, it’s good for 90 days, easy.

Tacos Birria


Birria, real birria, is a sublime beauty. Like so many fantastic regional Mexican sauces, there is a perceived, daunting complexity to the making, but birria is far easier than it looks or tastes, and it rewards with stunning depth and complexity. If you’ve ever enjoyed a really good red or black molé, the effect is similar. Birria hails from the state of Jalisco, which is more or less in the middle of the country on the Pacific side; it runs inland for nearly half the country’s width, some 30,000 square miles of beach, mountain, forest and plain, with altitudes from sea level to over 14,000 feet. Many things considered ‘Mexican’ by us gringos come from here, from mariachi and ranchero music to birria and tequila.

The popular nickname for people from Jalisco is Tapatio, a name hot sauce fans everywhere will instantly recognize. That, the competing hot sauce Cholula, and la Rojeña distillery, home of Jose Cuervo, are easily the most widely known constituents of Jalsciense food and drink, but there’s much more. Fish from ocean and lake, wild game birds, corn, beans, and a dizzying array of chiles are just the start. The Spanish introduced stock animals, dairy, and additional fruit and vegetables. All that bounty has lead to a rich and varied cuisine that blends the old and new in an ever-evolving melange. For classics, posole, menudo, and guacamole all have their roots here, as does birria.

Birria is arguably the state dish, served for special occasions and holidays. It, like posole and menudo, are also celebrated as hangover cures, (and you could do far worse for a morning after repast). Basically a stew, birria is most often found served in tacos, with pickled onions and lime from street carts, birrierias, throughout Mexico. Like any other long standing, legendary dish, the ‘correct’ preparation of birria varies widely. Traditionally, the meat is goat or mutton, marinaded in adobo spices, then married with chiles, tomatoes, onion, and spices. Here in the states, neither of those proteins is widely available, so the dish is made with beef or pork ribs, or even chicken.

Below you’ll find our take on birria; it’s pretty true to the original. If you go with beef ribs as we did, find a big package of the rough looking, inexpensive stuff – The long, slow boil will tenderize any cut, so don’t spend big bucks on short ribs, which are popular these days, and as such, stupid expensive.

I offer preparations for both homemade adobo and achiote paste as well. My understanding is that the latter is actually a Yucateco specialty, (From the Yucatan Penninsula), but it would not be much of a stretch for there to have been a cross-country trade in such things. Both of these are amazing when homemade – night and day from anything store bought.

When you’re ready to shop, locate a Mexican grocery or carniceria near you and make a visit. You will likely find all the spices and chiles you need there, (most of which are really inexpensive and already ground), and bitter orange juice, too. A carniceria will likely have great ribs as well. Don’t forget fresh tortillas either – 4″ or 5″ corn are best.

Again, this may look daunting, but I assure you it’s not. Assemble all the pieces on your kitchen table, stage ingredients, and enjoy the journey – It will be absolutely worth the effort. Make the adobo, achiote, and pickled onions ahead of the birria, so you’ll have plenty of time to build that at a leisurely pace. Several of the prep steps can be done the night before as well, so break things up if it seems like it’s too much in one swell foop. I strongly suggest you print this whole thing out and read it through it a time or two before you cut loose; it’s not hard, but there are quite a few moving parts…
Classic Adobo:

1/4 cup sweet paprika.

3 tablespoons ground black pepper.

2 tablespoons onion powder.

2 tablespoons dried oregano (preferably Mexican)

2 tablespoons ground cumin.

1 tablespoon chipotle chile powder.

1 tablespoon garlic powder.

Blend all ingredients throughly and place in an airtight spice jar. Adobo can be used as a dry rub, or moistened to a paste with bitter orange or grapefruit juices; each of the wet variants brings a whole new angle to the marinade. Apply to your chosen protein and allow to rest, refrigerated and uncovered, for at least 2 hours and up to overnight.


Achiote Paste
2 tablespoons annatto seeds

1 teaspoon cumin seeds or 1 teaspoon cumin powder

1 teaspoon black pepper or 1 teaspoon chipotle pepper

5 allspice berries

1 teaspoon salt

1 pinch nutmeg
NOTE: Annato is a colorant used to make cheese yellow, among other things; it will stain anything and everything porous it touches, (including your hands), so handle with care.

Put all ingredients into a spice grinder, and pulse until you’ve achieved a uniform, fine powder.

Transfer to a small mixing bowl, and add a tablespoon of cold water; mix into a thick paste that holds together well – For this recipe, 1 to 2 tablespoons of water is plenty.

You can place the paste into an ice cube tray, cover, and freeze it, and it’ll last a good 6 months; just pop out a cube when you need some. Refrigerating in an airtight container will last a good 90 days.

To use the paste as a marinade, blend a tablespoon of paste with 6 to 8 cloves of roasted garlic and 1/2 Cup of bitter orange juice, (also called Seville orange juice by some purveyors), or grapefruit juice.

Smear onto chicken or pork and allow to marinate for at least 2 hours and up to overnight.

Tacos Birria

3 Pounds Beef Ribs

5 mild Hatch or Anaheim Chiles

2 dried Pasilla Chiles

2 dried Ancho Chiles

1 12 oz. can Tomatoes

1 small Sweet Onion

4 cloves Garlic

12 black Peppercorns

1 tablespoon Achiote Paste

1/2 teaspoon Cumin Seed

Sea Salt

Freshly ground pepper
12 to 16 small corn tortillas.

Pickled sweet onions

Fresh Lime wedges


Pickled Onions

1 small sweet Onion (Red or yellows are fine if you prefer more bite)

3/4 Cup White Vinegar

2 Tablespoons Bakers Sugar

1/2 teaspoon Mexican Oregano

1/2 teaspoon Sea Salt
Refried Black Beans

1 12 ounce can Black Beans

1 Cup Chicken Stock

1-2 cloves Garlic

2 Tablespoons Butter

1/4 Cup Cream

Sea Salt and freshly ground Black Pepper to taste

Combine beans, stock, and smashed or pressed garlic in a pan over medium heat and bring to a boil. Reduce heat and allow to simmer while building the birria.

Drain beans and transfer to a skillet over medium heat. Smash beans with a fork or potato masher to a nice, rough consistency.

Add butter and whisk with a fork to incorporate.

Add cream and whisk to incorporate.

Season to taste with salt and pepper, reduce heat to low.
M’s Mexi Rice

1 Cup long grain white Rice

1 1/2 Cups Chicken Stock

1 Tablespoon Butter

1/2 teaspoon Chipotle powder

1/2 teaspoon Mexican Oregano

1/2 teaspoon Salt

1/2 teaspoon ground pepper

Combine rice, butter, and seasonings in a pot over medium high heat. Sauté the rice for 2 to 3 minutes.

Add stock bring to a boil.

Cover and reduce heat to low.

Simmer covered for 15 to 20 minutes until liquid is absorbed and rice is fluffy.

Remove from heat, leave covered and set aside until service.
The Birria

At least 4 hours prior to cooking, and up to overnight, prepare a wet adobo rub per instructions above. Evenly coat your meat, and allow to marinate, refrigerated and uncovered.

In a large stock pot over medium heat, add the ribs in tight layers. Season with a tablespoon of sea salt and cover with fresh water until you’ve got a couple inches over the highest ribs.

Bring the pot to a boil, then cover and reduce heat to low.


Skim the fat and foam that comes to the surface.

Boil ribs for 2 1/2 to 3 hours, skimming as needed; if the water gets down to rib level, add a bit more to keep them covered.

Rinse, peal, and thinly slice one of the sweet onions. In a mixing bowl, combine vinegar, sugar, salt and oregano, whisk to incorporate. Toss onions into the bowl and make sure they’re fully covered by the brine. Refrigerate for at least 2 hours and up to overnight.

If using whole dried chiles, put them in a small bowl and cover completely with water. Allow to soak for 30 to 60 minutes, until the chiles are soft and pliable.


Rinse, stem and seed Hatch or Anaheim chiles. Rinse, peel and quarter the remaining onion. Peel the garlic cloves and leave whole. Roast all those ingredients on a baking sheet under a broiler, turning once or twice, until chile skins are blistered. Remove from oven and hot baking sheet, and set aside to cool.

Prep Adobo and Achiote paste, per above.

When rib meat is tender and starting to separate from the bones, use tongs and transfer ribs to a colander for a 15 minute rest.

Reserve 1 1/2 cups of the rib broth, pour the rest off and return the pot to the stove, with the burner off.

Add peppercorns and cumin seed to a spice grinder and pulse to a smooth powder.

Remove reconstituted chiles from soaking water, then stem and seed them.

In a blender or food processor, combine all chiles, the roasted onion and garlic, tomatoes, pepper and cumin, and achiote paste. Pulse to a smooth consistency. Add a cup of the reserved broth and pulse to incorporate; you can add more broth if you prefer the sauce a bit thinner.


Place a single mesh strainer over the stock pot and run the sauce through, gently pressing by hand. Turn heat to medium. When the sauce starts to bubble, reduce heat to medium low and cook for 20 minutes, until the sauce thickens slightly.

Heat tortillas, wrapped in foil, in a warm oven.

Separate the rib meat from bones and fat, and hand shred.

Add the meat to the sauce, reduce heat to low, and cook for 15 minutes longer.


Season with sea salt and freshly ground black pepper to taste.


Serve three or four tacos, garnished with pickled onions and a couple lime wedges, refrieds, and rice.

Salut.

Perfect Popovers


It’s currently 48° F, with the wind south by southwest off the sea, blowing steadily at 20 knots with gusts strong enough to shake the cabin. In other words, it’s a great time for soup or stew. As an accompaniment to that, you’d be hard pressed to beat a nice, hot popover.

There are plausible claims that popovers are a U.S. dish. The oldest recipe reference to popovers I’m aware of is American, within M. N. Henderson’s Practical Cooking, which dates to the Centennial year of 1876.

It’s thought that the popover is naught but younger kin to Yorkshire Pudding, which certainly makes sense. Perhaps it’s good old yankee ingenuity that is evident in their making; much smaller, they don’t require the lengthy beat/chill/beat sequence that a Yorkshire does to rise successfully. They can be enjoyed in less than 45 minutes, as opposed to several hours.

While the batter for popovers is simplicity itself, the successful baking thereof is not. The tricks to great popovers are as follows;

1. Have all ingredients at room temperature before you incorporate them; this allows faster heating, which is critical to a good rise.

2. Scalding the milk; heating the milk helps integrate it with the other batter constituents, and promote a faster rise and lighter final product.

3. Very through blending of the batter; as with a quiche or frittata, well blended ingredients, with a wealth of minute air bubbles worked into the batter, make for a lighter popover. An immersion blender does the best job, especially one that has a beater head.

4. Heat the tin and the fat, (butter); again, having everything as hot as possible when introduced to baking heat allows that energy to be used for generating steam, the engine behind a well-risen popover, rather than it being needed to simply heat the pan and the batter.

5. Don’t open the oven door while they’re cooking, period.

Here’s our go to version. They’ll take you about 10 minutes to make.

1 Cup All Purpose Flour

1 Cup Whole Milk

2 Large Eggs

3 Tablespoons unsalted Butter

1 teaspoon fine Kosher Salt

Have all ingredients at room temperature, (Butter doesn’t matter, since you’ll melt it shortly).

Preheat the oven to 400° F.

Pour milk into a small saucepan over medium heat. Remove the milk when it scalds, (small bubbles formed along the edge of the pan), and set aside to cool.

Melt butter, and lightly brush 6 to 8 cups of a muffin tin with same.

Slide the muffin tin into the hot oven for about 5-7 minutes.

Crack eggs into a large mixing bowl; whisk until well blended, about 1-2 minutes.

Add milk, flour, remaining melted butter, and salt.

With an immersion blender, whisk briskly until the batter is smooth and even, about 2-3 minutes.

Remove tin from oven and fill each roughly half way with batter.

Bake until fully inflated and golden brown, about 30 to 35 minutes.

Serve immediately, piping hot.

Anthony Bourdain hates your garlic press.


In his epic tell all, Kitchen Confidential, my favorite kitchen kermudgeon, Anthony Bourdain, had this to say about garlic.

“Garlic is divine. Few food items can taste so many distinct ways, handled correctly. Misuse of garlic is a crime. Old garlic, burnt garlic, garlic cut too long ago and garlic that has been tragically smashed through one of those abominations, the garlic press, are all disgusting. Please treat your garlic with respect. Sliver it for pasta, like you saw in Goodfellas; don’t burn it. Smash it, with the flat of your knife blade if you like, but don’t put it through a press. I don’t know what that junk is that squeezes out the end of those things, but it ain’t garlic. And try roasting garlic. It gets mellower and sweeter if you roast it whole, still on the clove, to be squeezed out later when it’s soft and brown. Nothing will permeate your food more irrevocably and irreparably than burnt or rancid garlic. Avoid at all costs that vile spew you see rotting in oil in screw-top jars. Too lazy to peel fresh? You don’t deserve to eat garlic.”

Ah Tony Bourdain, never at a loss for words…
Is he over the top?
Absolutely.
Is he correct?
I’d say 90% yes, but let’s just break down his specific contentions to be sure, shall we?

First off, we have the implied divinity of garlic: Is he right?
In a word, yup.


Allium Sativum, of the Family Rosacea, (why it’s sometimes called ‘the stinking rose), is indeed magic, and its broad, utilitarian beauty is admirable. No other veggie has that ethereal combination of bite, heat, and sweet that garlic packs. What the author doesn’t note is that all garlic is not created equal. There are hundreds of cultivated garlic varieties worldwide, which is great if you’re a gardener or know a generous one. If you have a green thumb and your cultivation zone can handle it, by all means grow it. Just Google ‘Heirloom garlic starts’ and you’ll find a veritable cornucopia of options. Otherwise, hit up your local farmers market or CSA and load up when the magic is in season.

Great garlic is usually not available year round to the vast majority of us. As such, some plan for preservation is in order. Drying is your best bet; while there is a certain loss of flavor, it’s a given that great garlic dried will be better than OK garlic fresh, so it’s worth the effort. You should peel the cloves, and at the least, cut ’em in half, though you can chop or mince if you like; process in a dehydrator or warm oven until they’re light and dry to the feel.

Please know that garlic in oil is not a safe methodology; garlic is a low acid food, and you’re begging for botulism here. Making garlic oil in small batches and freezing it is A-OK. Puree your garlic, mix it with good olive oil, strain it through cheese cloth or a fine, double sieve. This is another perfect ice cube tray application – freeze it that way and pop a cube out for use.

You can and should pickle garlic, it’s delightful and has a complexity like no other. Finally, garlic salt or pepper are nice options as well. Kosher or sea salt both work fine, though the uniform grain of kosher probably works best; for garlic pepper, use whole black tellicherry berries. 1/4 cup of garlic for each cup of salt or pepper will do the trick. Preheat your oven to warm, or 180° F, and line a baking sheet with parchment paper. Peel the garlic cloves, then add them straight away with the salt or pepper to a food processor. Process for about 30 seconds, until you’ve got a uniform texture. Spread the results into an even, thin layer on your baking sheet. Bake for about an hour, until the results are crisp and dry. You do not want them to brown, so keep an eye on things. Transfer the salt or pepper back to the processor using the parchment. Pulse a few times to break things up to an even consistency. Stored in airtight glass jars, your housemade lovelies are good to go for 3 or 4 months.

If the grocery is your only option, then what you’re likely to find will break down into three varieties; Softneck, Hardneck, and Elephant. 

Softneck Garlic is the most common variety you’ll find; this is the fat, white head of multiple cloves with several layers of papery, thin skin surrounding that you can score for roughly .50¢ a pop. It’s also the easiest variety to grow in a backyard garden. Softneck garlic has a fairly strong garlic bite and a sweet, pungent odor. Most garlic heads that have been braided together are softneck varieties. Common Softneck varieties include California Early, California Late and Creole.

Hardneck Garlic is a bit less common, but still can be found in grocery stores. Hardneck features lovely shades of purple through brown, with thin skins and larger and fewer cloves than the softneck stuff. These varieties are generally somewhat stronger in flavor and scent than the soft stuff, and they generally don’t store as well, so it’s prudent to use them quickly after you buy. Commonly found Hardneck varieties include German Extra Hearty and Roja.

Elephant Garlic is the third variant you’re likely to find. It features a big ol’ head of very large cloves that can approach shallots in size. Prized for its subtle, mild flavor and scent, elephant garlic is great for folks who don’t like their garlic too assertive.

Onward! Bourdain’s next claim is that garlic “can taste so many distinct ways, handled correctly,” and that “misuse of garlic is a crime;” he is spot on here, though there are a couple of critical points left unstated.
First off, what the artist formerly known as Chef doesn’t say is this; more than how you prep it, the most important caveat for “correct” is how much garlic to use. Garlic is by nature potent, and this is why so many cooks over-season with it. Too much can bring out the negative aspects of its character every bit as much as improper cooking can. My simple rule is this: If the dish you’re making has garlic in the title, then you should use enough to bring it to the forefront of the flavor profile. When this is the case, do consider what form you’re going to use the garlic in. Let’s say you’re making garlic lamb or chicken; whole, peeled cloves added to a brine or marinade, or braised or roasted with the protein will deliver a lot of garlic flavor without blowing your socks off. Fewer cloves minced, diced, or crushed can be every bit as potent or more so than whole peeled cloves.
If garlic is not in a lead role, err to the side of caution and use less than you think you should. Let’s take chili for example – Garlic belongs here, but not as a dominant note. You’re after the subtle, sweet mouth feel a little garlic adds to a dish like this, so a moderate sized clove, one clove, will do for a whole pot of chili. That’s what I mean by subtle use; folks won’t even necessarily know garlic is there, but it will add that certain je ne sais quoi nonetheless. Consider adding peeled, whole cloves to soups, stews, and low and slow braised or roasted dishes; that’ll impart a nice, subtle background flavor, and some lucky diner gets to find a treat as well.

Next comes old garlic, and that is indeed a crime of epic proportion. Add to this, sub-par garlic. Since in large part we’re talking about gathering here, (AKA, shopping), then with whichever variety you’re hunting, do your due diligence. Choose firm, uniform heads with no soft spots, off colors, or smells. You should squeeze and scrutinize garlic as you would any other veggie you pay good money for.
Then there’s the storage thing. I’ll just tell ya straight up that garlic does not belong in the fridge, ’cause that will encourage sprouting, which leads pretty quickly to off flavors. Keep your garlic in a well ventilated, dry container, out of strong, direct sunlight. Garlic will last a month or two so stored, but as cheap as it is, you’re best served to buy a small head at a time and use it promptly.
When you’re ready to use the stuff, fresh garlic cloves should be firm and creamy white in color; if they’re yellowish, have brown spots, and/or are starting to sprout, toss it. That stuff will have a hot, bitter taste that is quite off-putting.

Burnt garlic comes next, and should we even have to say no to that? Actually, we do, because it happens far too often. Burnt garlic brings out the worst in this heavenly stuff, turning complex, sweet and pungent to bitter, sour, and overpowering. It will overwhelm everything else in a dish in a New York minute. Understanding how and why garlic burns is the key to avoiding this mess. Throwing garlic into a dish too soon often leads to burning: In a little oil in a saucepan over medium high heat, any form of processed garlic can and will burn within a minute or two at most; that’s why it should always be the last thing you add. Longer cooking under any kind of high heat will make garlic taste bitter, even if you don’t burn it. Smashing, pressing, mincing, dicing, and slicing garlic releases more flavor than cooking with whole cloves, but it also makes for a bunch more surface area that can potentially burn.
This ties into Anthony’s next assertion, castigating “garlic cut too long ago and garlic that has been tragically smashed through one of those abominations, the garlic press.”


For the former, he’s right on the money. The longer garlic sits after being cut, the more the essential oils and compounds that make it great begin to break down into other, much less desirable constituents. Ideally, it should be prepped 5 to 10 minutes prior to cooking with it; this little rest helps stabilizes the garlic, making it more resistant to heat.
As to the latter, I respectfully disagree. Pressed garlic is no more a crime than puréed, smashed, or minced.
Furthermore, there not only is a place for all these variants in cooking, they may actually be good for us.

Garlic contains a sulfoxide derivative of the amino acid cysteine, called Alliin, as well as a catalyzing enzyme, Alliinase. In a whole clove, these constituents remain separated within the cell structure. Slicing, chopping, mincing or pressing garlic ruptures the cells, releasing these elements to combine and form a new compound, Alliicin, the primary biologically active compound within garlic. Alliisin is garlic’s defense mechanism, released to ward of pests in the natural world. It is responsible for the pungent aroma, as well as the bite/heat/power of the stuff. Alliicin has known anti-fungal and anti-bacterial properties, and may aid in the reduction of atherosclerosis, decrease blood pressure, and provide anti-inflammatory properties as well.
In short, sorry Tony, but chopping, mashing and yes, even pressing garlic finely, produces more Alliisin, and coincidentally, provides the strongest garlic bang for the buck.
He goes on to vilify any form of processed garlic sold in a jar, and for the most part, he’s right. That stuff is far from fresh, and whatever methods are used to shelf stabilize it aren’t anything you should be hankering for.

Next, Bourdain encourages us all to enjoy roast garlic, and upon this there can be nothing negative said.
Roast garlic is indeed food of the gods, and here’s how you do it.

Preheat your oven to 400° F and place a rack dead in the middle.

Prep whole heads of garlic by removing the thicker outer papery layers.
Leave the skins on the individual cloves and carefully remove about the top 1/4″ of each, exposing the cloves.

Drizzle a little extra virgin olive oil in each clove, then loosely cover them with aluminum foil.

Roast for about 30 minutes until the tops of each clove is golden brown and they’re soft to the touch.

Allow the cloves to cool until handleable. Use a small fork or knife to extract the soft garlic and spread it onto fresh, crusty bread. Welcome to Heaven.

If roasted garlic is heaven, confit garlic is Valhalla.

Peel a few heads of garlic down to whole cloves.

In a small sauce pan over medium low heat, heat extra virgin olive oil through, then add the garlic, making sure all the cloves are fully submerged. Heat slowly but thoroughly for about an hour, until the cloves are soft. Keep the heat low so that the garlic doesn’t brown. Serve spread onto fresh, crusty bread with a nice glass of red.

Lastly, Le Tony notes, “Too lazy to peel fresh? You don’t deserve to eat garlic.”
And on that final note, we disagree completely. 

As I mentioned before, great garlic dried is really good garlic, especially if you made it at home.