Are you a raw oyster fan? If so, chances are good you’ve tried sauce mignonette. This brilliantly simple concoction adds a perfect tangy, bright note to shellfish. Look this stuff up, and you quickly find that the buck literally stops right there – Google alternate uses for mignonette, and you get next to nothing. I have no idea why that’s the case, because mignonette is fantastic on a bunch of other stuff as well.
A classic mignonette is a paean to simplicity. Just three ingredients – red wine vinegar, shallot, and black peppercorns are all it takes to make the magic happen. With three fairly potent constituents, proper ingredient ratio is critical to preparing great sauce – for every quarter cup of wine vinegar, you add a tablespoon of shallot and a two to three twists of pepper, about a quarter teaspoon. Combine, let them sit for a bit to marry, and you’re there.
Tweak things a bit, and you have a whole bunch more options. Change the vinegar to white wine, champagne, cider, sherry, or balsamic – or mix vinegar 50%-50% with wine or fresh fruit juices. Change shallot to sweet onion, or red, or white, or go wild and sub jalapeño or serrano chiles. Change black peppercorns to a fragrant 4 pepper blend, or Tasmanian pepperberry, grains of paradise, or Szechuan. Each variant reveals entirely new flavor notes and combinations – find yours, name it, and share it.
Damn near any simply prepared fresh fish will pair nicely with mignonette, as will chicken, pork, extra firm tofu, and sautéed veggies. Below you’ll find a solid basic recipe to start playing with as well as a great twist for hot summer months, a mignonette granita – freezing and shaving the mix intensifies the sauce, (at least to my palate) – Allow a generous spoonful of that to melt on top of freshly grilled fish or poultry at table side, and you’ve got a truly lovely treat.
Classic Mignonette
1/4 Cup Red Wine Vinegar
1 packed Tablespoon minced Shallot
2-3 twists Telicherry Pepper (about 1/4 teaspoon)
Combine all ingredients in a small, non-reactive bowl and whisk to thoroughly incorporate.
Allow to marry at room temp for at least 15 minutes before serving. The longer you allow for marriage time, the better your overall incorporation – you can’t really go overboard in that regard.
Lemon Mignonette Granita
NOTE – Works great with lime, blood orange, tangerine, grapefruit, or pineapple too.
1/4 Cup Red Wine Vinegar
1/4 Cup fresh Lemon Juice
2 packed Tablespoons Minced Shallot
5-6 Telicherry Peppercorns, crushed or ground
1/4 teaspoon sugar
In a small saucepan over medium heat, combine all ingredients and bring to a vigorous simmer for about 30 seconds.
Remove from heat, pour sauce into a non-reactive bowl and allow to cool to room temp.
Pour cooled sauce through a single mesh strainer into a freezer safe pan or dish with a flat bottom.
Place in freezer for 2-3 hours until well frozen, scraping the sauce down with a fork every hour to to keep it shaved.
It’s been a cold, wet Spring up here in the Pacific Northwet, but it looks like the tide is turning. It’s a gorgeous, blue sky day, temp near 70°, everything budding out, birds and bees all happily going about their business. A lot of things have started late, from Tulips in the Skagit valley to stuff in our garden.
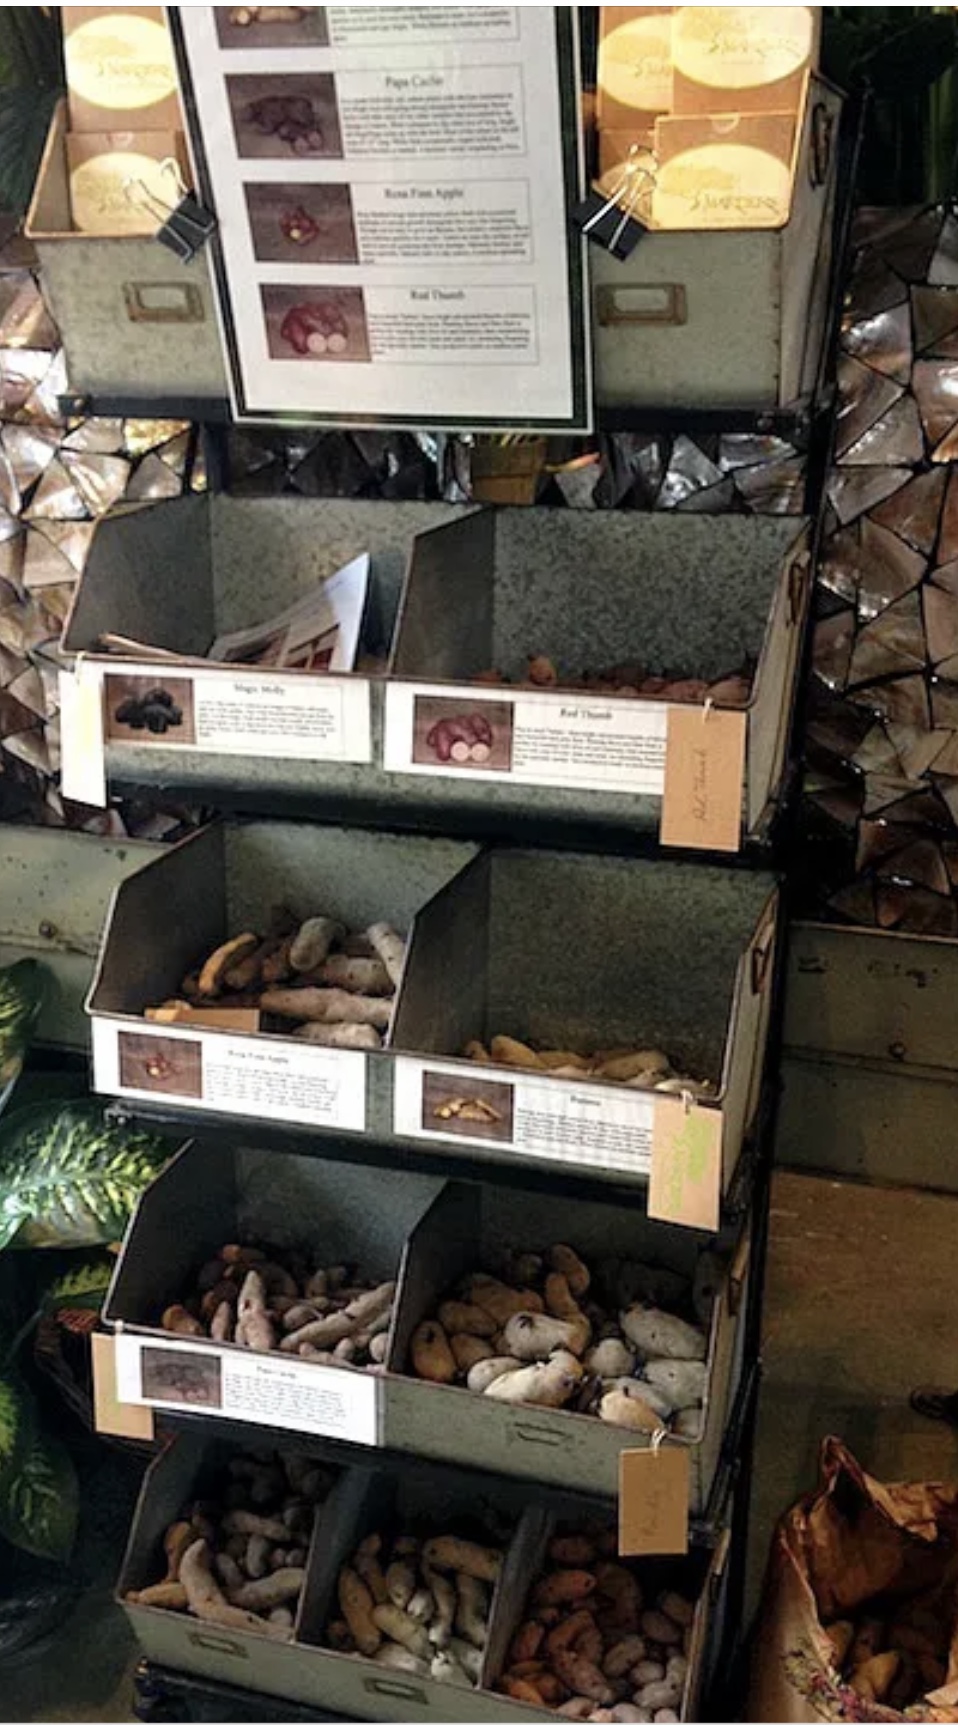
There’s a lot of joy in growing your own spuds – it’s a relatively simple process, they do well all over the place, and there are a bunch of unique and heirloom varieties that produce from early to late. Heck, they’re native to the Andes – chances are they’ll do just fine at your place. Normally, we’d see seed potatoes for sale in March, and look to plant spuds when the soil temp hangs around 40° F and frosts are pretty much done for – that time came quite a bit later this year.
So off I went off to see what seed spuds I could find. Check out co-ops, farmers markets, and choose firm, healthy looking seed spuds with a bunch of eyes on them. For a smaller garden, 4-6 each of two or three varieties will do the trick. We ended up with two purple varieties, Magic Molly and Purple Majesty, and Austrian Crescent, a lovely yellow fingerling.
Once you bring your bounty home, it’s time to chit them – in essence, this just means placing them inside, in an indirectly sunny spot to allow them to sprout. You can also just wait until a couple of days before planting and cut them into roughly 2” chunks, each with at least a couple of eyes – that’s how they’ll go into their new digs, and they’ll do their sprouting underground. Either way works fine.
Decide where you’re going to plant with an eye for good drainage and full sun (or purty near). As such, a lot of folks make potato towers or cages above ground. You can start these well ahead, filled with compost and good quality top soil, then topped with straw once your plants are established. We’ve grown this way with great success, and also in half barrels, as we opted for this year. Just make sure you leave room for hilling – adding soil throughout the growth season.
Plant your seed spud chunks about 8” apart and around 4” deep. As your plants grow, you’ll want to hill ‘em – add soil and straw two or three times during the growing season, a couple inches per add, shoveled right onto the main stems of each plant, leaving just a crown of green leaves above soil level.
Harvesting depends on what varieties you’ve chosen – there are new potatoes and storage potatoes, and the differences are pretty self explanatory. New potatoes can be harvested and enjoyed around 55 days after planting – when you see flowers on your NP plants, gently dig in and see whatcha got. Storage spuds are harvested late, after the plants have died and dried, often right up to or just past first frost.
Some folks harvest and store in the equivalent of root cellar conditions, (cool and not too moist), and others leave storage spuds in the ground and harvest when we want to enjoy them. There is something deeply satisfying about heading out in crisp, fall weather to dig a few gorgeous spuds from your garden. Once you taste what you’ve grown, you’ll be hooked – eating them fresh from the ground is a fabulous experience.
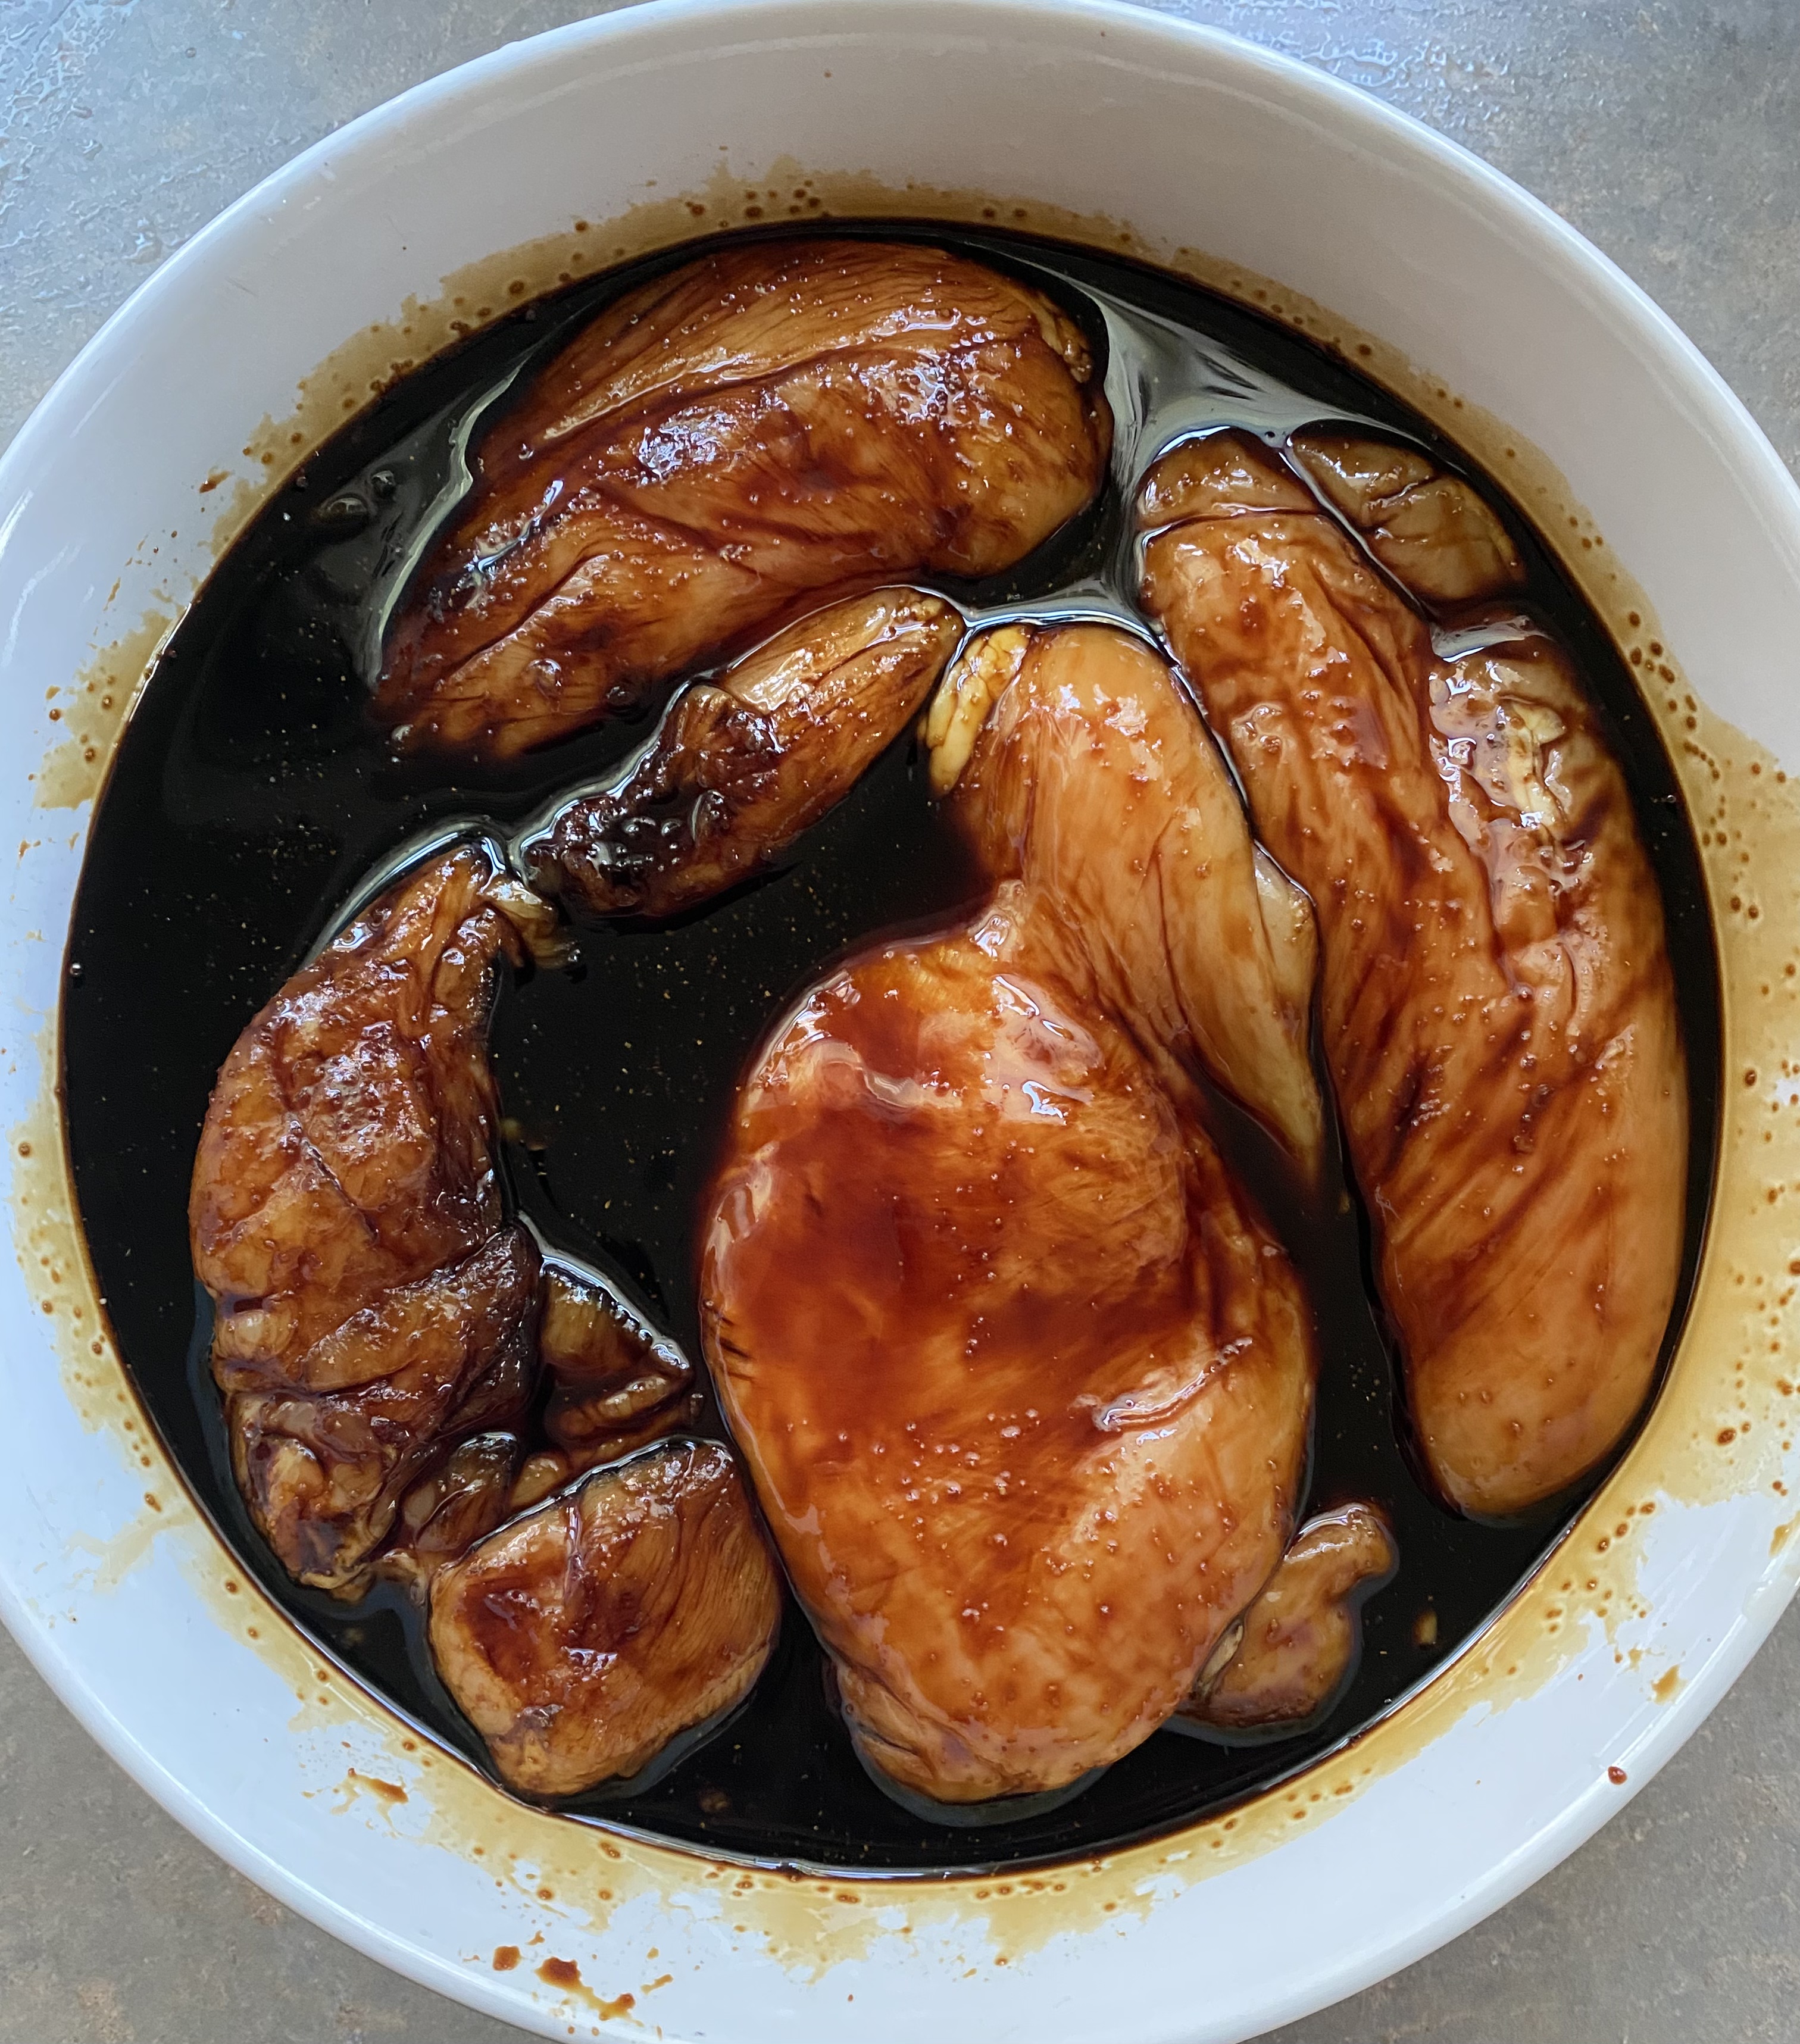
Yesterday was serendipitous, in teriyaki terms. First off, I received a message noting that someone poking about here couldn’t find a recipe for teriyaki marinade. I was sure there was one, right up until when I poked around and couldn’t find one either. 692 posts over 13 years, and I never wrote about teriyaki? Wow – time to fix that.
Teriyaki is Japanese in origin, and its roots stretch back hundreds of years. At heart, it’s a blend of sake or mirin, soy sauce, and a sugar. Done right, it’s a perfect tangy balance of sour, salty and sweet – and that balance is the key.
Nowadays, there are myriad variations on the theme, but it’s those roots I’m most interested in. Teriyaki can be done very well with just three ingredients. If you’re diving in to making your own, you should start there. Oh, and come to think of it, it’s grilling season again, too – serendipity redux.
Starting simple doesn’t mean you’ll stay there – in fact I encourage you not to. I’m sure you’ll find a three ingredient version that you really dig and do again and again – there’s a soul satisfying quality to teriyaki made this way. That said, there are lots of other things you should experiment with – Lemon, lime, pineapple, yuzu, sudachi, mandarin orange, ginger, garlic, and chiles come to mind. So long as you keep the ratio of ingredients properly balanced, you’ll love the results.
Ratios lie at the heart of cooking, and teriyaki is no exception. Starting with the three ingredient version, you’ll want 4:2:1 for acid, soy sauce, and sweetener. If you’re looking to marinate a couple pounds of protein, (chicken, beef, pork, fish, extra firm tofu, or veggies), you might go with this
Roots Teriyaki
1 Cup Sake or Rice Vinegar
1/2 Cup Soy Sauce
1/4 Cup Agave Nectar
Thoroughly whisk all three ingredients with a fork, and let them sit for about 15 minutes to get acquainted, then marinate for at least an hour, and as long as 3 hours – Note that fish and tofu should marinate for 15 to 20 minutes, tops. Yes, I know some folks swear by overnight, etc, but – there’s a lot of acid in this sauce, and if you go too long, it’s going to alter the texture of your protein in unpleasant ways.
Seen recipes out there that call for cooking the sauce? That’s done because granulated sugars simply will not dissolve in room temperature acid/soy mixes. If you want to use granulated sugars, you’ll need to simmer your sauce over medium low heat for about 5-7 minutes to dissolve the sugar completely. Cool to room temp before deploying.
If you’re adding ginger, garlic, chiles, etc – start small. For the base recipe above, a half teaspoon of minced, fresh will deliver the flavor notes without overwhelming the balance of the sauce.
Now, variety – change the acid, see what you think. Sake versus mirin or rice vinegar, and different varieties of same. Switch to citrus or pineapple and you’re in a whole other ballpark. Go way out in left field and try Chinese black vinegar, or balsamic, and you’re in another world altogether.
Change the soy sauce from koikuchi shoyu (dark) to usukuchi shoyu (light), shiro shoyu (white), tamari shoyu, or saishikomi shoyu (twice-brewed). Try Chinese, Thai or Korean soy sauces – whole nuther show there.
A note on Mirin – when you find and try the good stuff, it’s revelatory. Unfortunately, most of what you find in general grocery stores is crap – a pale shadow of the real thing with a bunch of preservatives added. If you have a good Asian grocery nearby, you can get the good stuff, and you should. Real mirin is slightly less alcoholic than sake, and subtly sweet/savory in flavor – it’s a vital ingredient in a lot of Japanese cooking, and it’s absolutely worth it.
Why Agave nectar for the sweetener? Because it‘s a light, neutral flavor and a decent coater/thickener, and makes teriyaki production super easy. For a more authentic option, ask for Mizuame (also known as Millet Jelly), or black sugar syrup (there’s a bunch of makers) at your local Asian grocery. You can use honey or maple syrup as well, with very intriguing results.
Have some fun, come up with what you dig most, and then call it yours.
Well, it appears that NPRs A Way With Words replayed the episode I was blessed to be featured on – that happened a good while back, and a couple of worlds away from where I am now. Nonetheless, I am thrilled and honored to see so many of you climb aboard recently as a result.
UrbanMonique is a labor of love that’s been around for quite a few spins, and it does so because I still love what I do here, and because y’all stay tuned.
I want to say thank you and welcome. My Pace is a bit slower these days, because my world has changed. That said, there are many years of posts here, and I truly hope you’ll dive in and have a look. I try very hard to post weekly, and when I do, you’ll get notice thereof.
in the meantime, as I’ve said a lot here, if you have a question, or a desire, or a need that I have not addressed, please let me know. I love to cook, I love to share, and I trust you do too. So again, thank you, and let’s boogie.
Wendy Kiang-Spray is another social media friend – I confess I don’t recall exactly how we met, but once I saw her book, The Chinese Kitchen Garden, I snagged it, devoured it, and have been enjoying it immensely ever since, and so will you.
As Wendy notes, ‘The Chinese Kitchen Garden is my first book and is an amalgamation of all my loves: family, cultural stories, gardening, heritage vegetables, and cooking. Through writing this book, I’ve also found a way to record and share with you many of my favorite recipes from my mom’s weeknight stir-fry, to her spicy Sichuan peppercorn quick pickles, to one of my favorite taro and coconut desserts.’
The recipes are delightful, and the gardening tips and strategies are priceless. This is not a coffee table book, although the images are truly lovely- This is a book you’ll use in kitchen and garden for years to come – one you’ll fill with notes, and refer back to frequently – especially as the seasons change.
What got me thinking about her work was a post of hers that you see below – the question and answer hit home, as our corner of the world finally starts to turn toward Spring. We had a delightful followup chat about growing asparagus and spring gardening, and I felt compelled to share her wonderful work with y’all.
Clearly, the answer to her question is – that gorgeous, fresh stuff on the right of the image. What that represents – our opportunity to work with and in our own gardens, is the siren song of this lovely season. May yours be bountiful and joyous.
Spring is the perfect time for deep cleaning. Shaking off the dust and cold and mold of winter, letting fresh air in – We do it to our homes, (hopefully), and we need to do it to our freezers as well.
Whether you’ve got a combo fridge/freezer, or a big ol’stand alone unit, it’s time to thoroughly clean that beast, inventory what’s there with a critical eye, toss what needs to be tossed and cook what must be cooked before that too goes to the great beyond.
This line of reasoning naturally brooks the question, “Can food go bad in the freezer?” The answer to which is a definite ‘Yup!’
Keep in mind that freezing does not kill bacteria, yeast, mold, etc – it just pretty much keeps them from multiplying. If there was something funky present prior to freezing, it could indeed reappear when thawed. Additionally, freezing does not do any favors for food quality or taste – over time, great stuff will become good and good stuff becomes that image up yonder.
In general terms, anything that looks like the image above – an obvious victims of freezer burn – needs to go. If flesh looks substantially different than it usually does when thawed, (Darker, off color, dried out, etc), then give it the heave ho. Trust me when I say if it looks funky, it’ll taste funky, and it could well be dangerous.
The time to clear out your freezer is also the time to clean; this should be done at least annually. The best time do the deed is when stocks are low – AKA, the end of winter.
Pull everything out and put it into a fridge or cooler(s) while you clean.
Turn off, unplug, and thoroughly defrost your unit.
Once it’s to room temp, clean the insides thoroughly; I like a bleach solution for the job, but dish soap and water works fine too. Remove and clean all the shelves, racks, drawers, etc as well.
Do a rinse wipe with a solution of 2 Tablespoons of baking soda to a quart of warm water, then wipe that down with a clean, dry cloth.
Don’t forget the unseen parts – Pull the freezer from its normal locale and clean underneath. Inspect the back and clean that and the top, and dust the coils if your unit has exposed ones.
Optimal freezer temp for food storage is -15ºF to -5ºF; it should never go above 15ºF for any extended length of time.
Fire ‘er back up, let it get fully cold and then put your bounty back in – and mark your calendar for the same time next year.
Does your grill look something like this after a winters slumber? Time to get after that before you fire up for the first time.
Open up and remove the grill grates. If you’ve got a gas rig, disconnect the fuel from the grill, remove the flame deflectors and burners from the grill body. Remove all old briquettes, burned whatever, and scrape as much grease and char off as you can by hand.
For the deep cleaning, you’ll need a grill brush, a heavy duty sponge, a scrubby pad and steel wool, a bucket of hot, soapy water, another of hot, clean water, some rags, and some degreaser. I recommend Simple Green, it’s effective and environmentally sound.
Have at the entire grill with the degreaser first, allowing it some working time before you scrub. Move onto the soapy water, then the rinse, until your grill looks as close to new as you can get it. FYI, if you’re a heavy user, a mid-season cleaning won’t hurt. Thoroughly clean every component, including the grates. A seasoned grill is a good thing, but excessive grease and char build up can lead to flaring, burning and off-putting flavors in your food. A clean grill will last far longer than a dirty one as well.
Kick the Tires & Light the Fires Now give your grill a point by point, detailed inspection of every component. Check grill and charcoal grates for rust, rot or missing and chipped porcelain. After they’re clean, dry, and inspected, you’ll re-season them. Check your framework and lid to make sure they’re all sound and there are no nuts, bolts, struts, or wheels missing or damaged.
If you use a gas grill, check your tank, valve, line, regulator, burners and flame deflectors to make sure they’re clean and sound. Don’t screw around with gas parts; if they’re rotted or badly rusted, replace them. At the least, your grill will cook poorly; at worst, you could have a genuine explosion or fire hazard brewing. If you need parts, Home Depot carries quite a few, and of course there’s probably a local supplier not to far from most of us.
When you’re ready to rock, season your grates prior to first use. Soak some paper towels with cooking oil and thoroughly rub all surfaces of the grates. Turn on the gas or light a small charcoal fire and heat the grill to high with the cover open until the oil burns off. Now turn the heat down to low and let the grill work for about fifteen minutes or, (or until your charcoal expires).
Let the grill cool down, then wipe the grates down and reapply a thin coating of fresh oil; those last steps are always a good idea after grilling, to prepare for your next session and extend the life of the grates by making sure rust doesn’t form.
Now your grill is ready to rock and roll but… Got fuel? It’s the first thing we need and the first one we forget on friday night when we step out the back door with a platter of steaks. Inspect any charcoal, smoking or seasoning woods and pellets, and gas tanks left over from last season. If any of your briquettes or woods got soaked, you’re OK if they retained their shape and what soaked them was just water. Set affected fuel out to dry and repackage as needed after they’re ready to go.
While we’re on the subject of charcoal, avoid instant light products and charcoal lighter fluid like the plague. It’s bad enough that the stuff contains things you don’t want to feed your family, and even worse that they absolutely ruin the flavor of good food. Get yourself a lighting chimney that works off scrap paper and use that; it’s just as fast, far cheaper, and makes better food.
Finally, charcoal quality does count. Crappy generic charcoal is the equivalent of mystery meat hot dogs; you’ve got no idea what’s in there and it’s likely none of it is good. High quality lump charcoal heats better, longer and more consistently, and that too means better food.